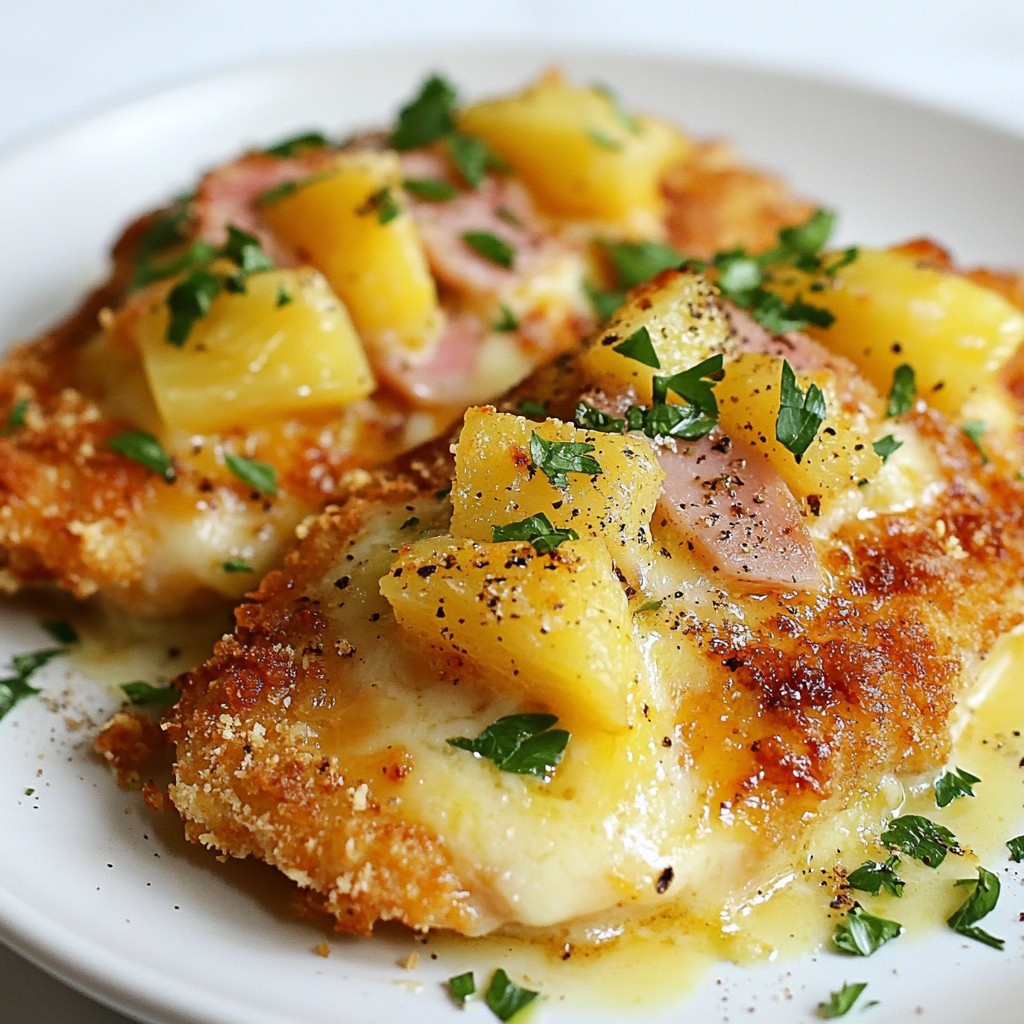
Are you ready to savor a dish that's both cheesy and flavorful? In this article, I’ll share my simple recipe for Cheesy Malibu Chicken. It’s a delightful blend of crispy chicken, ham, and melted cheese that will impress your family and friends. Whether you’re a beginner or a kitchen pro, this recipe makes cooking fun and easy. Let’s dive in and bring this tasty meal to your table!
Why I Love This Recipe
- Flavorful Combination: This dish brings together the savory flavors of chicken, ham, and cheese with the sweetness of pineapple, creating a delightful taste experience.
- Easy Preparation: With a straightforward breadcrumbing technique and simple baking method, this recipe is perfect for both novice and experienced cooks.
- Versatile Ingredients: Substituting turkey for ham or adjusting the cheese types allows for customization, making it adaptable to various dietary preferences.
- Impressive Presentation: Garnishing with fresh parsley and serving on a rustic board elevates the dish, making it great for family dinners or entertaining guests.
Ingredients
List of Ingredients with Measurements
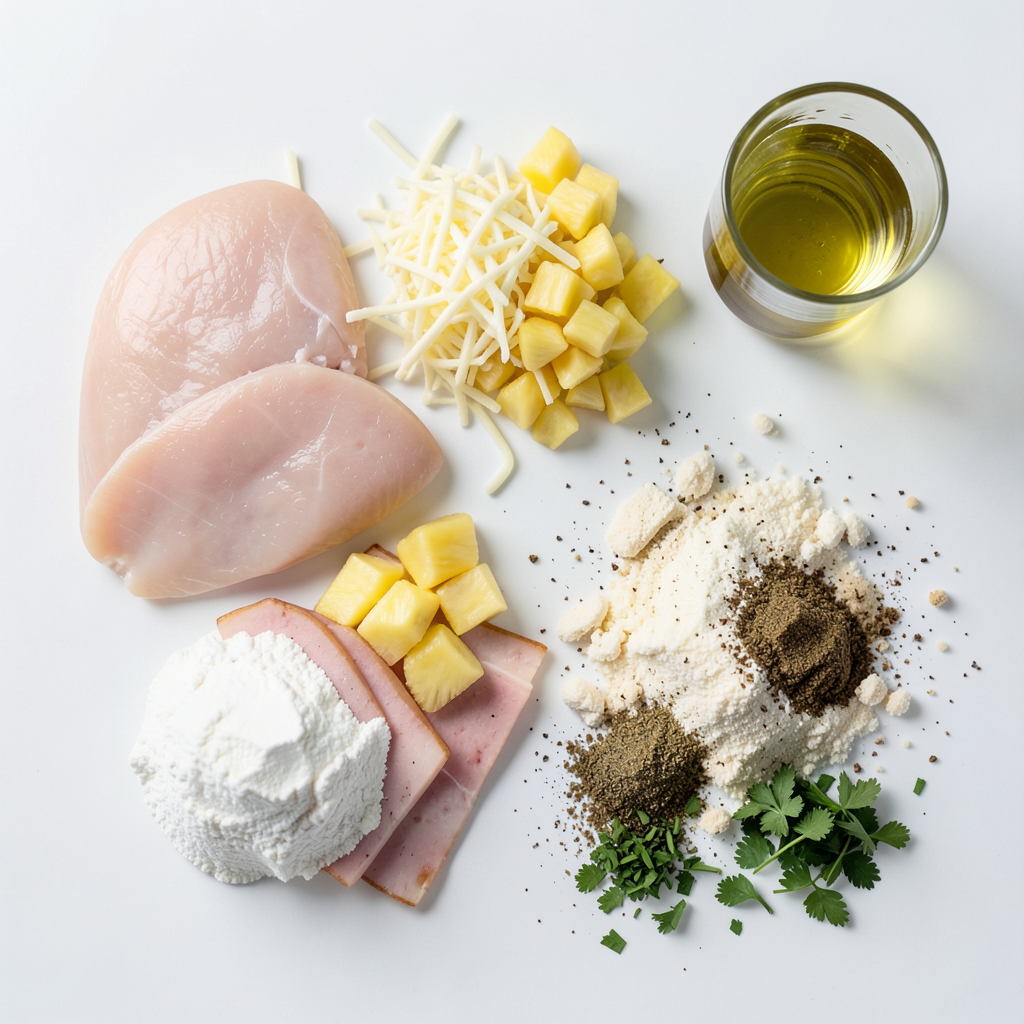
To make Cheesy Malibu Chicken, gather these ingredients:
- 4 boneless, skinless chicken breasts
- 1 cup shredded mozzarella cheese
- 1 cup shredded pepper jack cheese
- 1/2 cup fresh pineapple, diced
- 1/2 cup sliced ham (or turkey for a lighter option)
- 1/2 cup all-purpose flour
- 2 large eggs, beaten
- 1 cup panko breadcrumbs
- 1 teaspoon garlic powder
- 1 teaspoon onion powder
- 1/2 teaspoon dried oregano
- Salt and pepper to taste
- 3 tablespoons olive oil
- Fresh parsley, chopped (for garnish)
Substitutions and Alternatives
If you want to switch things up, try these options:
- Use chicken thighs instead of chicken breasts for more flavor.
- Swap mozzarella for cheddar or gouda for a different taste.
- Pineapple can be replaced with diced peaches or bell peppers for variety.
- Try using whole wheat flour or almond flour for a healthier twist.
- For a gluten-free version, use gluten-free breadcrumbs instead of panko.
Dietary Considerations
This dish can fit many diets with some tweaks:
- Gluten-Free: Use gluten-free flour and breadcrumbs.
- Dairy-Free: Substitute vegan cheese for mozzarella and pepper jack.
- Low-Carb: Replace breadcrumbs with crushed pork rinds or almond flour.
- Paleo: Use almond flour and skip the breadcrumbs altogether.
- High-Protein: Add more chicken or serve it with a side of beans.
This recipe is versatile and can be adjusted to meet your needs. Enjoy exploring the flavors!
Step-by-Step Instructions
Preparation Phase (flattening and seasoning the chicken)
Start by prepping your chicken. Place each chicken breast between two sheets of plastic wrap. Use a meat mallet to gently pound the chicken to about 1/2 inch thick. This step helps the chicken cook evenly. Next, season both sides of the chicken with salt, pepper, garlic powder, onion powder, and dried oregano. These spices add great flavor to your dish.
Dredging and Breading Process
Now, set up your dredging station. In one shallow dish, add the flour. In another, pour the beaten eggs. Lastly, in a third dish, mix the panko breadcrumbs with a pinch of salt and pepper. To bread the chicken, take each seasoned breast and coat it lightly in the flour. Shake off any extra flour. Then dip it in the eggs, letting the excess drip off. Finally, coat it with the panko breadcrumbs. Press gently to make sure the breadcrumbs stick well.
Cooking Method (skillet and baking instructions)
Heat 3 tablespoons of olive oil in a large oven-safe skillet over medium heat. Once hot, add the breaded chicken breasts. Cook them for about 3-4 minutes on each side until they turn golden brown. Remove the skillet from heat. Layer each chicken breast with a slice of ham or turkey, followed by the diced pineapple. Top with shredded mozzarella and pepper jack cheese. Carefully transfer the skillet to the oven preheated to 400°F (200°C). Bake for 15-20 minutes until the chicken is fully cooked. The internal temperature should be 165°F (75°C), and the cheese should be bubbly and melted. After baking, let the chicken rest for a few minutes. Garnish with chopped parsley before serving.
Tips & Tricks
Perfecting the Breaded Chicken
To get the best breaded chicken, start with even thickness. Use a meat mallet to flatten each chicken breast to about 1/2 inch. Season both sides well with salt, pepper, garlic powder, onion powder, and oregano. This boosts flavor in every bite. When breading, use three separate dishes: one for flour, one for beaten eggs, and one for panko mixed with a pinch of salt and pepper. Make sure to press the breadcrumbs onto the chicken for a good coat.
How to Achieve the Best Cheese Melt
For the ultimate cheese melt, choose a blend of mozzarella and pepper jack. Both cheeses melt well and add great flavor. After cooking the chicken, layer the ham or turkey, then add diced pineapple. Finish with a generous pile of cheese on top. Bake the dish in the oven at 400°F until the chicken reaches 165°F and the cheese is bubbly. This creates that gooey, cheesy goodness we all love.
Serving and Presentation Suggestions
When serving your Cheesy Malibu Chicken, use a rustic wooden board or individual plates. Drizzle a little balsamic glaze on top for an elegant finish. Fresh parsley adds color and a hint of flavor. Pair it with mixed greens for a fresh side. This makes the dish not just tasty but beautiful too. Enjoy your meal!
Pro Tips
- Use Fresh Ingredients: For the best flavor, opt for fresh pineapple and high-quality cheese. Fresh ingredients elevate the dish and enhance the overall taste experience.
- Perfecting the Breaded Coating: Ensure each chicken breast is evenly coated in flour, egg, and panko breadcrumbs. This will create a crispy, golden crust that locks in moisture.
- Checking Doneness: Use a meat thermometer to check the internal temperature of the chicken. It should reach 165°F (75°C) to ensure it's fully cooked and safe to eat.
- Make-Ahead Option: Assemble the chicken with toppings ahead of time and refrigerate. Bake just before serving for a quick and easy weeknight meal.
Variations
Healthier Substitutes
You can make Cheesy Malibu Chicken lighter by swapping ham for turkey. Turkey has less fat and fewer calories. It still gives a nice, savory taste. You can also use skinless chicken thighs. They stay moist and add a different flavor. If you want a veggie option, try using grilled mushrooms or zucchini. These add texture and taste without extra calories.
Flavor Additions
Change up the cheeses for new flavors. Try gouda for a smoky touch or cheddar for a sharp bite. You can mix in some diced jalapeños for heat. Adding fresh spinach or chopped bell peppers can boost nutrients. Each of these can make your dish unique and tasty. Explore different combinations to find your favorite!
Different Cooking Methods
You can cook Cheesy Malibu Chicken in many ways. Grilling adds a nice char and smoky flavor. Just make sure to keep an eye on the chicken so it doesn’t dry out. Air frying is another great method. It gives you a crispy coating with less oil. Both methods are quick and easy, making dinner fun and delicious!
Storage Info
How to Store Leftovers
After enjoying your Cheesy Malibu Chicken, let it cool down. Place the leftovers in an airtight container. This helps keep the chicken fresh. Store it in the fridge for up to three days. For best taste, try to eat it within this time frame.
Reheating Instructions
When you're ready to enjoy the leftovers, preheat your oven to 350°F (175°C). Place the chicken on a baking tray. Cover it with foil to keep it moist. Heat for about 15-20 minutes, or until it’s warm all the way through. You can also use a microwave, but the oven gives a better texture.
Freezing for Later Use
To freeze Cheesy Malibu Chicken, wrap each piece tightly in plastic wrap. Then place them in a freezer bag. This keeps air out and prevents freezer burn. You can freeze it for up to three months. When you want to eat it, thaw in the fridge overnight before reheating. This method keeps the chicken flavorful and juicy.
FAQs
What is the best side dish to serve with Cheesy Malibu Chicken?
The best side dish is mixed greens or a fresh salad. The crunch and lightness pair well with the rich chicken. You could also serve it with rice for a filling option. Mashed potatoes can work too, adding creamy comfort.
Can I make Cheesy Malibu Chicken in advance?
Yes, you can prepare the chicken ahead of time. Bread the chicken and cover it with plastic wrap. You can keep it in the fridge for up to a day. Bake it right before serving for the best taste.
What can I use instead of panko breadcrumbs?
If you don’t have panko, try regular breadcrumbs. Crushed cornflakes or crushed crackers are great options too. They add a nice crunch. Just make sure to season them well with salt and pepper.
How do I know when the chicken is fully cooked?
Check the internal temperature with a meat thermometer. It should read 165°F (75°C). If you don’t have a thermometer, cut into the chicken. The meat should be white, not pink. Juices should run clear, showing it is safe to eat.
We explored all the key parts for making Cheesy Malibu Chicken. You learned about the right ingredients, step-by-step instructions, and tips to make it shine. We also discussed variations for flavor and health, plus how to store leftovers. For a tasty meal that everyone loves, this dish checks all the boxes. Enjoy your cooking journey and get ready for a delicious feast!