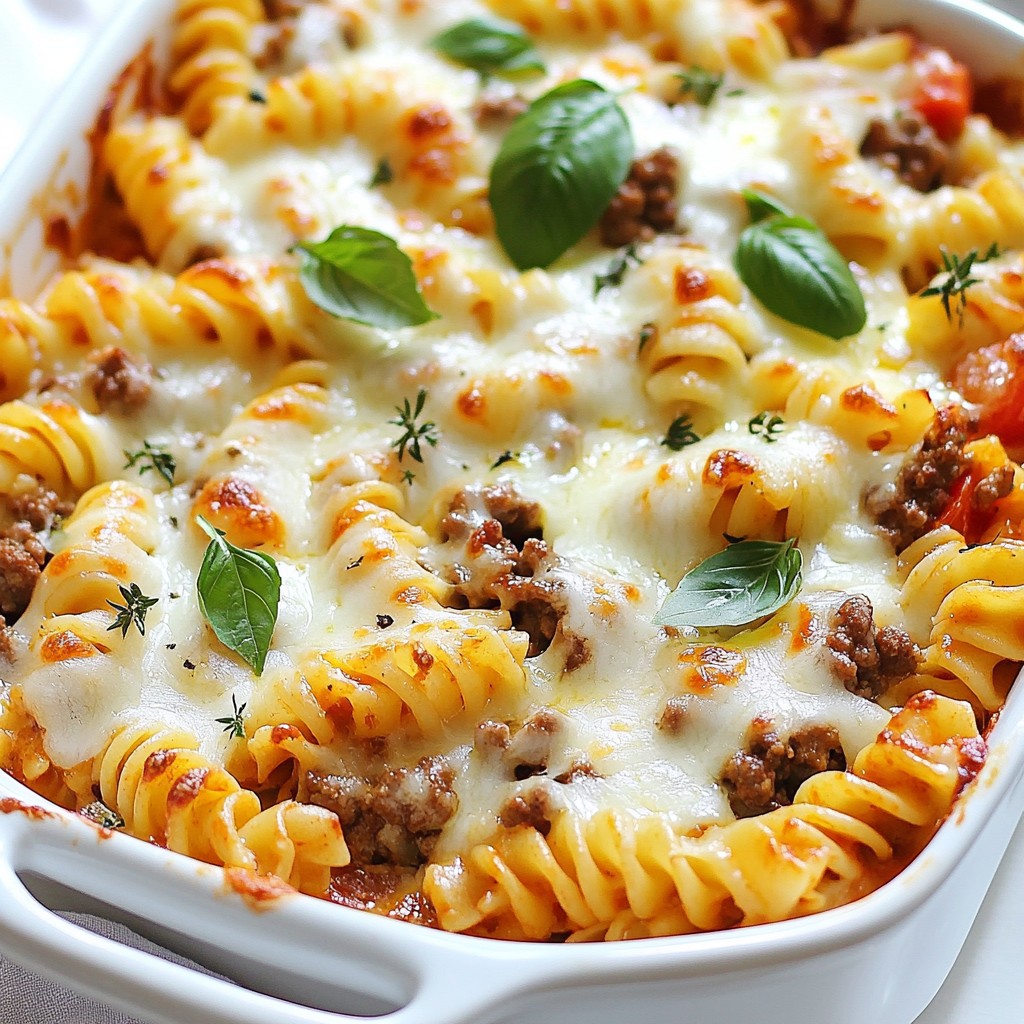
Looking for a cozy meal that’s quick to make and packed with flavor? You’ve found it! My Cheesy Beef Rotini Bake combines tender rotini pasta, juicy ground beef, and a blend of rich cheeses into one satisfying dish. Whether you need a family dinner or comfort food for a chilly night, this recipe delivers warmth and taste in every bite. Let’s dive into how to create this savory delight!
Why I Love This Recipe
- Comfort Food Delight: This Cheesy Beef Rotini Bake is the ultimate comfort food, perfect for cozy family dinners or gatherings with friends.
- Easy to Prepare: With simple ingredients and straightforward steps, this recipe is perfect for busy weeknights or novice cooks.
- Cheesy Goodness: The combination of mozzarella, ricotta, and Parmesan cheeses creates a rich and indulgent flavor that everyone loves.
- Versatile Dish: This bake can easily be customized with your favorite vegetables or spices, making it a versatile option for any palate.
Ingredients
Main Ingredients for Cheesy Beef Rotini Bake
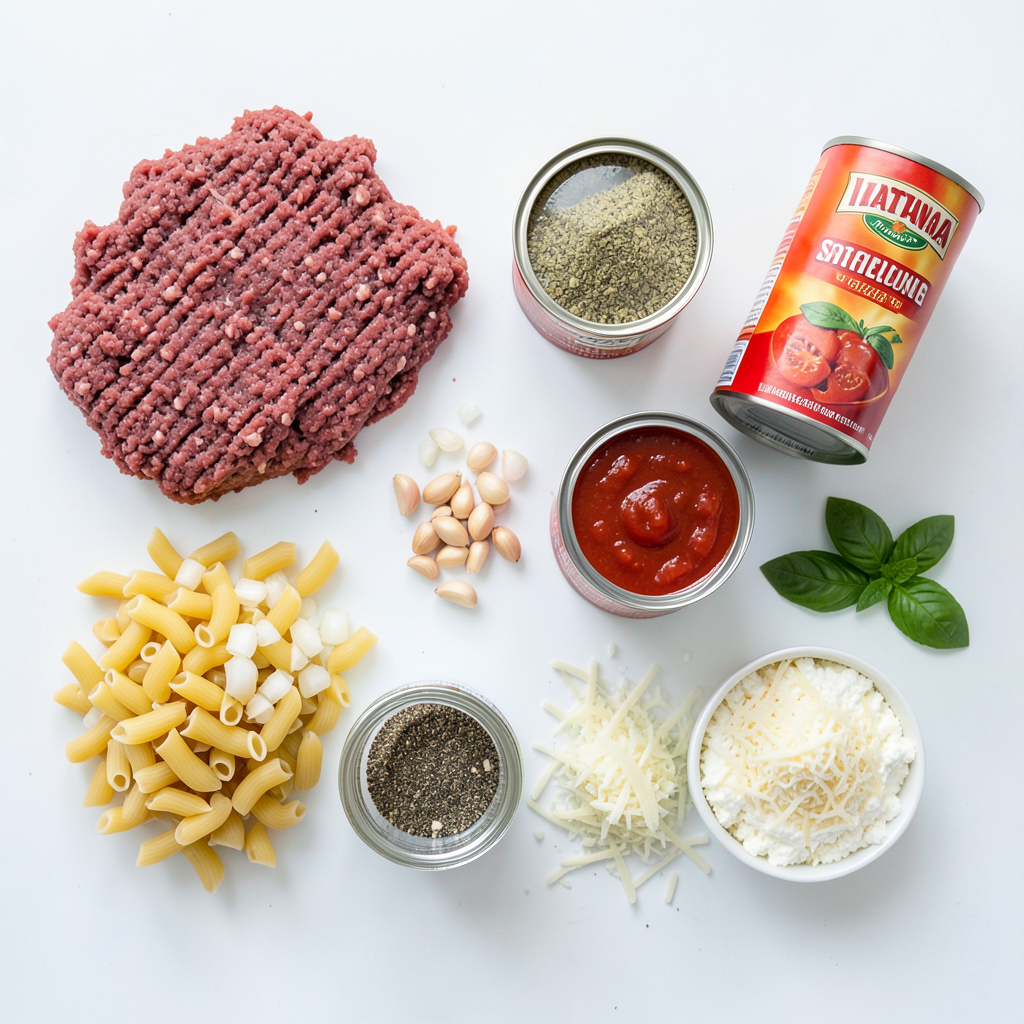
To make this tasty dish, you need:
- 1 pound ground beef
- 12 ounces rotini pasta
- 1 can (15 ounces) tomato sauce
- 1 can (14.5 ounces) diced tomatoes with their juices
- 1 small onion, finely diced
- 2 cloves garlic, minced
- 1 teaspoon Italian seasoning
- 1 teaspoon salt
- ½ teaspoon freshly ground black pepper
- 2 cups shredded mozzarella cheese, divided
- 1 cup ricotta cheese
- ½ cup grated Parmesan cheese
These ingredients give the dish a rich and creamy taste. The beef adds protein, and the pasta makes it hearty. The mix of cheeses creates a gooey layer on top that melts perfectly.
Optional Ingredients
You can also add these for extra flavor:
- Fresh basil for garnish
- Additional spices or herbs
Adding fresh basil gives a nice touch. You can also mix in your favorite herbs for more flavor. Consider trying oregano or thyme to boost the taste even more. These small tweaks can make a big difference in how your dish turns out.
Step-by-Step Instructions
Preparing the Pasta
1. Start by boiling a large pot of water. Add a pinch of salt to it.
2. Cook the rotini pasta until it is al dente. This means it should be firm.
3. Once cooked, drain the pasta well in a colander, then set it aside.
Cooking the Beef
1. In a large skillet, heat over medium heat. Add the ground beef to the pan.
2. Break the beef into smaller pieces with a wooden spoon. Cook it until brown.
3. This should take about 6 to 8 minutes. Drain any extra fat from the skillet.
4. Next, add the finely diced onion and minced garlic to the beef.
5. Sauté them until the onion is soft and fragrant, about 3 to 4 minutes.
Creating the Sauce
1. Mix the browned beef with the tomato sauce and diced tomatoes.
2. Be sure to include all the juices from the diced tomatoes.
3. Add the Italian seasoning, salt, and black pepper to the pan.
4. Let the sauce simmer for about 5 to 7 minutes. This helps the flavors blend.
Assembling the Bake
1. In a large mixing bowl, combine the cooked rotini and the meat sauce.
2. Add 1 cup of shredded mozzarella, the ricotta cheese, and half the Parmesan.
3. Mix everything well until all ingredients are combined.
4. Transfer this mixture into a greased 9x13-inch baking dish. Spread it out evenly.
5. Top with the rest of the shredded mozzarella and remaining Parmesan.
Baking Instructions
1. Cover the baking dish tightly with aluminum foil. Place it in the oven.
2. Bake at 375°F (190°C) for 20 minutes.
3. After 20 minutes, carefully remove the foil. Bake for another 10 to 15 minutes.
4. The top should be golden brown and bubbling when done.
5. Let it cool for a few minutes before serving. Optionally, garnish with fresh basil.
Tips & Tricks
Best Practices for Cooking Pasta
To cook your rotini just right, follow these tips. First, use plenty of salted water. It should taste like the sea! This helps flavor the pasta. Bring the water to a full boil before adding the rotini. Stir it often while it cooks. This keeps the pasta from sticking together. For al dente pasta, cook it for about 8-10 minutes. It should be firm but not hard. Once done, drain it right away. Do not rinse your pasta. This keeps the starch that helps sauce stick.
Perfecting the Cheese Layer
Choosing the right cheese makes a big difference. I recommend using mozzarella for its meltiness and ricotta for creaminess. Parmesan adds a lovely salty bite. Mix these cheeses well into the pasta for creamy goodness. For a golden crust, sprinkle more mozzarella on top. Bake it uncovered for the last 10-15 minutes. This allows the cheese to bubble and become golden brown. If you want extra crunch, broil it for a minute at the end. Just watch it closely to avoid burning!
Common Mistakes to Avoid
One common mistake is overcooking the beef. Cook it until it is brown, about 6-8 minutes. If you cook it longer, it can dry out. Another mistake is skipping the simmering step. Simmering the sauce helps blend all flavors well. Don’t rush this part! Let the sauce cook for 5-7 minutes. This step makes your dish taste richer and more flavorful. Following these tips will make your Cheesy Beef Rotini Bake a hit!
Pro Tips
- Cook Pasta Al Dente: Make sure to cook the rotini until it is al dente. This ensures it holds its shape and texture during baking.
- Layering for Extra Flavor: Layering the cheeses can enhance the flavor. Try adding some mozzarella between the pasta and sauce layers for a gooey texture.
- Customize with Veggies: Feel free to add vegetables like bell peppers or spinach to the meat sauce for added nutrition and flavor.
- Let It Rest: Allow the bake to rest for a few minutes after removing it from the oven. This helps set the layers and makes serving easier.
Variations
Meat Variations
You can change the meat in this dish easily. Substitute ground turkey or chicken for a lighter option. These meats still give great flavor while keeping it lean. If you want a vegetarian version, use plant-based protein instead of beef. This keeps the dish hearty while making it meat-free. Both options are tasty and work well in the recipe.
Sauce Variations
Adding vegetables can boost the nutrition of your Cheesy Beef Rotini Bake. Chopped bell peppers, spinach, or zucchini can mix nicely into the sauce. You can also switch up the tomato sauce. Try using marinara or a spicy arrabbiata for a different taste. Each choice adds unique flavors, making your dish special each time.
Cheese Variations
The cheese is key to this bake. You can try different types of cheese for fun. Cheddar, gouda, or pepper jack can change the flavor profile. If you need a dairy-free option, use vegan cheese or nutritional yeast. These swaps can still create a creamy texture and keep it delicious. Experimenting with cheese lets you find your favorite combination!
Storage Info
Storing Leftovers
To keep your Cheesy Beef Rotini Bake fresh, store it in an airtight container. Let it cool down before putting it away. This helps keep the cheese from getting soggy. Place the leftovers in the fridge. They will last for about three to four days. Make sure to check for any signs of spoilage before eating.
Freezing Instructions
You can also freeze Cheesy Beef Rotini Bake for later. First, let it cool completely. Then, cut it into portions. Wrap each piece tightly in plastic wrap. After that, place the wrapped portions in a freezer-safe bag. This keeps them fresh for up to three months.
When ready to eat, thaw the portions in the fridge overnight. To reheat, place them in an oven at 350°F (175°C) for about 20 minutes. Cover with foil to prevent burning. If you want a crispy top, remove the foil for the last five minutes. Enjoy your cheesy dish anytime!
FAQs
How can I make Cheesy Beef Rotini Bake ahead of time?
You can prep Cheesy Beef Rotini Bake ahead of time and bake it later. First, follow the recipe until you assemble the dish in the baking pan. Cover it tightly with plastic wrap or foil. Store it in the fridge for up to 24 hours. When you are ready to bake, remove the cover and bake it straight from the fridge. You may need to add a few extra minutes to the baking time. This method keeps the dish fresh and tasty.
Can I use whole wheat or gluten-free pasta?
Yes, you can use whole wheat or gluten-free pasta. Whole wheat pasta adds fiber and has a nuttier taste. Gluten-free pasta options include rice or corn pasta. Just be sure to check the cooking time, as they might cook faster or slower than regular pasta. Follow the package instructions for best results. This way, everyone can enjoy this dish, no matter their dietary needs.
What can I serve with Cheesy Beef Rotini Bake?
You can serve several side dishes with Cheesy Beef Rotini Bake. Here are some ideas:
- Garlic bread: A classic choice that pairs well.
- Side salad: Fresh greens with a light dressing add crunch.
- Steamed vegetables: Broccoli or green beans bring color and nutrition.
- Fruit salad: A sweet touch to balance the savory flavors.
These sides enhance your meal and make it even more satisfying.
Cheesy Beef Rotini Bake is a simple yet tasty dish. You start with ground beef, rotini pasta, and rich tomato sauce. Cheeses like mozzarella and ricotta bring it all together. I shared steps on cooking the pasta, browning beef, and making the sauce. Don't forget the tips on avoiding common mistakes.
You can customize this dish with different meats or veggies. Leftovers are easy to store, and I included freezing tips too. With these ideas in mind, enjoy your cooking adventure and share your delicious results!