Carrot Cake Cheesecake Delightful and Simple Recipe
. - Set temperature to 325°F (160°C) - Prepare a 9-inch springform pan Start by preheating your oven to 325°F (160°C). This will ensure that your carrot cake cheesecake bakes evenly. Next, grab a 9-inch springform pan. Grease it well and line the bottom with parchment paper. This will help the cheesecake come out easily after baking. - Mix dry ingredients and combine with wet ingredients - Fold in grated carrots, walnuts, and crushed pineapple In a medium bowl, mix the dry ingredients. You need flour, baking powder, baking soda, cinnamon, nutmeg, and salt. In a large bowl, whisk together the sugars, vegetable oil, eggs, and vanilla extract. Once it is smooth, slowly add the dry mix to the wet mix. Stir gently until just combined. Now, fold in the grated carrots, walnuts, and crushed pineapple. This gives your cake great texture and flavor. - Pour batter into the springform pan - Bake for 25-30 minutes until a toothpick comes out clean Pour the carrot cake batter into the prepared springform pan. Bake for 25-30 minutes. To check if it's done, insert a toothpick into the center. If it comes out clean, it's ready. Let the carrot layer cool in the pan on a wire rack. - Beat the cream cheese until smooth - Gradually add sugar and eggs while mixing In a large bowl, beat the softened cream cheese with an electric mixer on medium speed. Keep mixing until it's smooth. Gradually add in the sugar. Then, add the eggs one at a time, mixing on low speed after each one. Finally, mix in the vanilla extract, lemon juice, and sour cream. Your cheesecake batter should be creamy and well blended. - Pour cheesecake batter over the cooled carrot layer - Smooth the surface with a spatula Once the carrot layer is cool, pour the cheesecake batter over it. Use a spatula to spread it out evenly. This will create a nice, smooth top for your cake. - Bake for 45-50 minutes or until center slightly jiggles - Cool gradually in the oven Put the cake back in the oven. Bake for 45-50 minutes. The center should jiggle slightly when done. After baking, turn off the oven and crack the door open. This helps the cheesecake cool slowly, reducing the chance of cracks. - Chill in the refrigerator for at least 4 hours - Top with walnuts and shredded coconut before serving After an hour, take the cheesecake out and place it in the fridge. Chill for at least 4 hours, or overnight for the best taste. Before serving, sprinkle the top with walnuts and shredded coconut for extra flavor and crunch. Enjoy your delicious creation! For the full recipe, check the details above. - Use room temperature ingredients for better mixing. This helps all the flavors blend well. - Avoid overmixing the cheesecake batter to prevent cracks. Mix until just smooth for a perfect texture. - Serve with whipped cream or a scoop of vanilla ice cream. This adds a creamy touch to each bite. - Garnish with fresh carrots or edible flowers for decoration. This makes the dish look extra special and fun. - A springform pan is great for easy removal. It helps keep your cheesecake intact when serving. - An electric mixer ensures a smooth cheesecake batter. This saves time and effort, making mixing a breeze. {{image_4}} You can change the flavor of your carrot cake cheesecake. Try adding raisins or shredded coconut to the carrot layer. Both add sweetness and texture. You can also mix in spices like cardamom for a warm, spicy kick. This makes each bite more exciting. If you want a lighter version, use whole wheat flour instead of all-purpose flour. This swap adds fiber and nutrients. You can also replace sour cream with Greek yogurt. It gives creaminess with less fat. For a gluten-free option, use a gluten-free flour blend. This way, everyone can enjoy your cheesecake. If you need a vegan version, use dairy-free cream cheese. It works just as well in the cheesecake layer. These variations allow you to make this dessert fit your taste and dietary needs. Feel free to explore and enjoy the process! For the complete recipe, check the Full Recipe section. Store your carrot cake cheesecake in the refrigerator for up to 5 days. To keep it fresh, cover it tightly with plastic wrap or foil. This will help prevent it from drying out and absorbing other fridge odors. You can freeze carrot cake cheesecake for up to 2 months. Be sure to wrap it well in plastic wrap and then place it in an airtight container. When you're ready to enjoy it, thaw it in the refrigerator overnight before serving. This cheesecake is best enjoyed chilled. However, if you like it warm, you can briefly heat it in the oven. Just a few minutes at a low temperature will do. This method can enhance its creamy texture, making it even more delightful. The center should slightly jiggle and not look wet when finished. This means it has set properly. You can also check with a toothpick. Insert it into the center; it should come out mostly clean. Yes, it can be prepared a day in advance for optimal flavor. Making it ahead allows the flavors to blend better. Just remember to chill it in the fridge until you’re ready to serve. Slice with a sharp knife and serve chilled, topped as desired. You can add whipped cream or extra nuts for fun. A nice touch is a sprinkle of cinnamon on top. Absolutely! Pecans or almonds can be great substitutes for walnuts. They will add different flavors and textures. You can also skip the nuts if you prefer a nut-free version. This post covered everything you need to make a delicious Carrot Cake Cheesecake. We discussed the ingredients for both layers, how to bake, and tips for the best results. Remember, use room-temperature items and avoid overmixing the cheesecake. Feel free to try variations to fit your taste and dietary needs. This cake is perfect for any occasion and is easy to store. Now, grab your ingredients and impress your family or friends with this treat!](https://fastmealmate.com/wp-content/uploads/2025/06/33af2c91-c02f-4d6c-a85e-840ab017cd6c.webp)
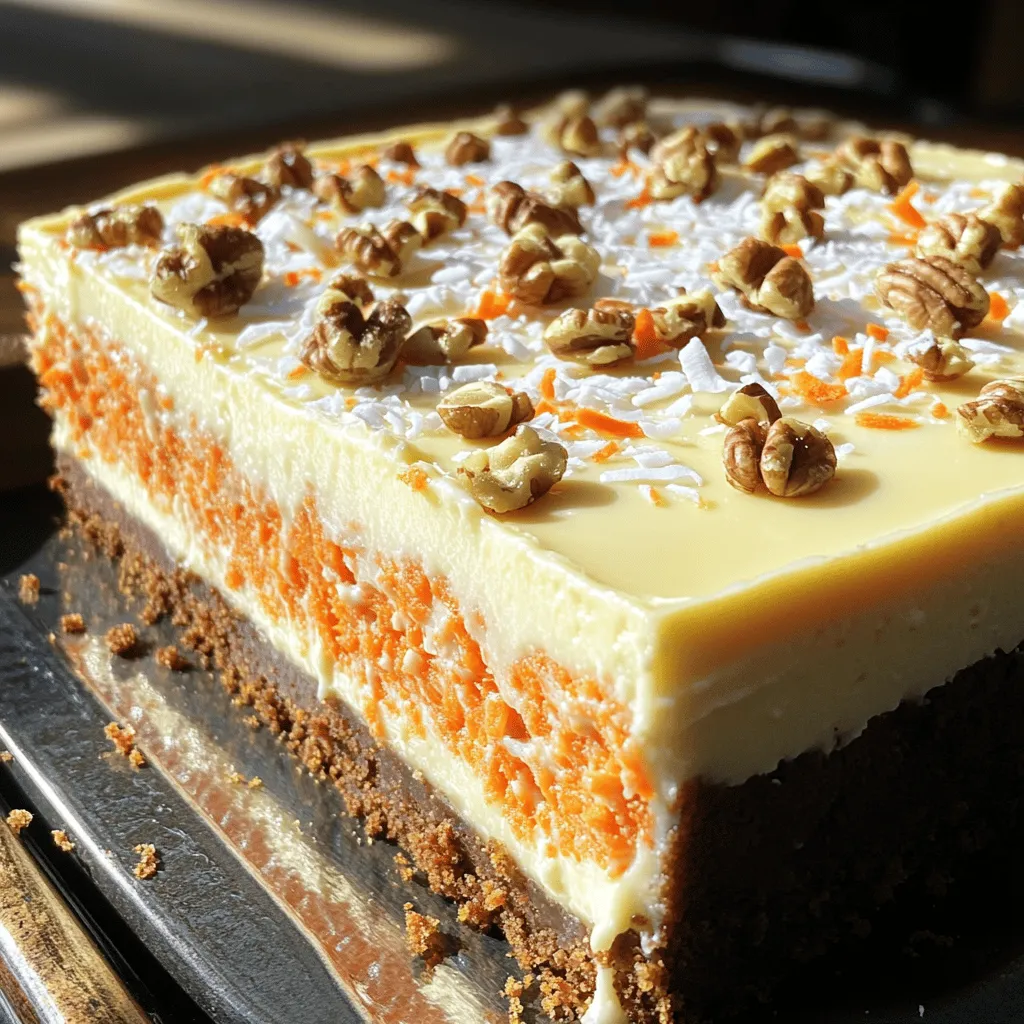
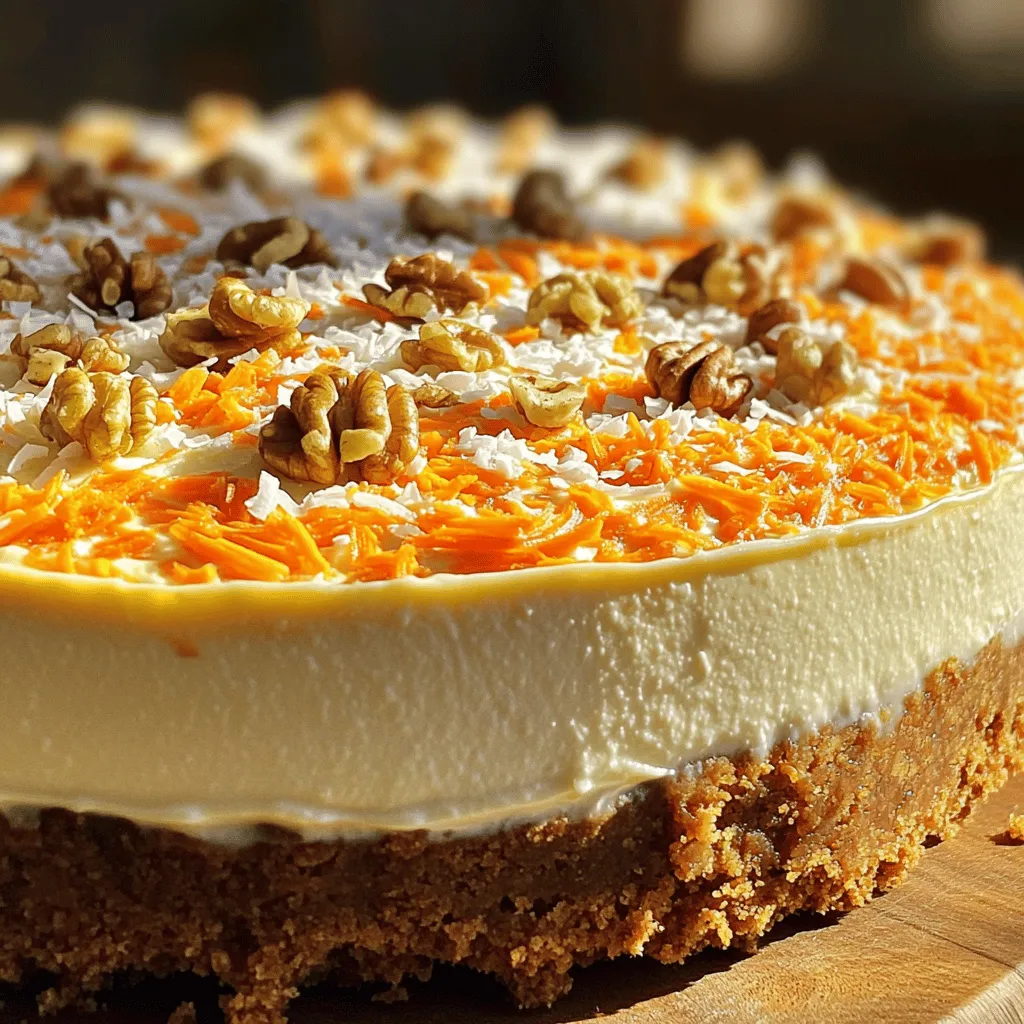
Get ready to indulge in a sweet treat that combines two classics: carrot cake and cheesecake! In this blog post, I’ll share my favorite Carrot Cake Cheesecake recipe that’s not only delightful but also simple to make. With layers of moist carrot cake and creamy cheesecake, this dessert will impress your friends and family. Plus, I’ll provide tips to make sure your bake is a success. Let’s get started!
Ingredients
Carrot Cake Layer Ingredients
– 1 cup all-purpose flour
– 1 teaspoon baking powder
– 1 teaspoon baking soda
– 1 teaspoon ground cinnamon
– 1/2 teaspoon ground nutmeg
– 1/4 teaspoon salt
– 1/2 cup granulated sugar
– 1/2 cup packed brown sugar
– 1/2 cup vegetable oil
– 2 large eggs
– 1 teaspoon vanilla extract
– 1 1/2 cups grated carrots
– 1/2 cup chopped walnuts (optional)
– 1/2 cup crushed pineapple, well-drained
Cheesecake Layer Ingredients
– 16 oz cream cheese, softened
– 1 cup granulated sugar
– 3 large eggs
– 1 teaspoon vanilla extract
– 1 tablespoon fresh lemon juice
– 1/2 cup sour cream
Topping Ingredients
– 1/4 cup finely chopped walnuts
– 1/4 cup shredded coconut
The ingredients are key to making a great Carrot Cake Cheesecake. The carrot cake layer is moist and flavorful, thanks to the grated carrots and optional walnuts. The spices like cinnamon and nutmeg bring out warmth and depth. For the cheesecake layer, cream cheese gives a rich and creamy texture. The addition of sour cream adds a nice tang.
If you want to make this dish even better, consider the toppings. Chopped walnuts and shredded coconut can add crunch and flavor.
Step-by-Step Instructions
Preheat the Oven
– Set temperature to 325°F (160°C)
– Prepare a 9-inch springform pan
Start by preheating your oven to 325°F (160°C). This will ensure that your carrot cake cheesecake bakes evenly. Next, grab a 9-inch springform pan. Grease it well and line the bottom with parchment paper. This will help the cheesecake come out easily after baking.
Prepare the Carrot Cake Layer
– Mix dry ingredients and combine with wet ingredients
– Fold in grated carrots, walnuts, and crushed pineapple
In a medium bowl, mix the dry ingredients. You need flour, baking powder, baking soda, cinnamon, nutmeg, and salt. In a large bowl, whisk together the sugars, vegetable oil, eggs, and vanilla extract. Once it is smooth, slowly add the dry mix to the wet mix. Stir gently until just combined. Now, fold in the grated carrots, walnuts, and crushed pineapple. This gives your cake great texture and flavor.
Bake the Carrot Layer
– Pour batter into the springform pan
– Bake for 25-30 minutes until a toothpick comes out clean
Pour the carrot cake batter into the prepared springform pan. Bake for 25-30 minutes. To check if it’s done, insert a toothpick into the center. If it comes out clean, it’s ready. Let the carrot layer cool in the pan on a wire rack.
Prepare the Cheesecake Layer
– Beat the cream cheese until smooth
– Gradually add sugar and eggs while mixing
In a large bowl, beat the softened cream cheese with an electric mixer on medium speed. Keep mixing until it’s smooth. Gradually add in the sugar. Then, add the eggs one at a time, mixing on low speed after each one. Finally, mix in the vanilla extract, lemon juice, and sour cream. Your cheesecake batter should be creamy and well blended.
Assemble the Cake
– Pour cheesecake batter over the cooled carrot layer
– Smooth the surface with a spatula
Once the carrot layer is cool, pour the cheesecake batter over it. Use a spatula to spread it out evenly. This will create a nice, smooth top for your cake.
Bake the Cheesecake
– Bake for 45-50 minutes or until center slightly jiggles
– Cool gradually in the oven
Put the cake back in the oven. Bake for 45-50 minutes. The center should jiggle slightly when done. After baking, turn off the oven and crack the door open. This helps the cheesecake cool slowly, reducing the chance of cracks.
Chill and Serve
– Chill in the refrigerator for at least 4 hours
– Top with walnuts and shredded coconut before serving
After an hour, take the cheesecake out and place it in the fridge. Chill for at least 4 hours, or overnight for the best taste. Before serving, sprinkle the top with walnuts and shredded coconut for extra flavor and crunch. Enjoy your delicious creation!
Tips & Tricks
Baking Tips
– Use room temperature ingredients for better mixing. This helps all the flavors blend well.
– Avoid overmixing the cheesecake batter to prevent cracks. Mix until just smooth for a perfect texture.
Serving Suggestions
– Serve with whipped cream or a scoop of vanilla ice cream. This adds a creamy touch to each bite.
– Garnish with fresh carrots or edible flowers for decoration. This makes the dish look extra special and fun.
Ideal Baking Tools
– A springform pan is great for easy removal. It helps keep your cheesecake intact when serving.
– An electric mixer ensures a smooth cheesecake batter. This saves time and effort, making mixing a breeze.

Variations
Flavor Variations
You can change the flavor of your carrot cake cheesecake. Try adding raisins or shredded coconut to the carrot layer. Both add sweetness and texture. You can also mix in spices like cardamom for a warm, spicy kick. This makes each bite more exciting.
Healthier Alternatives
If you want a lighter version, use whole wheat flour instead of all-purpose flour. This swap adds fiber and nutrients. You can also replace sour cream with Greek yogurt. It gives creaminess with less fat.
Dietary Substitutions
For a gluten-free option, use a gluten-free flour blend. This way, everyone can enjoy your cheesecake. If you need a vegan version, use dairy-free cream cheese. It works just as well in the cheesecake layer.
These variations allow you to make this dessert fit your taste and dietary needs. Feel free to explore and enjoy the process!
Storage Info
Refrigeration
Store your carrot cake cheesecake in the refrigerator for up to 5 days. To keep it fresh, cover it tightly with plastic wrap or foil. This will help prevent it from drying out and absorbing other fridge odors.
Freezing
You can freeze carrot cake cheesecake for up to 2 months. Be sure to wrap it well in plastic wrap and then place it in an airtight container. When you’re ready to enjoy it, thaw it in the refrigerator overnight before serving.
Reheating
This cheesecake is best enjoyed chilled. However, if you like it warm, you can briefly heat it in the oven. Just a few minutes at a low temperature will do. This method can enhance its creamy texture, making it even more delightful.
FAQs
How do I know when the cheesecake is done?
The center should slightly jiggle and not look wet when finished. This means it has set properly. You can also check with a toothpick. Insert it into the center; it should come out mostly clean.
Can I make this cheesecake ahead of time?
Yes, it can be prepared a day in advance for optimal flavor. Making it ahead allows the flavors to blend better. Just remember to chill it in the fridge until you’re ready to serve.
What is the best way to serve Carrot Cake Cheesecake?
Slice with a sharp knife and serve chilled, topped as desired. You can add whipped cream or extra nuts for fun. A nice touch is a sprinkle of cinnamon on top.
Can I use different nuts in the recipe?
Absolutely! Pecans or almonds can be great substitutes for walnuts. They will add different flavors and textures. You can also skip the nuts if you prefer a nut-free version.
This post covered everything you need to make a delicious Carrot Cake Cheesecake. We discussed the ingredients for both layers, how to bake, and tips for the best results. Remember, use room-temperature items and avoid overmixing the cheesecake. Feel free to try variations to fit your taste and dietary needs. This cake is perfect for any occasion and is easy to store. Now, grab your ingredients and impress your family or friends with this treat!
. - Set temperature to 325°F (160°C) - Prepare a 9-inch springform pan Start by preheating your oven to 325°F (160°C). This will ensure that your carrot cake cheesecake bakes evenly. Next, grab a 9-inch springform pan. Grease it well and line the bottom with parchment paper. This will help the cheesecake come out easily after baking. - Mix dry ingredients and combine with wet ingredients - Fold in grated carrots, walnuts, and crushed pineapple In a medium bowl, mix the dry ingredients. You need flour, baking powder, baking soda, cinnamon, nutmeg, and salt. In a large bowl, whisk together the sugars, vegetable oil, eggs, and vanilla extract. Once it is smooth, slowly add the dry mix to the wet mix. Stir gently until just combined. Now, fold in the grated carrots, walnuts, and crushed pineapple. This gives your cake great texture and flavor. - Pour batter into the springform pan - Bake for 25-30 minutes until a toothpick comes out clean Pour the carrot cake batter into the prepared springform pan. Bake for 25-30 minutes. To check if it's done, insert a toothpick into the center. If it comes out clean, it's ready. Let the carrot layer cool in the pan on a wire rack. - Beat the cream cheese until smooth - Gradually add sugar and eggs while mixing In a large bowl, beat the softened cream cheese with an electric mixer on medium speed. Keep mixing until it's smooth. Gradually add in the sugar. Then, add the eggs one at a time, mixing on low speed after each one. Finally, mix in the vanilla extract, lemon juice, and sour cream. Your cheesecake batter should be creamy and well blended. - Pour cheesecake batter over the cooled carrot layer - Smooth the surface with a spatula Once the carrot layer is cool, pour the cheesecake batter over it. Use a spatula to spread it out evenly. This will create a nice, smooth top for your cake. - Bake for 45-50 minutes or until center slightly jiggles - Cool gradually in the oven Put the cake back in the oven. Bake for 45-50 minutes. The center should jiggle slightly when done. After baking, turn off the oven and crack the door open. This helps the cheesecake cool slowly, reducing the chance of cracks. - Chill in the refrigerator for at least 4 hours - Top with walnuts and shredded coconut before serving After an hour, take the cheesecake out and place it in the fridge. Chill for at least 4 hours, or overnight for the best taste. Before serving, sprinkle the top with walnuts and shredded coconut for extra flavor and crunch. Enjoy your delicious creation! For the full recipe, check the details above. - Use room temperature ingredients for better mixing. This helps all the flavors blend well. - Avoid overmixing the cheesecake batter to prevent cracks. Mix until just smooth for a perfect texture. - Serve with whipped cream or a scoop of vanilla ice cream. This adds a creamy touch to each bite. - Garnish with fresh carrots or edible flowers for decoration. This makes the dish look extra special and fun. - A springform pan is great for easy removal. It helps keep your cheesecake intact when serving. - An electric mixer ensures a smooth cheesecake batter. This saves time and effort, making mixing a breeze. {{image_4}} You can change the flavor of your carrot cake cheesecake. Try adding raisins or shredded coconut to the carrot layer. Both add sweetness and texture. You can also mix in spices like cardamom for a warm, spicy kick. This makes each bite more exciting. If you want a lighter version, use whole wheat flour instead of all-purpose flour. This swap adds fiber and nutrients. You can also replace sour cream with Greek yogurt. It gives creaminess with less fat. For a gluten-free option, use a gluten-free flour blend. This way, everyone can enjoy your cheesecake. If you need a vegan version, use dairy-free cream cheese. It works just as well in the cheesecake layer. These variations allow you to make this dessert fit your taste and dietary needs. Feel free to explore and enjoy the process! For the complete recipe, check the Full Recipe section. Store your carrot cake cheesecake in the refrigerator for up to 5 days. To keep it fresh, cover it tightly with plastic wrap or foil. This will help prevent it from drying out and absorbing other fridge odors. You can freeze carrot cake cheesecake for up to 2 months. Be sure to wrap it well in plastic wrap and then place it in an airtight container. When you're ready to enjoy it, thaw it in the refrigerator overnight before serving. This cheesecake is best enjoyed chilled. However, if you like it warm, you can briefly heat it in the oven. Just a few minutes at a low temperature will do. This method can enhance its creamy texture, making it even more delightful. The center should slightly jiggle and not look wet when finished. This means it has set properly. You can also check with a toothpick. Insert it into the center; it should come out mostly clean. Yes, it can be prepared a day in advance for optimal flavor. Making it ahead allows the flavors to blend better. Just remember to chill it in the fridge until you’re ready to serve. Slice with a sharp knife and serve chilled, topped as desired. You can add whipped cream or extra nuts for fun. A nice touch is a sprinkle of cinnamon on top. Absolutely! Pecans or almonds can be great substitutes for walnuts. They will add different flavors and textures. You can also skip the nuts if you prefer a nut-free version. This post covered everything you need to make a delicious Carrot Cake Cheesecake. We discussed the ingredients for both layers, how to bake, and tips for the best results. Remember, use room-temperature items and avoid overmixing the cheesecake. Feel free to try variations to fit your taste and dietary needs. This cake is perfect for any occasion and is easy to store. Now, grab your ingredients and impress your family or friends with this treat!](https://fastmealmate.com/wp-content/uploads/2025/06/33af2c91-c02f-4d6c-a85e-840ab017cd6c-300x300.webp)


. To reheat grilled chicken sliders, I suggest using an oven. Preheat your oven to 350°F. Place the sliders on a baking sheet. Cover them with foil to keep moisture in. Heat for about 10-15 minutes. This keeps the chicken juicy and the buns soft. You can also use a microwave, but they might get soggy. If you choose the microwave, cover the sliders with a damp paper towel. Heat in short bursts of 30 seconds. Check often to avoid overcooking. Yes, you can prep these sliders in advance. First, cook the chicken and let it cool. Then, store it in the fridge for up to two days. To save time, you can also bread the chicken and freeze it. When you're ready to cook, just thaw and grill. This way, you’ll have tasty sliders ready in no time. Assemble them just before serving for the best flavor and texture. Definitely! You can use eggplant or portobello mushrooms instead of chicken. Slice the eggplant or mushrooms thickly. Bread and grill them just like the chicken. Use the same marinara and cheese for that classic taste. You can also try store-bought veggie patties as a quick option. This way, everyone can enjoy delicious sliders, no matter their diet. You now know how to make delicious grilled chicken Parmesan sliders. We covered the ingredients, cooking steps, and tips to ensure success. Remember to use fresh ingredients and monitor the grill for perfect results. These sliders can impress at any meal or gathering. Feel free to experiment with variations to suit your taste. When stored properly, leftovers taste great, too. Enjoy trying this recipe and make it your own. Happy cooking!](https://fastmealmate.com/wp-content/uploads/2025/06/2b1da996-745c-44b5-a796-c9c3c581ce53-768x768.webp)


. To keep your loaded baked potato salad fresh, store it in an airtight container. Make sure to cover the salad tightly to prevent air from entering. This keeps the flavors intact and stops the salad from drying out. In the refrigerator, your salad stays fresh for up to three days. After three days, the taste and texture start to decline. Reheating loaded baked potato salad can be tricky. The best way to do it is slowly. You can warm it in the microwave on low power. Stir it gently to help the heat spread evenly. Avoid using high heat, as it can make the potatoes mushy. You can also serve it cold for a refreshing twist. Can it be frozen? Yes, but it may change the texture. If you freeze it, store it in a freezer-safe container. When you thaw it, the salad might be a bit watery. To fix this, just stir it well and add a bit of sour cream or mayonnaise to bring back creaminess. Enjoy your loaded baked potato salad, no matter how you choose to serve it! You can prepare this salad up to a day in advance. Just follow all the steps and chill it in the fridge. This makes it perfect for parties or picnics. The flavors will mix together nicely, making it taste even better. Absolutely! You can use any cheese you like. Try mozzarella for a milder taste or pepper jack for some spice. Just make sure your cheese melts well if you bake the potatoes. If you want to cut calories, try Greek yogurt or a mix of sour cream and yogurt. Both options keep the creamy texture but add extra protein. They also help the salad taste fresh and zesty. This potato salad will stay fresh for about 3 to 5 days in the fridge. Just make sure to store it in an airtight container. Check for any changes in smell or texture before serving. Yes! This salad is very flexible. You can add diced tomatoes, jalapeños, or olives. Try mixing in some corn or bell peppers for extra crunch. Get creative and add whatever you enjoy! You can find the full recipe for Loaded Baked Potato Salad in this article. It has all the details you need to create this delicious dish at home. In this blog post, we explored how to make a creamy Loaded Baked Potato Salad. We covered important ingredients, step-by-step prep, and helpful tips. Remember, choosing the right potatoes and mixing well makes a big difference. Feel free to customize with your favorite toppings and seasonings. This dish works great for gatherings or as a side for grilled meats. With these guidelines, you can serve a delicious and satisfying salad any time. Trust me, it’s worth the effort! Enjoy your cooking adventure!](https://fastmealmate.com/wp-content/uploads/2025/06/841684b0-3d76-4995-bccc-748e700eeb02-768x768.webp)
