Caramel Brownie Cheesecake Irresistible Dessert Treat
. It details each step to make this delicious caramel brownie cheesecake! This article breaks down how to make a delicious caramel brownie cheesecake. We covered the key ingredients, from the fudgy brownie base to the creamy cheesecake layer and rich caramel sauce. I shared step-by-step instructions, tips for perfection, and variations to try. Make the most of this treat by storing it properly and experimenting with flavors. Dive into this dessert, and enjoy every bite with family and friends. You won’t regret it!](https://fastmealmate.com/wp-content/uploads/2025/06/2aae48c9-c1a8-4836-a5ef-44def97c7ba8.webp)
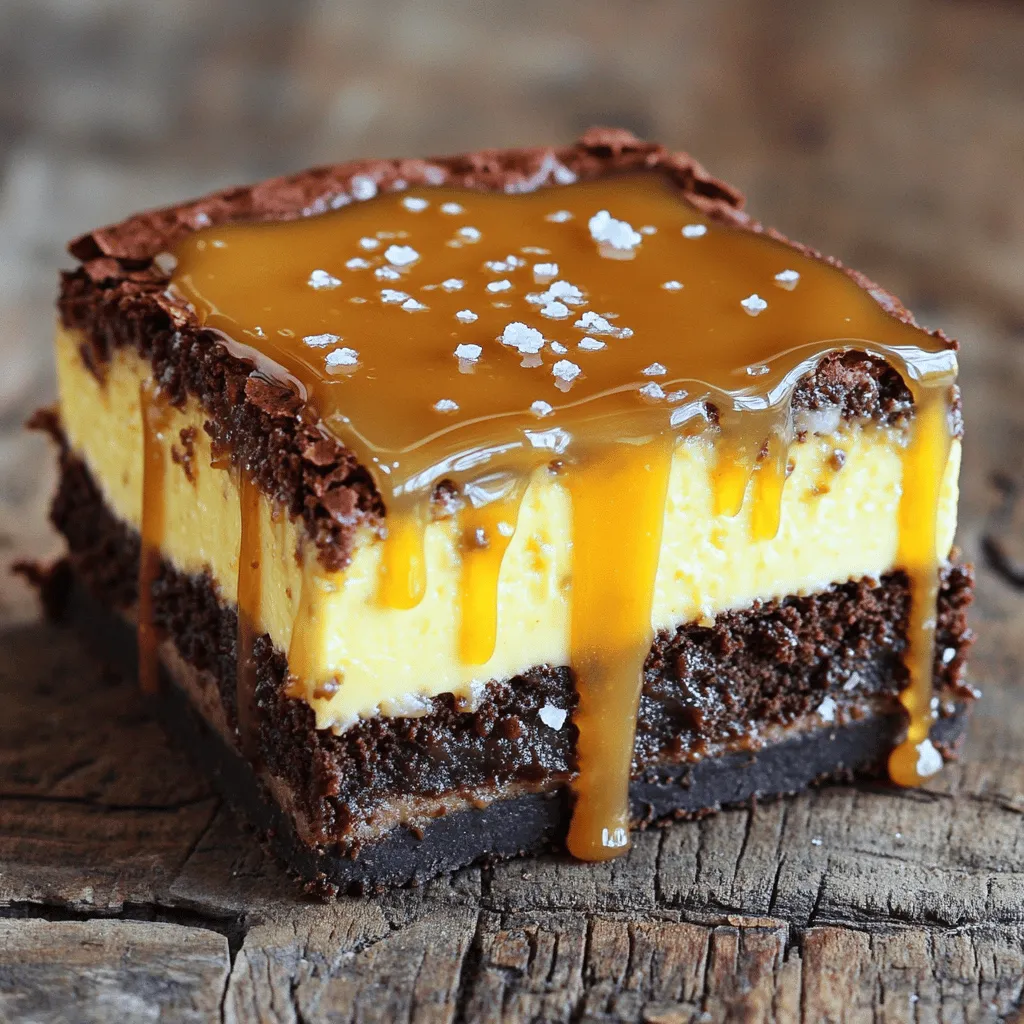
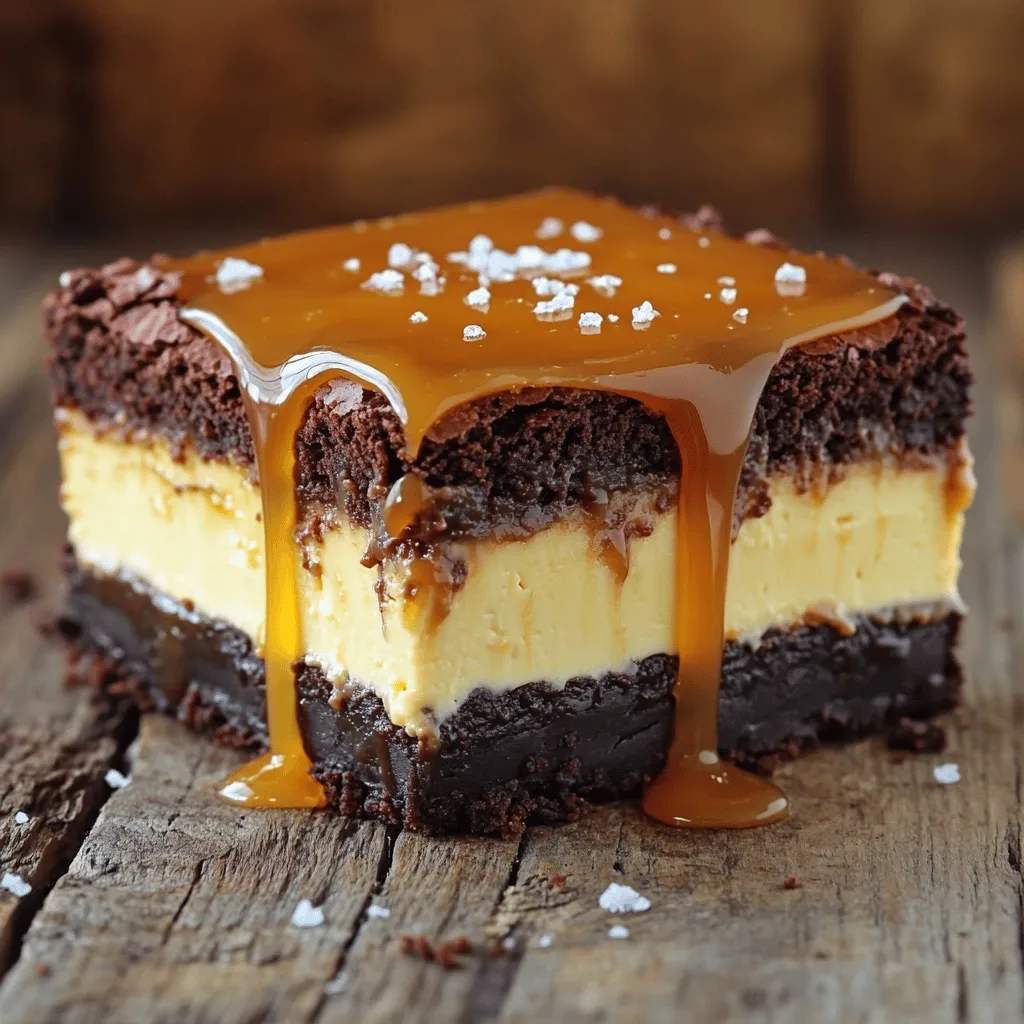
Indulge in the ultimate dessert experience with my Caramel Brownie Cheesecake! This decadent treat combines the rich fudginess of brownies, the creamy delight of cheesecake, and the sweet allure of caramel. Whether you’re whipping it up for a special occasion or just because, this cheesecake will wow your taste buds. Get ready to impress your friends and family as I share all the tasty details! Let’s dive into this irresistible dessert treat!
Ingredients
Ingredients for the Brownie Base
– 1 cup unsalted butter
– 2 cups granulated sugar
– 4 large eggs
– 1 teaspoon vanilla extract
– 1 cup all-purpose flour
– 1 cup unsweetened cocoa powder
– 1/2 teaspoon salt
Ingredients for the Cheesecake Layer
– 16 oz cream cheese, softened to room temperature
– 1 cup granulated sugar
– 3 large eggs
– 1 teaspoon vanilla extract
– 1/4 cup sour cream
– 1/4 cup heavy cream
Ingredients for the Caramel Sauce
– 1 cup granulated sugar
– 6 tablespoons unsalted butter, cut into pieces
– 1/2 cup heavy cream, at room temperature
– A pinch of salt
The brownie base gives this dessert its rich, chocolate flavor. The cream cheese layer adds a creamy texture. The caramel sauce is the sweet finish that ties everything together.
You need to measure your ingredients carefully. Start with the brownie base. Melt the butter in a pan. Mix in sugar and eggs. Then add the vanilla, flour, cocoa, and salt. The batter should be thick and smooth.
Next, the cheesecake layer needs cream cheese. Make sure it’s soft to mix well. Add sugar and eggs, then fold in sour cream and heavy cream. This will make the cheesecake rich and creamy.
For the caramel sauce, heat sugar in a pan until it melts. Stir in butter and cream. Be careful, as it will bubble. A pinch of salt enhances the flavor.
Step-by-Step Instructions
Preparing the Brownie Base
1. Preheat your oven to 350°F (175°C).
2. Grease a 9-inch springform pan well. You can also use parchment paper for easy removal.
3. In a medium saucepan, melt 1 cup of unsalted butter over low heat.
4. Once melted, mix in 2 cups of granulated sugar until well blended.
5. Add 4 large eggs one at a time, mixing until smooth each time.
6. Stir in 1 teaspoon of vanilla extract.
7. Gradually add 1 cup of all-purpose flour, 1 cup of unsweetened cocoa powder, and 1/2 teaspoon of salt. Mix just until combined.
8. Pour the batter into the prepared pan, smoothing it out evenly.
9. Bake for 20-25 minutes. A toothpick should come out with a few moist crumbs.
10. Let the brownie layer cool completely in the pan.
Making the Cheesecake Layer
1. In a large mixing bowl, beat 16 oz of softened cream cheese with 1 cup of sugar until smooth.
2. Add 3 large eggs one at a time, mixing well after each.
3. Fold in 1 teaspoon of vanilla extract, 1/4 cup of sour cream, and 1/4 cup of heavy cream. Mix until silky.
Assembling and Baking the Cheesecake
1. Pour the cheesecake batter over the cooled brownie base.
2. Use a spatula to smooth the top.
3. Lower the oven temperature to 325°F (160°C).
4. Bake for 50-60 minutes. The edges should set, but the center can jiggle.
5. Turn off the oven and crack the door open. Let the cheesecake cool there for an hour.
Preparing the Caramel Sauce
1. In a medium saucepan, add 1 cup of granulated sugar over medium heat.
2. Allow it to melt until it turns an amber color. Swirl the pan gently.
3. Once melted, remove from heat and quickly whisk in 6 tablespoons of unsalted butter.
4. Carefully add 1/2 cup of heavy cream. It will bubble up, so be cautious.
5. Mix in a pinch of salt and set the caramel sauce aside to cool.
Finishing and Serving the Cheesecake
1. Once the cheesecake cools to room temperature, pour the caramel sauce over the top.
2. Spread it evenly with a spatula.
3. Cover and refrigerate for at least 4 hours or overnight.
4. To serve, release the sides of the springform pan and remove it.
5. Slice the cheesecake and drizzle with any leftover caramel if you like.
Tips & Tricks
Perfecting the Brownie Texture
To make the perfect brownie base, avoid overmixing the batter. Mixing too much can lead to a cake-like texture. Stir just until the flour disappears. Keep an eye on baking times, as they can vary. Check them at 20 minutes for moist, fudgy brownies. A toothpick should come out with a few moist crumbs, not wet batter. For extra fudginess, use a higher cocoa powder ratio and add an extra egg yolk.
Cheesecake Tips
Use room temperature ingredients for the cheesecake layer. This helps achieve a smooth texture. Cold cream cheese can form lumps that are hard to mix out. To prevent cracks, bake the cheesecake in a water bath. This creates a gentle heat that reduces temperature changes. After baking, let the cheesecake cool gradually in the oven. Cracking often happens with sudden temperature shifts.
Caramel Sauce Perfection
Making caramel can be tricky. A common issue is sugar crystallizing if stirred too soon. Melt the sugar undisturbed until it turns amber. If it gets too sweet, add a pinch of salt for balance. If your caramel is too thick, you can adjust it. Adding a splash of water or cream helps achieve the right pourable consistency. For serving, you can microwave any leftover caramel. Just heat it in short bursts and stir until smooth.

Variations
Flavor Additions to the Cheesecake
You can make your cheesecake even better by adding flavors. Here are some fun ideas:
– Chocolate Chips or Chunks: Mix chocolate chips into the cheesecake layer for a rich surprise.
– Infuse Flavors: Try adding coffee or orange zest for a fresh twist. It adds depth and brightness.
– Swirl Techniques: Create a pretty marble effect by swirling caramel or chocolate sauce through the cheesecake batter.
Brownie Base Alternatives
If you want to change up the brownie base, consider these options:
– Gluten-Free Brownies: Use gluten-free flour or almond flour for a tasty alternative. There are many great recipes online.
– Vegan Substitutions: You can swap eggs for flaxseed meal or applesauce. This keeps the brownies moist and delicious.
– Adjusting Sweetness: For a less sweet brownie, cut down on sugar without losing flavor. This helps balance the richness of the cheesecake.
Different Toppings
Toppings can make your dessert shine. Here are some ideas:
– Nuts or Sea Salt: Add chopped nuts or sprinkle sea salt on top for crunch and flavor. This contrast enhances the taste.
– Whipped Cream Ideas: Top each slice with whipped cream for a light and airy touch. You might even add a bit of caramel to the cream.
– Fruit Pairings: Fresh berries or sliced bananas make great garnishes. They add color and a refreshing taste.
Feel free to explore these variations to make your caramel brownie cheesecake uniquely yours!
Storage Info
Storing Leftovers
To keep your caramel brownie cheesecake fresh, store it in the fridge. Use an airtight container or cover it tightly with plastic wrap. This prevents the cheesecake from drying out or absorbing other smells. Your cheesecake can stay fresh for about 5 to 7 days.
Freezing Tips
If you want to save some for later, you can freeze it! First, cut the cheesecake into slices. Wrap each slice in plastic wrap, then place them in a freezer-safe bag. This helps prevent freezer burn. To thaw, take a slice out and leave it in the fridge overnight. You can also let it sit at room temperature for a couple of hours.
Reheating Caramel Sauce
If you have leftover caramel sauce, you can warm it up easily. The best way is to use a microwave. Place the sauce in a microwave-safe bowl and heat it in short bursts, stirring in between. This keeps it smooth. Store any unused caramel sauce in the fridge for up to 2 weeks.
FAQs
How long does it take to make caramel brownie cheesecake?
Making this dessert takes about 6 hours in total. This includes 30 minutes for prep and about 5 hours for cooling and chilling. You will need to bake the brownie, prepare the cheesecake, and let it set in the fridge.
Can I make this dessert ahead of time?
Yes, you can make this dessert ahead. It tastes even better the next day. Store it in the fridge, covered with plastic wrap. It will stay fresh for about 3 to 4 days.
What can I substitute for cream cheese in the cheesecake layer?
You can use Greek yogurt or silken tofu as a cream cheese alternative. Greek yogurt gives a tangy flavor, while silken tofu offers a smooth texture. Both options can affect the taste, so choose based on your preference.
Is this recipe suitable for special diets?
This recipe can be adjusted for special diets. For gluten-free, use almond flour instead of all-purpose flour. To make it dairy-free, use dairy-free cream cheese and a suitable butter. For low-sugar, try a sugar substitute like stevia.It details each step to make this delicious caramel brownie cheesecake!
This article breaks down how to make a delicious caramel brownie cheesecake. We covered the key ingredients, from the fudgy brownie base to the creamy cheesecake layer and rich caramel sauce. I shared step-by-step instructions, tips for perfection, and variations to try. Make the most of this treat by storing it properly and experimenting with flavors. Dive into this dessert, and enjoy every bite with family and friends. You won’t regret it!
. It details each step to make this delicious caramel brownie cheesecake! This article breaks down how to make a delicious caramel brownie cheesecake. We covered the key ingredients, from the fudgy brownie base to the creamy cheesecake layer and rich caramel sauce. I shared step-by-step instructions, tips for perfection, and variations to try. Make the most of this treat by storing it properly and experimenting with flavors. Dive into this dessert, and enjoy every bite with family and friends. You won’t regret it!](https://fastmealmate.com/wp-content/uploads/2025/06/2aae48c9-c1a8-4836-a5ef-44def97c7ba8-300x300.webp)


![- 4 cups of juicy watermelon (cut into cubes) - 2 cups of crisp cucumber (diced) - 1 cup of creamy feta cheese (crumbled) - 1/4 cup of fresh mint leaves (finely chopped) - 2 tablespoons of high-quality olive oil - 1 tablespoon of balsamic reduction (optional) - Sea salt to taste - Freshly cracked black pepper to taste - Juice from one fresh lemon The ingredients for this salad create a refreshing blend. The watermelon brings sweetness, while the cucumber adds crunch. Feta cheese gives a creamy touch, making the dish rich and satisfying. Fresh mint adds a burst of flavor that brightens every bite. Using high-quality olive oil enhances the taste, while balsamic reduction adds a sweet twist. You can adjust salt and pepper to fit your taste. The lemon juice lifts the flavors, making everything pop. This salad is perfect for hot days. It’s simple to make and looks great on any table. Plus, it’s a great way to enjoy fresh, seasonal produce. For the full recipe, check out the detailed steps later in this article. To cube watermelon, start with a big, ripe piece. Cut off both ends to make it stable. Stand it up, then slice down the sides to remove the skin. Now, cut the flesh into thick slabs. After that, slice the slabs into cubes. Aim for bite-sized pieces so they are easy to eat. For the cucumber, wash it well. Cut off the ends, then slice it in half lengthwise. Use a spoon to scrape out the seeds if you want a less watery salad. Next, chop it into small, even pieces. This helps the cucumber mix well with other ingredients. When it comes to crumbling feta cheese, first take it out of its packaging. Use your hands or a fork to break it into small pieces. Try to keep the crumbles big enough to stay distinct in the salad. This way, you get that lovely creamy bite. In a large bowl, start by adding the cubed watermelon and diced cucumber. Gently mix them together, ensuring they are evenly combined. Next, sprinkle the crumbled feta cheese over the top. This will add a creamy texture and a salty kick. Add the finely chopped mint leaves next. This herb brightens the salad with its fresh flavor. Now, drizzle the olive oil and squeeze the fresh lemon juice over the salad. This will give it a bright, zesty taste. Using a large spoon, carefully toss the salad. Do this gently to keep the feta from mashing. You want to mix the flavors without losing the feta's shape. Now it's time to season the salad. Add sea salt and freshly cracked black pepper to taste. Start with a little, then adjust as needed. The salt will help enhance all the flavors. Let the salad rest for about 10 minutes before serving. This step is key. It allows the flavors to meld together. The watermelon will release some juice, creating a light dressing. For the complete recipe, check the [Full Recipe]. To create the best flavor in your salad, balance sweetness and acidity. Watermelon is sweet, so you need acidity to cut through that. Fresh lemon juice adds bright notes. You can also try balsamic reduction for a sweet twist. Adjust seasonings to your taste. Add sea salt and black pepper slowly. Taste as you go. This way, the salad fits your personal preference. Presentation matters when serving this salad. For a colorful display, choose a large bowl. Layer the watermelon, cucumber, and feta beautifully. You can also arrange the watermelon cubes in a fun pattern. Lastly, garnish with extra mint leaves. This adds a pop of green and a fresh smell. Having the right tools makes preparation easy. A sharp chef's knife is key for cutting watermelon and cucumber. Use a sturdy mixing bowl to combine all ingredients gently. These tools ensure you maintain the salad's texture and create a lovely dish. For the best results, make sure your tools are clean and ready to go. For a complete guide, check the Full Recipe. {{image_4}} You can swap feta cheese for a vegan option like tofu or almond cheese. These substitutes provide a similar creamy texture. If you want to add more flavor, try using a vegan feta made from cashews. For fruits or vegetables, consider adding berries, mango, or radishes. These additions add color and a unique taste to your salad. Watermelon pairs well with many fruits, so feel free to get creative! Different dressings can enhance your salad. A simple lemon vinaigrette works great. Mix olive oil, lemon juice, salt, and pepper for a fresh taste. You can also make your own balsamic reduction at home. Just simmer balsamic vinegar on low heat until it thickens. This sweet and tangy sauce pairs well with the salad, adding depth to the flavors. Changing the salad with the seasons can keep it fresh. In summer, add fresh basil or strawberries for a sweet twist. In fall, try diced apples or pears for a crunchy bite. For winter, include pomegranate seeds or citrus fruits. These ingredients add a pop of color and flavor to your dish. Always look for seasonal produce to keep your salad exciting and vibrant! To keep your leftover salad fresh, place it in an airtight container. This helps prevent moisture loss and keeps flavors strong. You can use glass or plastic containers. Glass is great for easy cleaning and doesn’t absorb odors. If you want to keep it extra fresh, add a layer of plastic wrap on top before sealing. You can freeze Watermelon Cucumber Feta Salad, but it’s not ideal. Freezing can change the texture of watermelon and cucumber. If you choose to freeze, prepare it without the feta and dressing. Store the fruit and cucumber in a freezer-safe bag. When you're ready to eat, thaw it in the fridge overnight. Add feta and dressing just before serving. In the fridge, this salad lasts about 2 to 3 days. After that, it may start to lose its crispness. Look for signs of spoilage, like a mushy texture or off smell. If the feta starts to look slimy, it’s time to toss it. Always trust your senses when deciding if food is still good to eat. To make this salad heartier, add protein or grains. You can include: - Grilled chicken breast, sliced thin - Cooked quinoa for a nutty flavor - Chickpeas for a plant-based option - Shrimp for a light seafood touch These ingredients mix well with the fresh flavors and keep your salad satisfying. Yes, you can prep ingredients ahead. To keep the salad fresh: - Chop watermelon and cucumber a few hours before serving. - Store the feta separately to avoid sogginess. - Mix everything together just before serving. This way, you enjoy that crisp texture and vibrant taste. Watermelon is hydrating and low in calories. It has vitamins A and C, which support your skin and immune system. Cucumber is also hydrating and offers fiber, which is good for digestion. This salad fits into a healthy diet by providing essential nutrients with low calories. Yes, this salad is gluten-free. All the ingredients, including watermelon, cucumber, and feta, do not contain gluten. For extra options: - Serve it with gluten-free crackers. - Pair it with gluten-free bread for a light meal. Feel free to enjoy this salad without worries about gluten! The Watermelon Cucumber Feta Salad is a refreshingly light dish. You learned about its main ingredients, step-by-step preparation, and unique variations. Remember to balance flavors and let it rest before serving. With tips for storage and healthy options, you can enjoy this salad any time. This recipe is simple, delicious, and perfect for warm days. Now, you have the tools to create a great salad that impresses everyone. Enjoy making it your own!](https://fastmealmate.com/wp-content/uploads/2025/07/b20d6dc1-e7c2-400f-acd5-da5290acfeaa-768x768.webp)
![- 8 oz spaghetti or fettuccine - 3 large egg yolks - 1 whole egg - 1/2 cup finely grated Parmesan cheese - 1 tablespoon gochujang - 2 cloves garlic, minced - 1 tablespoon olive oil - 4 oz pancetta or diced turkey bacon (optional) - Salt and freshly cracked black pepper - Chopped green onions (for garnish) - Sesame seeds (for garnish) Gather these ingredients before you start cooking. This will make your process smooth and fun. The star of this dish is gochujang. It adds a deep heat and unique flavor. The creamy sauce comes from the eggs and cheese. The garlic and olive oil offer a nice aroma. If you want a meat option, use pancetta or turkey bacon. - Large pot - Medium mixing bowl - Large skillet - Tongs You need a large pot to boil the pasta. A medium mixing bowl helps mix the egg and cheese. The large skillet cooks the garlic and meat. Tongs are key to tossing your pasta with the sauce. Having the right tools makes cooking easier and more enjoyable. - Calories per serving: about 500 - Protein: 20g - Fat: 25g - Carbohydrates: 50g This dish is rich and filling. The calories come from the pasta, eggs, and cheese. It packs a good protein punch from the eggs and cheese. Enjoy it as a main meal or share it with a friend. For more details, check the Full Recipe for serving sizes and more tips. - Bring a large pot of salted water to a boil. - Cook spaghetti or fettuccine until al dente, about 8-10 minutes. First, salt the water. This helps the pasta taste great. When it boils, add the pasta. Stir it often. Before draining, save one cup of pasta water. This water helps make the sauce creamy later. - Whisk together egg yolks, whole egg, Parmesan, gochujang, and seasonings. - Heat olive oil and sauté garlic. In a medium bowl, mix the egg yolks, whole egg, and finely grated Parmesan cheese. Add gochujang and a pinch of salt and pepper. Whisk until it looks smooth. Heat olive oil in a skillet over medium heat. Add minced garlic. Sauté it for about 30 seconds. Watch for it to smell great and turn golden. - Cook pancetta or turkey bacon if using. - Toss drained pasta with garlic oil. - Mix in egg and gochujang mixture off the heat. If you want meat, add pancetta or turkey bacon now. Cook it until it is crispy, about 3-4 minutes. Then, toss the drained pasta into the skillet. Mix it well with the garlic oil. Off the heat, pour the egg and gochujang mixture over the hot pasta. Use tongs to toss it. The heat will cook the eggs gently, making a creamy sauce. Slowly add the reserved pasta water until the sauce is creamy and smooth. Taste and add more salt or pepper if you need to. Plate your Gochujang Carbonara right away. Enjoy the spicy twist! For the full recipe, check out the detailed steps and tips. To achieve a creamy sauce, start with room temperature eggs. Cold eggs can make the sauce clumpy. Whisk the yolks and the whole egg together well. This creates a smooth base. When you combine the egg mixture with the pasta, do it off the heat. The pasta should be hot enough to cook the eggs gently. Toss quickly with tongs. This helps make a rich sauce. If your sauce feels too thick, use reserved pasta water. Add it a little at a time. This water adds starch and helps to loosen the sauce. Keep tossing until you reach your desired creaminess. To boost the flavor, try adding spices. A pinch of red pepper flakes can add heat. Fresh herbs like parsley or basil can bring brightness. These small changes can really lift your dish. You can also experiment with different cheese. Pecorino Romano adds a sharp flavor. A mix of Parmesan and Pecorino can give you a nice depth. Use what you like best for a personal touch. One big mistake is overcooking the pasta. Al dente is best, as it will cook a bit more in the sauce. Always check the package time and taste a strand. Another mistake is scrambling the eggs. Keep the heat low when mixing the egg and pasta. If the skillet is too hot, the eggs will cook too fast. You want a creamy sauce, not scrambled eggs. {{image_4}} You can make a great vegetarian version of gochujang carbonara. Start by replacing the pancetta. Use mushrooms instead. They add a nice umami flavor. You can use shiitake or cremini mushrooms for this. Just sauté them in olive oil until they are golden and tender. Next, add seasonal vegetables. Think spinach, zucchini, or asparagus. They brighten up the dish and add color. Just toss them in the skillet with the garlic. This adds flavor and nutrition. Want more heat? You can increase the gochujang. Adding a little more will make it extra spicy. Just be careful! Start small and taste as you go. If you want to add other spices, try crushed red pepper flakes. They bring another layer of heat and flavor. Do you need a gluten-free option? You can easily swap out regular pasta for gluten-free pasta. There are many good brands available now. They work well in this recipe. You can also explore other noodle types. Try rice noodles or soba noodles. Each option gives a unique twist to the dish. They can bring different textures and flavors, making it fun to try new things. To keep your Gochujang Carbonara fresh, store it in an airtight container. Place the container in the fridge. Make sure to cool the pasta to room temperature before sealing. This helps prevent moisture buildup. Leftovers last about 3 days in the fridge. The best way to reheat carbonara is on the stove. Add a splash of water or broth to a skillet. Heat it over low to medium heat. Stir gently until warm. This keeps the sauce creamy and smooth. Avoid using the microwave, as it can dry out the pasta. You can freeze carbonara, but it may change texture. To freeze, place cooled portions in freezer-safe bags. Remove as much air as possible before sealing. For best taste, eat it within 1 month. When ready to eat, thaw it in the fridge overnight. Reheat gently on the stove with added liquid. This helps restore some of the creaminess. For the full recipe, check out the details above. Gochujang is a Korean chili paste. It has a deep red color. This paste is made from fermented soybeans, glutinous rice, and chili powder. Its flavor is sweet, spicy, and umami-rich. Gochujang adds a unique kick to many dishes. You can find it in Asian markets and some grocery stores. Yes, you can prep this dish ahead of time. Cook the pasta and store it in the fridge. Keep the sauce separate, so it stays creamy. When you are ready to eat, heat the pasta and mix in the sauce. This way, you enjoy fresh, tasty carbonara. If you lack pancetta, try turkey bacon or diced ham. For a vegetarian option, use mushrooms. Sauté them until golden and add them to the dish. You can also use smoked tofu for a plant-based protein. To make it milder, use less gochujang. You can start with half a tablespoon and taste it. If you want more heat, add a little more gochujang or some red pepper flakes. Adjust slowly until it meets your preference. For the complete steps and extra tips for making Gochujang Carbonara, click here: [Full Recipe]. This blog post covered how to make Gochujang Carbonara, from ingredients to storage tips. You learned about choosing the right pasta, creating a creamy sauce, and avoiding common cooking mistakes. No matter your taste, you can try variations like vegetarian options. Always store leftovers correctly to enjoy them later. Remember, cooking is fun, so feel free to experiment with flavors! Enjoy your delicious meal and impress others with your skills!](https://fastmealmate.com/wp-content/uploads/2025/06/8ba01260-66cf-4de4-8766-bae4801448e1-768x768.webp)
