Buttery Scallop and Shrimp Skewers Deliciously Grilled

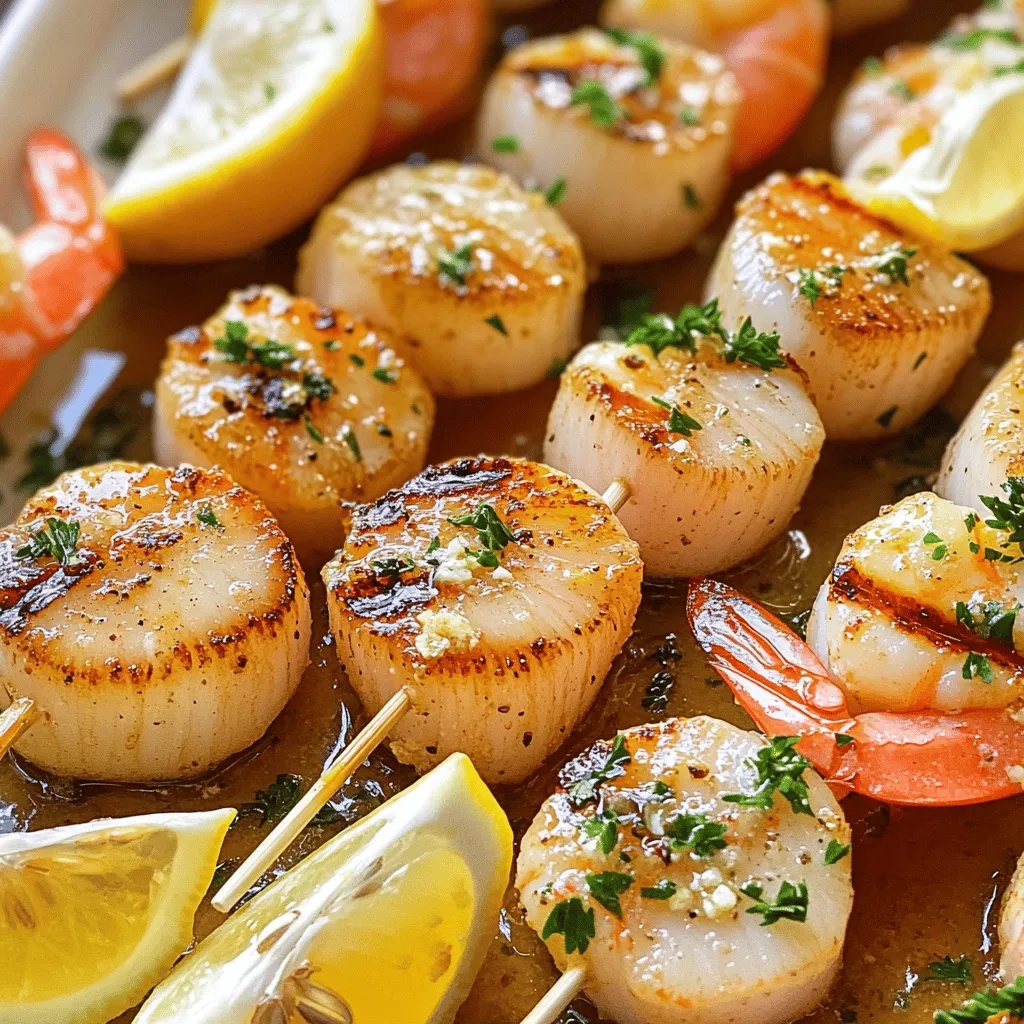
If you love seafood, you’ll adore these buttery scallop and shrimp skewers! Grilled to perfection, they burst with flavor thanks to a simple garlic marinade and smoky spices. This easy recipe makes for a fantastic dish to share at any cookout. Ready to impress your guests? Let me guide you through the simple steps to create a dish that’s as delicious as it is beautiful. Let’s get cooking!
Ingredients
Main Ingredients
– 12 large sea scallops
– 12 large shrimp, peeled and deveined
– 2 tablespoons unsalted butter, melted
Seasoning and Marinade
– 2 cloves garlic, minced
– 1 tablespoon fresh lemon juice
– 1 teaspoon smoked paprika
– 1 teaspoon fresh thyme (or 1/2 teaspoon dried thyme)
– Salt and freshly ground black pepper to taste
Additional Requirements
– Skewers (if wooden, soak in water for 30 minutes to prevent burning)
– Fresh lemon wedges and chopped parsley for garnish
Using fresh, high-quality seafood is key. I love the taste of large sea scallops and juicy shrimp. They make each bite feel like a treat. The melted butter, garlic, and seasonings create a marinade that blends well. The smoked paprika gives a nice touch of warmth, while the lemon juice brightens the dish.
Marinating the seafood adds flavor and enhances the dish. I prefer to let the scallops and shrimp soak for 15 to 20 minutes. This time allows the flavors to seep in. Just remember to coat them well. The blend of spices makes them taste amazing.
When grilling, keep an eye on the skewers. They cook quickly, just 2 to 3 minutes on each side. I like to see the shrimp turn pink and the scallops get a golden crust. This means they are ready to eat.
Step-by-Step Instructions
Preparing the Marinade
First, grab a medium bowl. In this bowl, I whisk together the melted butter, minced garlic, fresh lemon juice, smoked paprika, thyme, salt, and pepper. Mix until everything blends well. The smell will be amazing!
Marinating the Seafood
Now, gently add the scallops and shrimp into the bowl. Make sure they are coated in the flavorful butter mix. Cover the bowl and place it in the fridge for 15-20 minutes. This time helps the seafood soak up all the great flavors.
Grilling Process
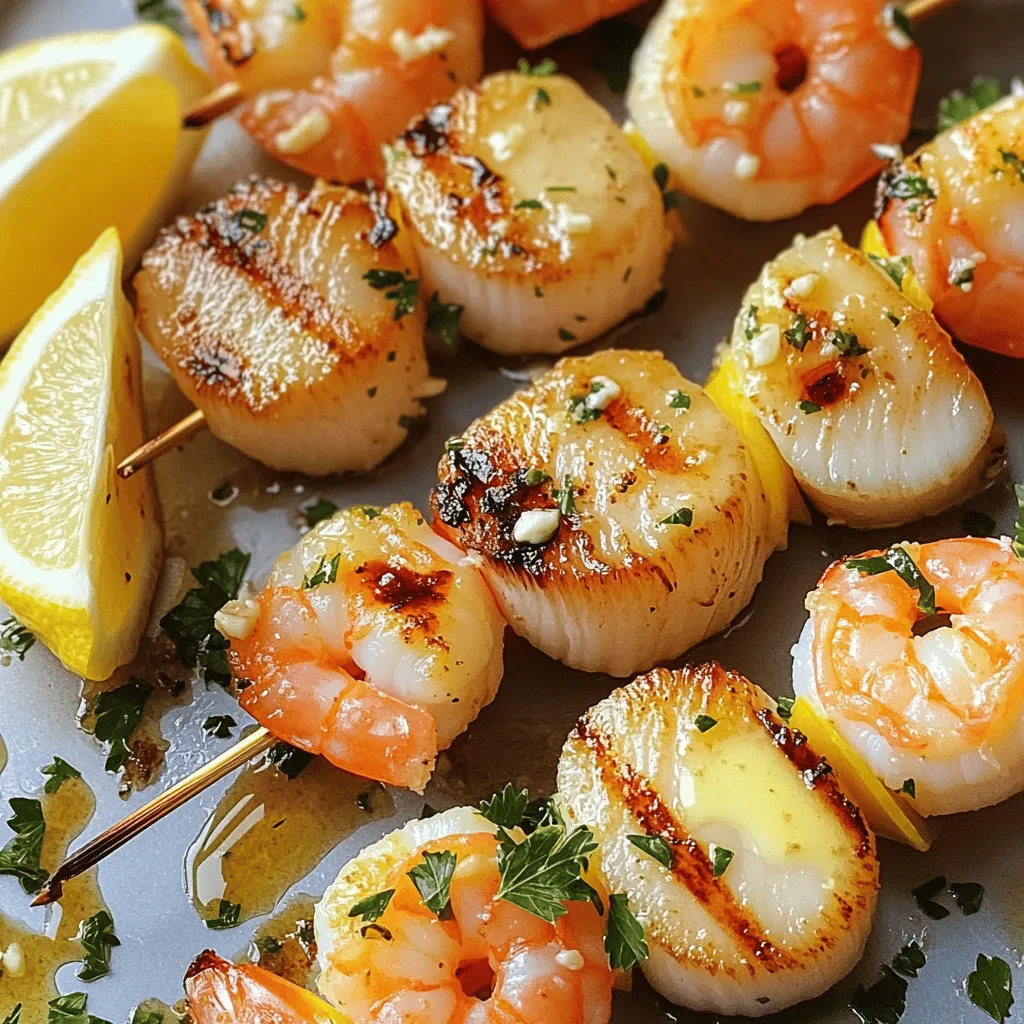
While your seafood marinates, preheat your grill. Get it hot on medium-high heat. After marinating, take your skewers. Thread 2 scallops and 2 shrimp onto each skewer, alternating them. Aim for 3 skewers for even cooking.
Place the skewers on the grill and cook for 2-3 minutes on each side. Watch closely! The shrimp should turn pink and the scallops should get a nice golden crust. This is key to perfect seafood. When they are done, remove the skewers from the grill. Drizzle any leftover marinade over them for extra flavor. Finish with fresh lemon wedges and chopped parsley for a pop of color.
Tips & Tricks
Perfecting the Grill Time
Monitor the grill time closely. Scallops and shrimp cook fast. If you overcook them, they become tough and dry. Cook for just 2-3 minutes on each side. Look for shrimp to turn pink and scallops to get a nice golden crust. This careful timing keeps your seafood juicy.
Enhancing Flavor
After grilling, drizzle any leftover marinade over the skewers. This adds extra flavor. You can also serve a small bowl of the marinade on the side. It makes dipping easy and fun. The extra taste makes the dish even more special.
Presentation Suggestions
Arrange the skewers on a bright platter. This makes them stand out. Garnish them with fresh lemon wedges and chopped parsley. The green and yellow colors add a nice touch. A well-presented dish impresses guests and makes the meal feel gourmet.

Variations
Flavor Additions
You can add chili flakes to bring heat to your skewers. The spice balances well with the sweet seafood. Fresh herbs like basil or cilantro can also enhance the taste. They add a bright note to the dish. Try mixing in a bit of lime zest for a citrus twist. This small change can make a big difference in flavor.
Alternative Cooking Methods
If you prefer cooking indoors, you can bake or pan-sear the skewers. For baking, place them on a lined baking sheet. Bake at 400°F for about 10-12 minutes. Flip them halfway through to ensure even cooking. For pan-searing, use a hot skillet with a little oil. Cook for about 3-4 minutes on each side. Both methods yield tasty results while keeping your kitchen smoke-free.
Serving Ideas
These skewers shine when paired with sides. A simple rice dish complements the seafood well. You can also serve them with a fresh salad. Grilled vegetables add a nice touch, too. For a fun twist, serve with a dipping sauce. A garlic lemon aioli or a spicy cocktail sauce works wonders. Each option enhances the meal and adds variety to your plate.
Storage Info
Storing Leftovers
To keep your buttery scallop and shrimp skewers fresh, refrigerate them in an airtight container. They taste best when eaten within 2 days. If you plan to enjoy them later, this is the way to go.
Reheating Options
When you’re ready to eat your leftovers, gently reheat the skewers. You can do this in a pan over low heat or use the microwave. This keeps the seafood tender. Just be careful not to overcook them.
Freezing Recommendations
If you want to save some skewers for later, you can freeze them. Freeze raw marinated skewers for up to 2 months. Just remember to thaw them before cooking. This way, you can enjoy a tasty meal anytime.
FAQs
Can I use frozen scallops and shrimp?
Yes, but ensure they are completely thawed and patted dry before marinating. This step keeps the seafood from becoming watery and losing flavor.
How do I prevent the skewers from burning?
Soak wooden skewers in water for at least 30 minutes before using them. This simple trick helps prevent burning on the grill and keeps your seafood safe.
What can I serve with buttery scallop and shrimp skewers?
These skewers pair well with quinoa, grilled vegetables, or a fresh green salad. Each option adds color and nutrition to your meal.
Is it safe to eat undercooked scallops?
No, scallops should be cooked until opaque and firm to ensure safety. Undercooked scallops can pose health risks, so always check for doneness.
You now have a simple and tasty recipe for buttery scallop and shrimp skewers. We covered the ingredients, easy steps, and tips for great grilling. Remember to check the cooking time so your seafood stays tender. You can even try different spices or sides to make it your own. Enjoy making this dish for family or friends, and savor every bite. Cooking should be fun and delicious, so get grilling!


![- 2 fresh salmon fillets - 1 cup quinoa, thoroughly rinsed - 2 cups vegetable broth or water - 1 cup cherry tomatoes, halved - 1 crisp cucumber, diced - 1/2 cup Kalamata olives, pitted and sliced - 1/2 red onion, delicately thin-sliced - 1/4 cup fresh parsley, finely chopped - 1 lemon, juiced - Salt and freshly cracked pepper, to taste - 1 teaspoon garlic powder - 1 teaspoon dried oregano - Extra-virgin olive oil - Optional toppings (e.g., feta cheese, avocado, arugula) Gather these fresh ingredients for your Healthy Mediterranean Salmon Bowl. The salmon gives protein and a rich flavor. Quinoa adds a nutty taste and is full of fiber. The vegetables bring color, crunch, and nutrients. You can always switch up the ingredients based on what you like or have on hand. If you want to make it even more gourmet, consider our Full Recipe for detailed steps. Enjoy mixing and matching! To start, combine 1 cup of rinsed quinoa with 2 cups of vegetable broth or water in a medium saucepan. Heat the mixture on medium-high until it boils. Once it bubbles, reduce the heat to low. Cover it and let it simmer for about 15 minutes. You’ll know it’s done when all the liquid is soaked up. After that, take it off the heat and fluff it with a fork. Next, preheat your oven to 400°F (200°C). While it warms, line a baking tray with parchment paper. Place the 2 salmon fillets skin-side down. Drizzle them with olive oil and season with garlic powder, dried oregano, salt, and freshly cracked pepper. Bake the salmon for 12 to 15 minutes. It should be opaque and flake easily when it’s done. While the salmon bakes, it’s time to chop the vegetables. In a large mixing bowl, toss together 1 cup of halved cherry tomatoes, 1 diced cucumber, ½ thinly sliced red onion, and ½ cup of pitted Kalamata olives. Drizzle with 1 tablespoon of olive oil and the juice from 1 lemon. Season with salt and pepper to taste. Mix well to spread the flavors evenly. Now, grab your serving bowls. Start with a generous scoop of fluffy quinoa as the base. Place a roasted salmon fillet right on top of the quinoa. Next, add a hearty portion of the vibrant vegetable mixture on one side of the salmon. Garnish with fresh parsley for a lovely finish. You can find the complete recipe [Full Recipe]. Enjoy a fresh and healthy Mediterranean salmon bowl! To know when salmon is done, check its color. It should turn from bright pink to a lighter pink. The fish should also flake easily when you poke it with a fork. For the best results, I recommend two cooking methods. Grilling gives a nice char and smoky flavor. Poaching keeps the fish moist and tender. Marinate your salmon for extra taste. A simple mix of olive oil, lemon juice, and garlic works well. You can let it sit for 30 minutes. For the veggies, add a splash of balsamic vinegar or a sprinkle of feta cheese. This will really boost their flavors. To save time, prep your ingredients in advance. Cook the quinoa and chop the veggies a day before. Store them in airtight containers in the fridge. This way, assembly is quick and easy. For leftovers, keep them in separate containers. This helps keep the salmon and veggies fresh. {{image_4}} You can change the grains in your bowl. Try using rice or farro instead of quinoa. Each grain adds its own flavor and texture. For the salmon, think about different ways to cook it. You can use smoked salmon for a rich taste or grill it for a nice char. Both options can give your dish a new twist. Adding spices can change your bowl's taste. Try paprika for a smoky flavor or cumin for warmth. You can also switch up the dressing. Balsamic dressing adds sweetness, while tahini brings a nutty taste. These small changes can make a big difference in flavor. If you want a plant-based meal, you can swap salmon with tofu or chickpeas. Tofu absorbs flavors well and gives a nice texture. Chickpeas add protein and fiber. For toppings, consider using avocado for creaminess or nuts for crunch. These alternatives keep your bowl tasty and healthy. For the full recipe, check out the Mediterranean Bliss Salmon Bowl. To keep your Healthy Mediterranean Salmon Bowl fresh, place leftovers in airtight containers. This helps lock in flavors and moisture. I recommend glass containers for better heat retention. Let the bowl cool to room temperature before sealing. Store in the fridge for up to three days. You can freeze both quinoa and salmon. For quinoa, allow it to cool, then spread it in a thin layer on a baking sheet. Freeze until firm, then transfer to a freezer-safe bag. For salmon, wrap each fillet tightly in plastic wrap, then place in a freezer bag. To reheat, thaw overnight in the fridge. Warm quinoa in a microwave or on the stove until hot. Bake the salmon at 350°F (175°C) for about 10 minutes until heated through. For the best taste and safety, eat the salmon within three days if stored in the fridge. Quinoa can last about five days. If frozen, consume salmon within three months for the best quality. Enjoy your meal while it's fresh! You can add many tasty sides to your salmon bowl. Here are some ideas: - A simple green salad with mixed greens and vinaigrette. - Whole-grain pita or flatbread for dipping. - Roasted vegetables like zucchini, bell peppers, or asparagus. - Hummus or tzatziki for extra flavor. - Sliced avocado for creaminess. Yes, you can prep this meal in advance. For best results, cook the quinoa and salmon and store them in separate containers. Keep the vegetables fresh by cutting them just before serving. To store: - Quinoa lasts up to 4 days in the fridge. - Cooked salmon stays fresh for 2-3 days. - Store veggies in an airtight container to keep them crisp. You can easily change the spice level in your bowl. To add heat, sprinkle some red pepper flakes or cayenne pepper on the salmon before baking. For less spice, simply skip these ingredients. You can also serve a spicy sauce on the side for those who want it hot. Yes, this recipe is naturally gluten-free. Quinoa is a great gluten-free grain. Just ensure any additional ingredients, like dressings, are gluten-free too. Check labels on store-bought items to be safe. This dish is packed with nutrients. Salmon provides healthy fats and protein. Quinoa is rich in fiber and contains all nine essential amino acids. The fresh veggies add vitamins and antioxidants. Together, these ingredients support heart health, weight management, and overall wellness. Enjoy a bowl full of healthy goodness! This blog post explored a delicious Mediterranean salmon bowl. We discussed fresh ingredients like salmon, quinoa, and vibrant vegetables. Each step, from cooking the quinoa to baking the salmon, ensures a tasty meal. You can adapt flavors to fit your taste and enjoy meal prep tips for easy assembly. Remember, leftovers can be stored or frozen for future meals. Try this recipe, and you'll have a healthy, flavorful dish that satisfies. Eating well can be simple and enjoyable!](https://fastmealmate.com/wp-content/uploads/2025/06/f0df72fe-6851-4768-81fd-7e53aec44a27-768x768.webp)
![- Pasta Types: I recommend using rotini or fusilli pasta. These shapes hold the dressing well. If you prefer, you can swap them for penne or farfalle. Just make sure the pasta cooks until it’s al dente. - Fresh Vegetables: For a great taste and texture, use cherry tomatoes, cucumbers, and bell peppers. These add color and crunch. Red onion gives a nice bite. Fresh corn, either cooked or frozen, adds sweetness. Lastly, diced avocado brings creaminess to the salad. - Dressing Components: The dressing is what makes this salad shine. Use the juice of two fresh limes for tangy flavor. Extra virgin olive oil adds richness. Garlic powder gives depth. Don’t forget salt and freshly ground pepper to taste. These ingredients create that fresh cilantro lime flavor that everyone loves. You can find the complete preparation method in the [Full Recipe]. To start, bring a large pot of salted water to a boil. This step is key for flavor. Add 8 oz of rotini or fusilli pasta. Cook it until it's al dente, which means it should have a slight bite. This usually takes about 8 to 10 minutes. Once cooked, drain the pasta. Rinsing it under cold water stops the cooking. It also helps cool it down quickly. You’ll need a large pot for boiling and a colander for draining. While the pasta cools, get your veggies ready. Chop the cherry tomatoes, cucumber, bell pepper, and red onion. Aim for even pieces to ensure a nice bite. Use a sharp knife for clean cuts. For the avocado, slice it carefully. Cut it in half, remove the pit, and scoop out the flesh with a spoon. Then dice it into small pieces. Handle it gently to avoid mashing. Next, it’s time for the dressing. In a small bowl, combine the juice of 2 limes, 3 tablespoons of olive oil, and 1 teaspoon of garlic powder. Whisk these ingredients together until they blend well. Always taste it! Adjust the seasoning with salt and pepper to suit your preference. Now, let’s mix everything together. In a large bowl, combine the cooled pasta, chopped veggies, and diced avocado. Drizzle the dressing over the top. Toss gently to coat everything. Be careful not to mash the avocado. Finally, fold in ½ cup of chopped cilantro. This adds a fresh flavor. Mix gently, ensuring the avocado stays intact. For the best taste, cover the salad and chill it in the fridge for at least 30 minutes. This allows all the flavors to blend beautifully. For the full recipe, check the instructions at the beginning. Enjoy your bright and zesty Cilantro Lime Pasta Salad! To boost the citrus flavor in your cilantro lime pasta salad, try adding lime zest. This adds a bright, fresh taste. You can also mix in a little orange juice for a sweet twist. For herbs and spices, consider adding fresh parsley or mint. Both pair well with cilantro. A pinch of cumin or chili powder can also give your salad a nice kick. You want your salad to look as good as it tastes. Serve it in a clear bowl to show off the colorful veggies. You can layer the ingredients for a fun effect. For garnishes, fresh cilantro leaves work wonders. Add lime wedges on the side for a pop of color and extra zing. Slices of radish or a sprinkle of feta cheese can also elevate the dish. Chill your salad for at least 30 minutes before serving. This lets the flavors mix well. If you have time, chilling it longer is even better. To enjoy leftovers, keep them in a sealed container. Add a splash of lime juice before eating. This helps keep everything fresh and tasty. {{image_4}} You can change this salad to match your taste. Here are some great protein options: - Chicken - Shrimp - Beans Adding these gives you more protein and flavor. If you want a vegetarian dish, beans are a good choice. They add nutrients and make the salad filling. Need to change the recipe for special diets? No problem! You can use gluten-free pasta instead of regular pasta. There are many kinds available, like rice or chickpea pasta. For a vegan version, simply swap out the dressing. Use a mix of lime juice and avocado oil, or find a vegan dressing at the store. The best ingredients change with the seasons. In summer, use fresh corn and ripe tomatoes. They add sweetness and crunch. In winter, try roasted vegetables like squash or broccoli. They give warmth and heartiness to the dish. Always look for local produce. It tastes better and supports your community! Check your farmer's market for fresh options. For the full recipe, check out the entire section above! To keep your cilantro lime pasta salad fresh, store it in the fridge. Place it in an airtight container; this helps lock in flavors. Use a glass or plastic container with a tight lid. Avoid large bowls, as they can let air in and make the salad dry out. You can freeze pasta salad, but it may change the texture. If you choose to freeze it, use a freezer-safe container. When you want to eat it, move it to the fridge overnight. Let it thaw slowly for best results. Serve it cold once it’s thawed. Leftovers will last up to three days in the fridge. Check for signs of spoilage before eating. If you see any mold or if it smells off, throw it away. Always trust your senses. Keeping track of freshness helps you enjoy your salad at its best! For the full recipe, check the section above. To keep avocado fresh, use lime juice. The acid slows the browning. You can also cover the avocado tightly with plastic wrap. This limits air exposure. If you mix the avocado in last, it stays bright green longer. Yes, you can prepare this pasta salad a few hours in advance. Just store it in the fridge. For the best taste, mix in the avocado right before serving. This helps keep it fresh. If you dislike cilantro, try parsley or basil instead. Both herbs add a fresh taste. You can also use mint for a unique twist. Mix in different herbs to find your favorite flavor. To make this pasta salad gluten-free, use gluten-free pasta. Many brands offer great options like rice or quinoa pasta. Check the box for cooking times. The rest of the ingredients are naturally gluten-free. Serve the pasta salad in a large, colorful bowl. Add lime wedges and extra cilantro on top for decoration. This makes it more inviting. For a buffet, set it out with serving spoons. This allows guests to help themselves easily. This blog post covered key ingredients, cooking steps, and helpful tips for making a delicious pasta salad. Remember to choose the right pasta and fresh vegetables for a tasty mix. The dressing adds incredible flavor, so don't skip it. Storing leftovers properly keeps your salad fresh for later. Try different variations to suit your taste. My final thought? Pasta salad is versatile and fun. Enjoy making it your own, and share it with others!](https://fastmealmate.com/wp-content/uploads/2025/07/1fb0967e-6542-4160-ae3e-9e2a11b1d0c7-768x768.webp)


