Brown Butter Maple Pecan Blondies Soft and Chewy Treat

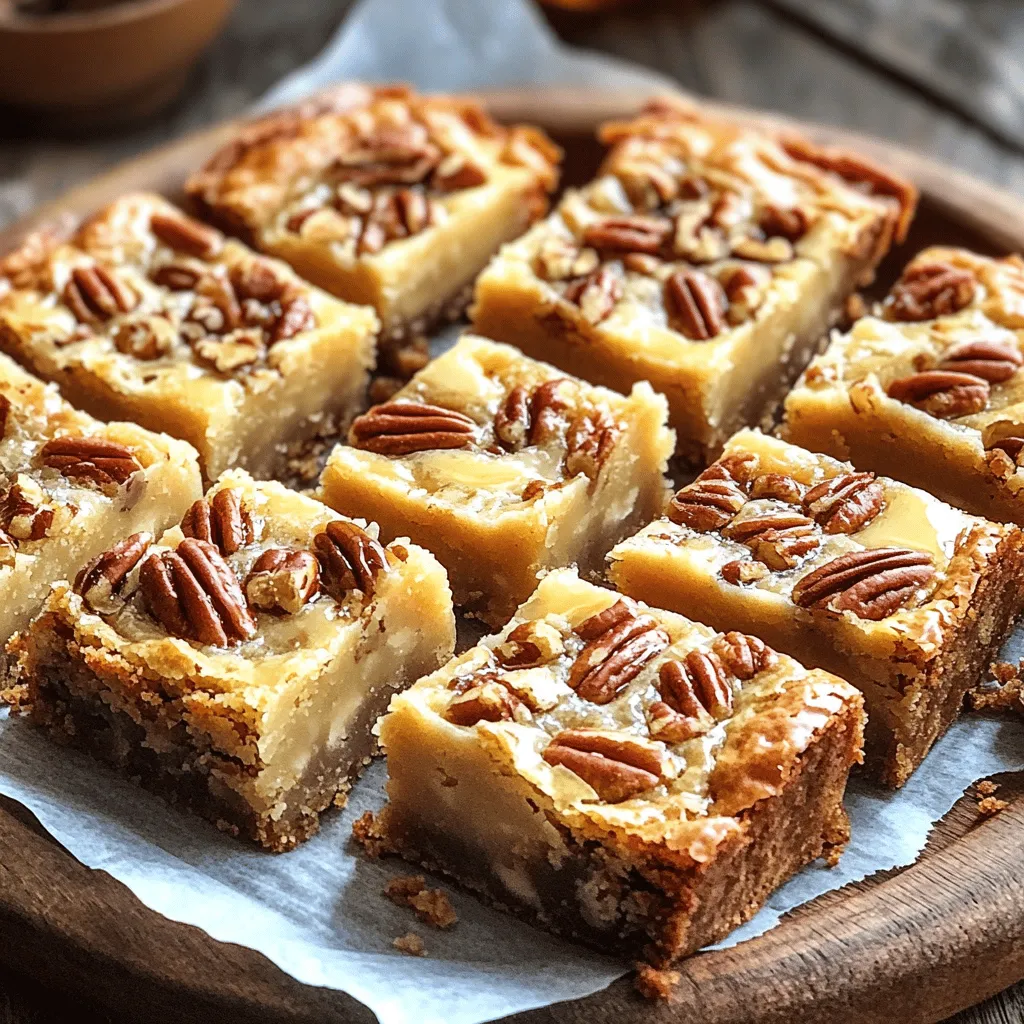
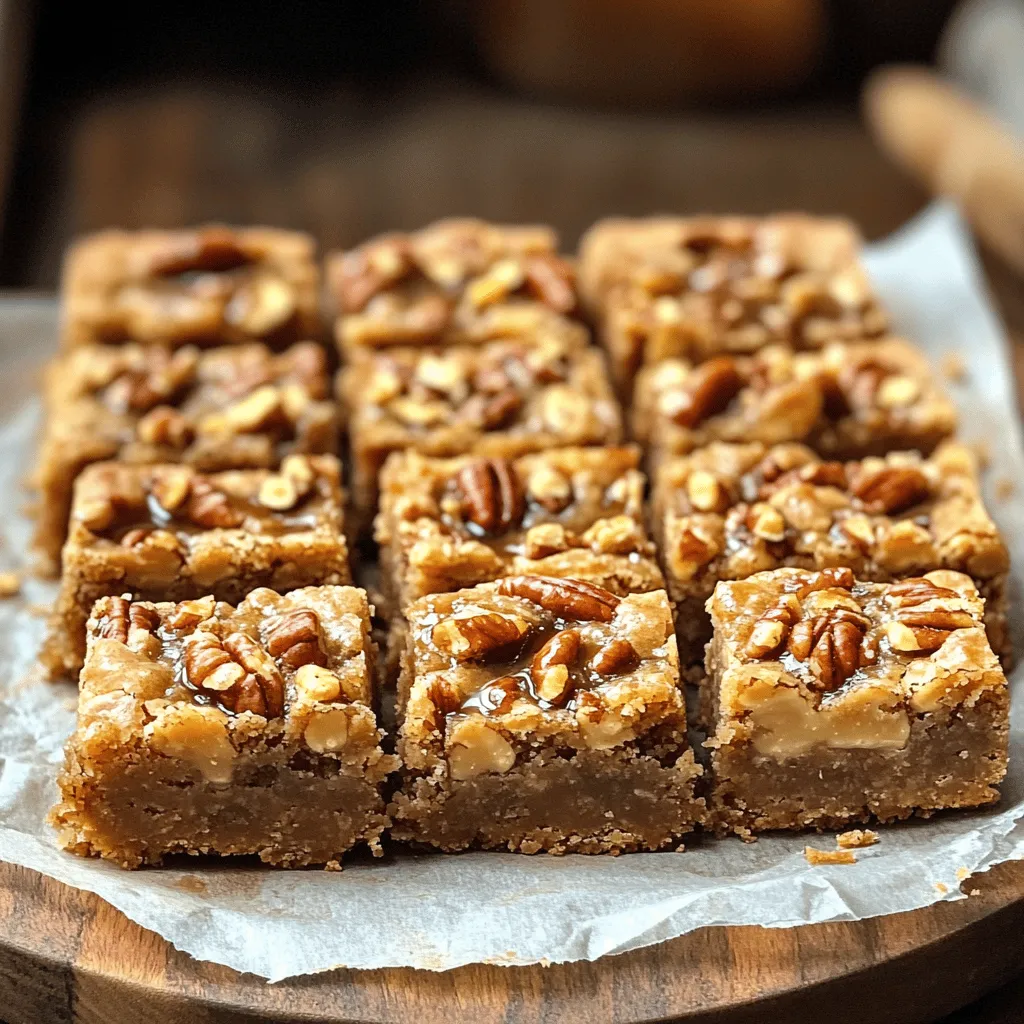
Get ready to indulge in a sweet treat that’s both soft and chewy: Brown Butter Maple Pecan Blondies! In this blog post, I’ll guide you through every step of creating these irresistible blondies. With rich flavors from brown butter and a delightful crunch from pecans, you’ll want to keep this recipe handy. Let’s dive in and make your new favorite dessert!
Ingredients
For a great batch of Brown Butter Maple Pecan Blondies, you need some simple yet rich ingredients. Here’s what to gather:
– 1 cup unsalted butter
– 1 cup packed brown sugar
– 1/2 cup granulated sugar
– 2 large eggs, at room temperature
– 1 teaspoon pure vanilla extract
– 2 cups all-purpose flour
– 1 teaspoon baking powder
– 1/2 teaspoon fine salt
– 1/2 cup pure maple syrup
– 1 cup pecans, roughly chopped (plus extra for garnish)
These ingredients work together to create a sweet, chewy treat. The unsalted butter gives a rich base, while the brown sugar adds depth. Granulated sugar balances the sweetness. Eggs and vanilla bring moisture and flavor, making the blondies soft.
Flour, baking powder, and salt form the backbone of the batter. They create structure and help the blondies rise. Maple syrup adds a distinct taste, making the blondies special. Lastly, chopped pecans add crunch and nuttiness.
When you combine these ingredients, you create a delightful dessert that everyone will love. Now, let’s dive into how to make these delicious blondies!
Step-by-Step Instructions
Prepping the Oven and Baking Pan
First, set your oven to 350°F (175°C). This helps the blondies bake evenly. Next, take a 9×9-inch baking pan. You can lightly grease it with butter or line it with parchment paper. This makes removing the blondies easy after baking.
Brown the Butter
To brown the butter, melt 1 cup of unsalted butter in a medium saucepan. Use medium heat and stir often. Watch as the butter changes color from yellow to golden brown. You will smell a nutty aroma when it is ready. This should take about 5-7 minutes. Turn off the heat and let it cool for a few minutes.
Mixing the Batter
In a large mixing bowl, mix the browned butter with 1 cup of brown sugar and 1/2 cup of granulated sugar. Whisk until smooth. Next, add the 2 large eggs one at a time. Mix well after each egg. Then, stir in 1 teaspoon of pure vanilla extract. This adds great flavor. In another bowl, whisk 2 cups of all-purpose flour, 1 teaspoon of baking powder, and 1/2 teaspoon of fine salt. Gradually add this mix to the wet ingredients. Stir gently until just combined. Don’t overmix!
Add Maple Syrup and Pecans
Now, fold in 1/2 cup of pure maple syrup and 1 cup of roughly chopped pecans. Be careful to fold gently. This helps keep the blondies soft and chewy. Ensure the pecans are evenly spread in the batter for great taste.
Baking the Blondies
Pour the batter into your prepared pan. Use a spatula to spread it out evenly. If you like, sprinkle extra chopped pecans on top for crunch. Bake the blondies for 25-30 minutes. Check for doneness by inserting a toothpick in the center. It should come out with a few moist crumbs. Once baked, let the blondies cool in the pan for about 10 minutes. Then, transfer them to a wire rack to cool completely. Enjoy your delicious treat!
Tips & Tricks
Perfecting the Blondies
To make the best blondies, avoid overmixing the batter. When you combine the dry and wet ingredients, mix just until you see no more flour. This keeps the blondies soft and chewy. Checking for doneness is key. Look for a golden edge and a toothpick test. Insert a toothpick in the center; it should come out with a few moist crumbs, but no wet batter.
Presentation Tips
When serving your blondies, cut them into even squares. Place them on a nice serving platter to make them look inviting. For a sweet touch, drizzle extra maple syrup on top before serving. You can also add a few chopped pecans as a garnish for some crunch and color.
Enhancing Flavor
You can enhance the flavor of your blondies with fun mix-ins. Consider adding chocolate chips or dried fruit for extra taste. If you want to switch up the toppings, try using a sprinkle of sea salt on top or a dusting of powdered sugar for a pretty finish.

Variations
Dietary Adjustments
You can make these blondies fit different diets. If you need gluten-free blondies, swap the all-purpose flour. Use a gluten-free flour blend that works in baking. This keeps the blondies soft and chewy.
For dairy-free blondies, choose a plant-based butter. Brands like Earth Balance work well. You can also use coconut oil for a hint of flavor. These swaps help you enjoy the blondies without dairy.
Flavor Variations
You can switch up the nuts in this recipe. Try walnuts or almonds for a different crunch. Each nut adds a unique taste and texture. You can even skip the nuts and add seeds instead.
Want to add some extra sweetness? Mix in chocolate chips! Dark chocolate pairs well with maple flavors. You can also add dried fruit like cranberries or cherries. This makes the blondies fruity and fun.
Storage Info
Storing Leftovers
To keep your blondies fresh, store them in an airtight container. This method helps keep moisture in. You can leave them at room temperature for up to three days. If it’s warm or humid, the fridge is a better choice. Blondies can last up to a week in the fridge.
Freezing Blondies
Freezing blondies is easy and great for long-term storage. First, let them cool completely. Next, cut them into squares. Wrap each piece tightly in plastic wrap. For extra protection, place the wrapped blondies in a freezer bag. They can stay frozen for up to three months.
When you’re ready to eat a blondie, take it out and let it thaw in the fridge overnight. If you’re in a hurry, you can leave it at room temperature for a few hours. Enjoy your sweet treat later!
FAQs
Can I use salted butter instead of unsalted?
Yes, you can use salted butter. It will add a bit of saltiness. Just reduce the added salt in the recipe. The flavor will change slightly, but it can still taste good.
How do I know when blondies are done baking?
Check for a light golden edge. Insert a toothpick into the center. If it comes out with a few moist crumbs, they are done. Avoid overbaking to keep them soft and chewy.
What can I substitute for pecans?
You can use walnuts, almonds, or even chocolate chips. Each nut gives a different flavor. Choose what you like best.
How long will the blondies stay fresh?
These blondies will stay fresh for about 3 to 5 days at room temperature. Keep them in an airtight container. You can also refrigerate them for up to a week.
Can I make the batter ahead of time?
Yes, you can make the batter ahead of time. Store it in the fridge for up to 24 hours. Just stir it a bit before pouring it into the pan and baking.
You learned how to make delicious blondies using simple ingredients. We covered browning butter, mixing the batter, and baking. Plus, tips for perfecting the flavor and presentation. Don’t forget about storage and variations to suit dietary needs.
Blondies are fun to make and share. Experiment with flavors and enjoy your tasty treats!


![- 4 ripe peaches, sliced into wedges - 1 cup granulated sugar, divided - 1 teaspoon pure vanilla extract - 1 teaspoon ground cinnamon - 1 cup all-purpose flour - 1 tablespoon baking powder - 1/2 teaspoon sea salt - 1 cup whole milk - 1/2 cup unsalted butter, melted and slightly cooled - 1 teaspoon freshly squeezed lemon juice - Optional: Creamy vanilla ice cream for serving You need four ripe peaches for the base. They should be juicy for the best taste. Use one cup of granulated sugar, split in half. One half will sweeten the peaches, and the other half will go into the batter. You will also need one teaspoon each of pure vanilla extract and ground cinnamon for flavor. One cup of all-purpose flour and one tablespoon of baking powder will make the batter rise. Add half a teaspoon of sea salt to balance the sweetness. One cup of whole milk helps create a smooth batter. Lastly, you need half a cup of unsalted butter, melted, and one teaspoon of freshly squeezed lemon juice to brighten the flavor. You can make this dish even better by adding creamy vanilla ice cream when you serve it. The cold ice cream pairs well with the warm cobbler. If you want extra flavor, consider adding a pinch of nutmeg or using brown sugar instead of granulated sugar. These choices can add depth to your peach cobbler. Use the full recipe to explore all the possibilities! Start by gathering 4 ripe peaches. Slice them into wedges. Place the sliced peaches in a large mixing bowl. Add 1/2 cup of granulated sugar to the peaches. Pour in 1 teaspoon of pure vanilla extract. Sprinkle 1 teaspoon of ground cinnamon over the peaches. Squeeze in 1 teaspoon of freshly squeezed lemon juice. Gently toss the peaches until they are well-coated. Set this bowl aside for about 10 minutes. This waiting time allows the peaches to macerate and release their juices. In another bowl, add 1 cup of all-purpose flour. Measure 1 tablespoon of baking powder and add it to the flour. Next, sprinkle in 1/2 teaspoon of sea salt. Finally, add the remaining 1/2 cup of granulated sugar. Whisk these dry ingredients together until they are mixed well. This step ensures even flavor throughout the cobbler. Now, it’s time to mix the wet and dry ingredients. Gradually pour in 1 cup of whole milk into the dry mix. Stir gently until the batter is just combined. Be careful not to overmix; lumps are okay! Next, add 1/2 cup of melted and slightly cooled unsalted butter. Mix until the batter is smooth and free of lumps. Once done, pour the batter into a greased 9x13 inch baking dish. Spread it evenly across the bottom. Then, take your peach mixture and spoon it over the batter carefully. Do not stir. The peaches will sink while baking. Now you’re ready to bake your Easy Peach Cobbler. Check the [Full Recipe] for baking time and tips. To make the best peach cobbler, use ripe peaches. They should be soft to touch. Slice them evenly for a nice look. Mixing in sugar and cinnamon enhances the sweetness and flavor. Letting peaches sit for ten minutes helps them release juices. This makes the filling juicy and tasty. One mistake is overmixing the batter. This can make your cobbler tough. Another common issue is using unripe peaches. They won't have the same flavor. Don’t stir the peach mixture into the batter. This can ruin the layered look. Also, avoid opening the oven door too often. It can cause uneven baking. Always preheat your oven for even cooking. Use a greased baking dish to prevent sticking. Bake until the top is golden brown, checking with a toothpick. Let it cool for ten minutes before serving. This helps the flavors settle. For a treat, top with creamy vanilla ice cream. It adds a rich taste that pairs well with the cobbler. For the full recipe, check the previous sections. {{image_4}} You can swap peaches for other fruits. Try using fresh plums, cherries, or even berries. Each fruit brings its own taste. For example, blueberries add a sweet burst of flavor. Raspberries can give a nice tartness. The method stays the same; just change the fruit. This keeps your dessert fresh and fun! You can make this cobbler gluten-free easily. Just switch out the all-purpose flour for a gluten-free blend. Many brands offer great options that work well in baking. Check the mix for a good rise. You can also use almond flour for a nutty taste. The cobbler will still be delicious and warm. Toppings can make your cobbler even better. Consider adding a sprinkle of oats on top for crunch. You can also mix in nuts like pecans for added flavor. Drizzling honey over your serving can add a sweet touch. Want a dessert with flair? Top your cobbler with whipped cream or ice cream for a special treat. Each topping can change the whole experience! For the full recipe, check out the Peachy Dream Cobbler. To store leftover peach cobbler, let it cool completely. Once cooled, cover the dish tightly with plastic wrap or aluminum foil. You can also transfer it to an airtight container. This will keep it fresh for up to three days in the fridge. When you want to enjoy your cobbler again, preheat your oven to 350°F (175°C). Place the cobbler in an oven-safe dish. Cover it with foil to keep it moist. Heat for about 15-20 minutes, until it’s warm. You can also microwave it for about 30 seconds, but the oven gives a better texture. If you want to freeze peach cobbler, wrap it tightly in plastic wrap. Then, place it in a freezer bag. It can last up to three months in the freezer. To thaw, move it to the fridge overnight. Reheat it in the oven for the best taste. You can also bake it straight from frozen; just add a few extra minutes to the cooking time. Enjoy your peach cobbler again with these easy storage tips! The best peaches for cobbler are freestone peaches. They are sweet and juicy. Their flesh comes off the pit easily, making slicing simple. Yellow peaches work well too. They have a nice balance of sweet and tart flavors. For a unique twist, try ripe white peaches. They are sweeter and less acidic. Yes, you can prep your peach cobbler ahead. Prepare the peach filling and batter separately. Store each in the fridge for up to a day. When ready to bake, combine them and follow the baking steps. If you want to bake it later, just keep it covered. No, peeling peaches is not necessary. The skin adds texture and flavor. Many people enjoy the rustic look. If you prefer a smoother texture, you can peel them. It’s really up to your taste. To achieve a crispier crust, try these tips: - Use cold butter in the batter. - Don’t overmix the batter; lumps are fine. - Bake the cobbler in a preheated oven. - For extra crunch, sprinkle a little sugar on top before baking. You can serve Easy Peach Cobbler with: - Creamy vanilla ice cream - Fresh whipped cream - A drizzle of caramel sauce - A sprinkle of nuts for crunch Each option adds a new layer of flavor to your dessert! Enjoy it warm for the best taste. For the full recipe, check out the details above. In this blog post, we explored how to make an easy peach cobbler. We covered key ingredients, step-by-step prep, and helpful tips for success. We also discussed fun variations and smart storage methods. As you bake your cobbler, remember that fresh peaches shine. Enjoy personalizing your dish with other fruits too. Making peach cobbler can be fun and tasty. With practice, you’ll master this classic dessert.](https://fastmealmate.com/wp-content/uploads/2025/06/359a1da5-912a-4431-92dc-d72eb97db899-768x768.webp)
. To make your shortcake soft and fluffy, avoid overmixing the dough. Overmixing can lead to tough shortcakes. Mix just until the dough comes together. This keeps your shortcakes light. The temperature of your ingredients matters. Use cold butter and chilled cream. Cold butter creates steam when baked. This steam helps the shortcakes rise. Chilled cream keeps the dough from getting warm. Use a good pastry cutter or your hands to mix the butter. A sturdy mixing bowl helps, too. For cutting, a round biscuit cutter works best. It gives neat edges for your shortcakes. For baking, use a parchment-lined baking sheet. This prevents sticking and makes cleanup easier. A wire rack helps cool the shortcakes evenly after baking. Whipped cream is a classic topping for your shortcake. It adds creaminess and balances the sweetness of the strawberries. You can also use ice cream for a richer dessert. For a beautiful presentation, garnish with fresh strawberries on top. A sprinkle of mint leaves adds color and freshness. Serve your shortcake with a dollop of whipped cream on the side for extra delight. For the full recipe, check the Classic Strawberry Shortcake Delight. {{image_4}} You can swap strawberries for other fruits. Berries, peaches, and rhubarb work great. For berries, use blueberries, raspberries, or blackberries. Just follow the same steps for macerating. With peaches, slice them thin and sprinkle with sugar. Let them sit for about 20 minutes to get juicy. Rhubarb needs a little cooking. Chop it and simmer with sugar until tender. Then use it just like strawberries. Whipped cream can be fun! Try adding different flavors to it. Mix in vanilla, almond, or even a bit of lemon zest. You can create a unique taste. For a twist, drizzle chocolate or caramel over the top. Melt chocolate chips for a rich sauce, or warm up caramel. Both add a nice touch to your dessert. Want a vegan version? Swap dairy for plant-based options. Use coconut cream instead of heavy cream. For the shortcake, replace butter with coconut oil. You can choose almond milk or soy milk for the liquid. If you're looking for sugar-free options, use a sugar substitute. Stevia or monk fruit can work well. Just adjust the amount to your taste. Feeling adventurous? Check the Full Recipe to see all the details! To keep your baked shortcakes fresh, store them in an airtight container. Place parchment paper between layers to avoid sticking. Store at room temperature for up to two days. If you need to keep them longer, refrigerate for up to a week. However, cold can change the texture. For best taste, eat them fresh. After macerating your strawberries, cover them tightly with plastic wrap. This keeps them juicy and tasty. Store them in the fridge for up to three days. Avoid washing them until just before use. Moisture can cause strawberries to spoil quickly. If you have leftover shortcakes, you can warm them up. Preheat your oven to 350°F (175°C). Wrap each shortcake in foil to keep them soft. Heat for about 10 minutes. You can also microwave them for about 15-20 seconds. Just be careful not to overheat. Enjoy the warmth and flavor! Strawberry shortcake has roots in England. The dessert started as a simple biscuit, served with cream and fruit. In the 19th century, it made its way to America. Here, chefs added sweetened strawberries and whipped cream. This combination made it a summer favorite. Today, it remains a beloved treat, especially during strawberry season. Yes, you can prepare some parts ahead. Make the shortcakes and store them in an airtight container. You can also prepare the strawberries and chilling cream earlier. Just keep the strawberries in the fridge. When you're ready to serve, assemble the shortcake. This way, you keep the shortcakes fresh and fluffy. Look for a golden-brown color on top. The edges should feel firm, and the center should spring back when touched. You can also insert a toothpick into the center. If it comes out clean, your shortcakes are done. Be careful not to overbake, as this can dry them out. Yes, you can freeze leftover shortcake. Wrap each piece tightly in plastic wrap, then place them in a freezer bag. They can last up to three months in the freezer. When you want to enjoy them, thaw them in the fridge overnight. Reheat in the oven for a few minutes to restore warmth and texture. In this blog post, we explored how to make great strawberry shortcake. We covered fresh ingredients, the right techniques, and tips for perfect results. Remember, the quality of your ingredients matters most. You can swap in different fruits and toppings for variety. Storing and reheating your shortcake can keep it fresh. I hope these steps inspire you to whip up this classic dessert. Enjoy the sweet rewards of your hard work!](https://fastmealmate.com/wp-content/uploads/2025/06/e92a88f0-b46a-45f1-a24e-50dd1609a02e-768x768.webp)
![When making Hot Honey Feta Chicken, you need to gather some key ingredients. Here’s what to prepare: - Chicken breasts - Crumbled feta cheese - Hot honey (store-bought or homemade) - Extra-virgin olive oil - Garlic powder - Smoked paprika - Salt and freshly cracked black pepper - Freshly chopped parsley (for garnish) - Lemon wedges (for serving) These ingredients come together to create a dish that is both simple and packed with flavor. The chicken breasts are the star, providing a juicy base. The crumbled feta cheese adds a creamy and salty touch, while the hot honey brings in that sweet heat. Extra-virgin olive oil ensures the chicken stays moist and flavorful. Each spice plays a role. Garlic powder offers depth, and smoked paprika gives it a warm, smoky flavor. Don’t forget the salt and pepper; they are essential for enhancing all the tastes. Finally, fresh parsley brightens the dish, and lemon wedges add a refreshing twist when served. Make sure to check the Full Recipe to see how each ingredient shines in this delightful dish. - Preheat the oven to 375°F (190°C). - In a medium bowl, mix 1 cup of crumbled feta cheese with 1/3 cup of hot honey. Stir well until it's creamy and smooth. Set this aside for later. - Take 4 boneless, skinless chicken breasts. Drizzle 2 tablespoons of extra-virgin olive oil over them. - Make sure each breast is well coated. Season both sides with 1 teaspoon of garlic powder, 1 teaspoon of smoked paprika, salt, and freshly cracked black pepper to taste. - Place the seasoned chicken in a baking dish, laying them flat. - Spoon the hot honey feta mixture over each breast. Cover them well to keep in moisture and flavor. - Put the baking dish in the oven. Bake for about 25-30 minutes. Check that the chicken reaches an internal temperature of 165°F (74°C). It should look juicy and slightly golden. - Once done, take the dish out and let the chicken rest for 5 minutes. This helps keep it moist. - Finally, sprinkle chopped parsley on top. Serve with lemon wedges for a fresh touch. For the complete recipe, check out the [Full Recipe]. To make your chicken juicy and flavorful, start with fresh chicken breasts. They should be boneless and skinless for the best results. Pat them dry with paper towels before seasoning. This helps the spices stick better. For seasoning, use garlic powder and smoked paprika. These add depth to the flavor. Don’t forget to sprinkle salt and pepper, too. Be generous but don't overdo it. To achieve a golden crust, coat each chicken breast with olive oil. This creates a beautiful, crispy layer. Make sure to bake it in a preheated oven. The heat helps in getting that crust just right. When serving the chicken, presentation matters. Place it on a large platter. Garnish with freshly chopped parsley. This adds color and freshness. Add lemon wedges on the side. They provide a zesty flavor that brightens the dish. For sides, consider serving it with roasted vegetables or a simple salad. Both complement the chicken well. You can also serve it with quinoa or rice for a complete meal. For more detailed steps, refer to the Full Recipe. {{image_4}} If you want to mix things up, consider using different types of cheese. You can try goat cheese or ricotta for a creamy texture. Both add unique flavors. If you are lactose intolerant or prefer dairy-free options, look for plant-based cheeses. Almond or cashew-based cheeses work well and can mimic feta's tangy taste. Adjusting the heat level is easy and fun. You can reduce the amount of hot honey if you prefer a milder dish. Start with less and taste as you go. If you want more heat, try adding crushed red pepper flakes or cayenne pepper. This adds spice without changing the dish too much. Remember, the key is to find a balance that suits your taste. After you enjoy your hot honey feta chicken, you will likely have some leftovers. To keep them fresh, follow these steps: - Refrigeration: Place the chicken in an airtight container. This helps keep moisture in and air out. Store it in the fridge for up to three days. - Reheating: When ready to eat, reheat the chicken in the oven at 350°F (175°C). This helps keep the chicken juicy. Cover it with foil to prevent it from drying out. Heat it for about 10-15 minutes, or until warmed through. If you want to keep some chicken for later, freezing is a great option. Here’s how: - Freezing Portion Sizes: Cut the chicken into portions before freezing. This makes it easy to grab just what you need. Place each piece in a freezer bag. Remove as much air as possible to avoid freezer burn. - Defrosting Tips: When you’re ready to eat your frozen chicken, let it thaw in the fridge overnight. This keeps the taste fresh. You can also use the microwave for faster thawing, but be careful not to cook it. After thawing, reheat as mentioned before to keep the flavors intact. For the complete recipe, check out the [Full Recipe]. Bake the chicken at 375°F (190°C) for 25-30 minutes. This time ensures the chicken cooks evenly. Use a meat thermometer to check. The internal temperature should reach 165°F (74°C). This guarantees juicy chicken that is safe to eat. Yes, you can use chicken thighs! They have more fat and flavor, making them tender. However, chicken thighs may require a bit more time to cook. Bake them for 30-35 minutes, checking the internal temperature, just like with breasts. Hot honey has a sweet and spicy flavor. The heat level varies by brand. Some are mild, while others pack a punch. If you are unsure, taste a small amount first. Adjust the amount you use in the recipe if you prefer less heat. Hot honey adds a unique twist to this dish, balancing sweetness and spice. For the complete recipe, be sure to check the full recipe section. This blog post covered the essentials for making a delicious chicken dish. You learned about the key ingredients, like chicken, feta cheese, and hot honey. I shared step-by-step instructions to help you bake it perfectly. We also explored tips for juicy chicken and creative serving ideas. Variations let you switch up flavors, and I provided storage tips for leftovers. Remember, cooking can be simple and fun. Enjoy making this dish and impressing your friends and family!](https://fastmealmate.com/wp-content/uploads/2025/06/84055c4e-16bd-4803-b39c-56f6143ad9ea-768x768.webp)

