Black Forest Christmas Trifle Festive and Tasty Treat

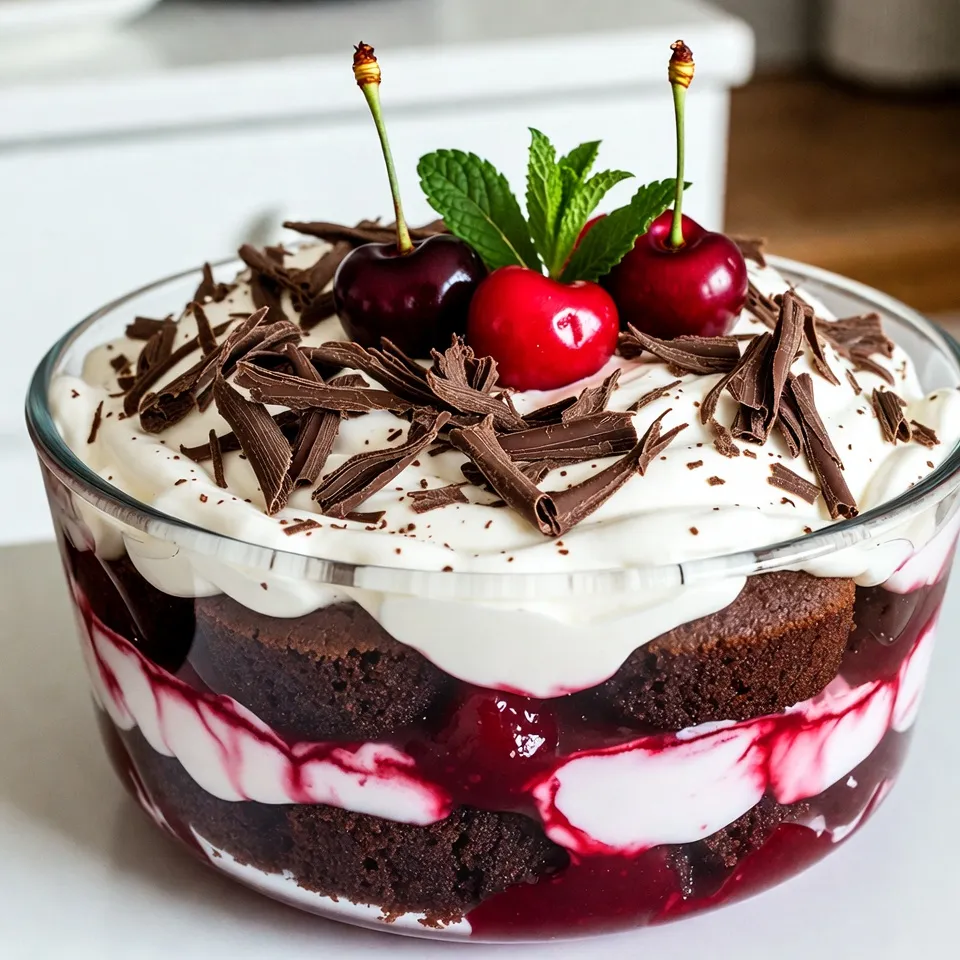
Get ready to elevate your holiday dessert game with my Black Forest Christmas Trifle! This festive treat combines rich chocolate cake, sweet cherries, and creamy layers in a stunning display. It’s perfect for gatherings or cozy nights at home. I’ll walk you through the key ingredients, step-by-step instructions, and insider tips to make your trifle shine. Let’s dive into the joy of creating this tasty holiday delight!
Why I Love This Recipe
- Decadent Layers: This trifle combines rich chocolate cake, creamy whipped cream, and sweet cherry filling for a delightful contrast in flavors and textures.
- Festive Presentation: Served in a clear glass dish, the vibrant layers make for an eye-catching centerpiece at any holiday gathering.
- Simple Assembly: With easy-to-follow steps, this trifle recipe allows even novice bakers to impress their guests without stress.
- Customizable Delight: Feel free to add your favorite toppings or adjust the ingredients to suit your taste, making it a versatile dessert option.
Ingredients
Key Components for Black Forest Christmas Trifle
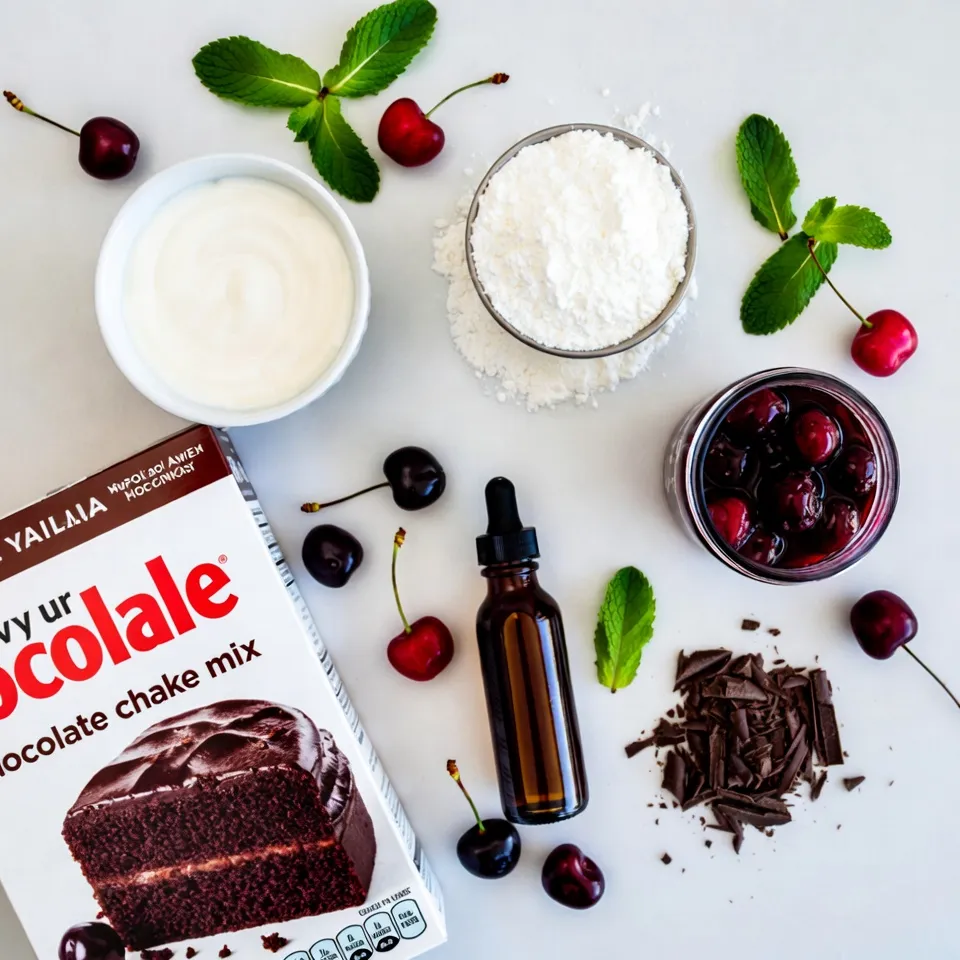
To make a delicious Black Forest Christmas Trifle, you’ll need:
– 1 box chocolate cake mix (plus eggs, oil, and water as per the package)
– 3 cups heavy cream
– 1 cup powdered sugar
– 1 teaspoon pure vanilla extract
– 2 cups cherry pie filling (preferably sweetened)
– 1 cup dark chocolate shavings or finely grated chocolate
These ingredients create a rich and creamy dessert. The chocolate cake offers a moist base, while the whipped cream adds lightness. The cherry pie filling brings a sweet and tart flavor that balances the chocolate.
Optional Garnishes for a Festive Touch
To make your trifle even more special, consider these garnishes:
– Fresh cherries for a pop of color
– Fresh mint leaves for a touch of green
These garnishes not only look great but also enhance the flavor. You can add them right before serving for the best appearance.
Substitutions and Dietary Considerations
If you need substitutions, here are some ideas:
– Use gluten-free cake mix for a gluten-free option.
– Swap heavy cream for coconut cream for a dairy-free version.
– Choose a sugar substitute if you want a lower-sugar treat.
These options help you cater to different dietary needs while keeping the trifle tasty. Always read labels to ensure your substitutes work well together.

Step-by-Step Instructions
Baking the Chocolate Cake
To start, preheat your oven as the cake mix box tells you to. Prepare the chocolate cake batter according to the package instructions. Pour the batter evenly into two greased 9-inch round cake pans. Bake until a toothpick inserted into the center comes out clean. This usually takes about 25-30 minutes. Once done, let the cakes cool completely in the pans on a wire rack. This cooling time is important for easy handling later.
Preparing and Whipping the Cream
Next, grab a large mixing bowl. Add 3 cups of heavy cream, 1 cup of powdered sugar, and 1 teaspoon of pure vanilla extract. Using an electric mixer, beat this mixture on medium speed. Whip until soft peaks form, but be careful not to overwhip. Reserve 1 cup of the whipped cream for the topping. This step makes the trifle creamy and light.
Assembling the Trifle Layers
Now it’s time to layer the trifle. Carefully remove the cooled cakes from the pans. Use a serrated knife to slice each cake in half horizontally, creating four layers in total. Choose a large trifle dish or individual dessert cups. Start with one layer of chocolate cake at the bottom. Spread a layer of cherry pie filling on top, covering the cake evenly. Follow this with a layer of whipped cream. Repeat this process with the remaining layers, finishing with a generous layer of whipped cream on top. For a lovely finish, sprinkle dark chocolate shavings on top. You can also add fresh cherries and mint leaves if you like. Cover the trifle loosely with plastic wrap or foil and chill in the fridge for at least 1 hour. For the best flavor, allow it to chill for up to 4 hours before serving.
Tips & Tricks
Achieving Perfect Whipped Cream
To make smooth whipped cream, start with cold heavy cream. Use a large bowl for mixing. Combine the cream, powdered sugar, and vanilla extract. Whip on medium speed until soft peaks form. Avoid overwhipping, as it can turn grainy. If you want it sweeter, add more sugar to taste.
Layering Techniques for Best Presentation
When layering your trifle, use clear glass dishes. This way, you can see the beautiful layers. Start with cake on the bottom. Add cherry filling on top, then whipped cream. Repeat this until you reach the top. Finish with a generous layer of whipped cream. Top with chocolate shavings for flair.
How to Make Ahead for the Holidays
To save time, you can prepare your trifle a day in advance. Bake the chocolate cake and whip the cream ahead of time. Store them in the fridge. Assemble the trifle the day you plan to serve it. This keeps the layers fresh and tasty. Chilling it for a few hours helps the flavors blend.
Pro Tips
- Use Quality Ingredients: The flavor of your trifle heavily relies on the quality of the chocolate cake and cherry filling. Opt for high-quality chocolate and fresh cherries for the best results.
- Chill for Flavor: Allowing the assembled trifle to chill for several hours helps the flavors meld together beautifully, enhancing the overall taste.
- Layering Technique: Ensure even layers by using a spatula to spread the cherry filling and whipped cream. This will create a visually appealing and balanced trifle.
- Presentation Matters: Serve in clear glass containers to showcase the delicious layers of your trifle. Garnishing with fresh mint leaves and cherries adds a lovely touch.

Variations
Chocolate Cake Alternatives
You can change up the chocolate cake if you want. Try using a brownie mix for a richer base. A moist chocolate sponge cake works great too. For a lighter touch, consider using a vanilla or yellow cake. Each option brings its own flavor and texture to the trifle.
Different Fruit Options for Layering
While cherries are traditional, other fruits can shine here. Sliced strawberries or raspberries add a fresh twist. You could also use blueberries for a pop of color. Mixing fruits can create a fun fruity surprise in every bite. Just remember to adjust the sweetness based on the fruit you choose.
Gluten-Free or Vegan Adjustments
For a gluten-free trifle, use a gluten-free chocolate cake mix. You can also make your own cake using almond flour or coconut flour. If you want a vegan version, swap eggs and dairy. Use a flax egg for binding and coconut cream for the whipped topping. These swaps keep the trifle tasty and enjoyable for everyone.
Storage Info
Best Practices for Refrigeration
Store your Black Forest Christmas Trifle in the fridge. Use a clear, airtight container. This keeps the trifle fresh and safe. If you use a dish, cover it loosely with plastic wrap. Avoid pressing the wrap on top of the whipped cream.
How Long Can the Trifle Last?
The trifle stays good for up to three days in the fridge. After that, the cake may get soggy. The cream can lose its fluffiness too. Always check for any signs of spoilage before serving.
Tips for Reassembly After Storage
If you need to reassemble, carefully layer the trifle again. Start with the cake pieces, then add the cherry filling and cream. You can also freshen the top with more chocolate shavings. This gives it a nice touch before serving.
FAQs
Can I use store-bought cake for this trifle?
Yes, you can use store-bought chocolate cake. It saves time and effort. Just choose a moist cake for the best taste. Slice the cake into layers, just like you would with homemade cake. This option works well if you want to enjoy the trifle without baking.
How do I make my own cherry pie filling?
Making cherry pie filling is easy! You need fresh or frozen cherries. Cook them with some sugar and a bit of cornstarch to thicken. Here’s a quick recipe:
– 2 cups pitted cherries
– 1 cup sugar
– 2 tablespoons cornstarch
– 1 cup water
– 1 tablespoon lemon juice
In a pot, mix cherries, sugar, cornstarch, and water. Cook over medium heat until it thickens. Add lemon juice for flavor. Let it cool before using in your trifle.
What’s the best way to serve and present the trifle?
For the best presentation, use clear glass dishes. This shows off the pretty layers of cake, cherries, and cream. You can serve in a large trifle bowl or individual cups. It looks charming and makes serving easy. Garnish with dark chocolate shavings, fresh cherries, and mint leaves for a festive touch.
This article covered how to create a Black Forest Christmas Trifle. We discussed key ingredients, step-by-step instructions, and tips for success. You learned about baking, layering, and garnishing your trifle. I shared options for different diets and how to store your tasty treat.
In the end, making this trifle is fun and festive. You can impress your guests and enjoy a classic dessert. Try out the tips and variations to make it your own. Happy bakin

Black Forest Christmas Trifle
Ingredients
- 1 box chocolate cake mix (plus eggs, oil, and water as per package instructions)
- 3 cups heavy cream
- 1 cup powdered sugar
- 1 teaspoon pure vanilla extract
- 2 cups cherry pie filling (preferably sweetened)
- 1 cup dark chocolate shavings or finely grated chocolate
- to taste fresh cherries for garnishing (optional)
- to taste fresh mint leaves for garnishing (optional)
Instructions
- Preheat your oven according to the cake mix instructions. Prepare the chocolate cake batter as directed on the package, then pour evenly into two greased 9-inch round cake pans. Bake until a toothpick inserted into the center comes out clean. Once baked, allow the cakes to cool completely in the pans set on a wire rack.
- In a large mixing bowl, combine the heavy cream, powdered sugar, and vanilla extract. Use an electric mixer to beat the mixture on medium speed until soft peaks form, taking care not to overwhip. Reserve 1 cup of the whipped cream to use as a topping later.
- After the chocolate cakes have cooled, carefully remove them from the pans. Using a serrated knife, slice each cake layer in half horizontally to create four even layers in total.
- Choose a large trifle dish or individual dessert cups for assembly. Begin by placing a layer of one cake piece at the bottom. Top it with an even layer of cherry pie filling, spreading it gently to cover the cake. Follow this with a layer of the whipped cream. Repeat the layering process of cake, cherry filling, and whipped cream, finishing with a final generous layer of whipped cream on the top.
- To enhance the trifle, sprinkle the top with dark chocolate shavings or grated chocolate, adding an extra touch of flavor and visual appeal. If desired, crown it with fresh cherries and a few mint leaves for an elegant finish.
- Cover the assembled trifle loosely with plastic wrap or foil and refrigerate for at least 1 hour. For optimum flavor fusion, allow the trifle to chill for up to 4 hours before serving.


![- 1 cup pumpkin puree - 1/2 cup unsalted butter, softened - 1 cup brown sugar and 1/2 cup granulated sugar These ingredients form the base of your chewy pumpkin spice cookies. Pumpkin puree provides moisture and flavor. Softened butter helps create that melt-in-your-mouth texture. Mixing brown and granulated sugar gives sweetness and a lovely depth. - 1/2 cup chocolate chips - 1/2 cup chopped pecans or walnuts If you want to elevate your cookies, consider adding chocolate chips. They bring a rich sweetness that pairs well with pumpkin spice. Chopped pecans or walnuts add a nice crunch and nutty flavor. Feel free to mix and match based on your taste. - 2 cups all-purpose flour - 1 teaspoon baking soda, baking powder, pumpkin spice, and sea salt All-purpose flour is your main structure builder. Baking soda and baking powder help the cookies rise and stay soft. Pumpkin spice adds warmth and that classic fall flavor. Sea salt enhances the sweetness and balances the spices. For the full recipe, check out the details above. Each ingredient plays a key role in creating these irresistibly soft treats! - Preheat your oven to 350°F (175°C). This step ensures even baking. - Line a baking sheet with parchment paper. This helps the cookies not stick. - In a large bowl, cream together softened butter and both sugars. - Use an electric mixer for the best results. Mix until light and fluffy. - Next, add the pumpkin puree, egg, and vanilla extract. - Beat well until everything is smooth and combined. - In a separate bowl, whisk together the flour, baking soda, baking powder, pumpkin spice, and salt. - Gradually add this dry mix to the wet ingredients. Stir gently and avoid overmixing. - Use a tablespoon or cookie scoop to portion the dough onto the lined baking sheet. - Leave enough space between each cookie to allow for spreading. - Bake in the preheated oven for 10-12 minutes. The edges should be golden brown. - The centers might look a bit soft but will set as they cool. For the full recipe, refer to the earlier sections. Enjoy the process! To make your cookies chewy, do not overmix the dough. Mix just until the flour disappears. Overmixing makes cookies tough. The right baking time and temperature are key. Bake at 350°F (175°C) for 10-12 minutes. Watch for golden edges and soft centers. They will harden as they cool. You can use homemade pumpkin puree or canned. Homemade puree adds a fresh taste. Canned options are quick and easy. Also, try different spices. While pumpkin spice is great, adding a pinch of cardamom or allspice can elevate the flavor. Experiment until you find your favorite blend. For a stunning display, stack your cookies on a rustic platter. This adds charm to your table. To make them look even nicer, dust with powdered sugar. Add some cinnamon sticks beside the cookies for a cozy touch. These small details impress guests and enhance enjoyment. For the full recipe, check the complete instructions above. {{image_4}} You can make fun swaps for your chewy pumpkin spice cookies. One easy change is to use coconut oil instead of butter. This makes the cookies dairy-free and adds a light coconut flavor. If you want a vegan option, replace the egg with flax eggs. To make a flax egg, mix one tablespoon of ground flaxseed with three tablespoons of water. Let it sit for five minutes to thicken. This keeps your cookies soft and chewy, just like the original recipe. Want to add more flavor? Try adding dried fruits like cranberries or raisins. They bring a sweet chewiness that pairs well with pumpkin spice. For a fresh twist, you can also add a hint of citrus zest. A little orange or lemon zest brightens the cookies and gives them a fun taste. These small changes can make your cookies stand out during the fall season. Frosting can take your cookies to another level. Cream cheese frosting pairs perfectly with the warm spices in these cookies. To make it, mix cream cheese with powdered sugar and a splash of vanilla. If you want something lighter, consider a simple glaze. Just mix powdered sugar with a bit of milk until smooth. Drizzle it over the cookies for added sweetness. These frosting options make each bite even more delightful. To keep your chewy pumpkin spice cookies fresh, use an airtight container. This helps lock in moisture. Store them at room temperature, away from sunlight. A cool, dry place works best. To maintain their soft and chewy texture, place a slice of bread in the container. The cookies absorb moisture from the bread, keeping them soft. You can also wrap each cookie in plastic wrap for extra protection. Freezing cookies is easy and a great way to save them for later. First, let the cookies cool completely. Then, arrange them in a single layer on a baking sheet. Freeze them for about one hour. This step prevents them from sticking together. After freezing, transfer the cookies to a freezer-safe bag. Remove as much air as possible before sealing. They can last for up to three months in the freezer. When you're ready to eat them, thaw cookies at room temperature. For a warm treat, pop them in the microwave for about 10-15 seconds. Chewy pumpkin spice cookies last about a week at room temperature. Store them in an airtight container to keep them fresh. Look out for signs of spoilage. If they become hard or dry, they may be past their prime. Also, check for any off smells or mold. If you see or smell anything unusual, it’s best to throw them away. These tips will help you enjoy your chewy pumpkin spice cookies even longer! For the full recipe, check out the [Full Recipe]. You can use pumpkin pie filling, but it is not the same. Pumpkin puree is pure pumpkin with no added sugar or spices. Pumpkin pie filling has sugar and spices mixed in. If you use it, cut back on the sugar in your recipe. It may make your cookies sweeter than you want. To reduce sweetness, cut down on the sugar. You can use 3/4 cup of brown sugar instead of 1 cup. You can also skip the granulated sugar. Another option is to add more pumpkin puree. This can balance the sweetness while keeping the texture. To reheat your cookies, use the oven for the best results. Preheat your oven to 350°F (175°C). Place the cookies on a baking sheet. Heat them for about 5 minutes. This keeps them soft and chewy. You can also use the microwave. Heat them for 10-15 seconds. This works, but they may not be as chewy. Enjoy your chewy pumpkin spice cookies warm! These chewy pumpkin spice cookies are simple to make with the right ingredients. Start with pumpkin puree, butter, and sugars for the best taste. Follow the steps to create a delightful treat and use my tips for the perfect chewy texture. Experiment with flavors to make your cookies unique. Store them well to keep that freshness. Enjoy sharing these cookies, as they are sure to impress!](https://fastmealmate.com/wp-content/uploads/2025/07/8de16806-55b5-45ec-964c-13b68a3ec1a0-768x768.webp)


![- 1 cup fresh raspberries (plus extra for garnish) - 1 cup mascarpone cheese - 1 cup heavy whipping cream - 1/2 cup powdered sugar - 1 teaspoon vanilla extract - 1 cup strong brewed coffee, cooled to room temperature - 1 package ladyfinger cookies (savoiardi) - 1 tablespoon cocoa powder - Zest of 1 lemon - Fresh mint leaves for garnish Gather these ingredients to create a delightful Raspberry Tiramisu. Fresh raspberries add a bright taste and color. Mascarpone cheese makes the dessert creamy and rich. Heavy whipping cream gives a light texture. Powdered sugar adds sweetness, while vanilla extract enhances the flavor. You will need strong brewed coffee to soak the ladyfingers. Use ladyfinger cookies for the classic base. Cocoa powder adds a nice touch on top. A bit of lemon zest brings brightness to the dish. Finally, fresh mint leaves will add a pop of color and flavor. For the full recipe, follow the steps provided. Enjoy making this beautiful and tasty dessert! In a large bowl, add the mascarpone cheese, powdered sugar, and vanilla extract. Use a whisk or an electric mixer to blend these until smooth. This will create a creamy base. Make sure there are no lumps. In another bowl, pour in the heavy cream. Whip it until stiff peaks form. The cream should be light and airy, which adds volume to our dessert. Gently fold the whipped cream into the mascarpone mixture. Use a spatula for this step. Be careful not to deflate the whipped cream. Mix until it is fully combined and creamy. Brew a strong cup of coffee and let it cool to room temperature. Take each ladyfinger and quickly dip it into the coffee. Be careful not to soak them too long; you want them to absorb flavor without getting mushy. In a 9x9-inch dish, arrange half of the dipped ladyfingers in a single layer. Make sure they cover the bottom evenly. Spoon half of the mascarpone mixture over the ladyfingers. Spread it out evenly with a spatula. Next, scatter half of the fresh raspberries over the mascarpone layer. This adds a burst of flavor to each bite. Repeat the layers with the remaining ladyfingers, mascarpone mixture, and the rest of the raspberries. Dust the top layer lightly with cocoa powder. Then, sprinkle fresh lemon zest for a bright touch. This zest enhances the dessert wonderfully. Cover the dish with plastic wrap and refrigerate for at least four hours. For best results, let it chill overnight. Before serving, add extra fresh raspberries and mint leaves for a beautiful finish. For the complete recipe, check the [Full Recipe]. Whipping cream to stiff peaks is key. This helps create a light and airy dessert. Stiff peaks mean the cream holds its shape well. If you skip this step, your Tiramisu can turn out too dense. To avoid sogginess in ladyfingers, dip them quickly into coffee. Just a quick dip is enough. If you soak them too long, they will become mushy. You want them soft but firm enough to hold their shape. You can swap raspberries for strawberries or blueberries. Each fruit brings its own unique taste. Adding a splash of coffee liqueur can also enhance the flavor. Just a little can make a big difference. For extra toppings, consider dark chocolate shavings. They add a rich flavor and nice texture. Fresh mint leaves can also brighten the dish. They give a pop of color and taste. Serve individual portions in clear dessert cups. This shows off the layers and makes for a pretty display. You can also cut neat squares from the main dish for serving. For garnishing, add more fresh raspberries on top. A sprinkle of lemon zest adds color and a burst of flavor. A sprig of mint can elevate the look and taste. These simple touches can make your Tiramisu shine. For the full recipe, check out the details above! {{image_4}} You can switch up the fruit in your tiramisu. Strawberries are a great choice. Their sweetness adds a nice touch. Blueberries can work too. They bring a vibrant color and a tangy flavor. You can mix different berries for a colorful dessert. This way, you get a burst of flavors in each bite. Want a twist? Try adding coffee liqueur. It gives a rich, deep flavor. You can also add chocolate elements. Chocolate shavings or cocoa powder can make it even more special. This adds a nice contrast to the tart raspberries. If you need gluten-free options, use gluten-free ladyfingers. They are just as tasty! For vegan versions, use plant-based mascarpone and whipped cream. This way, everyone can enjoy your delicious treat. Check out the Full Recipe for more ideas. How long can Raspberry Tiramisu be stored? You can keep your Raspberry Tiramisu in the fridge for up to 3 days. This time frame allows the flavors to meld beautifully. Covering and sealing the dessert is key. Use plastic wrap or a lid to keep it fresh. This helps prevent it from absorbing other smells in the fridge. Can you freeze Raspberry Tiramisu? Yes, you can freeze it! Wrap the dessert tightly in plastic wrap and then place it in an airtight container. This keeps the dessert safe from freezer burn. Tips for successful thawing and serving include letting it thaw in the fridge overnight. This method keeps the texture smooth and creamy. Recommended consumption timeline is about 3 days in the fridge or up to 2 months in the freezer. Signs of spoilage include an off smell or a watery texture. If you notice these signs, it’s best to discard it. Always trust your senses when it comes to food safety. Raspberry Tiramisu is a twist on the classic Italian dessert. Traditionally, tiramisu uses coffee and cocoa. In this version, we add fresh raspberries for a fruity touch. The layers consist of ladyfingers dipped in coffee, creamy mascarpone, and ripe raspberries. The dessert is rich, yet it feels light because of the whipped cream. It is perfect for summer or any time you crave something sweet. Making Raspberry Tiramisu takes about 20 minutes for prep. After that, you need to chill it for at least 4 hours. For the best taste, let it chill overnight. This allows the flavors to blend well. So, in total, you’re looking at about 4 hours and 20 minutes before serving. Yes, you can make Raspberry Tiramisu ahead of time! This dessert keeps well in the fridge. Prepare it the day before you plan to serve it. The longer it sits, the better the flavors meld. Serve it cold right from the fridge for a refreshing treat. If you can't find mascarpone cheese, you have options. Cream cheese works, but mix it with sour cream or heavy cream for a smoother texture. Use a 1:1 ratio for cream cheese. This will keep the balance of flavors. Another option is ricotta cheese, blended until smooth. Raspberry Tiramisu can fit into many diets with tweaks. A serving has about 300 calories, but this varies based on your ingredients. For a lighter version, use low-fat cream or sugar substitutes. If you need gluten-free, look for gluten-free ladyfingers. Always adjust ingredients to match dietary needs. Enjoy this dessert without worry! For the full recipe, visit the recipe section. Raspberry tiramisu is a simple yet delightful dessert. It combines fresh raspberries, creamy mascarpone, and strong coffee. With our step-by-step guide, you can make this treat easily. Remember to pay attention to the texture of your whipped cream and avoid soggy ladyfingers. Feel free to explore variations and substitutions to suit your taste. This dessert is perfect for any occasion. Enjoy your creation, and don’t forget to share it with friends and family!](https://fastmealmate.com/wp-content/uploads/2025/06/e92d9679-76f1-46ea-8457-1368e269da4c-768x768.webp)