Baileys Cheesecake Truffles Delightful No-Bake Treat

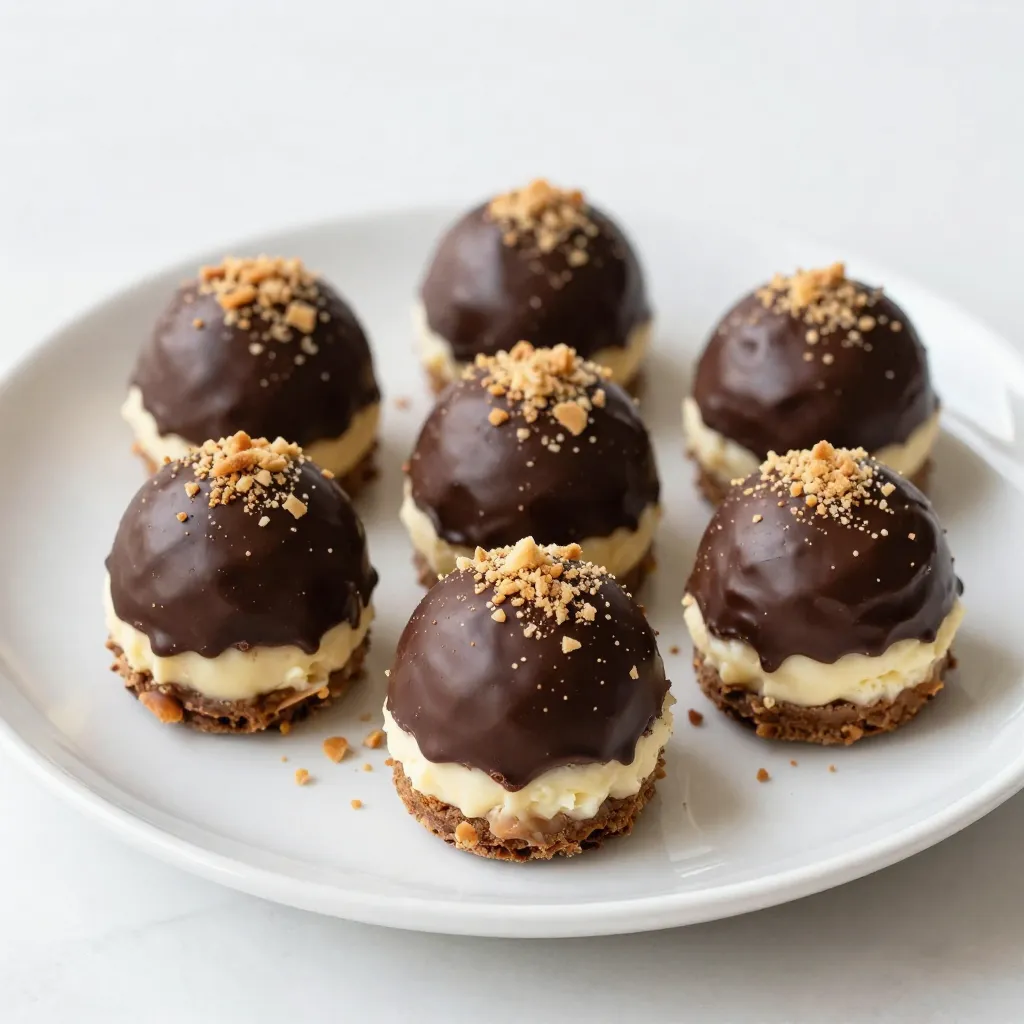
Craving a sweet treat that’s easy to make and oh-so-delicious? Look no further! Baileys Cheesecake Truffles are the perfect no-bake dessert. With just a few simple ingredients, you can whip up a creamy, chocolatey delight that will impress your friends and family. In this guide, I’ll share step-by-step instructions, tips for perfect truffles, and fun variations to make them your own. Let’s dive into this sweet adventure!
Why I Love This Recipe
- Irresistible Flavor: The combination of cream cheese and Baileys creates a rich and creamy flavor that is simply unforgettable.
- Easy to Make: With just a few simple steps, you can whip up these truffles in no time, making them perfect for any occasion.
- Perfect for Sharing: These bite-sized treats are great for parties, gatherings, or as a delightful gift for friends and family.
- Customizable: You can easily adapt the recipe by using different types of chocolate or adding your favorite toppings for a unique twist.
Ingredients
Main Ingredients
– 8 oz cream cheese, softened
– 1/2 cup powdered sugar
– 1/4 cup heavy cream
Additional Ingredients
– 1/4 cup unsweetened cocoa powder
– 1/4 cup finely crushed graham crackers
– 1/4 cup chocolate chips
Coating Ingredients
– 8 oz dark chocolate, for coating
– Optional garnishes: additional graham cracker crumbs
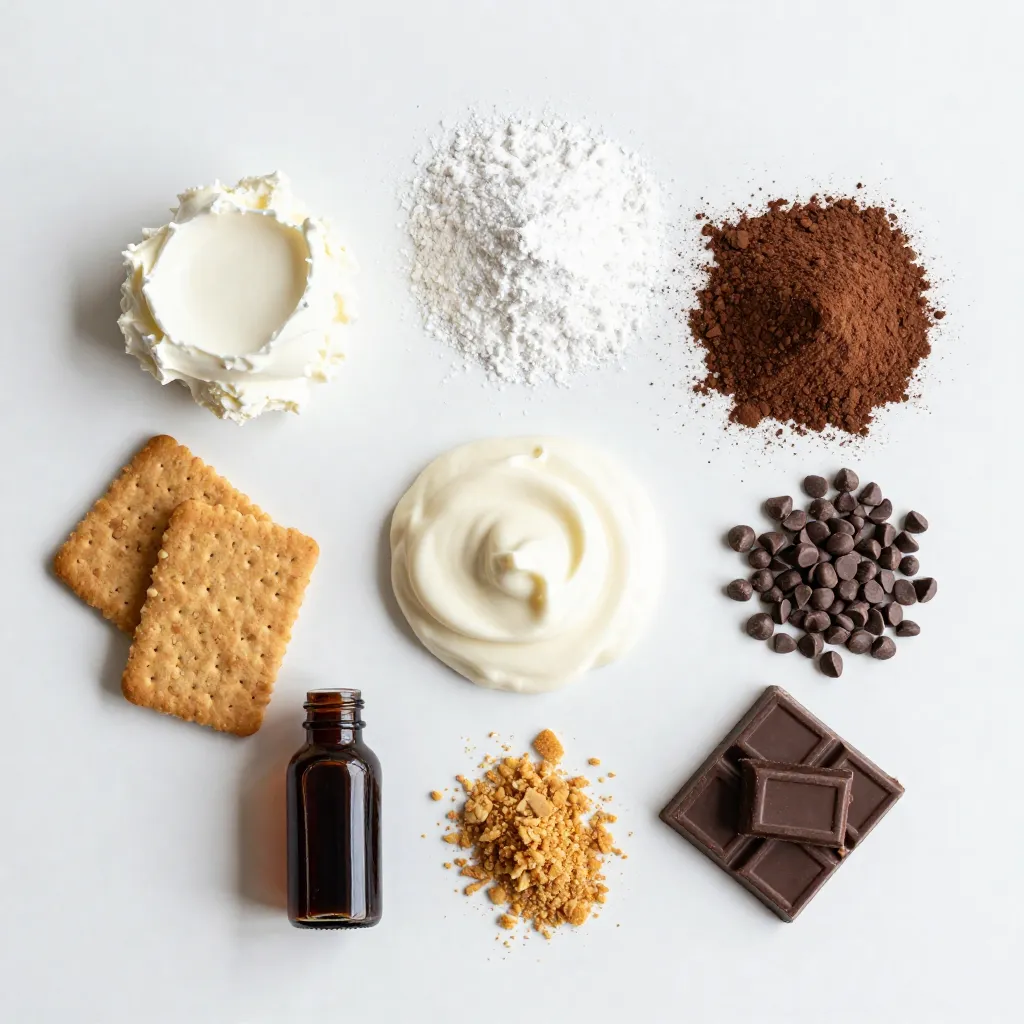
To make Baileys cheesecake truffles, you need simple ingredients. First, start with cream cheese. Softened cream cheese creates a smooth base. Then, add powdered sugar for sweetness. Heavy cream adds richness and helps blend everything.
Next, you need unsweetened cocoa powder. It gives the truffles a nice chocolate flavor. Finely crushed graham crackers add a crunchy texture. They also remind you of cheesecake crust. The chocolate chips will melt in your mouth and add richness.
For coating, dark chocolate works best. It adds a nice contrast to the sweet truffle. Optional garnishes like graham cracker crumbs can make your truffles look even more appealing.
Gather these ingredients and prepare to enjoy a delightful no-bake treat!

Step-by-Step Instructions
Preparation Steps
1. First, take 8 oz of softened cream cheese. Place it in a medium bowl.
2. Add 1/2 cup of powdered sugar to the cream cheese. Beat them together for 2-3 minutes.
3. Next, pour in 1/4 cup of heavy cream, 1/4 cup of cocoa powder, and 1 teaspoon of vanilla extract. Mix until smooth and creamy.
Combining Ingredients
1. Now, gently fold in 1/4 cup of finely crushed graham crackers and 1/4 cup of chocolate chips. Use a rubber spatula for this step.
2. Cover the bowl with plastic wrap and chill it in the fridge for 1 hour. This helps the mixture firm up.
3. After chilling, scoop out the mixture and shape it into bite-sized balls, about 1 inch wide.
Coating Process
1. Melt 8 oz of dark chocolate in a microwave-safe bowl. Heat in 30-second bursts, stirring in between, until smooth.
2. Dip each truffle into the melted chocolate. Make sure to coat them well.
3. Place the coated truffles back on parchment paper. For a fun touch, sprinkle some graham cracker crumbs on top before the chocolate sets.
4. Finally, refrigerate the truffles for another 30 minutes to let the chocolate harden completely.
Tips & Tricks
Successful Preparation
To make Baileys cheesecake truffles, start with the cream cheese. Make sure it is at room temperature. This helps it mix smoothly. If it is cold, the texture will be lumpy. Next, use an electric mixer. This tool is great for a creamy texture. Mix the cream cheese and sugar for 2-3 minutes. You want it free of lumps.
Storage Guidelines
After making the truffles, store them properly. Place them in an airtight container. This keeps them fresh. They can stay in the fridge for up to one week. If you want to keep them longer, consider freezing. They can last for a few months in the freezer.
Presentation Suggestions
For serving, use decorative boxes or a nice platter. This adds a special touch. Garnish each truffle with graham cracker crumbs or chocolate shavings. This makes them look fancy. A little extra care in presentation goes a long way!
Pro Tips
- Use Room Temperature Cream Cheese: Ensure your cream cheese is softened to room temperature for easier blending and a smoother texture.
- Chill for Easy Handling: Chilling the mixture before shaping the truffles makes them easier to handle and helps maintain their shape during coating.
- Perfect Chocolate Coating: To achieve a glossy chocolate coating, temper the chocolate by melting it gently and avoiding overheating.
- Add Flavor Variations: Experiment with different types of chocolate or flavor extracts to customize your truffles to your taste preferences.
Variations
Flavor Variations
You can change the flavor of your Baileys cheesecake truffles easily. Try adding different extracts like mint or orange. This small change can make a big difference. You can also use flavored chocolate for coating. Think about using mint chocolate or orange-infused chocolate. These flavors give your truffles a unique twist.
Dietary Variations
If you want vegan options, you can use dairy-free cream cheese. This keeps the truffles creamy and delicious without any dairy. For those who need gluten-free options, choose alternate graham crackers that are gluten-free. Many brands make gluten-free options that work great in this recipe.
Serving Variations
When serving, think about drinks that pair well. Coffee or a splash of Baileys complements the truffles nicely. You can also serve them with fresh fruits or nuts on platters. This adds color and texture to your dessert spread, making it even more appealing.
Storage Info
How to Store Baileys Cheesecake Truffles
To keep your Baileys cheesecake truffles fresh, store them in the fridge. Place them in an airtight container. This helps prevent them from drying out. They stay good for about one week in the refrigerator.
If you want to keep them longer, you can freeze the truffles. Place them in a freezer-safe container or bag. They can last up to three months in the freezer. When you want to enjoy them, just take out what you need.
Best Containers for Storage
For best results, use airtight containers. These containers protect the truffles from air and moisture. You can also use regular containers, but they may not keep the truffles as fresh.
To prevent sticking, use parchment or wax paper. Place a layer of paper between each truffle. This helps keep them from sticking together, making it easy to grab one when you want a treat.
How to Revive Chilled Truffles
If your truffles feel too cold or hard, let them sit at room temperature. Leave them out for about 10 to 15 minutes. This helps them become soft and creamy again.
For the best taste, serve the truffles slightly chilled. They have a rich flavor that shines when not too cold. Enjoy your delightful truffles with friends or family!
FAQs
What is the best way to melt chocolate?
To melt dark chocolate, I suggest using a microwave or a double boiler. If you choose the microwave:
– Chop chocolate into small pieces.
– Place it in a microwave-safe bowl.
– Heat it in 30-second intervals.
– Stir well after each interval.
– Stop when it’s mostly melted, then stir until smooth.
This method keeps the chocolate from burning, which can ruin its texture.
Can I use other types of cheese?
Yes, you can use other cheeses! If you want a different taste, try these options:
– Mascarpone for a rich, creamy flavor.
– Ricotta for a lighter texture.
– Goat cheese for a tangy twist.
Just remember to soften any cheese you pick before mixing it in.
How long do these truffles last?
These truffles can last up to one week in the fridge. To keep them fresh:
– Store them in an airtight container.
– Place parchment paper between layers to prevent sticking.
For longer storage, you can freeze them. Just wrap each truffle tightly before freezing.
Can I make these truffles without alcohol?
Absolutely! To make a non-alcoholic version:
– Simply skip the Baileys.
– Replace it with an equal amount of heavy cream or milk.
– Add a splash of vanilla extract for flavor.
This way, you can still enjoy the rich taste without the alcohol.
You learned how to make delicious Baileys cheesecake truffles with simple steps. We covered ingredients, preparation, and storage tips to keep them fresh. You can customize flavors and make variations for any diet. Follow these easy steps for a treat that impresses. Enjoy your truffles with friends or family, and try the suggested pairings for a special touch. Keep experimenting to find your favorite twist. Now, you’re ready to create these tasty bites and share the

Decadent Baileys Cheesecake Truffles
Ingredients
- 8 oz cream cheese, softened to room temperature
- 1/2 cup powdered sugar
- 1/4 cup heavy cream
- 1/4 cup unsweetened cocoa powder
- 1/4 cup finely crushed graham crackers
- 1/4 cup chocolate chips
- 1 teaspoon pure vanilla extract
- 8 oz dark chocolate, for coating
- optional additional graham cracker crumbs for garnish
Instructions
- In a medium mixing bowl, add the softened cream cheese along with the powdered sugar. Using an electric mixer set to medium speed, beat the mixture until it becomes creamy and free of lumps, which should take about 2-3 minutes.
- Pour in the heavy cream, unsweetened cocoa powder, and vanilla extract. Continue mixing until all ingredients are fully blended, resulting in a velvety, smooth consistency.
- Gently fold in the crushed graham crackers and chocolate chips using a rubber spatula, ensuring they are evenly distributed throughout the mixture.
- Cover the mixing bowl tightly with plastic wrap and place it in the refrigerator for approximately 1 hour. This will help the mixture firm up for easier shaping.
- After chilling, use a small cookie scoop or your hands to form the mixture into uniform bite-sized balls, approximately 1 inch in diameter.
- Arrange the formed truffles on a parchment-lined baking sheet, and return them to the refrigerator for an additional 30 minutes to set properly.
- In the meantime, melt the dark chocolate in a microwave-safe bowl. Heat it in 30-second intervals, stirring well between each interval, until the chocolate is completely melted and smooth. Be careful not to overheat, as chocolate can burn easily.
- Once the truffles have set, remove them from the fridge. Dip each truffle into the melted chocolate, making sure to coat each one thoroughly. Place the coated truffles back onto the parchment-lined sheet.
- For an optional finishing touch, sprinkle a small amount of graham cracker crumbs on top of each truffle before the chocolate coating hardens completely.
- Finally, refrigerate the truffles for an additional 30 minutes, allowing the chocolate coating to set fully.


![- 1 lb ground beef - 1 cup shredded cheddar cheese - 1 cup shredded mozzarella cheese - 1/2 cup grated Parmesan cheese - 1 tablespoon minced garlic - 1 teaspoon onion powder - 1 teaspoon garlic powder - 1/2 teaspoon salt - 1/2 teaspoon black pepper - 1 package (16 oz) refrigerated pizza dough - 1/2 cup unsalted butter, melted - 2 tablespoons fresh parsley, chopped (for garnish) I recommend using fresh ground beef for the best flavor and texture. Look for good-quality cheeses. A mix of sharp cheddar and creamy mozzarella works wonders. For the Parmesan, choose a block and grate it yourself. Fresh garlic adds a punch that garlic powder cannot match. Always opt for unsalted butter to control the saltiness in your dish. Each serving contains approximately: - Calories: 250 - Protein: 15g - Carbohydrates: 20g - Fat: 14g - Fiber: 1g - Sugar: 1g This dish packs flavor and comfort in each bomb. Enjoy the satisfaction of creating these tasty bites. For the full recipe, check the section above. First, preheat your oven to 375°F (190°C). This ensures the bombs bake evenly. While the oven warms up, grab a large mixing bowl. In this bowl, mix together the ground beef, shredded cheddar, mozzarella, and grated Parmesan cheese. Add minced garlic, onion powder, garlic powder, salt, and black pepper. Stir until all the ingredients blend well. This mixture is the heart of your cheeseburger bombs. Next, you need to handle the pizza dough. Lightly flour a clean surface to prevent sticking. Roll out the pizza dough into a large rectangle. Use a pizza cutter or knife to slice the dough into 12 equal squares. Each square should measure about 3 inches by 3 inches. For each square, place a generous spoonful of the cheeseburger filling right in the center. Now, fold the corners of each dough square over the filling. Pinch them tightly to create a seal. Place the sealed bombs seam-side down on your prepared baking sheet. Now it’s time to bake. Brush the tops of each bomb with melted butter. This gives them a nice, golden finish. Bake these tasty treats in the preheated oven for 18-20 minutes. They should puff up and turn a beautiful golden brown. After baking, let them cool for a few minutes on the baking sheet. This step helps enhance the flavors. For a fresh touch, sprinkle chopped parsley on top just before serving. For the full recipe, check the earlier section. Enjoy your Garlic Parmesan Cheeseburger Bombs! To make your Garlic Parmesan Cheeseburger Bombs pop with flavor, use quality spices. Fresh garlic adds a strong taste. Minced garlic blends well with the beef. Garlic powder boosts the garlic flavor. Onion powder adds depth and sweetness. The mix of cheddar, mozzarella, and Parmesan gives a rich, creamy texture. Try using sharp cheddar for a bolder taste. Always taste the mixture before sealing the bombs. Adjust the salt and pepper to your liking. A perfect golden crust makes your bombs look and taste great. Start by brushing the tops with melted butter. This adds flavor and helps with browning. Bake at 375°F for 18-20 minutes. Keep an eye on them as they bake. If they are not golden yet, let them bake a few more minutes. The crust should be puffed and golden brown. For a stunning display, use a large platter. Place the bombs in a circle, and sprinkle fresh parsley on top. This adds a nice pop of color. Serve with dipping sauces like ketchup or ranch for extra fun. You can also add a side of pickles or a fresh salad. This makes a great snack or meal for any gathering. Enjoy each tasty bite from your Garlic Parmesan Cheeseburger Bombs! For the complete recipe, click [Full Recipe]. {{image_4}} You can change the filling for your Garlic Parmesan Cheeseburger Bombs. For a vegetarian option, swap ground beef for cooked lentils or black beans. Add some diced bell peppers and chopped onions for flavor. If you want a spicy kick, mix in jalapeños or hot sauce. You can even use spicy sausage for a meaty twist. This way, everyone can enjoy these tasty bombs. If you need a gluten-free option, use gluten-free pizza dough. Many stores sell this now. If you feel adventurous, you can make homemade dough. Combine almond flour, coconut flour, and eggs for a gluten-free base. This change keeps the bombs delicious and safe for those with gluten issues. Experiment with different types of dough to find your favorite. Toppings can take your bombs to a new level. After baking, try adding melted cheese on top. You can also sprinkle some crispy bacon bits for extra flavor. Fresh herbs like chives or cilantro can add a burst of color and taste. Consider serving with a side of garlic butter for dipping. These creative touches make your Garlic Parmesan Cheeseburger Bombs truly special. For detailed steps, check the Full Recipe. After you enjoy your Garlic Parmesan Cheeseburger Bombs, store any leftovers right away. Let them cool to room temperature first. Then, place them in an airtight container. This keeps them fresh and tasty. You can also wrap them tightly in plastic wrap. Store them in the fridge for up to three days. If you want to keep them longer, freezing is a great option. When it’s time to eat those leftover bombs, reheating them properly is key. Preheat your oven to 350°F (175°C). Place the bombs on a baking sheet. Heat for about 10-15 minutes. This helps them regain their crispiness. You can also use a microwave. Heat them for about 30-45 seconds. However, the oven method is best for keeping that nice texture. If you want to freeze your Garlic Parmesan Cheeseburger Bombs, do it before baking. After shaping the bombs, place them on a baking sheet. Freeze them for about an hour until solid. Then, transfer them to a freezer-safe bag. They can last up to three months in the freezer. When you’re ready to bake, just add a few extra minutes to the cooking time. Enjoy the fresh taste anytime with this simple method! You can still enjoy these bombs without specific cheese. Use any cheese you like. Try gouda, pepper jack, or even cream cheese. Just make sure the cheese melts well. This keeps the bombs gooey and tasty. Yes, you can prepare these bombs ahead of time. Make the filling and fill the dough squares. Place them on a baking sheet. Cover and store them in the fridge. Bake them fresh when you are ready to eat. This saves time for your busy days. Dipping sauces make these bombs even better. Ketchup is a classic choice. Ranch dressing or garlic aioli adds a nice touch. You can also try spicy mustard or BBQ sauce. Each sauce brings a new flavor and fun to your meal. This blog post covered all you need for Garlic Parmesan Cheeseburger Bombs. I shared the key ingredients, step-by-step instructions, and handy tips to enhance flavor. You also learned about great variations to try and how to store your tasty treats. In my final thoughts, remember to have fun while cooking. Experiment with flavors and enjoy every bite of your creations. Happy cooking!](https://fastmealmate.com/wp-content/uploads/2025/06/70ca770e-dfd2-457a-a57a-f773e5b0e22d-768x768.webp)

