Get ready to savor the rich, comforting flavors of Apple Cider Braised Chicken Thighs with Garlic Herbs! This dish is perfect for a cozy night in or a gathering with friends. In this post, I’ll walk you through each step, from choosing the freshest ingredients to mastering the braising process. Let’s dive in and create a meal that will impress everyone at your table!
Ingredients
List of Ingredients
– 4 chicken thighs, bone-in and skin-on
– 2 cups apple cider (not spiced)
– 4 cloves garlic, minced
– 1 onion, diced
– 2 sprigs fresh thyme
– 1 tablespoon fresh rosemary, finely chopped
– 2 tablespoons apple cider vinegar
– 2 tablespoons olive oil
– Salt and pepper, to taste
– 1 cup chicken broth
– 1 tablespoon honey (optional, for added sweetness)
– Fresh parsley, chopped (for garnish)
Measurement Details
When you measure the ingredients, accuracy matters. Use a standard measuring cup for liquids. For dry items like herbs and spices, use a measuring spoon. These tools help ensure your dish turns out great every time.
Optional Ingredients for Enhanced Flavor
For a touch of sweetness, consider adding honey. It blends well with the tartness of apple cider. You can also try a splash of balsamic vinegar for a richer flavor. Fresh herbs like oregano or sage can add a unique twist to the dish.
Step-by-Step Instructions
Preparation of Chicken Thighs
Start by drying the chicken thighs with paper towels. This helps the skin get crispy. Season both sides with salt and pepper. This step adds great flavor.
Searing the Chicken
Heat olive oil in a large skillet over medium-high heat. Once the oil shimmers, add the chicken thighs, skin-side down. Sear for about 5 to 7 minutes until the skin turns golden brown. Flip the chicken and sear the other side for 3 to 5 minutes. Once done, move the chicken to a plate.
Sautéing Aromatics and Deglazing
In the same skillet, add diced onion and minced garlic. Stir them for 3 to 4 minutes until the onions are soft and clear. This makes the kitchen smell amazing. Next, pour in the apple cider and chicken broth. Use a wooden spoon to scrape the bottom of the skillet. This gets all the tasty bits into the sauce.
Braising Process
Now, return the chicken thighs to the skillet, skin-side up. Make sure they sit partly in the liquid. Cover the skillet and reduce the heat to low. Let the chicken braise for 30 to 35 minutes. It’s ready when the chicken is tender and reaches 165°F.
Final Steps for Serving
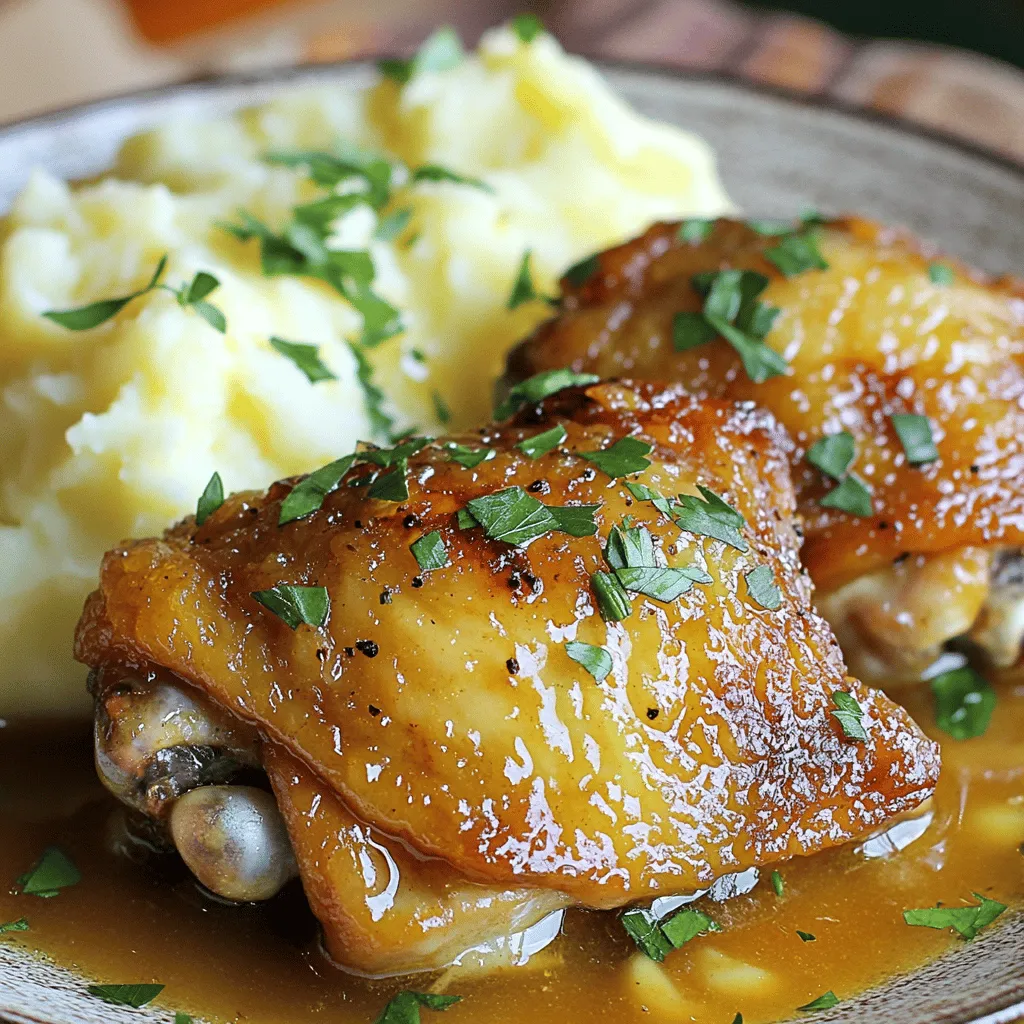
Once cooked, take the chicken out of the skillet. If you want a thicker sauce, raise the heat and let the liquid simmer for 5 to 10 minutes. This will make it rich. Serve the chicken on a platter with the sauce drizzled on top. Garnish with fresh parsley. Enjoy with mashed potatoes or crusty bread to soak up the flavors.
Tips & Tricks
Enhancing Crispy Skin
To get that crispy skin, start with dry chicken thighs. Use paper towels to pat them dry. This step helps remove moisture. Moisture makes skin soggy. Season the thighs with salt and pepper. This adds flavor and helps with browning. When you sear the chicken, make sure the oil is hot. A hot pan gives you a nice golden color. Don’t rush the searing. Let it cook undisturbed for a few minutes.
Cooking Tips for Perfectly Braised Chicken
For great braised chicken, follow the cooking time closely. The chicken should cook at a low heat. This makes it tender and juicy. Use a lid to trap steam and heat. This keeps the chicken moist. Check the internal temperature. It should reach 165°F. If you want extra flavor, try using chicken broth instead of water. The broth adds depth to the dish.
Sauce Thickening Techniques
If you want a thicker sauce, here’s what to do. After cooking the chicken, remove it from the skillet. Turn the heat up high. Let the sauce simmer uncovered. This helps it reduce and thicken. Stir occasionally to avoid burning. You can also mix a bit of cornstarch with water. Add this mixture to the sauce. This will help it thicken quickly.

Variations
Ingredient Substitutions
You can easily change some ingredients while keeping the dish tasty. If you want a lighter option, use skinless chicken thighs. They will still absorb all the great flavors but cut some fat. Swap apple cider for white grape juice if you want a sweeter taste.
For those who avoid alcohol, replace the apple cider with more chicken broth. This keeps the dish flavorful without the cider. If you do not have fresh herbs, use dried ones. Just remember, dried herbs are stronger, so use less.
Different Herbs for Flavor
Herbs add a lot of flavor to this dish. While thyme and rosemary are great choices, feel free to experiment. Use sage for an earthy taste or tarragon for a hint of sweetness. Fresh parsley brightens the dish after cooking.
Mix and match to find your favorite flavor combo. Each herb brings its own twist to the dish. It is fun to try new things!
Serving Suggestions and Pairings
This dish is versatile when it comes to sides. Serve it with creamy mashed potatoes or fluffy rice to soak up the sauce. Roasted vegetables like carrots or Brussels sprouts make a great match too.
For a fresh touch, add a simple salad with mixed greens and a light vinaigrette. You can also serve some crusty bread on the side. The bread is perfect for dipping into that delicious sauce. Enjoy your meal!
Storage Info
Best Practices for Storing Leftovers
To keep Apple Cider Braised Chicken Thighs fresh, follow these steps:
– Allow the chicken to cool to room temperature.
– Place the chicken and sauce in an airtight container.
– Store in the fridge for up to three days.
– Keep the chicken skin on to maintain moisture.
Reheating Instructions
When you’re ready to enjoy leftovers, use these simple methods:
– Stovetop: Heat in a skillet over medium-low heat. Add a splash of chicken broth to keep it moist.
– Microwave: Place chicken on a microwave-safe plate. Cover with a damp paper towel. Heat in 30-second intervals until warmed through.
Freezing Tips for Long-Term Storage
If you want to save some for later, try freezing:
– Let the chicken cool completely before freezing.
– Use freezer-safe bags or containers. Remove as much air as possible.
– Label with the date. Store for up to three months.
– To reheat, thaw in the fridge overnight and follow reheating instructions.
FAQs
What can I serve with Apple Cider Braised Chicken Thighs?
You can serve this dish with many sides. I love creamy mashed potatoes, which soak up the sauce. Roasted vegetables also pair well, adding color and nutrients. Another great option is crusty bread. It’s perfect for dipping in the rich sauce.
Can I use boneless chicken thighs?
Yes, you can use boneless chicken thighs. They cook faster than bone-in thighs. Just keep an eye on cooking time. Boneless thighs can become dry if overcooked.
How can I adjust sweetness in the recipe?
To adjust sweetness, add honey or reduce the apple cider. If you find the dish too sweet, add a splash of apple cider vinegar. This balances the flavors and adds depth.
What is the best way to ensure tender chicken?
To ensure tender chicken, braise on low heat for a longer time. This method breaks down the meat fibers. Start with a good sear to lock in juices. Always check the internal temperature; it should reach 165°F.
How to make the dish ahead of time?
You can prepare this dish a day ahead. Follow all cooking steps, then let it cool. Store in an airtight container in the fridge. When ready to serve, reheat on low heat until warmed through.
This blog post covered how to make delicious apple cider braised chicken thighs. We explored the key ingredients, step-by-step instructions, and helpful tips. You learned about important cooking methods and ingredient variations. I shared storage tips so you can enjoy leftovers safely. Remember, cooking is fun! Try new flavors and serve with your favorite sides. Enjoy this dish and make it your own!


