Craving a fresh, easy meal that delivers bold flavor? Look no further than these Air Fryer Sweet Chili Shrimp Tacos! Bursting with sweet and spicy goodness, they come together quickly and use simple ingredients. I’ll guide you through each step, from marinating the shrimp to assembling the perfect taco. Get ready to impress your taste buds and elevate taco night to a whole new level!
Ingredients
Main Ingredients
– 1 lb large shrimp, peeled and deveined
– 1/4 cup sweet chili sauce
– 1 tablespoon soy sauce
Additional Ingredients
– 1 teaspoon garlic powder
– 1 teaspoon ground ginger
– 1 teaspoon fresh lime juice
– 8 small corn tortillas
Toppings and Garnishes
– 1 cup cabbage, finely shredded
– 1/2 avocado, thinly sliced
– Fresh cilantro, chopped
– Lime wedges, for serving
When making Air Fryer Sweet Chili Shrimp Tacos, the right ingredients matter. Start with one pound of large shrimp. Make sure they are peeled and deveined for easy handling. The sweet chili sauce adds a nice touch of flavor. Use a quarter cup to coat the shrimp well. A tablespoon of soy sauce brings out the shrimp’s natural taste.
Next, you need some spices. Add one teaspoon of garlic powder and ground ginger. These spices will enhance the shrimp’s flavor. Finish the marinade with a teaspoon of fresh lime juice for a bright touch.
For the tacos, you’ll need eight small corn tortillas. Warm them up before filling. This helps them stay soft and pliable.
Now, let’s think about toppings. A cup of finely shredded cabbage gives a nice crunch. Half an avocado, thinly sliced, adds creaminess. Chopped fresh cilantro brings a fresh aroma. Don’t forget lime wedges to squeeze on top for a zesty finish.
With these ingredients, you will create a fresh and tasty meal that everyone loves.
Step-by-Step Instructions
Marinating the Shrimp
– Combine shrimp and marinade ingredients in a bowl.
– The marinade includes sweet chili sauce, soy sauce, garlic powder, ground ginger, and lime juice.
– Stir well to coat each shrimp.
– Allow the shrimp to marinate for at least 15 minutes.
– This step makes the shrimp flavorful and juicy.
Cooking the Shrimp in the Air Fryer
– Preheat air fryer to 375°F (190°C).
– This helps the shrimp cook evenly.
– Place the marinated shrimp in the basket.
– Make sure not to overcrowd it.
– Air fry shrimp for 6-8 minutes.
– Shake the basket halfway through cooking.
– The shrimp will turn pink and opaque when done.
Preparing the Tortillas
– Stack and wrap tortillas in a damp paper towel.
– This keeps them moist and warm.
– Microwave for about 30 seconds.
– Warm tortillas enhance the taco flavor.
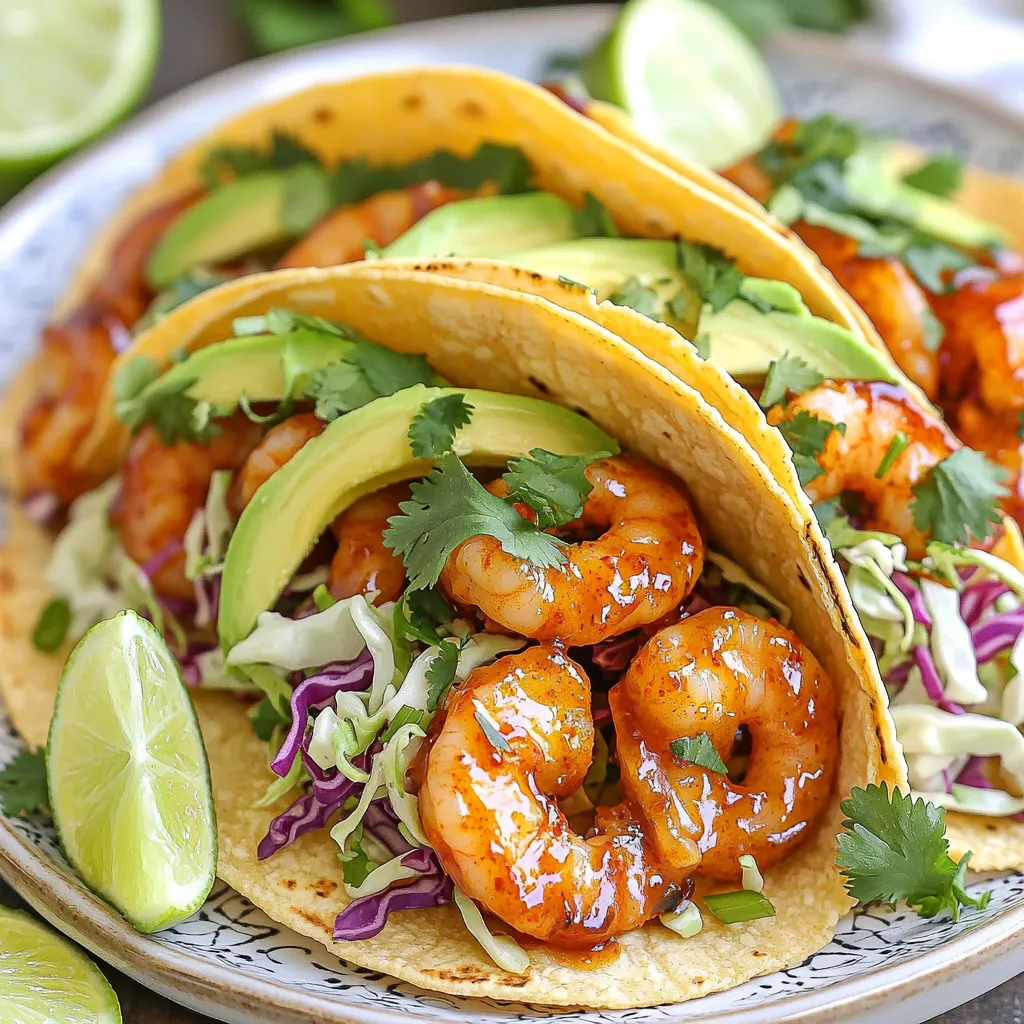
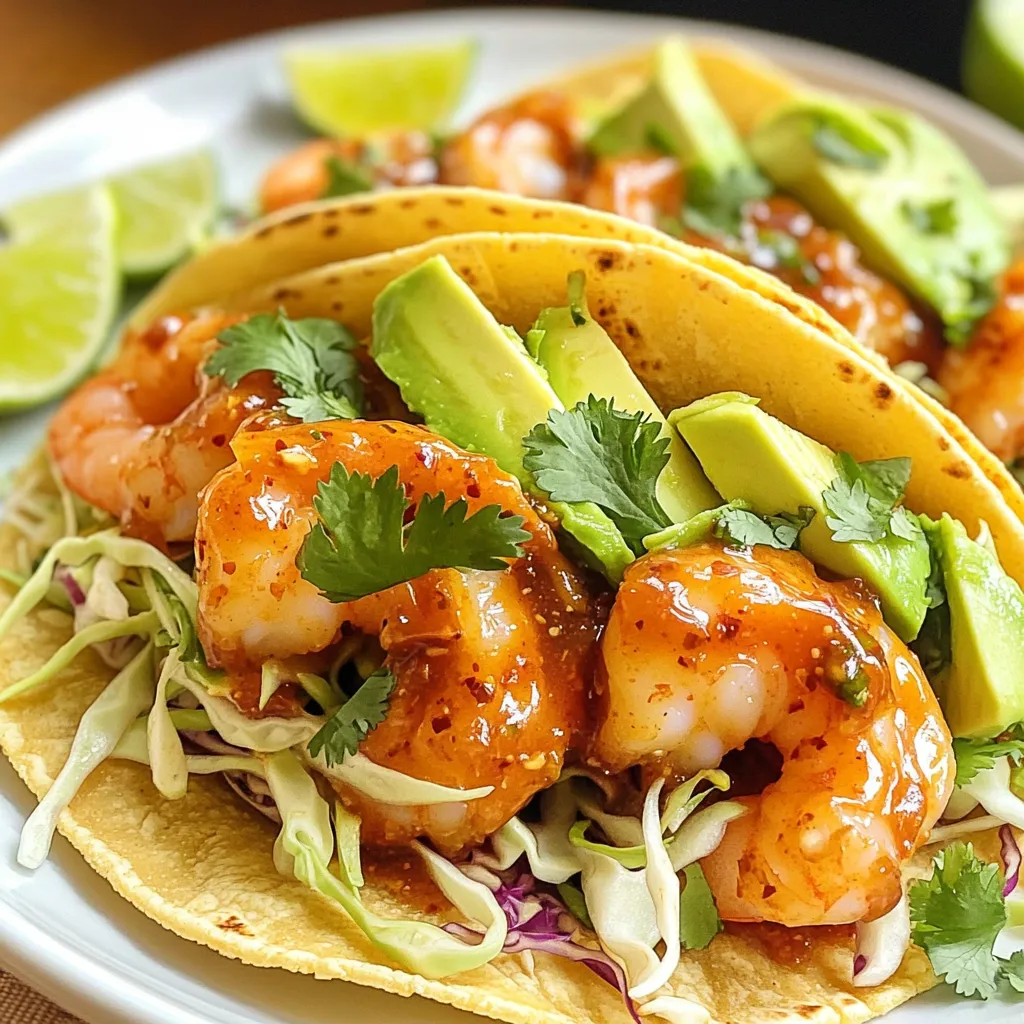
Assembling the Tacos
– Take a warm tortilla and layer it with shredded cabbage.
– Add a few pieces of cooked shrimp on top.
– Layer thin slices of avocado next.
– Finish with a sprinkle of fresh cilantro.
– Serve immediately with lime wedges on the side.
Tips & Tricks
Perfecting the Shrimp
To make your shrimp shine, coat them well in the marinade. This gives each bite rich flavor. I recommend using a medium bowl for this. Toss the shrimp gently so every piece gets the sauce. Don’t rush the marinating step; let them sit for at least 15 minutes. This helps the shrimp soak up all those sweet and spicy notes. When cooking, avoid overcrowding the air fryer. Cook in batches if needed. This way, each shrimp gets nice and crispy.
Tortilla Handling
For the best tacos, keep your tortillas moist. Use a damp paper towel to wrap them. This prevents them from drying out. Just microwave the wrapped tortillas for about 30 seconds. It makes them soft and easy to handle. If you want extra flavor, lightly toast the tortillas in the air fryer or on a skillet. It adds a nice crunch and enhances their taste.
Presentation Ideas
When serving, use a colorful platter to make your tacos pop. A vibrant display makes your meal look inviting. Don’t forget to garnish. Add extra lime wedges and chopped cilantro on the side. These small touches bring freshness and color to your dish. Plus, they add zesty flavor with every bite. Enjoy your beautiful creation!
Variations
Alternative Proteins
You can swap shrimp for chicken or tofu. Both options work great. Chicken adds a hearty bite. Tofu soaks up flavors well and gives a nice texture. For chicken, cut it into small pieces. Marinate just like the shrimp. For tofu, press it to remove water. Then, cube it and marinate.
Veggie Tacos
Want to add more crunch? Try adding bell peppers or corn. Both will boost the flavor and color. Dice bell peppers into small pieces and toss them in. Corn adds sweetness and pairs well with the other ingredients. You can use fresh, frozen, or canned corn.
Spicy Twist
If you crave heat, add minced jalapeños to the shrimp marinade. Start with one or two, depending on your spice level. Mix them in with the marinade. This will give your tacos a spicy kick. Enjoy the balance of sweet and spicy in every bite!
Storage Info
Refrigeration Tips
Store any leftover shrimp and toppings in separate airtight containers. This keeps them fresh. Enjoy them within 2-3 days for the best taste. Shrimp can lose its flavor when stored too long.
Reheating Instructions
To reheat shrimp, use an air fryer or skillet. This keeps them crispy and tasty. For the tortillas, warm them in the microwave. You can also wrap them in foil and heat them up. This makes them soft and ready for your tacos.
FAQs
Can I use frozen shrimp for this recipe?
Yes, but ensure they’re fully thawed and drained before marinating. Frozen shrimp work well. They save time and are often just as tasty. Remember to pat them dry to avoid extra water in the marinade.
How can I make this recipe gluten-free?
Use gluten-free soy sauce and ensure tortillas are gluten-free. Many brands offer gluten-free options for soy sauce. Make sure to check the labels on your tortillas. Enjoying this dish without gluten is easy!
What can I substitute for sweet chili sauce?
Try a homemade blend of honey, garlic, and chili for a similar flavor. Mix equal parts honey and chili sauce, add minced garlic, and adjust to taste. This gives you a fresh twist on the sauce.
How do I know when the shrimp are done?
Shrimp should turn pink and opaque when fully cooked. Check for a firm texture. If they curl tightly, they’re done. Overcooking can make them tough, so keep an eye on them!
This blog post shared a simple shrimp taco recipe. You learned about the key ingredients and step-by-step cooking instructions. I also included tips for perfecting your tacos, fun variations, and storage advice. Remember, these tacos can easily adapt to your taste. Whether you choose shrimp, chicken, or veggies, your meal can be fresh and full of flavor. Enjoy making these tacos and impressing your friends and family with your cooking skills!


