30 Minute Honey Garlic Chicken Quick and Simple Dish

Are you ready for a quick and tasty meal? This 30 Minute Honey Garlic Chicken recipe is perfect for busy weeknights. With tender chicken, sweet honey, and savory garlic, it’s a dish you’ll crave over and over. Plus, it only takes a half-hour to whip up! Let me guide you through easy steps, cooking tips, and fun serving ideas. Grab your apron and let’s get started!
Ingredients
Main Ingredients
– 1 pound boneless, skinless chicken thighs or breasts, cut into bite-sized chunks
– 1/4 cup honey
– 1/4 cup low-sodium soy sauce
– 3 cloves garlic, finely minced
– 1 tablespoon fresh ginger, freshly grated
– 1 tablespoon extra-virgin olive oil
– 1 teaspoon toasted sesame oil
– 1/2 teaspoon freshly ground black pepper
The main ingredients create a balance of sweet and savory flavors. The honey provides sweetness, while the soy sauce adds a salty depth. Garlic and ginger bring warmth and spice. You can use either chicken thighs or breasts; thighs offer more flavor and moisture.
Optional Ingredients
– 1/2 teaspoon red pepper flakes (optional, for a spicy kick)
– 2 green onions, thinly sliced (for garnish)
– 1 tablespoon sesame seeds (for garnish)
Red pepper flakes add a nice heat to the dish. If you like spice, don’t skip them. Green onions and sesame seeds make a great garnish. They add color and crunch, enhancing the dish’s appeal.
Serving Suggestions
– Cooked rice or quinoa, for serving
Pair the honey garlic chicken with cooked rice or fluffy quinoa. Both options soak up the sauce well. You can also serve it with steamed veggies like broccoli or snap peas. This adds nutrition and color to your plate. For a balanced meal, consider serving a light salad on the side.
Step-by-Step Instructions
Preparation Steps
1. In a mixing bowl, whisk together the marinade ingredients. You need honey, soy sauce, garlic, ginger, black pepper, and red pepper flakes. Mix until smooth. This helps the flavors blend well. Set the marinade aside for later.
2. Prepare the chicken next. Use boneless, skinless chicken thighs or breasts. Cut them into bite-sized chunks. This makes it easy to cook and eat. Season the chicken lightly with salt and pepper for extra flavor.
Cooking Steps
1. Heat the oils in a large skillet over medium-high heat. Use extra-virgin olive oil and toasted sesame oil. Wait until the oils shimmer. This shows they’re hot enough to cook the chicken.
2. Carefully add the chicken pieces to the skillet. Make sure they are in a single layer. Cook the chicken for about 5-7 minutes. Stir occasionally to brown all sides. The chicken should reach an internal temperature of 165°F. This ensures it is safe to eat.
Finishing Touches
1. Pour the prepared honey garlic sauce over the browned chicken. Make sure to coat each piece well. Stir gently to mix everything together.
2. Allow the sauce to simmer gently for about 3-5 minutes. This thickens the sauce a bit. Stir occasionally to keep everything from sticking to the skillet.
3. When the sauce is sticky and thick, remove the skillet from heat.
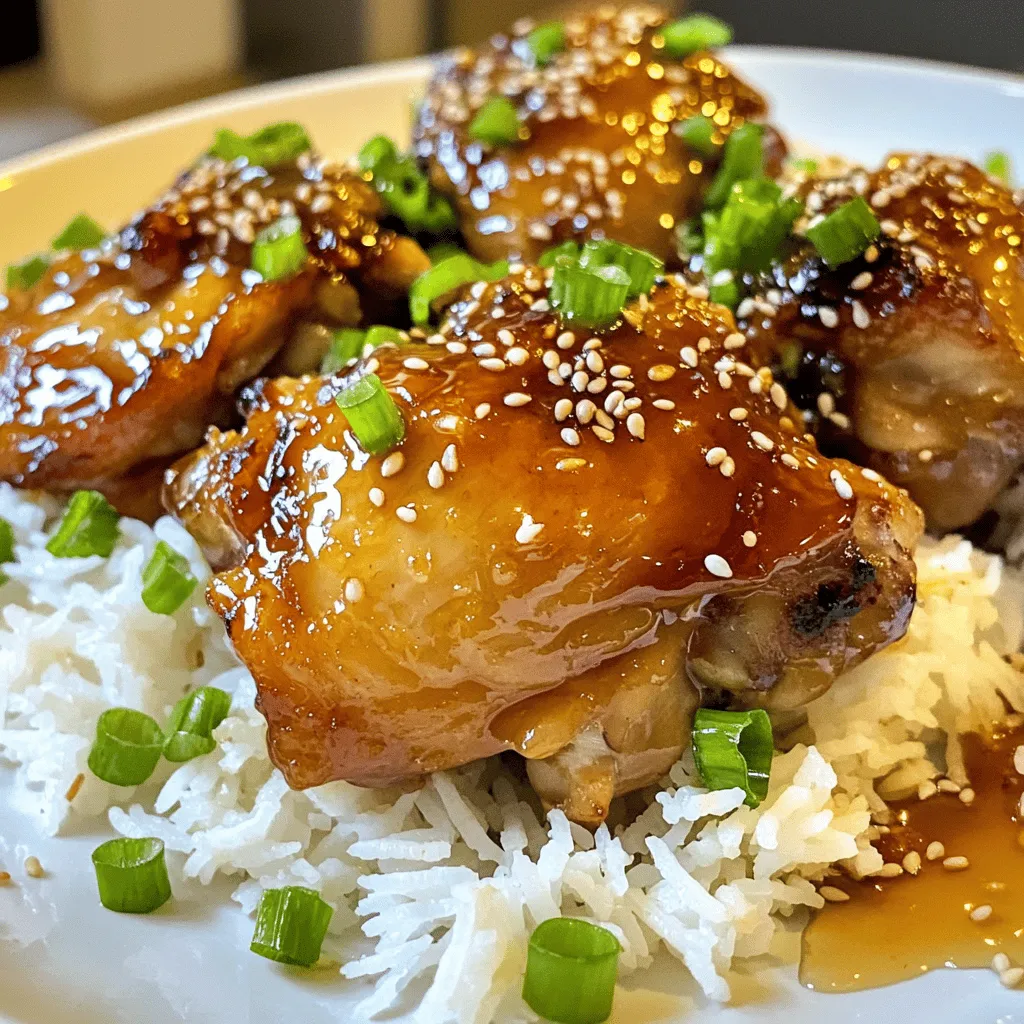
4. Serve the honey garlic chicken over cooked rice or quinoa. For a nice finish, garnish with sliced green onions and sesame seeds. This adds color and flavor to your dish.Enjoy your meal!
Tips & Tricks
Cooking Tips
To ensure the chicken is fully cooked, use a meat thermometer. The internal temperature should reach 165°F. This step keeps your meal safe and tasty. To prevent sticking in the skillet, heat the oils well before adding chicken. This creates a non-stick surface. Another trick is to avoid overcrowding the pan. Cook in batches if needed.
Flavor Enhancement
To boost the flavor, think about adding fresh herbs like cilantro or basil. These can add a nice touch. You can also switch the honey for maple syrup for a unique taste. If you want it sweeter, add more honey. For extra spice, simply raise the red pepper flakes. Just a pinch can make a big difference.
Presentation Tips
For a great visual appeal, serve the honey garlic chicken on a large, colorful platter. Place it over a fluffy bed of rice or quinoa. Drizzle any extra sauce on top to make it shine. Finish with a sprinkle of green onions and sesame seeds. This not only adds color but also texture. Your guests will be impressed by the look and taste of the dish!

Variations
Different Proteins
You can switch the chicken with shrimp or tofu. Shrimp cooks fast and gives a nice flavor. Sauté shrimp for about 3-4 minutes until pink. Tofu, on the other hand, adds a great texture. Sauté it for about 5-7 minutes until golden brown. Both options work well with the honey garlic sauce.
Dietary Modifications
If you need a gluten-free dish, use tamari instead of soy sauce. This keeps the flavor while making it safe for gluten-free diets. For a low-calorie version, use less honey or try a sugar substitute. You can also use skinless chicken to cut down on fat.
Additional Ingredients
Adding vegetables boosts nutrition and adds color. Try bell peppers, broccoli, or snap peas. Toss them in the skillet with the chicken for a tasty mix. You can also play with different sauces. A splash of sriracha adds heat, while a touch of lime juice brightens the dish. Get creative and make it your own!
Storage Info
Storing Leftovers
To keep your honey garlic chicken fresh, store it in the fridge. Place leftovers in an airtight container. This helps prevent odors and keeps the chicken tasty. Use your leftovers within three to four days for the best flavor.
Freezing Options
You can freeze honey garlic chicken for later use. First, let it cool completely. Then, place the chicken in a freezer-safe bag or container. Remove as much air as possible to avoid freezer burn. It can last in the freezer for up to three months. When ready to eat, move it to the fridge to thaw overnight.
Reheating Guidelines
To reheat your chicken, you have two good options: the oven or the microwave. If you use the oven, preheat it to 350°F (175°C). Place the chicken in a baking dish and cover it with foil. Heat for about 15-20 minutes. This method keeps the chicken juicy. If you use the microwave, put the chicken on a plate. Heat it in short bursts of 1-2 minutes, stirring in between, until hot. Be careful not to overheat, as this can dry it out.
FAQs
How long does it take to make 30 Minute Honey Garlic Chicken?
Making this dish takes only 30 minutes. You spend about 10 minutes prepping. Then, cooking takes around 20 minutes. This quick dish fits perfectly into a busy day.
Can I use chicken breasts instead of thighs?
Yes, you can use chicken breasts. They cook faster than thighs. Chicken breasts may be drier since they have less fat. Thighs give a rich taste and stay juicy. Adjust your cooking time to about 5-6 minutes for breasts.
What can I serve with honey garlic chicken?
You can serve this chicken with rice or quinoa. Both are great options for soaking up the sauce. Try adding steamed broccoli or snap peas for color and crunch. A light salad or roasted veggies pairs well too. For drinks, serve iced tea or a light beer.
Can I make this recipe in advance?
Yes, you can prep the chicken and sauce ahead. Store the chicken and sauce in separate containers. Keep them in the fridge for up to two days. When ready, cook the chicken and add the sauce. This keeps your dish fresh and tasty.
This blog post covered everything you need for 30 Minute Honey Garlic Chicken. We explored main and optional ingredients, step-by-step cooking instructions, and tips for flavor and presentation. We also looked at variations with different proteins and dietary needs. Proper storage tips help you enjoy leftovers too.
Remember, you can make this meal your own with easy tweaks. Enjoy trying out new flavors and impressing your family or friends!


![To create a delightful 20-minute couscous, you need a few simple ingredients. Here’s what you will need: - 1 cup couscous - 1 ¼ cups vegetable broth (or water) - 1 cup cherry tomatoes, halved - 1 small cucumber, diced into small cubes - ½ red onion, finely chopped - ½ cup Kalamata olives, pitted and sliced into rings - 1 cup fresh spinach, roughly chopped - ¼ cup feta cheese, crumbled - 2 tablespoons extra virgin olive oil - 1 tablespoon fresh lemon juice - 1 teaspoon dried oregano - Salt and freshly ground black pepper to taste These ingredients bring a burst of flavor and color to your meal. Couscous cooks fast and absorbs the broth well, making it fluffy. The cherry tomatoes and cucumber add crunch, while olives give a salty kick. Fresh spinach provides nutrients, and feta cheese adds creaminess. Use good olive oil and fresh lemon juice for a bright taste. This mix of flavors makes your dish fresh and inviting. For the detailed recipe, check out the Full Recipe section. To start, bring 1 ¼ cups of vegetable broth or water to a rolling boil in a saucepan. This step is crucial for cooking the couscous properly. Once the liquid bubbles up, remove the pan from the heat. Stir in 1 cup of couscous and cover the pan with a lid. Let it sit for 5 minutes. This allows the couscous to absorb all the liquid, making it fluffy and light. While the couscous cooks, grab a large mixing bowl. Combine 1 cup of halved cherry tomatoes, 1 small diced cucumber, ½ finely chopped red onion, and ½ cup of sliced Kalamata olives. Toss in 1 cup of roughly chopped fresh spinach. Mixing these colorful veggies adds crunch and freshness to your meal. In a small bowl, whisk together 2 tablespoons of extra virgin olive oil, 1 tablespoon of fresh lemon juice, and 1 teaspoon of dried oregano. Add a pinch of salt and pepper to taste. This dressing brings all the flavors together and enhances the dish's brightness. Pour the dressing over the vegetable mix and toss gently. This helps each piece get coated well. Next, fluff the couscous with a fork, breaking apart any clumps. Add the fluffed couscous to the veggie mixture and stir until everything is mixed evenly. To finish, sprinkle ¼ cup of crumbled feta cheese on top. This adds a nice salty bite and creamy texture to the dish. Check the [Full Recipe] for all details. To make your couscous extra tasty, add fresh herbs like parsley or cilantro. You can also try spices like cumin or paprika for more depth. Feel free to swap feta cheese with goat cheese or even mozzarella if you prefer. Each cheese brings its own flavor and texture to the dish. For the best fluff, always use a fork to fluff your couscous. This helps break up any clumps. When cutting vegetables, try to make them uniform in size. This way, they cook evenly and look nice in your dish. Serve your couscous in colorful bowls to make it pop. You can also spread it on a large platter for a family-style meal. For a finishing touch, sprinkle extra crumbled feta and fresh herbs on top. This adds color and makes the dish more inviting. {{image_4}} You can change up the recipe in many ways. Use seasonal vegetables for a fresh twist. Think about adding bell peppers, zucchini, or even asparagus. These veggies add color and flavor to your dish. Protein is another way to mix things up. Chickpeas are great for a plant-based option. They add a nice texture and protein boost. Grilled chicken is another good choice if you want meat. It pairs well with the other flavors in couscous. The flavor can shift based on your ingredients. A Mediterranean style is bright and fresh. Use herbs like basil, parsley, or mint for a burst of taste. On the other hand, a Middle Eastern twist adds warmth. Spices like cumin or coriander can really change the game. Dressings also play a big role. You can use a tangy vinaigrette or a creamy yogurt dressing. Each option gives the dish a new taste profile. Experiment with what you like best. If you're looking for gluten-free options, consider quinoa or rice. Both work well in place of couscous. They provide a similar texture and are easy to cook. For vegan meals, swap out the cheese and broth. Use a plant-based broth and nuts or seeds instead of cheese. Nutritional yeast can give a cheesy flavor without dairy. These changes keep the dish tasty and suitable for all diets. To keep your leftover couscous fresh, use airtight containers. Glass containers work great, as they do not absorb smells. Plastic containers are also fine if they are good quality. Make sure to cool the couscous completely before sealing the container. This reduces moisture inside and keeps it from getting soggy. When refrigerating, store couscous within two hours of cooking. This helps prevent bacteria growth. Place it in the fridge right away. If you plan to eat it later, consider separating it from any dressing or veggies. This keeps the couscous from becoming mushy. Reheating couscous is easy. The best method is to use the microwave. Start by placing your couscous in a microwave-safe bowl. Add a few drops of water to keep it moist. Cover it with a damp paper towel and heat for 1-2 minutes. Stir halfway through for even heat. You can also reheat couscous on the stove. Add a splash of water to a pan over low heat. Stir often until warm. This method helps keep the couscous fluffy. Avoid high heat, as it may dry out the grains. When stored properly, couscous lasts about 3 to 5 days in the fridge. Check for any signs of spoilage before eating. If you see mold or a sour smell, it's best to throw it away. Fresh couscous should have a light, fluffy texture. If it feels hard or clumpy, it may have gone bad. Always trust your senses when deciding whether to eat leftovers. You can tell when couscous is done by its texture. Perfectly cooked couscous is light and fluffy. It should not be sticky or mushy. After letting it sit, fluff it with a fork. This helps break up clumps and adds air. Yes, you can meal prep couscous. Cook it in advance and store it in the fridge. It keeps well for three to five days. Just make sure to let it cool before storing. You can add your veggies and dressing just before eating. This keeps the flavors fresh. Couscous pairs well with many dishes. You can serve it with grilled chicken or fish. A fresh salad is a great side too. Roasted vegetables add nice flavor. You can also enjoy it with hummus or tzatziki for a dip. Check out the " Speedy Mediterranean Couscous Delight" for the detailed recipe and enjoy this quick meal! This blog post guides you to make a tasty Mediterranean couscous dish. We covered the key ingredients, step-by-step cooking instructions, and helpful tips to enhance flavor. Remember, you can mix in different veggies or proteins to make it your own. Storing and reheating couscous is easy, too, so enjoy your leftovers! This simple recipe is perfect for meal prep or a quick dinner. You’re now set to impress your family and friends with this delightful dish. Dive in, create, and enjoy every bite!](https://fastmealmate.com/wp-content/uploads/2025/06/3a323c96-3f14-4a25-b011-50d8f6184ffe-768x768.webp)
![To make Maine Blueberry Bread, you need the right ingredients. Here’s what you will need: - 1 ½ cups all-purpose flour - ½ teaspoon baking soda - 1 teaspoon baking powder - ½ teaspoon salt - 1/3 cup unsalted butter, softened - ½ cup granulated sugar - 1 large egg, at room temperature - 1 teaspoon pure vanilla extract - ½ cup plain Greek yogurt - 1 cup fresh or frozen blueberries - Zest of 1 lemon - 2 tablespoons fresh lemon juice These ingredients come together to create a soft, flavorful bread. The blueberries add sweetness, while the lemon gives a nice zing. You can customize your Maine Blueberry Bread with some fun add-ins. Here are a few ideas: - Chopped nuts, like walnuts or pecans - A sprinkle of cinnamon for warmth - Chocolate chips for a sweet twist - A handful of oats for texture Feel free to mix and match these options to suit your taste. Before you start, gather your tools to make the process smooth. You will need: - A 9x5-inch loaf pan - Mixing bowls (one large and one medium) - An electric mixer or whisk - A spatula for mixing - Measuring cups and spoons Having these items ready will help you stay organized and focused. For the full recipe, check the details provided earlier. First, preheat your oven to 350°F (175°C). This sets the stage for baking. Next, grab a 9x5-inch loaf pan. Grease it with butter or line it with parchment paper. This helps the bread come out easily later. In a medium bowl, whisk together the flour, baking soda, baking powder, and salt. Mix these dry ingredients well and set them aside for now. In another large bowl, cream the softened butter and sugar using an electric mixer. Beat this mixture for 3-4 minutes until it is light and fluffy. Then, add the egg, vanilla extract, lemon zest, and lemon juice. Mix until everything is combined well. Now, add the Greek yogurt to this mix and blend until smooth. Gradually add the dry ingredient mixture to the wet mixture. Stir gently until just combined. Be careful not to overmix; this keeps the bread soft. Finally, fold in the blueberries. Make sure they are evenly spread throughout the batter. Pour the batter into your prepared loaf pan. Smooth the top with a spatula to ensure it rises evenly. Place the loaf pan in the oven and bake for 50-60 minutes. To check if it’s done, insert a toothpick into the center. If it comes out clean, your bread is ready. Once baked, take the loaf out of the oven. Let it cool in the pan for about 10 minutes. After that, transfer the bread to a wire rack to cool completely. When you are ready to serve, slice the bread. For a tasty touch, add a pat of butter or a sprinkle of powdered sugar on top. This blueberry bread pairs perfectly with tea or coffee, making it a wonderful treat for breakfast or a snack. Enjoy your Maine Blueberry Bread! For the complete recipe, be sure to check the [Full Recipe]. When making Maine blueberry bread, avoid overmixing the batter. This can make the bread tough. Also, don’t skip the lemon juice. It brightens the flavor and balances the sweetness. If using frozen blueberries, do not thaw them. This keeps the batter from turning blue. For a soft and moist texture, use room temperature ingredients. This includes the butter, egg, and yogurt. They mix better and create a fluffy bread. Make sure your oven is preheated to 350°F (175°C). Baking at the right temperature is key for even cooking. You can add a pinch of cinnamon or nutmeg for warmth. A bit of cardamom can also bring a unique twist. Pure vanilla extract adds depth to the flavor. Feel free to experiment with different spices to find your favorite mix. For a citrusy kick, try adding a bit more lemon zest. For the full recipe, check the earlier sections. {{image_4}} You can swap blueberries for other fruits. Try raspberries, blackberries, or strawberries. Each fruit brings a unique taste. For a tropical twist, use diced mango or pineapple. These fruits change the flavor but keep the bread moist and delicious. To make this recipe gluten-free, use a gluten-free flour blend. Make sure it has xanthan gum to help with texture. Also, check that your baking powder and baking soda are gluten-free. These small changes will let you enjoy this bread without gluten. Nuts and chocolate can add flavor and texture. Walnuts or pecans work well in this bread. Just chop them coarsely and fold them into the batter. If you love chocolate, try adding chocolate chips. They melt and create sweet pockets in each slice. For the full recipe, check out the Maine Blueberry Bread section above. Store leftover Maine blueberry bread at room temperature. Wrap it in plastic wrap or foil. This keeps it fresh for up to three days. If you want to keep it longer, consider freezing. To freeze Maine blueberry bread, slice it first. Wrap each slice in plastic wrap. Place the wrapped slices in a freezer-safe bag. This method allows you to take out one slice at a time. The bread can last in the freezer for up to three months. Reheat blueberry bread for the best taste. Use a toaster oven or microwave. For a toaster oven, set it to 350°F (175°C) and heat for about 10 minutes. If using a microwave, warm a slice for 15-20 seconds. Enjoy it warm for a cozy flavor. You can buy Maine blueberries at local farms, farmers' markets, or grocery stores. Many stores offer fresh blueberries during the summer months. You can also find frozen Maine blueberries year-round in the freezer section. Online retailers may offer them as well, so check for local delivery options. Maine blueberries are unique due to their intense flavor and vibrant color. They grow wild in the state’s unique climate and soil. This gives them a sweet, tangy taste that stands out. Maine blueberries are also smaller than cultivated ones, making them more flavorful. Additionally, their high antioxidant levels make them a healthy choice. Fresh blueberries should be firm and plump. Look for a deep blue color with a hint of white bloom. Avoid any berries with wrinkles or soft spots. If they are still attached to the stem, that’s a good sign they are fresh. Smelling them can also help; they should have a sweet, fruity aroma. Yes, you can use other types of yogurt. Greek yogurt gives a rich texture, but you can use regular yogurt. Non-dairy options like almond or coconut yogurt work too. Just keep in mind that the flavor may change slightly. Choose a plain yogurt to maintain the taste of the bread. To make Maine blueberry bread vegan, substitute the egg with flaxseed meal or applesauce. For the butter, use a plant-based alternative like coconut oil or vegan butter. Ensure your yogurt is dairy-free. These swaps keep the bread moist and delicious while making it suitable for a vegan diet. You can still enjoy the same great flavor! Making Maine Blueberry Bread is fun and easy. We covered key ingredients, optional add-ins, and the right tools to use. I shared step-by-step instructions, common mistakes to avoid, and tips for great texture. You can even try different fruits or make it gluten-free. Lastly, I explained how to store extras and answered some questions about blueberries. Enjoy baking and sharing this delicious bread with friends!](https://fastmealmate.com/wp-content/uploads/2025/06/ff86cb4e-0a8a-479f-8f36-b1606605b05b-768x768.webp)

