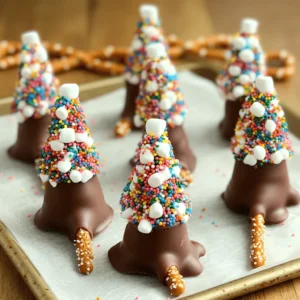
Chocolate Pocky Christmas Trees
Create festive fun with these adorable Chocolate Pocky Christmas Trees! Perfect for holiday gatherings, this easy recipe combines Pocky sticks, melted chocolate, colorful sprinkles, and pretzel trunks to craft tasty little trees that are sure to impress. With just a few simple steps, you’ll have a delightful treat that's as beautiful as it is delicious.