Pumpkin Sugar Cookies Delightfully Soft and Sweet

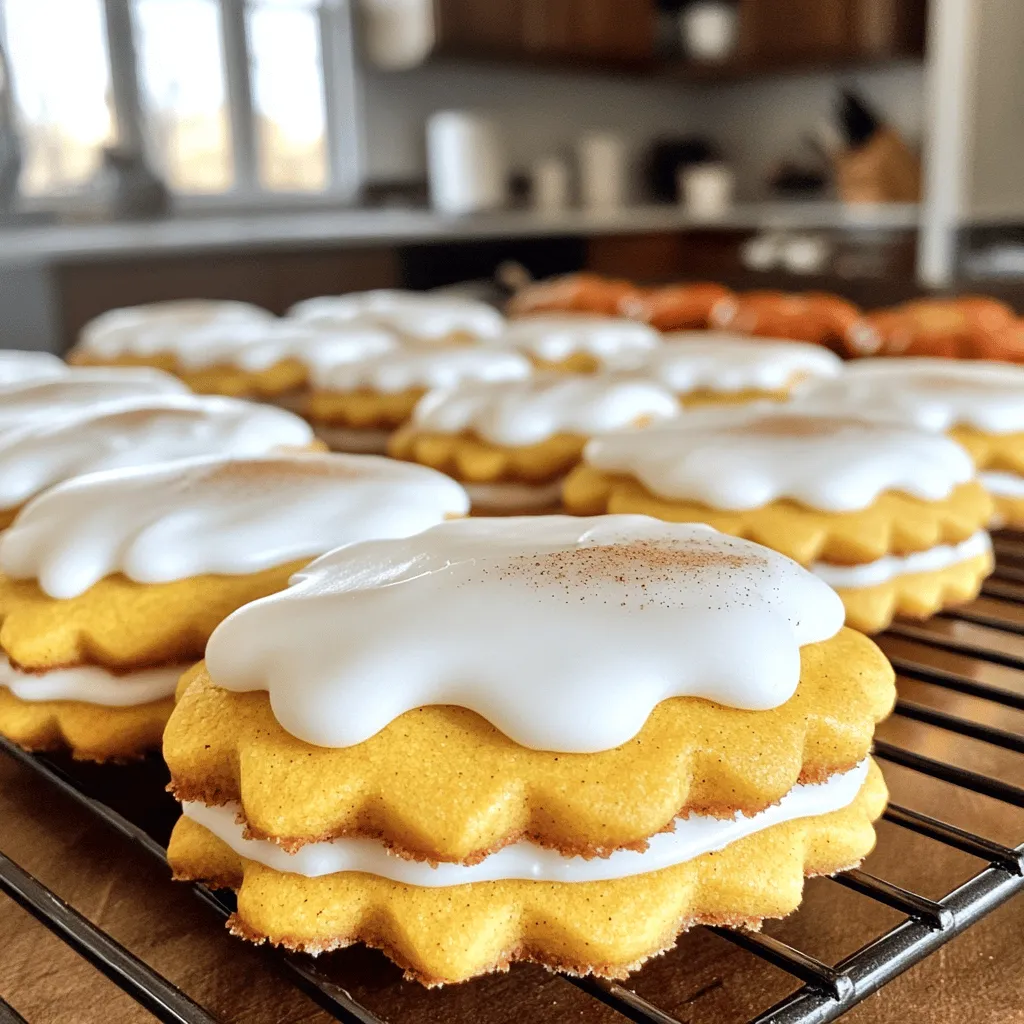
Are you ready to bake the softest, sweetest treat of the season? My Pumpkin Sugar Cookies are the perfect blend of cozy flavors that will make your taste buds dance. With the warm spices of cinnamon and nutmeg paired with creamy pumpkin, these cookies are a fall favorite. Join me as we dive into the simple steps to create these delightful cookies that will surely impress your friends and family!
Ingredients
Dry Ingredients
– 2 ½ cups all-purpose flour
– 1 teaspoon baking soda
– ½ teaspoon baking powder
– 1 teaspoon ground cinnamon
– ½ teaspoon ground ginger
– ¼ teaspoon ground nutmeg
– ½ teaspoon salt
Wet Ingredients
– 1 cup unsalted butter, softened
– 1 cup granulated sugar
– ½ cup brown sugar, packed
– 1 large egg
– 1 cup pure pumpkin puree
– 1 teaspoon vanilla extract
Icing Ingredients
– 1 cup powdered sugar
– 2–3 tablespoons milk
– A pinch of ground cinnamon
I love using these simple ingredients for my pumpkin sugar cookies. The dry ingredients create a base that is light and fluffy. The spices bring warmth and flavor, making each bite a treat. The wet ingredients add moisture and sweetness. Pumpkin puree gives the cookies a soft texture and a lovely color.
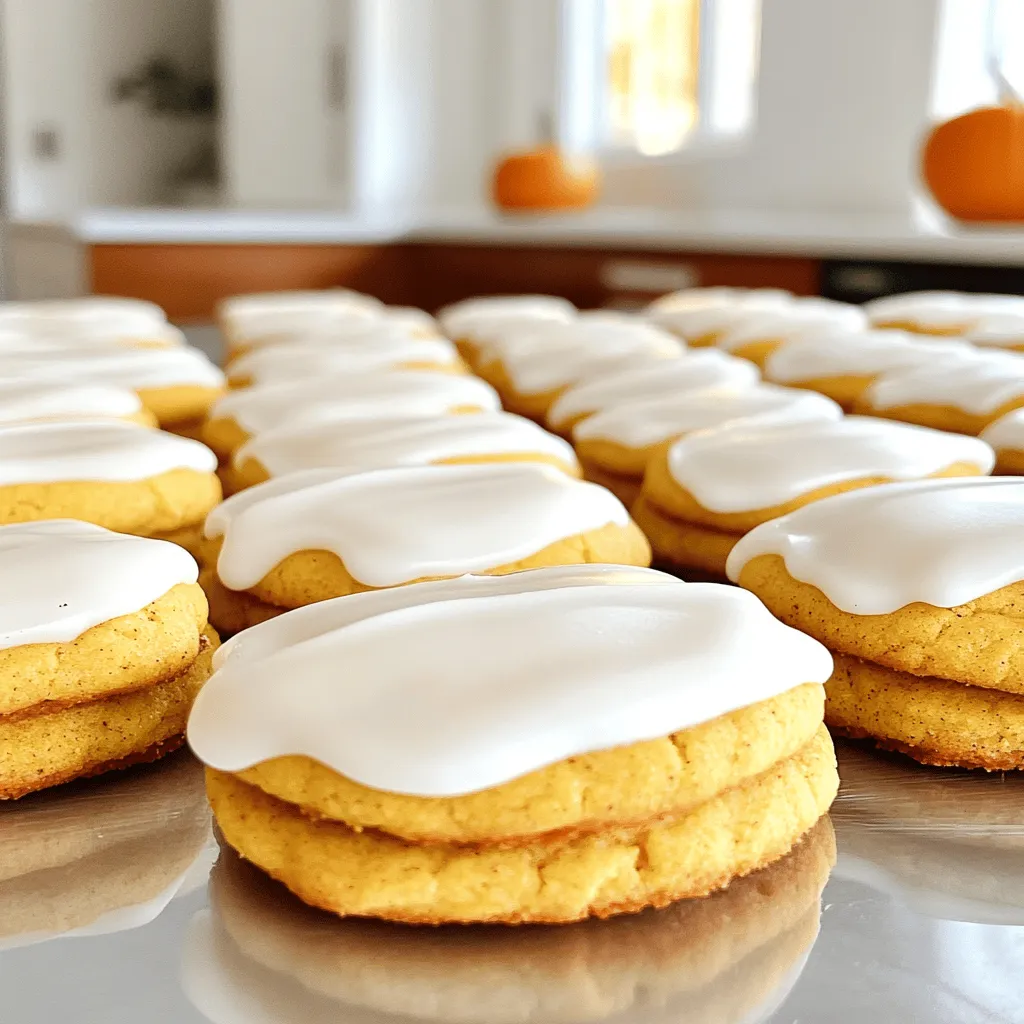
For the icing, I stick to just a few ingredients. Powdered sugar and milk combine to create a smooth icing. A sprinkle of cinnamon on top makes it special. When I bake these cookies, I feel the joy of the season.Enjoy baking and sharing them!
Step-by-Step Instructions
Preparation and Preheating
– Preheat the oven to 350°F (175°C).
– Line baking sheets with parchment paper.
Mixing Dry Ingredients
– Combine flour, baking soda, baking powder, spices, and salt in a mixing bowl.
Creaming Butter and Sugars
– Cream butter, granulated sugar, and brown sugar on medium speed until fluffy.
Combining Wet Ingredients
– Add egg, pumpkin puree, and vanilla; beat until smooth and combined.
Mixing Dry and Wet Ingredients
– Gradually incorporate dry ingredients into the wet mixture without over-mixing.
Baking the Cookies
– Scoop dough onto prepared sheets and bake for 10 to 12 minutes.
Cooling and Icing
– Cool cookies on wire racks before icing with powdered sugar and milk mixture.
Follow these steps for perfect pumpkin sugar cookies.
Tips & Tricks
Achieving the Perfect Texture
To keep your cookies soft, avoid over-mixing the dough. When you mix too much, the cookies can turn tough. I recommend mixing just until the flour is combined. This helps maintain that delightful, tender bite.
Baking Time Adjustment
Ovens can vary greatly. So, monitor your baking time closely. I suggest checking the cookies at the 10-minute mark. You want the edges to be set and lightly golden, while the centers should still look soft.
Icing Consistency
For the icing, start with the milk. Add it little by little until you reach your desired thickness. If you want a thicker icing, use less milk. For a thinner drizzle, add more. This flexibility allows you to make the icing just right for your cookies.

Variations
Flavor Additions
You can make your pumpkin sugar cookies even more fun! Try adding chocolate chips or nuts for extra texture. Chocolate chips give a sweet bite, while nuts add a nice crunch. You can use walnuts, pecans, or even almonds. Mix them into the dough before baking. This change will surprise your taste buds!
Icing Alternatives
If you want to change the icing, use cream cheese frosting for a richer flavor. This frosting pairs well with the soft cookie. It adds a tangy sweetness that you will love. Just spread it on after the cookies cool. You can also add a sprinkle of cinnamon on top for an extra touch.
Gluten-Free Option
If you need a gluten-free option, substitute all-purpose flour with a gluten-free blend. There are many great blends available at stores. Make sure to check that it works well for baking. This way, everyone can enjoy these delightful cookies.
Storage Info
Room Temperature
Store cookies in an airtight container for up to 5 days. This keeps them soft and moist. If you want to enjoy them longer, you should think about other storage methods.
Refrigeration
For extended freshness, refrigerate cookies for up to 2 weeks. Just wrap them well to avoid any drying out. The cool air helps maintain their flavor and texture.
Freezing
Freeze unbaked dough or iced cookies for later enjoyment. To freeze dough, scoop it into balls and place them on a baking sheet. Once frozen, transfer them to a freezer bag. You can also freeze iced cookies in a single layer. Just layer parchment paper in between to prevent sticking. When ready to bake, simply pop the dough balls into the oven straight from the freezer! This makes cookie baking quick and easy. Enjoy the joy of fresh cookies anytime!
FAQs
Can I use pumpkin pie filling instead of pumpkin puree?
No, pumpkin pie filling contains additional spices and sugar. Using it can change the flavor and sweetness of your cookies. Stick with pure pumpkin puree for the best results.
How do I make the cookies thicker?
Chill the dough for 30 minutes before baking to increase thickness. This helps the cookies hold their shape better while baking. It’s a simple step that makes a big difference.
What decorations work well with pumpkin sugar cookies?
Sprinkles, crushed nuts, or edible glitter work great for festive occasions. You can also use icing to create fun designs. Get creative and make each cookie unique!
Can I make these cookies dairy-free?
Yes! Substitute butter with a dairy-free alternative and use non-dairy milk for icing. This way, you can enjoy these cookies without dairy. It’s easy to modify the recipe to fit your needs.
How do I ensure even baking?
Rotate baking sheets halfway through the bake time. This helps cookies bake evenly and prevents one side from browning too much. It’s a quick tip for perfect results!
These pumpkin sugar cookies are simple to make and full of fall flavor. We covered the ingredients, step-by-step instructions, and some handy tips to ensure success. With a few variations, you can even customize them to fit your taste. Whether you enjoy them fresh or save for later, these cookies promise to delight. Enjoy your baking journey and treat yourself to these tasty bites!


![- 2 ripe mangoes, peeled and diced - 1 cup freshly squeezed lemon juice (approximately 4-5 lemons) - 4 cups cold water - 1/2 cup honey or agave syrup (adjust for sweetness) - 1/4 teaspoon sea salt - Ice cubes - Fresh mint leaves and lemon slices for garnish In this recipe, ripe mangoes are key. They give the drink a rich, sweet flavor. Fresh lemon juice adds a tangy twist that balances the sweetness. I recommend using cold water for a refreshing drink. Honey or agave syrup allows you to control the sweetness level. Adding a pinch of sea salt enhances the taste and brings out the flavors. Don't forget the ice cubes! They keep your drink cool and refreshing. Lastly, fresh mint leaves and lemon slices make a beautiful garnish. They add a nice touch to your glass and make it look appetizing. For the complete recipe, check out the [Full Recipe]. To start, you need ripe mangoes. Peel and dice two mangoes. Place the diced mangoes in a blender. Add 1 cup of cold water. Blend on high until smooth and creamy. This mango puree gives your drink a rich flavor. Next, grab a large pitcher. Pour in 1 cup of freshly squeezed lemon juice. Use about 4-5 lemons for this. Add 3 cups of cold water. Mix in 1/2 cup of honey or agave syrup. Stir until everything is well combined. This mixture will be your refreshing lemonade base. Now, it’s time to combine. Gently pour the mango puree into the pitcher with the lemonade. Stir carefully until everything is mixed. You want the mango and lemonade to blend perfectly for a smooth taste. Take a moment to taste your mixture. If it’s too sweet, add more lemon juice. If you want it sweeter, mix in more honey or agave. Don't forget the salt! Stir in 1/4 teaspoon of sea salt to balance the flavors. Adjust until it tastes just right for you. It’s almost time to serve! Fill your glasses with ice cubes. Carefully pour the mango lemonade over the ice. Each glass should be full of that bright, fruity goodness. For a nice touch, garnish with fresh mint leaves and a lemon slice on the rim. This makes your drink look inviting and fresh. For the full recipe, check out the detailed steps above! To make your mango lemonade sweet, you can adjust the honey or agave syrup. Start with the half cup stated in the recipe. After mixing, taste it. If it’s not sweet enough, add more sweetener a little at a time. This way, you control the flavor. Remember, mangoes also add some natural sweetness. So, your lemonade may not need much more. Want to add some extra flavor? Fresh herbs like mint or basil work great. Just chop them up finely and mix them into the lemonade. You can also try adding a pinch of ginger or a dash of cinnamon. These spices bring a new twist to your drink. They can brighten the mango's flavor and make it even more refreshing. Mango lemonade pairs well with light snacks. Think about serving it with fresh fruit or a light salad. It also goes perfectly with grilled chicken or fish. For a fun twist, try it with spicy tacos. The sweet and tangy lemonade cools down the heat. Serve it over ice for a refreshing treat. Enjoy the colorful look with mint and lemon slices on top, making your table even more inviting. {{image_4}} You can make mango lemonade even better by adding other fruits. Try mixing in fresh berries like strawberries or blueberries. Pineapple also works great. These fruits add extra color and fun flavors. To do this, simply blend the fruits with the mango before mixing with the lemonade. Each fruit brings its own unique taste, making your drink more exciting. Want to spice things up? You can turn mango lemonade into a fun adult drink. Add rum or vodka for a spiked version. Use about 1 to 2 ounces of your favorite spirit per glass. This addition gives the drink a kick, perfect for parties or summer gatherings. Just remember to drink responsibly! Get creative by using flavored teas or herbal infusions in your mango lemonade. You can brew a light green tea or a refreshing mint tea. Once it cools, mix it into your lemonade base. This adds a whole new layer of flavor. You can even try herbal infusions like chamomile for a soothing twist. Explore these options to find your favorite mix. The full recipe will guide you through making this delightful drink. To keep your mango lemonade fresh, store it in an airtight container. A glass jar or a pitcher works well. Make sure to seal it tightly to prevent any odors from the fridge from mixing in. Always place it in the coldest part of the fridge, usually towards the back. This helps keep it cool and refreshing. Your mango lemonade will stay fresh for about 3 to 5 days. After that, the flavors may start to fade. If it starts to taste less vibrant, you might want to add a little more lemon juice or honey to revive it. Always check for any changes in smell or color before drinking. If you want to save some for later, freezing is a great option. Pour the mango lemonade into ice cube trays or freezer-safe bags. Leave a little space at the top, as liquids expand when frozen. When you want to enjoy it again, just thaw it in the fridge overnight. You can also blend the frozen cubes into smoothies for an instant fruity treat. For the full recipe, check out the [Full Recipe]. Mango lemonade is packed with vitamins. Mangoes are rich in vitamin C, which helps boost your immune system. They also contain vitamin A, good for your eyes and skin. The lemon juice adds more vitamin C and antioxidants. Together, they help you stay hydrated and healthy. Drinking mango lemonade can also support digestion due to its natural enzymes. Yes, you can use frozen mangoes! They make a great substitute. When you use frozen mango, it still blends well into a smooth puree. You do not need to thaw them first. Just add them to the blender with some water and blend until smooth. This makes it easy for you to enjoy mango lemonade anytime, even when fresh mangoes aren't available. To make your mango lemonade less tart, add more sweetness. You can increase the honey or agave syrup. Start with a little, then taste and add more if needed. If it’s still too sour, you can add more mango puree. A pinch of salt can also help balance the flavors. This way, you will enjoy a sweeter, more balanced drink. This mango lemonade recipe is sure to refresh you. We covered the ingredients, step-by-step instructions, and variations to try. Don't forget to adjust sweetness and explore fun combos. You can enjoy this drink fresh or store it for later. Whether you sip it by itself or with snacks, it's a bright treat. I hope you’re excited to make this delicious drink and share it with others!](https://fastmealmate.com/wp-content/uploads/2025/07/c517a603-1516-4e83-8a0a-b9bae852f1a0-768x768.webp)
![- 2 large cucumbers, peeled and thinly sliced - 1 medium red onion, thinly sliced - 1/4 cup apple cider vinegar - 2 tablespoons honey - 1 tablespoon olive oil - 1 teaspoon salt - 1/2 teaspoon freshly ground black pepper - 1/4 teaspoon red pepper flakes (optional, for a hint of heat) - Fresh dill or chopped parsley for garnish Cucumbers are refreshing and hydrating. They contain vitamins A and K. Red onions add a sweet and mild flavor. They also have antioxidants that may help reduce inflammation. Apple cider vinegar provides a tangy taste. It may help with digestion. Honey adds sweetness and balances flavors. Olive oil not only adds richness but is also heart-healthy. Salt enhances all the flavors, while black pepper adds a slight kick. Fresh herbs like dill or parsley brighten up the dish. If you can’t find red onions, try using white or yellow onions. Both will work well. You can swap apple cider vinegar with white wine vinegar for a different taste. If you prefer, maple syrup can replace honey for a vegan option. For a lighter touch, use lemon juice instead of vinegar. If you want a different herb, mint or basil can add a unique flavor twist. For those who dislike spice, leave out the red pepper flakes altogether. You can find the full recipe above for a detailed guide on making this crisp salad! To make a fresh cucumber and onion salad, start with two large cucumbers. Peel them and slice them thinly. Use a sharp knife or a mandolin slicer for even slices. Next, take one medium red onion and slice it thinly as well. Add both slices to a large mixing bowl. In a small bowl, whisk together 1/4 cup of apple cider vinegar and 2 tablespoons of honey. Add 1 tablespoon of olive oil, 1 teaspoon of salt, 1/2 teaspoon of freshly ground black pepper, and 1/4 teaspoon of red pepper flakes if you like some heat. Mix until the honey is dissolved. Drizzle this dressing over the cucumbers and onions. Toss everything gently with two big spoons or salad tongs. Cover the bowl and place it in the fridge for at least 30 minutes. This helps the flavors meld together. When you are ready to serve, toss the salad again. Taste it, and adjust the seasoning if needed. Finally, add fresh dill or chopped parsley on top for garnish. To slice cucumbers and onions well, aim for thin and even pieces. This helps them blend in the salad. Use a mandolin slicer if you have one; it gives uniform slices. If you use a knife, keep your fingers tucked in. This helps prevent cuts. Chill your knife in the fridge before slicing. This can keep your vegetables crisper. Mixing the salad well is key to great flavor. Use two large spoons or salad tongs to toss the ingredients. Be gentle to avoid crushing the vegetables. Make sure every slice gets coated in dressing. Let the salad sit in the fridge for at least 30 minutes. This allows the flavors to soak in. Before serving, always taste and adjust the seasoning. This ensures the salad is just right for you. For a fun twist, consider adding other fresh herbs like basil or cilantro! To boost the taste of your Cucumber and Onion Salad, think about adding fresh herbs. Chopped dill or parsley brings a bright flavor. You can also add a squeeze of lemon juice for zest. If you like heat, try adding a pinch of cayenne pepper. This will give your salad a nice kick. Always taste as you go. Adjust the flavors to fit your own liking. For the best dressing, whisk the ingredients well. Mix the vinegar, honey, and olive oil until smooth. The honey needs to dissolve fully. If the dressing is too thick, add a little water or more vinegar. This will help it coat the veggies better. You want a nice balance between tangy and sweet. One common mistake is not letting the salad chill. Allowing it to sit in the fridge helps the flavors blend. Another mistake is cutting the cucumbers too thick. Thin slices absorb the dressing well. Lastly, don’t forget to taste your salad before serving. Adjust the salt and pepper to make it just right. Remember, the key is to keep it fresh and crisp. For a full recipe, check out the Crisp Cucumber & Sweet Onion Delight. {{image_4}} You can make this salad even better by adding other veggies. Try bell peppers for crunch. You can also add tomatoes for a sweet touch. Radishes bring a nice bite and color. Grated carrots can add a fun twist. Mix and match to find your favorite blend! While I love the apple cider vinegar dressing, you can switch it up. Try a creamy dressing like ranch or yogurt. Lemon juice can add a fresh zing. You can also use balsamic vinegar for a sweeter flavor. Experiment with herbs like basil or cilantro to change the taste. Seasonal ingredients can make your salad shine. In summer, add fresh herbs like mint or basil. In fall, sliced apples can give a sweet crunch. Winter might call for roasted veggies like squash. Use what’s fresh at the market to keep it exciting! For the complete recipe, check out the [Full Recipe]. To keep your cucumber and onion salad fresh, store it in an airtight container. This helps keep the crispness intact. Make sure to place the salad in the fridge. The cold temperature slows down spoilage. If you have a lot of salad left, divide it into smaller containers. When stored properly, this salad lasts about 3 to 5 days in the fridge. To maintain freshness, avoid adding dressing until you are ready to eat. The vinegar can cause the cucumbers to become soggy over time. If you notice any signs of wilting or change in color, it’s best to discard the salad. I do not recommend freezing cucumber and onion salad. The freezing process makes cucumbers watery and soft, ruining their crunch. If you want to use cucumbers later, consider pickling them instead. Pickled cucumbers can last for months and taste great in many dishes. For fresh enjoyment, stick to the fridge for this salad. You can find the Full Recipe to enjoy this dish fresh. For this salad, I recommend using English cucumbers. They are long, thin, and have fewer seeds. Their skin is also tender, which means no peeling is needed. If English cucumbers are not available, you can use Persian cucumbers. They are small and sweet, making them a great choice too. Yes, you can make this salad ahead of time. In fact, chilling it for a few hours helps the flavors blend. I suggest preparing it up to a day in advance. Just remember to toss it again before serving to mix the dressing well. To add some heat, you can increase the red pepper flakes in the dressing. You can also add sliced jalapeños or a dash of hot sauce for an extra kick. Start with a small amount and taste as you go to find the right spice level for you. This salad pairs well with grilled meats like chicken or fish. It also makes a great side for sandwiches and wraps. For a light meal, serve it alongside quinoa or rice. The fresh flavors complement many dishes beautifully. If you want to explore more, check out the Full Recipe for ideas on how to enhance your meal. Cucumber and Onion Salad is fresh and easy to make. You learned the best ingredients, helpful tips for slicing and mixing, and ways to enhance flavor. I shared options for variations, storage, and common mistakes to avoid. In the end, this salad is great any time of year. Enjoying it can brighten any meal. Keep experimenting and find what flavors you love best!](https://fastmealmate.com/wp-content/uploads/2025/06/e5e61b33-6e6d-48c4-8abd-5090a0f7425b-768x768.webp)

