Pumpkin Spice Latte Tiramisu Cups Delightful Dessert

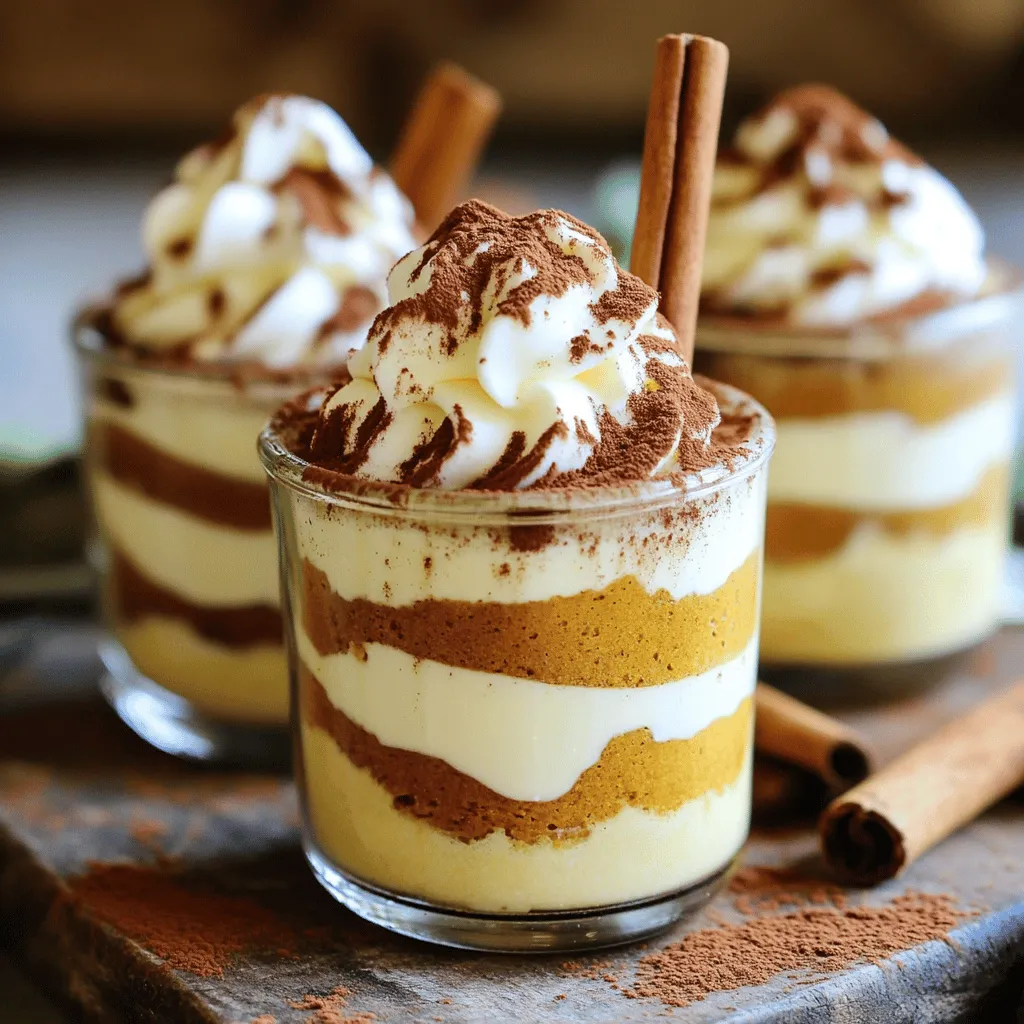
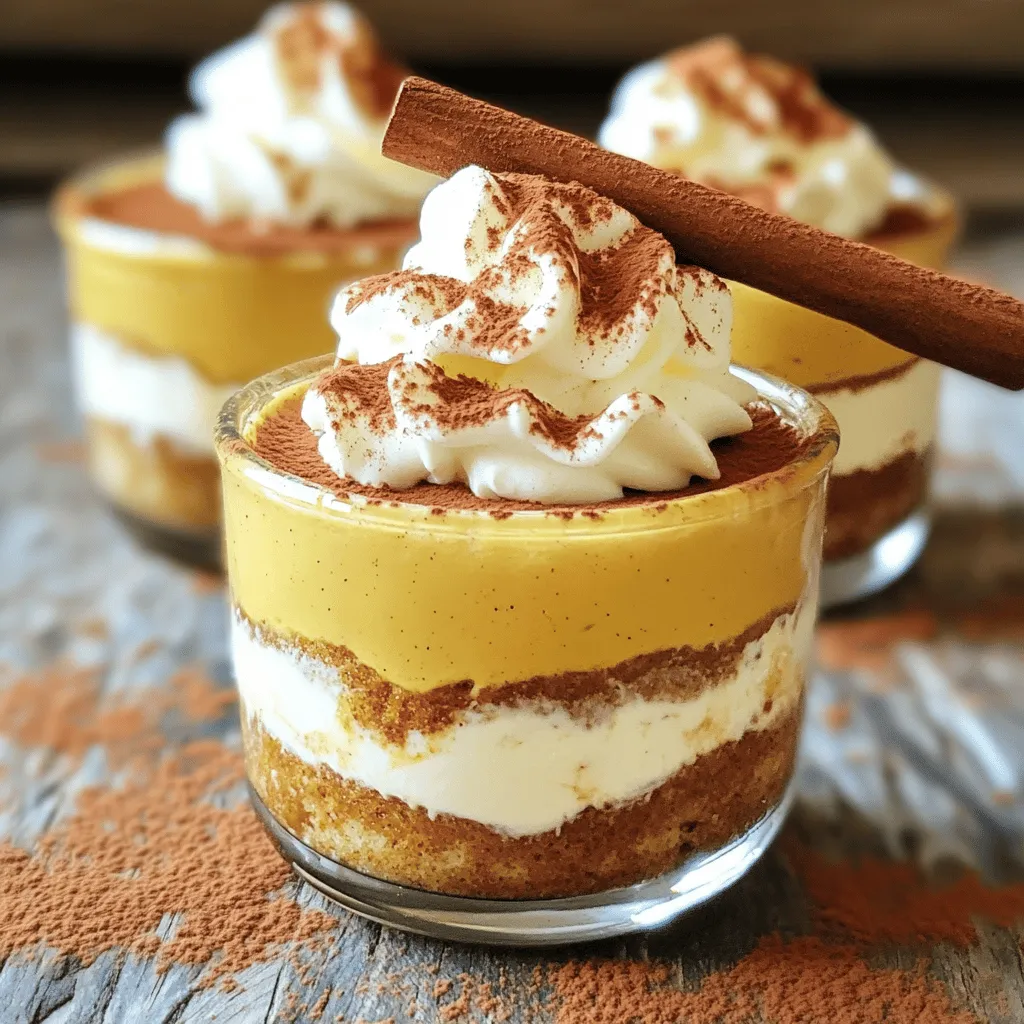
Are you ready to indulge in a dessert that blends the rich flavors of pumpkin spice and coffee? My Pumpkin Spice Latte Tiramisu Cups will delight your taste buds and impress your guests! This simple, yet stunning treat combines creamy layers of mascarpone, rich coffee, and spirited pumpkin spice, making it perfect for fall gatherings. Let’s dive into the ingredients and steps you need to create this irresistible dessert!
Ingredients
Main Ingredients for Pumpkin Spice Latte Tiramisu Cups
– 1 cup strong brewed coffee (cooled)
– 1/2 cup canned pumpkin puree (not pumpkin pie filling)
– 1/2 cup mascarpone cheese
– 1 cup heavy whipping cream
– 1/3 cup powdered sugar (divided)
– 1 teaspoon pure vanilla extract
– 1 teaspoon pumpkin spice mix
– 12 ladyfinger cookies
– Unsweetened cocoa powder, for dusting
– Whipped cream and cinnamon sticks, for garnish
The main ingredients create a rich and creamy dessert. Strong brewed coffee is key. Use canned pumpkin puree, not pie filling. Mascarpone cheese gives a smooth texture. Heavy whipping cream adds lightness and richness.
The powdered sugar sweetens without overpowering the flavors. Pure vanilla extract enhances the taste. Pumpkin spice mix brings warmth and fall vibes. Ladyfinger cookies soak up coffee and add structure. Don’t forget the cocoa powder for that classic tiramisu finish! The whipped cream and cinnamon sticks add festive flair.
Ingredient Substitutions
– For mascarpone cheese, you can use cream cheese mixed with a bit of sour cream.
– If you need non-dairy options, try coconut cream or cashew cream.
– For sugar substitutes, consider using honey, agave, or a sugar-free option like stevia.
These swaps keep the taste delightful while meeting dietary needs. Each ingredient plays a role in the final dish, so choose wisely. You can still enjoy the flavors you love while making these adjustments.
Step-by-Step Instructions
Preparation Overview
Preparing the coffee mixture
Start by brewing strong coffee. Let it cool completely. Pour the coffee into a shallow dish. Add one tablespoon of pumpkin spice mix. Stir well until it blends nicely.
Making the pumpkin mixture
In a large bowl, mix the canned pumpkin puree, mascarpone cheese, and one-third cup of powdered sugar. Add the pure vanilla extract. Beat this mixture using an electric mixer on medium speed. Aim for a smooth and creamy texture, with no lumps.
Whipping the cream
In a separate bowl, whip the heavy cream on medium speed. Keep whipping until soft peaks form. Slowly add the remaining two tablespoons of powdered sugar. Increase the speed to high and whip until you see stiff peaks. Be careful not to overbeat.
Layering and Assembling
Soaking ladyfingers
Quickly dip each ladyfinger into the coffee mixture. Make sure they soak well but do not fall apart. Place the soaked ladyfingers at the bottom of each serving cup.
Filling the serving cups
Spoon a generous layer of the pumpkin mascarpone mixture over the ladyfingers. Repeat the process by adding another layer of soaked ladyfingers, followed by more pumpkin cream. Finish with the pumpkin cream on top.
Ensuring the perfect layer technique
When layering, be sure each layer is even. This will help create a beautiful dessert. Make sure the top layer is smooth and even for a nice presentation.
Chilling for Best Results
Recommended chilling time
Cover each cup with plastic wrap or a lid. Refrigerate for at least four hours. This allows the flavors to mix well.
Importance of overnight refrigeration
For the best taste and texture, chill the cups overnight. This makes the layers set properly and enhances the flavors. Trust me, it will be worth the wait!
Tips & Tricks
Achieving the Perfect Texture
To whip cream to stiff peaks, start with cold heavy cream. Pour it into a clean bowl. Use an electric mixer on medium speed. As soft peaks form, add powdered sugar. This helps with sweetness and stability. Increase the speed to high. Stop when you see stiff peaks. Be careful not to overbeat. Overbeating makes the cream grainy.
Folding is a key step. Use a spatula to gently combine the whipped cream with the pumpkin mixture. Start by adding a small amount of whipped cream to the pumpkin mix. This lightens the mixture. Then, fold in the rest. Use a gentle motion to keep air in the cream. This keeps your dessert fluffy and light.
Serving Suggestions
For an appealing look, use clear cups. This shows off the layers. Arrange the cups on a nice platter. Add a sprinkle of pumpkin spice on top. It enhances the flavor and looks festive. Garnish each cup with a dollop of whipped cream. A cinnamon stick adds a charming touch.
Pair these cups with a warm drink. A spiced coffee or hot chocolate works great. You can also serve them with cookies or biscotti on the side. These add a nice crunch and complement the soft tiramisu.
Troubleshooting Common Issues
If your cream separates, don’t worry. Start by gently re-whipping it. Use a low speed to combine it back. If it stays separated, you may need to start over with fresh cream.
For overly soggy ladyfingers, don’t let them soak too long. Dip them quickly in the coffee mixture. If you find them too soggy after the first try, you can layer them again with a thicker pumpkin mixture. This helps balance the moisture.
Remember, practice makes perfect. Enjoy the process of making these delightful cups!

Variations
Flavor Variations
You can change the taste of your Pumpkin Spice Latte Tiramisu Cups by adding layers of chocolate. Just melt some chocolate and mix it into the pumpkin cream. This adds depth and richness to each bite. You can also use different spices or flavors. Try using chai spice mix for a warm twist or even some espresso powder for a bolder coffee taste. These small changes can really enhance your dessert.
Dietary Adaptations
To make gluten-free versions, use gluten-free ladyfinger cookies. They taste just as good and work well in this recipe. If you want to make vegan alternatives, swap the mascarpone cheese for coconut cream. You can also replace the heavy whipping cream with a plant-based whipped topping. This way, everyone can enjoy this tasty treat.
Seasonal Twist Ideas
You can also incorporate holiday flavors into your Pumpkin Spice Latte Tiramisu Cups. Add crushed peppermint candies for a festive touch around Christmas. For Thanksgiving, mix in some pecans or walnuts for extra crunch. Adjusting for different occasions can make this dessert even more special. Think about adding a splash of eggnog for a cozy winter vibe or some citrus zest for a refreshing spring taste.
Storage Info
How to Store Leftovers
To keep your Pumpkin Spice Latte Tiramisu Cups fresh, use airtight containers. Glass jars or plastic containers work well. Make sure they are sealed tightly. This prevents air from drying them out. Store the cups in the fridge. They stay tasty for days. Avoid stacking them to keep the layers pretty.
Freezing Instructions
You can freeze tiramisu cups, but they will change a bit. Wrap each cup in plastic wrap and then foil. This helps keep them fresh. To thaw, place them in the fridge overnight. Avoid thawing at room temperature. This keeps the texture nice and creamy.
Shelf Life
In the fridge, these dessert cups last about four days. After that, the flavors may fade. Watch for signs of spoilage, like an off smell or watery layers. If the cream looks strange, it’s best to toss it. Always trust your senses when it comes to food safety.
FAQs
How can I make Pumpkin Spice Latte Tiramisu Cups ahead of time?
You can make these cups a day in advance. Just assemble them and chill. This lets the flavors blend well. The longer they sit, the better they taste. Make sure to cover them with plastic wrap. This keeps them fresh and prevents drying out.
Can I use different types of coffee?
Yes, you can. Any strong brewed coffee works well. Espresso adds a rich flavor. If you prefer, use flavored coffee for a twist. Just remember to let it cool before soaking the ladyfingers.
What can I use instead of ladyfingers?
If you don’t have ladyfingers, use sponge cake or biscotti. They can soak up the coffee well. You can also try using graham crackers. Just cut them to fit your cups.
Is it possible to make a larger batch?
Absolutely! Just double or triple the ingredients. Use bigger cups or more cups to serve. Keep the layers even for a nice look. Adjust the chilling time if you make a lot.
Can I use pumpkin pie filling instead of pure pumpkin puree?
I do not recommend using pumpkin pie filling. It has added spices and sugar. This can change the flavor of your dessert. Stick to pure pumpkin puree for the best taste in your tiramisu cups.This recipe blends classic tiramisu with pumpkin spice. The flavors work so well together!
1. Prepare the Coffee Mixture: Start by pouring the cooled brewed coffee into a shallow dish. Add 1 tablespoon of pumpkin spice mix to the coffee. Stir well until both mix completely. This step gives the ladyfingers a rich flavor.
2. Make the Pumpkin Mixture: In a large mixing bowl, combine the pumpkin puree, mascarpone cheese, 1/3 cup of powdered sugar, and vanilla extract. Use an electric mixer to beat the mix on medium speed. Keep going until the mixture is smooth and creamy. You want no lumps here!
3. Whip the Cream: In a separate bowl, whip the heavy cream on medium speed. Watch for soft peaks to form. Gradually add the remaining powdered sugar, about 2 tablespoons. Increase the speed to high and whip until stiff peaks form. Be careful not to overbeat; you want it just right!
4. Combine Mixtures: Now, gently fold the whipped cream into the pumpkin mixture using a spatula. Do this gradually, so the fluffy texture stays intact. Continue until it’s fully mixed and light.
5. Assemble the Cups: Quickly dip each ladyfinger into the coffee mixture. Turn to coat, but don’t let them break apart. Layer the soaked ladyfingers at the bottom of each serving cup. This forms a solid base.
6. Layer the Pumpkin Cream: Spoon a generous layer of the pumpkin mascarpone mixture over the ladyfingers in each cup. Repeat the process, adding another layer of dipped ladyfingers, then more pumpkin cream. Finish with a layer of pumpkin cream on top.
7. Chill: Cover each tiramisu cup with plastic wrap or a lid. Refrigerate for at least 4 hours, or overnight if you can wait. This helps the flavors meld and the layers set.
8. Serve: Just before serving, dust the top with unsweetened cocoa powder for a rich touch. Add a dollop of whipped cream and a cinnamon stick for a festive look.
This recipe gives you a delightful dessert that is perfect for sharing or enjoying alone. Each cup brings warmth and joy with every bite!
This blog post covered how to make Pumpkin Spice Latte Tiramisu Cups. We explored the main ingredients, substitutions, and step-by-step instructions. You learned tips for achieving the right texture, creative variations, and proper storage.
In my view, this dessert is worth trying! Its rich flavors and easy steps make it great for any occasion. With a little practice, you can delight your family and friends with this treat. Enjoy your cooking adventure!


![- 1 medium ripe dragonfruit (pitaya) - 1 ripe banana - 1 cup coconut milk - 1/2 cup Greek yogurt - 1/2 cup passion fruit pulp - 1 tablespoon honey or maple syrup - 1/2 cup ice cubes - Fresh mint leaves for garnish The dragonfruit is the star of our smoothie. Its bright pink skin and white flesh make your drink pop. This fruit is sweet and has tiny seeds that add a nice crunch. Bananas bring a creamy texture to the mix. They also add natural sweetness, which balances the tartness of the passion fruit. Coconut milk gives a rich, tropical flavor. It makes the smoothie creamy and smooth. You can switch it with almond milk if you want a nutty touch. Greek yogurt boosts the protein content. It also adds a pleasant tang, making the smoothie thicker. Passion fruit pulp offers a burst of flavor. It has a sweet and tangy taste that brightens the smoothie. You can use fresh or canned pulp, depending on what's available. Honey or maple syrup acts as a sweetener. You can adjust this based on your taste. Ice cubes keep the drink cold and refreshing. They make it perfect for hot days. Finally, fresh mint leaves add a splash of color and a hint of freshness. - Dairy-free options: Use a dairy-free yogurt instead of Greek yogurt. Almond or oat milk can replace coconut milk. - Sweetener variations: Try agave syrup or stevia if you want different sweeteners. - Flavor enhancers: Add vanilla extract or a squeeze of lime for a unique twist. These substitutions help you create a smoothie that fits your diet and taste. You can easily customize this drink to make it your own! For the full recipe, be sure to check the [Full Recipe]. First, gather your ingredients. You need dragonfruit, banana, coconut milk, Greek yogurt, and honey. Cut the dragonfruit in half and scoop out the flesh. In your high-speed blender, add the dragonfruit, banana, coconut milk, Greek yogurt, and honey. Blend on medium-high speed for about 30 seconds. The goal is a smooth and creamy texture. A high-speed blend helps mix everything well. This step is key for a tasty base. Now, let’s make that beautiful swirl. Pour half of the dragonfruit mixture into a tall glass. Make sure you leave some space at the top for the passion fruit pulp. Next, return the rest of the mixture to the blender. Add the passion fruit pulp and blend briefly. You want to mix just enough to create a marbled look. Pour the passion fruit blend over the first layer in the glass. This lets the colors swirl together, making it look stunning. It’s time to make your smoothie look great! Use clear glasses to show off the layers. Top your drink with ice cubes to keep it cool. For a touch of color, add a sprig of fresh mint leaves. This fresh mint not only looks nice but adds a nice aroma too. Enjoy your Dragonfruit Passion Swirl Smoothie! For the full recipe, check the instructions above. To make your smoothie creamy, use a high-speed blender. Start on medium speed, then switch to high. Blend until smooth, which usually takes about 30 seconds. For chilled drinks, ice is key. Use fresh ice cubes, but don’t overdo it. Too much ice can make your smoothie watery. Aim for a balance between ice and liquid. Sweetness is easy to adjust. If you want it sweeter, add more honey or maple syrup. You can also try different fruits like mango or berries. These fruits add layers of flavor and can change the taste profile. Experiment with what you like best! Preparing dragonfruit is simple. Cut it in half, then scoop out the flesh with a spoon. For passion fruit, cut it in half and scoop out the pulp. Make sure to use ripe fruits for the best flavor. If you have leftovers, store them in airtight containers in the fridge. This keeps your ingredients fresh for later use. {{image_4}} Trying different flavors keeps our smoothies exciting. Here are some fun ideas to mix things up. You can create a tropical fruit mix by adding mango or pineapple. These fruits bring sweetness and a sunny flavor. You can also add berries, like strawberries or blueberries. They boost the color and add a tart taste. If you want to add protein, mix in some protein powder. This helps make your smoothie a meal. For those watching calories, use low-calorie sweeteners. This keeps the taste without the extra calories. Change your smoothie with the seasons. In summer, try adding fresh peaches or watermelon for a refreshing twist. In fall, consider adding spices like cinnamon or pumpkin puree. These ingredients bring warm flavors to your drink. Experiment with these variations for a fun smoothie experience. For the full recipe, check out the previous section! You can store your Dragonfruit Passion Swirl Smoothie in the fridge for up to 24 hours. Just keep it in a sealed container to maintain freshness. If you want to prep for the week, pour the smoothie into ice cube trays or small containers. This way, you can easily blend a quick smoothie whenever you want. Frozen portions can last for about three months. To keep fresh dragonfruit and passion fruit at their best, store them at room temperature. Once you cut them, wrap them tightly and put them in the fridge. This helps keep them fresh for up to three days. For coconut milk and yogurt, always check the expiration date. Store them in the fridge and use them within a week after opening for the best taste. Look out for any strange smells or colors in your ingredients. If your dragonfruit turns brown or feels mushy, it’s time to toss it. For passion fruit, if the skin is too wrinkled or hard, it’s past its prime. Always check for mold on yogurt or coconut milk. When in doubt, it’s best to avoid using those ingredients. Freshness is key to enjoying your smoothie to the fullest. Dragonfruit is packed with nutrients. It has a high vitamin C content. This fruit supports your immune system. It contains fiber, which aids digestion. Dragonfruit is low in calories, making it a great snack. It also has antioxidants that help fight free radicals. These properties may lower your risk of chronic diseases. Eating dragonfruit can improve heart health by lowering bad cholesterol. Overall, dragonfruit is a tasty and healthy choice. Yes, you can use frozen fruits! Frozen fruits make the smoothie cold and thick. They are also convenient since they last longer. If you use frozen dragonfruit, thaw it slightly for easier blending. For other fruits, like bananas, you can slice and freeze them in advance. Just remember to adjust the amount of ice. If you want a creamier smoothie, reduce the ice when using frozen fruits. Making this smoothie vegan is easy! Simply swap Greek yogurt with a dairy-free yogurt. Almond or coconut yogurt works well. Replace honey with maple syrup for a vegan sweetener. You can also add a scoop of plant-based protein powder for extra nutrition. These simple swaps keep the smoothie delicious and vegan-friendly. Absolutely! This smoothie is bright and colorful, which kids love. The sweet taste of dragonfruit and banana makes it appealing. It has a creamy texture that is easy to drink. Packed with vitamins, it is a healthy choice for kids. Serve it in fun cups or with a colorful straw to make it exciting. This smoothie is a great way to sneak in some fruit for kids! This blog post laid out all you need for a tasty Dragonfruit Passion Swirl Smoothie. We covered the main ingredients, tips for blending, and fun variations. Remember, you can tweak the recipe to match your taste and needs. Smoothies are great for quick meals or snacks. Enjoy experimenting with flavors and ingredients! Drink it fresh for the best taste and health benefits. Your smoothie journey begins now!](https://fastmealmate.com/wp-content/uploads/2025/06/150b527a-71cf-4bb1-8c82-2935aeae296c-768x768.webp)

![To make this dish, gather these key ingredients: - 2 boneless, skinless chicken thighs - 2 tablespoons gochujang (Korean chili paste) - 1 tablespoon soy sauce - 1 tablespoon honey - 1 teaspoon sesame oil - 1 garlic clove, finely minced - 1 teaspoon fresh ginger, grated - 2 cups cooked rice (white or brown) - 1 cup Napa cabbage, shredded - 1 medium carrot, julienned - 2 green onions, finely chopped - 1 tablespoon sesame seeds - Salt and freshly ground black pepper to taste These ingredients create a bold and tasty flavor. The chicken absorbs the gochujang and other sauces, making each bite delicious. The fresh veggies add crunch and color. You can add more fun flavors with these optional items: - Kimchi for a tangy kick - Sliced cucumbers for freshness - Avocado for creaminess - Extra sesame seeds for crunch - More green onions for a pop of color Feel free to mix and match these extras. They add depth and make your bowl even more exciting. To prepare this dish, you will need: - A medium bowl for marinating - A grill pan or heavy skillet for cooking - A cutting board and knife for chopping - Measuring spoons for accuracy - A serving bowl to assemble your dish Having the right tools makes cooking easier. You’ll enjoy making this meal even more when you have everything at hand. Check out the Full Recipe for detailed steps! To start, you need a good marinade for the chicken. In a medium bowl, mix the gochujang, soy sauce, honey, sesame oil, minced garlic, and grated ginger. Whisk this mixture until it feels smooth. Now, add the chicken thighs. Make sure to coat them well with the marinade. Cover the bowl with plastic wrap. Let it sit in the fridge for at least 30 minutes. For richer flavor, you can marinate for up to 4 hours. Next, it’s time to cook the chicken. Preheat a grill pan or a heavy skillet on medium-high heat. When it gets hot, place the marinated chicken in the pan. Avoid crowding the pan. Cook each side for about 6 to 7 minutes. You want the chicken to be golden-brown and fully cooked. It should reach an internal temperature of 165°F (75°C). Once cooked, take the chicken out and let it rest for a few minutes. After resting, slice it into bite-sized pieces. While the chicken rests, let’s focus on the veggies. In the same pan, add a splash of oil if needed. Sauté the shredded Napa cabbage and julienned carrot for about 3 to 4 minutes. Stir them occasionally. You want them to be tender but still a bit crunchy. Lightly season with salt and black pepper to taste. Now it's time to put everything together. In a large serving bowl, start with a base of cooked rice. Layer the sautéed cabbage and carrots on top. Then, arrange the sliced grilled chicken over the vegetables. For the final touch, sprinkle chopped green onions and sesame seeds over the top. If you like it spicy, drizzle some extra gochujang on top. Enjoy your Easy Korean BBQ Chicken Rice Bowl! For the full recipe, check out the details above. Marinating chicken adds flavor and keeps it moist. Always use a mix of gochujang, soy sauce, honey, sesame oil, garlic, and ginger. Make sure to coat the chicken well. Cover the bowl and chill it in the fridge. Aim for at least 30 minutes. For a deeper taste, marinate for up to 4 hours. This extra time allows the flavors to soak in nicely. The right rice texture makes your bowl special. For this recipe, use either white or brown rice. Rinse the rice under cold water before cooking. This step removes excess starch and prevents stickiness. Cook the rice according to package instructions. Fluff it with a fork after cooking. This keeps the grains separate and light, perfect for a rice bowl. A beautiful bowl makes any meal more inviting. Use deep, colorful dishes for a striking look. Start with a base of rice, then layer on the veggies and chicken. Arrange the chicken slices neatly for a great visual. Finish with green onions and sesame seeds on top. You could also add small bowls of sauces for a fun touch. Use chopsticks to enhance the Korean BBQ feel. {{image_4}} You can swap chicken for other proteins. Try using pork, beef, or shrimp. Each option adds a new taste. If you choose beef, flank steak works well. For shrimp, use large, peeled ones. Just adjust cooking times as needed. You can easily make this dish vegan or vegetarian. Instead of chicken, use tofu or tempeh. Marinate them just like the chicken. For a twist, add marinated mushrooms for extra flavor. You can also use seitan for a meaty texture. Feel free to get creative with your veggies. You can use bell peppers, broccoli, or zucchini. Just chop them up and sauté them along with the cabbage and carrots. This way, your rice bowl stays colorful and fresh. Add your favorite greens for extra nutrition. After enjoying your Easy Korean BBQ Chicken Rice Bowl, store leftovers in an airtight container. Keep the chicken and veggies separate from the rice. This method helps keep everything fresh and tasty. Store it in the fridge for up to three days. If you want to keep it longer, consider freezing the chicken and veggies together. The rice can be stored separately. To reheat, use a microwave or skillet. If using a microwave, heat in short bursts to avoid drying out the chicken. You can add a splash of water to help keep moisture. If using a skillet, add a little oil and heat on low until warmed. This method helps maintain the chicken's juicy texture and the veggies' crunch. For meal prep, freeze the marinated chicken before cooking. This way, the flavors blend better. Place the chicken in a freezer bag and remove as much air as possible. You can freeze the sautéed veggies too. When ready to cook, thaw everything overnight in the fridge. This ensures your meal is quick and easy, with great taste. For the Full Recipe, be sure to check the instructions again before cooking! Yes, you can use chicken breast. Chicken breast cooks faster and is leaner. Just remember that it can dry out more easily than thighs. To keep it juicy, don’t overcook it. Adjust cooking time to about 5-6 minutes per side. If you need a substitute for gochujang, try miso paste mixed with a bit of chili powder. This mix gives a similar depth of flavor. You can also use sriracha for heat, but it won’t have the same sweetness. To add more spice, mix in extra gochujang. You can also add sliced fresh chilies or a dash of red pepper flakes. Adjust the heat to your liking. Remember, it’s easier to add spice than to take it away. Yes, you can prepare the chicken and veggies ahead of time. Marinate the chicken and store it in the fridge for up to 4 hours. Cook the chicken and veggies just before serving for the best flavor. For a full recipe, check out the [Full Recipe]. This blog post covered everything you need for an Easy Korean BBQ Chicken Rice Bowl. We explored essential and optional ingredients, plus equipment needed for cooking. I shared clear steps for marinating and cooking the chicken, sautéing veggies, and tips for perfect rice. We also looked at tasty variations and smart storage options. Ultimately, this dish is flexible and fun to make. Enjoy experimenting with flavors and keep your meals exciting!](https://fastmealmate.com/wp-content/uploads/2025/07/632ec05d-af1e-4ba2-bf58-6505b43008ee-768x768.webp)

