Peach Sorbet Dairy Free Refreshing Summer Treat

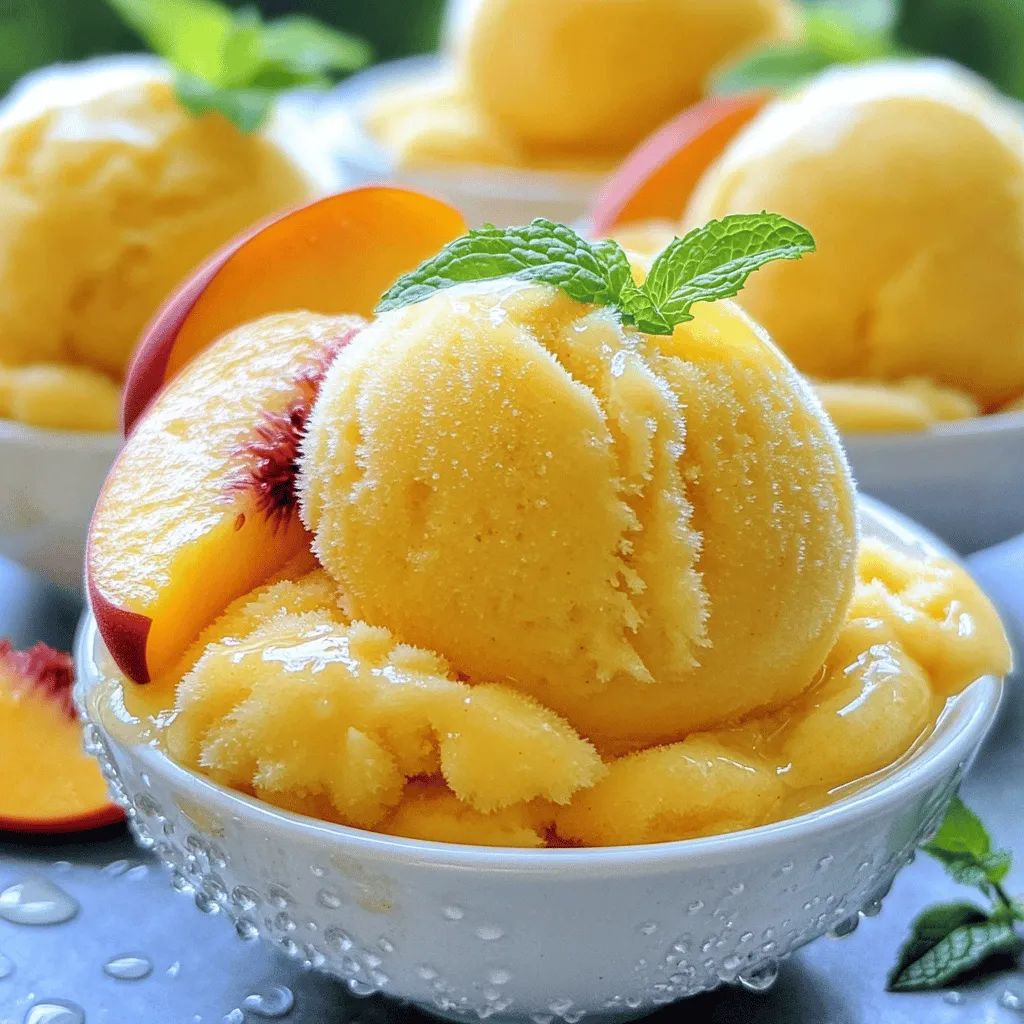
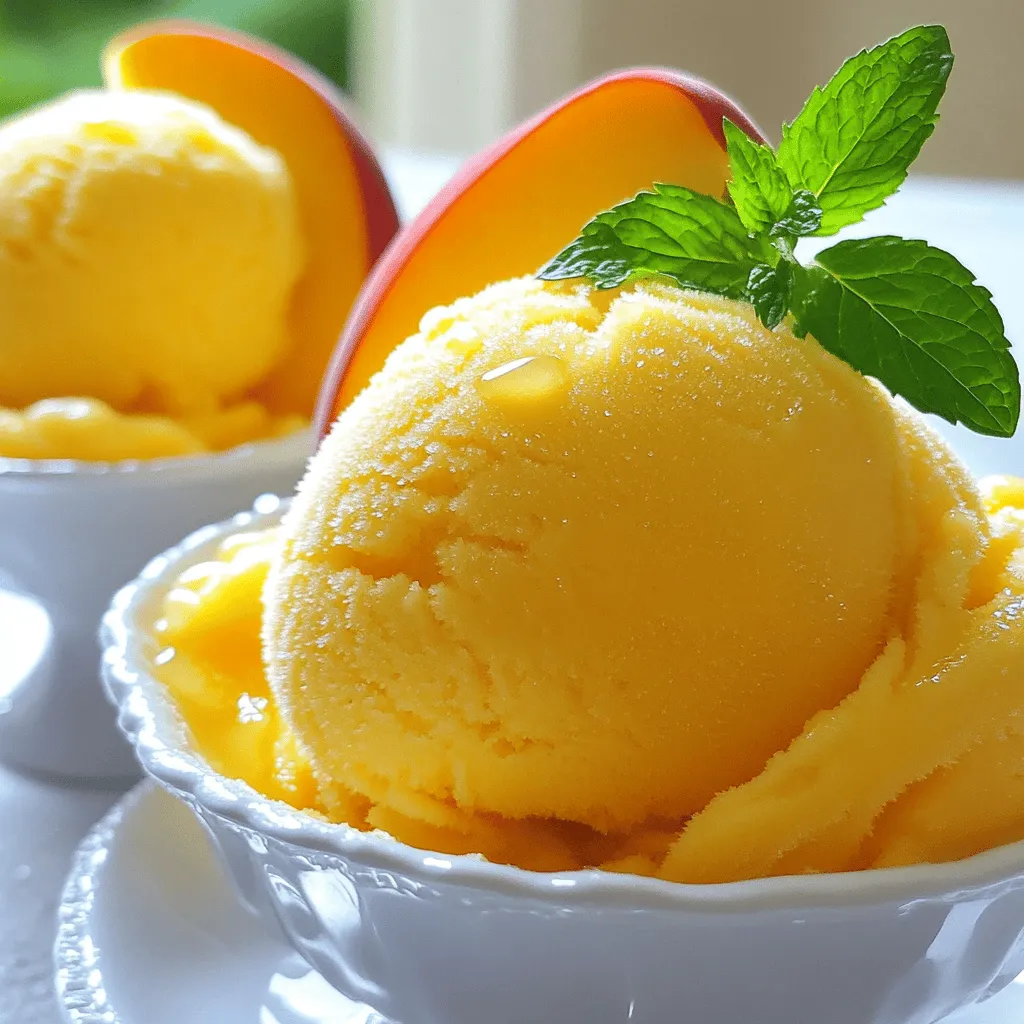
Looking for a delicious way to cool off this summer? Try my Peach Sorbet! This dairy-free treat is simple and refreshing. With just ripe peaches, a splash of lemon juice, and a touch of sweetness, you can make a creamy sorbet that everyone will love. In this post, I’ll guide you through the easy steps to create this tasty delight and share tips for perfecting your dessert. Let’s dive in!
Ingredients
Main Ingredients for Dairy-Free Peach Sorbet
– 4 ripe peaches, pitted and chopped into small chunks
– 1/2 cup coconut water (alternatively, filtered water can be used)
– 1/4 cup agave syrup (or substitute with maple syrup for a different flavor profile)
– 1 tablespoon freshly squeezed lemon juice
– A pinch of sea salt
The key to a great sorbet lies in using ripe peaches. They give the best flavor and sweetness. Choose peaches that feel soft and smell fragrant. This makes a huge difference in taste.
Coconut water adds a nice touch. It makes the sorbet light and refreshing. If you don’t have coconut water, filtered water works just as well.
Agave syrup is my go-to sweetener here. It blends well with fruit. Maple syrup can also work if you want a unique twist. Just be mindful of the flavor shift.
Fresh lemon juice brings brightness to the dish. It balances the sweetness and enhances the peach flavor.
Finally, a pinch of sea salt is crucial. Salt helps to elevate the other flavors. It makes each bite even better.This treat is perfect for hot summer days. You’ll love how easy and delicious it is!
Step-by-Step Instructions
Preparation
– Rinse and chop the peaches
– Optional: Peel the peaches for a smoother consistency
Start by rinsing the ripe peaches under cool water. Clean them well to remove any dirt or residue. After rinsing, chop the peaches into small chunks. If you want a smooth texture, you can peel the peaches. The skin adds some texture, but peeling gives a creamier feel.
Blending
– Combine all ingredients in a blender
– Blend until smooth and creamy
Next, add the chopped peaches to a blender. Include coconut water, agave syrup, fresh lemon juice, and a pinch of sea salt. The sea salt brings out the flavors. Blend everything on high speed until it is smooth and creamy. Stop and taste it. If you want it sweeter, add more agave syrup.
Freezing Process
– Pour mixture into a container
– Freeze for approximately 4 hours
Now, pour the peach mixture into a shallow container or a loaf pan. This shape helps it freeze evenly. Place the container in the freezer. Let it freeze for about four hours. After four hours, take it out and let it sit for five to ten minutes. This helps it soften for easier scooping. Using a fork, scrape the surface of the frozen sorbet to fluff it up. This creates a light texture. Now you can scoop it into bowls or cones and enjoy this refreshing treat!
Tips & Tricks
Achieving the Perfect Texture
To get a creamy sorbet, start with ripe peaches. The sweeter and juicier the peaches, the better your sorbet will taste. Use coconut water for a light texture. You can also add a bit of coconut cream for richness. If you find the mixture too thick, add more coconut water. This will help it blend smoothly.
Adjusting sweetness is easy. After blending, taste the mixture. If it needs more sweetness, add a bit of agave syrup. Remember, the sweetness can change after freezing. A less sweet mix might taste perfect after it freezes.
Serving Suggestions
Serve peach sorbet in chilled bowls for a fancy look. You can also use cones for a fun treat. Top each serving with a fresh peach slice. A sprig of mint adds a nice touch too. For extra flavor, drizzle some honey or maple syrup on top.
Troubleshooting Common Issues
If your sorbet is too icy, it may have frozen too fast. Next time, blend it longer or add a bit more liquid. You can also let it sit out for a few minutes before serving. This helps it soften.
If your sorbet is overly sweet, add a splash of lemon juice. This will help balance the flavors. A pinch of salt can also enhance the taste. Remember, it’s all about finding the right balance!

Variations
Flavor Combinations
You can make peach sorbet even better with fun flavors. Try adding other fruits like strawberries or mangoes. These fruits mix well with peaches and give a fresh taste. You can also combine peach with berries for a tart kick. Experimenting is key to finding your favorite mix!
Switching sweeteners can change the flavor too. Agave syrup is great, but maple syrup adds a unique twist. Honey can also work, but it is not vegan. Each sweetener brings its own taste to the sorbet.
Vegan Alternatives
If you want a creamier sorbet, you can use dairy-free options. Coconut milk is a fantastic choice. It gives a rich texture without any dairy. You can blend it in with the peaches to make it smooth and creamy.
Nut milks, like almond or cashew milk, are also great options. They add a subtle flavor while keeping it dairy-free. Cashews can be soaked and blended for an even richer base. These enhancements will elevate your peach sorbet to a new level!
Storage Info
How to Store Peach Sorbet
To keep your peach sorbet fresh, use airtight containers. Glass or plastic containers work well. Make sure the container is shallow. This helps the sorbet freeze evenly.
For long-term storage, cover the sorbet with a piece of plastic wrap. Press it down onto the surface. This prevents ice crystals from forming, keeping the sorbet smooth.
Re-freezing Tips
If your sorbet melts, you can refreeze it! Let it sit at room temperature for a few minutes. This softens it for easier scooping.
When re-freezing, place it back in the original container. Press plastic wrap against the top again. This helps keep it fresh and tasty.Enjoy your peach sorbet!
FAQs
Can I use frozen peaches for this recipe?
Yes, you can use frozen peaches. They work well in this recipe. Just make sure to let them thaw a bit. This helps with blending. The texture may change slightly, but the flavor stays great.
How long can I store peach sorbet in the freezer?
You can store peach sorbet for about one month. After that, it might lose flavor and texture. Keep it in an airtight container. This keeps the sorbet fresh and tasty.
What can I substitute if I don’t have coconut water?
If you don’t have coconut water, use filtered water. It will still taste good. You can also try fruit juice, like peach or pineapple juice. This adds a nice twist to the flavor.
Is this recipe nut-free?
Yes, this recipe is nut-free. It uses no nuts at all. If you want to make it creamier, you can add coconut milk. Just check for any nut allergies if you serve it to others.
How to make a sugar-free version of this sorbet?
To make it sugar-free, use a sugar substitute. Try stevia or erythritol. Adjust the amount based on your taste. You can also use ripe peaches, as they are naturally sweet. This keeps the sorbet delicious without added sugar.
This blog post covered how to make dairy-free peach sorbet. We discussed ingredients like ripe peaches and agave syrup. You learned easy steps for preparation, blending, and freezing. We also shared tips for texture, serving ideas, and troubleshooting common issues.
In closing, this refreshing treat is simple to make. With a few tweaks, you can tailor it to your taste. Enjoy a healthy, homemade dessert that everyone will love.


![To make these tasty bars, you need a few simple ingredients: - 1 cup creamy peanut butter - 1/2 cup honey or maple syrup - 1 1/2 cups rolled oats - 1/2 cup almond flour - 1/4 cup unsweetened cocoa powder - 1/2 teaspoon vanilla extract - A pinch of salt - 1/3 cup dark chocolate chips (optional) These ingredients blend well together. The peanut butter gives a rich flavor. Honey or maple syrup adds sweetness. Oats provide a hearty base, making them filling. You may want to add some extra touches for more flavor: - A sprinkle of cinnamon for warmth - Chopped nuts for crunch - Dried fruits for sweetness These options can change the taste and texture. Feel free to mix and match based on your preferences. If you have allergies, here are some easy swaps: - Use sunflower seed butter instead of peanut butter - Substitute maple syrup for honey if needed - Replace almond flour with oat flour or coconut flour These substitutions keep the recipe safe and delicious. You can still enjoy the bars while avoiding allergens. Just remember to follow the same steps, and you’ll be good to go! Start by gathering your ingredients. Place the creamy peanut butter and honey in a large bowl. Use a spatula or wooden spoon to mix them. Stir until the mix is smooth and creamy. This step is key to a tasty bar. Next, add the rolled oats, almond flour, cocoa powder, vanilla, and salt. Mix everything together well. You want to see no dry spots. This creates a thick and sticky dough that holds together nicely. Now, take an 8x8 inch baking dish and line it with parchment paper. Leave some paper hanging over the edges. This makes it easy to lift out the bars later. Transfer your peanut butter mixture into the dish. Use your hands or a spatula to press it down. Make sure it’s even and firm across the bottom. If you want to add a chocolate drizzle, melt the dark chocolate chips next. Place them in a microwave-safe bowl. Heat in 15-second bursts, stirring each time. Once melted, drizzle the chocolate over the pressed mixture. Use a spoon or piping bag for a nice look. Finally, place your baking dish in the fridge. Chill for at least 1-2 hours. This helps the bars set firmly. Once ready, lift them out by the parchment paper. Cut into squares or bars as you like. You can find the full recipe [Full Recipe]. To get the best texture, mix the peanut butter and honey well. You want it smooth and creamy. If your mixture seems too dry, add a bit more honey or a splash of water. This helps bind everything together. The rolled oats should be well coated to hold the bars nicely. When you press the mixture into the dish, use damp hands. This prevents sticking. Start at the center and push outward. Press firmly and evenly to avoid air pockets. A flat spatula can help smooth the top. Make sure the layer is compact and even for better bars. For a great look, cut the bars into squares or rectangles. Place them on a colorful plate. You can add fresh fruit like berries or banana slices on the side. For a fun touch, sprinkle some extra cocoa powder or crushed nuts on top. This makes your treat look even more inviting. {{image_4}} You can make these bars even better with fun mix-ins. Chopped nuts add crunch. Walnuts or almonds work great. Dried fruits like cranberries or raisins give a sweet touch. Mix in about 1/2 cup of these before you press the mixture into the dish. This way, each bite has a surprise! Want to change the flavor? Use coconut or almond extract! Just add a teaspoon to the mix. Coconut gives a tropical twist. Almond makes it rich and nutty. You can also add shredded coconut for extra texture. It’s easy to make each batch unique! You can swap honey for maple syrup if you want. Both sweeteners work well, but they taste different. Maple syrup has a deep flavor. Honey is sweeter and lighter. You can also use agave nectar if you prefer. Just remember, the texture may change slightly with each choice. Use the one that you love best for your no-bake peanut butter bars. For the full recipe, check the details above! To keep your no-bake peanut butter bars fresh, use an airtight container. This helps lock in moisture. Place a piece of parchment paper between layers if you stack them. This prevents sticking and makes them easy to grab. Store them in the refrigerator for the best taste and texture. You can freeze these bars for later. Cut them into squares first and wrap each one in plastic wrap. Then, place them in a freezer-safe bag. Squeeze out as much air as you can before sealing. They will last up to three months in the freezer. When you're ready to enjoy, thaw them in the fridge overnight. These bars can last up to one week in the fridge. Keep them cool and away from heat. Check for any changes in smell or texture before eating. If you notice anything off, it's best to toss them. Following these tips ensures you always have a tasty treat on hand. If you want the full recipe, you can check it out for more details! Yes, you can use crunchy peanut butter. It will add some nice texture to the bars. The flavor will be the same, but the crunch gives a fun bite. If you like a little crunch, go for it! The bars need to chill for at least 1-2 hours. This time helps them set well. If you can wait longer, they will be even firmer and easier to cut. Just make sure they are cold before slicing. They can be vegan if you use maple syrup instead of honey. Just check your peanut butter, too, to ensure it doesn’t have added ingredients. With the right swaps, you can enjoy this treat without any animal products! You can use any nut flour, like hazelnut or cashew flour. If you need a nut-free option, try oat flour or even whole wheat flour. Just remember that different flours may change the texture a bit. The bars are set when they are firm to the touch. They should hold their shape when you lift them out of the pan. If they feel soft, give them more time in the fridge. Once set, they are ready to cut into pieces. These no-bake peanut butter bars are simple and tasty. We covered ingredients, steps, and great tips. You can customize them with different flavors and mix-ins. Remember to store them well for freshness. Feel free to experiment with substitutes and variations. Enjoy making these treats for yourself or to share. They are quick to whip up, perfect for any snack. Now, it’s your turn to enjoy this easy, delicious recipe!](https://fastmealmate.com/wp-content/uploads/2025/07/4c36effc-71ba-4d9d-bf30-f4c7732f2b92-768x768.webp)
![When making Baked Zucchini Parmesan, you need fresh, simple ingredients. Here’s what you should gather: - 4 medium zucchinis, sliced into ½-inch thick rounds - 1 cup shredded mozzarella cheese - ½ cup freshly grated Parmesan cheese - 1 cup panko breadcrumbs - 2 garlic cloves, finely minced - 1 teaspoon dried oregano - 1 teaspoon dried basil - 1 teaspoon sea salt - ½ teaspoon freshly cracked black pepper - 2 tablespoons extra virgin olive oil - Fresh basil leaves for garnish (optional) These ingredients create a great mix of flavors and textures. The zucchini becomes soft, while the cheese melts beautifully. The panko breadcrumbs add the perfect crunch. Each bite gives you a taste of cheesy goodness! For the full recipe, check out the detailed instructions. Enjoy creating this dish! - Preheat the oven to 400°F (200°C). - Line a baking sheet with parchment paper. - In a bowl, combine: - 1 cup panko breadcrumbs - 2 minced garlic cloves - 1 teaspoon dried oregano - 1 teaspoon dried basil - 1 teaspoon sea salt - ½ teaspoon black pepper - Toss the ingredients well. - Drizzle 2 tablespoons olive oil over the mixture. - Mix again until all the breadcrumbs are coated. - Lay sliced zucchini on the baking sheet in a single layer. - Sprinkle the breadcrumb mixture evenly over the zucchini. - Add 1 cup shredded mozzarella cheese on top. - Finish with ½ cup grated Parmesan cheese for extra flavor. - Place the baking sheet in the oven. - Bake for 25-30 minutes until golden and bubbly. - Let cool for a few minutes. - Garnish with fresh basil leaves if desired. For the full recipe, check out the detailed steps included above. Enjoy your crispy, cheesy zucchini! To make your baked zucchini truly crunchy, adjust the breadcrumb coating. Use panko breadcrumbs for a lighter, crispier texture compared to regular breadcrumbs. If you want even more crunch, mix in some crushed cornflakes or a sprinkle of grated Parmesan into the panko. This combination gives a great bite. Baking technique plays a key role too. Make sure you lay the zucchini slices in a single layer. If they overlap, they will steam instead of bake, and you’ll lose that crunch. Turning the baking sheet halfway through baking can also help ensure even cooking. For more flavor, add spices like smoked paprika or chili powder. These spices bring a warm touch that pairs well with zucchini. Fresh herbs can brighten the dish. Use fresh basil or parsley for a burst of color and taste. If fresh herbs are hard to find, dried herbs like oregano or thyme work well too. You can serve baked zucchini parmesan in many ways. For a delightful appetizer, cut it into small squares and serve with a dipping sauce. As a side dish, pair it with grilled chicken or fish for a healthy meal. You can also serve it over pasta for a heartier option. Feel free to explore these ideas and make the dish your own. Enjoy the process! For the full recipe, check out the [Full Recipe]. {{image_4}} You can make baked zucchini parmesan even more exciting by adding other veggies. Try including bell peppers, tomatoes, or mushrooms. These vegetables add color and taste. You can also mix in some spinach for a healthy twist. Adding protein can turn this dish into a hearty meal. Consider cooked chicken, turkey, or even crumbled sausage. For a vegetarian option, use chickpeas or lentils. They add both flavor and protein. If you need a gluten-free dish, swap panko for gluten-free breadcrumbs. This keeps the crunch while catering to dietary needs. Always check the labels to ensure they are truly gluten-free. For a vegan version, replace cheese with plant-based alternatives. Nutritional yeast gives a cheesy flavor without dairy. You can also use cashew cheese for a creamy texture. Use olive oil to replace any butter in the recipe. Using seasonal herbs can elevate your baked zucchini parmesan. Fresh basil, parsley, or thyme can add unique flavors. You can mix and match herbs based on the season for fresh taste. During holidays, adapt this dish to fit the occasion. Add a layer of roasted garlic or sun-dried tomatoes for a festive flair. These simple changes can make it special for gatherings. For the full recipe, check out the [Full Recipe]. To keep your Baked Zucchini Parmesan fresh, store leftovers in an airtight container. This helps lock in flavor and moisture. You can keep it in the fridge for up to three days. If you want to enjoy it later, make sure it cools completely before sealing. Freezing is a great way to save this tasty dish. Here’s how to do it: 1. Cool Completely: Ensure the dish is fully cooled. 2. Wrap it Up: Use plastic wrap to cover it tightly. Then, place it in a freezer-safe container or bag. 3. Label and Date: Write the date on the bag or container. This helps you remember when you made it. You can freeze it for up to three months. When you’re ready to eat, you can reheat it in the oven or microwave. - Oven Method: Preheat the oven to 350°F (175°C). Place the zucchini on a baking sheet and cover it with foil. Bake for about 15-20 minutes until hot. This keeps it crispy. - Microwave Method: Heat it in a microwave-safe dish. Cover it with a damp paper towel. Heat in short bursts of 30 seconds until warm. Note, this method may make it a bit soggy. Choose the method that works best for you! Enjoy your delicious dish anytime! You can tell when the zucchini is done by checking its color and texture. The cheese should be golden and bubbly. The zucchini should be soft but not mushy. This usually takes about 25-30 minutes in the oven. Keep an eye on it to avoid overcooking. Yes, you can use different cheeses! Cheddar, gouda, or even a spicy pepper jack can work well. Mix and match to find your favorite flavor. Just make sure the cheese melts nicely to create a gooey texture. Baked zucchini parmesan is a healthy choice. Each serving has about 180 calories, with 10 grams of fat and 8 grams of protein. It also provides vitamins A and C, plus calcium from the cheese. This dish is a great way to enjoy veggies! You can prepare the zucchini ahead of time! Slice and layer them with breadcrumbs and cheese. Cover the dish and store it in the fridge for up to 24 hours. Just bake it right before serving for a fresh taste. Yes, the recipe is vegetarian as it uses no meat. It features cheese, zucchini, and herbs, all of which are plant-based. Enjoy this dish as a great meat-free option for any meal. To spice things up, add crushed red pepper flakes to the breadcrumb mix. You can also use spicy cheese or add jalapeños for extra kick. Adjust the heat to your taste for a fun twist! For the full recipe, check out the Cheesy Baked Zucchini Delights. Enjoy your cooking adventure! This blog post shares a simple and tasty baked zucchini parmesan recipe. We covered essential ingredients, step-by-step instructions, and helpful tips to enhance flavor and crunch. You learned how to store leftovers and even make variations for different diets. Now you can confidently whip up this dish as a side or appetizer. Enjoy experimenting with flavors and sharing your creations. Baked zucchini parmesan is a great way to eat healthy and delicious food. Happy cooking!](https://fastmealmate.com/wp-content/uploads/2025/06/6985a322-15fd-4ae0-839d-4317f4e09967-768x768.webp)


