One Pan Harvest Chicken and Maple Veggies Delight

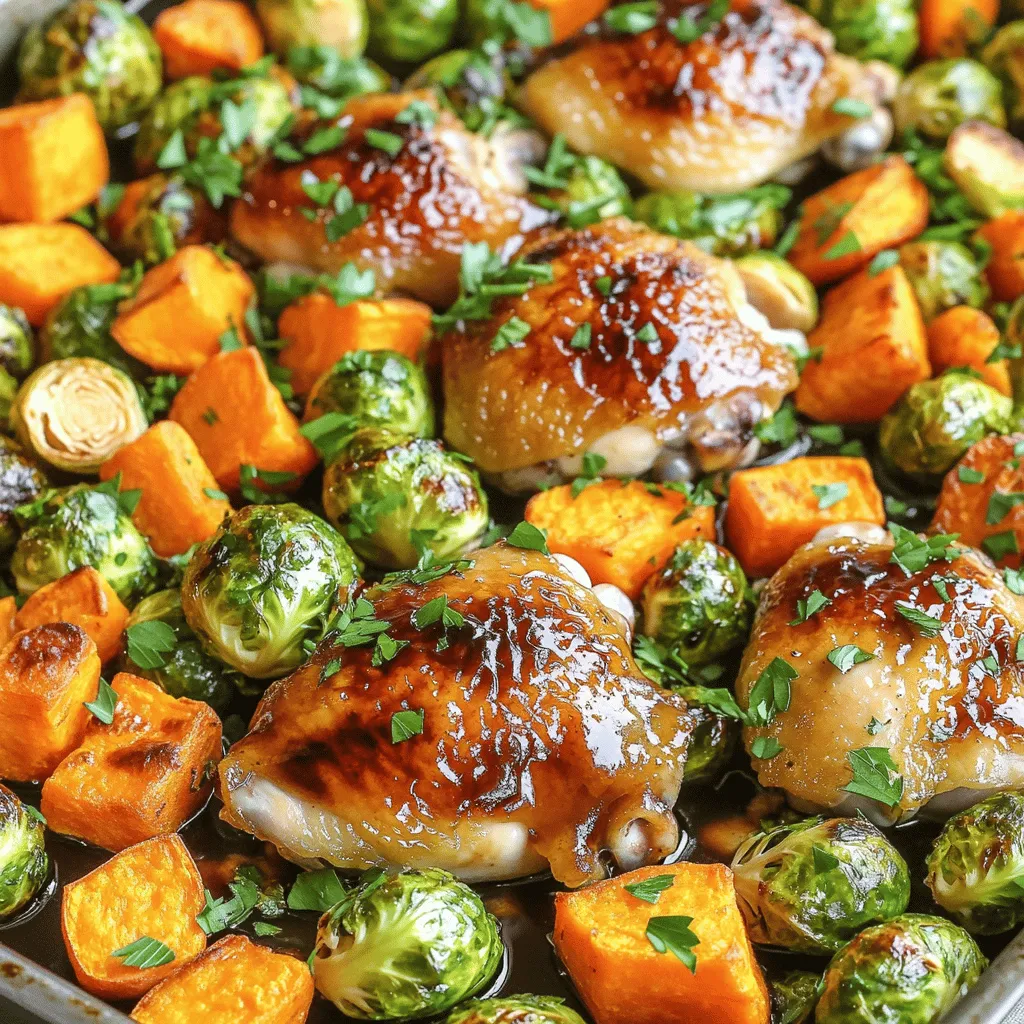
Welcome to One Pan Harvest Chicken and Maple Veggies Delight! If you crave a warm, hearty meal, you’re in the right place. This dish brings together juicy chicken thighs, fresh veggies, and a sweet touch of maple syrup, all roasted together in one pan. It’s perfect for busy nights or cozy gatherings. Get ready to impress your family with flavors that sing and a cleanup that’s a breeze! Let’s dive into this delicious recipe!
Ingredients
Main Ingredients
– 4 bone-in, skin-on chicken thighs
– 2 cups Brussels sprouts, halved
– 1 large sweet potato, peeled and diced into cubes
– 1 red onion, peeled and cut into wedges
– 1 cup baby carrots, trimmed
Seasonings
– 1 teaspoon sea salt
– 1/2 teaspoon freshly ground black pepper
– 1 teaspoon garlic powder
– 1 teaspoon dried thyme
Additional Flavorings
– 3 tablespoons pure maple syrup
– 1 tablespoon balsamic vinegar
– 1/2 cup low-sodium chicken broth
Gather these ingredients before you start cooking. The chicken thighs give great flavor and texture. The fresh veggies add color and nutrition. The seasonings bring out the best in each ingredient. Maple syrup and balsamic vinegar provide a sweet and tangy kick. Together, these ingredients create a dish that warms your heart.
Step-by-Step Instructions
Preparation Steps
– Preheat your oven to 400°F (200°C). This step is key for even cooking.
– Pat the chicken thighs dry with paper towels. This helps the skin get crispy.
– Rub each thigh with olive oil. Then, season them with sea salt, black pepper, garlic powder, and thyme.
Assembling the Dish
– Take a large, oven-safe skillet and place the chicken thighs skin-side up in the center.
– Surround the chicken with halved Brussels sprouts, sweet potato cubes, onion wedges, and baby carrots. This helps all the flavors blend.
– Drizzle pure maple syrup and balsamic vinegar over the veggies. This adds sweetness and tang. Pour chicken broth into the pan and gently toss the vegetables.
Cooking Process
– Bake in the oven for 30-35 minutes. The chicken should reach 165°F (75°C) inside. The veggies should be fork-tender.
– For crispy skin, switch to broil and cook for another 3-5 minutes. Keep an eye on it to avoid burning.
This One Pan Harvest Chicken and Maple Veggies recipe is simple yet packed with flavor. Enjoy your meal!
Tips & Tricks
Achieving the Perfect Roast
To get that delicious roast, always preheat your oven. A hot oven helps the chicken cook evenly. I recommend using a meat thermometer. This tool ensures your chicken reaches 165°F (75°C) safely. It also keeps the chicken juicy and tender.
Enhancing Flavors
Adjusting seasoning can make a big difference. If you like spice, add some paprika or cayenne pepper. You can also swap dried thyme for rosemary or oregano. Each herb brings its own unique taste to the dish. Feel free to experiment with what you have on hand.
Visual Appeal
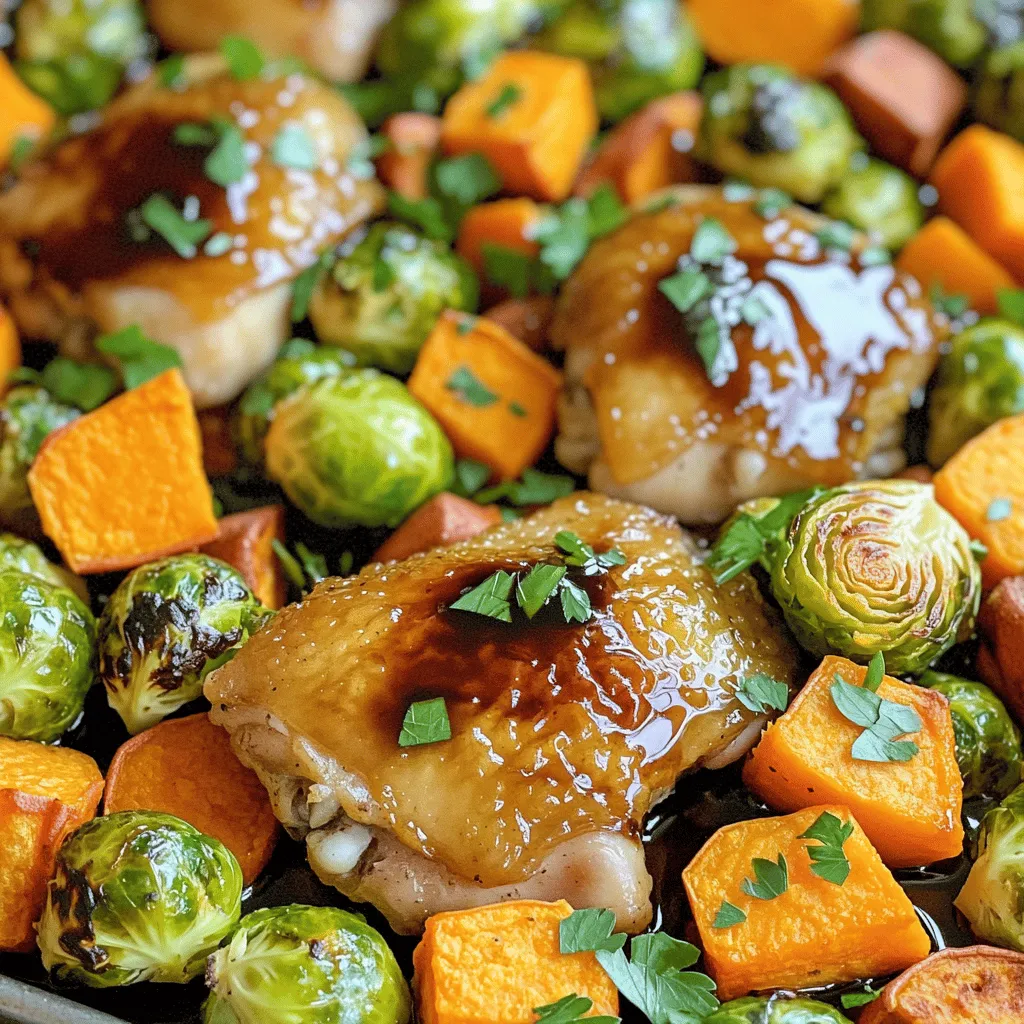
For a stunning plate, serve the dish straight from the skillet. This method gives a rustic, homey feel. If you prefer individual plates, arrange the chicken and veggies nicely. A drizzle of extra maple syrup adds shine and color. Don’t forget to sprinkle fresh parsley on top. It brightens the dish and adds a fresh touch.

Variations
Vegetable Substitutions
You can switch up the veggies in this dish. Try using:
– Cauliflower florets
– Butternut squash, diced
– Green beans, trimmed
– Zucchini, sliced
These options add new flavors and textures. Choose seasonal vegetables for freshness. In fall, use root veggies like parsnips or turnips. In summer, go for bell peppers and zucchini. Using what’s in season helps your dish taste great and supports local farms.
Protein Options
If you want to change the protein, there are many choices. Use:
– Bone-in chicken breasts
– Pork chops, bone-in
– Turkey thighs
You can even make it vegetarian or vegan! Swap chicken for hearty options like:
– Chickpeas, drained and rinsed
– Firm tofu, cubed and pressed
– Tempeh, sliced
These proteins will soak up the delicious flavors of the dish.
Flavor Profile Changes
For a different taste, you can alter the sweeteners. Instead of maple syrup, try:
– Honey
– Agave nectar
– Brown sugar
Each sweetener brings a unique touch. Want some heat? Add spices like:
– Red pepper flakes
– Paprika
– Chili powder
These changes will make your dish stand out and keep your taste buds excited.
Storage Info
Leftovers
To store leftovers, let the dish cool first. Place the chicken and veggies in an airtight container. This helps keep them fresh. Store in the fridge for up to three days. For best taste, eat them within this time.
To reheat, use the oven or microwave. If using the oven, preheat to 350°F (175°C). Cover the dish with foil to keep moisture in. Heat for about 15-20 minutes or until hot. If using a microwave, place in a safe dish and heat in short bursts. Stir between bursts to ensure even warmth.
Meal Prepping
You can prepare this meal in advance for busy days. Start by chopping the veggies a day before. Store them in the fridge in a sealed bag. This keeps them fresh and ready to go.
If you want to freeze the dish, cook it first. Let it cool completely, then place it in a freezer-safe container. It can stay in the freezer for up to three months. When ready to eat, thaw in the fridge overnight. Reheat as described above.
Shelf Life
In the fridge, this dish lasts about three days. Look for signs of spoilage like a sour smell or strange colors. If you notice any changes, it’s best to toss it. Always trust your senses when it comes to food safety.
FAQs
How long does it take to cook One Pan Harvest Chicken and Maple Veggies?
Cooking One Pan Harvest Chicken and Maple Veggies takes about 50 minutes. This includes 15 minutes for prep and 35 minutes to cook. You will love how fast it comes together! The chicken thighs cook until they reach 165°F (75°C). This ensures they are safe to eat and juicy. The veggies will be tender and full of flavor.
Can I use frozen chicken for this recipe?
You can use frozen chicken, but there are some things to think about. First, frozen chicken takes longer to cook. Be sure to add extra time to your cooking. You can also thaw the chicken in the fridge overnight for best results. This helps the chicken cook evenly. Always check the internal temperature to be sure it is safe.
What’s the best way to reheat leftover chicken and veggies?
To reheat leftovers, I suggest using the oven or microwave. If you use the oven, preheat it to 350°F (175°C). Place the chicken and veggies in a dish, cover with foil, and heat for about 20 minutes. If you choose the microwave, heat in short bursts. Stir the food in between to keep it moist and tasty. Enjoy your delicious meal again!
This blog post shared a tasty One Pan Harvest Chicken and Maple Veggies recipe. We discussed key ingredients, like bone-in chicken thighs and fresh vegetables. You learned simple steps to prepare and cook the dish, plus tips for getting it just right. We looked at variations, storage, and reheating methods.
Now you can enjoy a delicious meal without the hassle. Try this recipe and make it your own!


![To make homemade pumpkin spice creamer, you need a few key ingredients. Here’s the list: - 1 cup whole milk (or your favorite milk alternative) - 1 cup heavy cream - 1/2 cup pumpkin puree (canned or homemade) - 1/4 cup pure maple syrup - 1 teaspoon vanilla extract - 1 teaspoon pumpkin pie spice (or a blend of cinnamon, nutmeg, and ginger) - 1/4 teaspoon ground cinnamon - A pinch of fine sea salt Each ingredient brings its own flavor and texture. The milk and cream create a rich base. The pumpkin puree gives that warm autumn flavor. Maple syrup adds sweetness, while vanilla adds depth. The spices create that perfect pumpkin spice blend we all love. If you have dietary needs, don’t worry! You can easily swap some ingredients. For a dairy-free option, use almond milk or oat milk instead of whole milk. Coconut cream works well if you want a dairy-free alternative to heavy cream. You can also use agave syrup if you need a different sweetener. Just make sure to taste as you go! Choosing the right ingredients makes a big difference. Always pick fresh pumpkin puree. If you can, opt for pure pumpkin without extra sugar or additives. Look for real maple syrup, not the imitation kind. It tastes better and is healthier. When it comes to spices, fresher is always better. Check the expiration dates on your spices for maximum flavor. To start, gather your ingredients. You will need: - 1 cup whole milk (or your favorite milk alternative) - 1 cup heavy cream - 1/2 cup pumpkin puree - 1/4 cup pure maple syrup - 1 teaspoon vanilla extract - 1 teaspoon pumpkin pie spice - 1/4 teaspoon ground cinnamon - A pinch of fine sea salt Next, grab a medium saucepan. Pour in the whole milk and heavy cream. Add the pumpkin puree and whisk it together. Make sure the mixture is smooth and blended. Set your heat to medium. As it warms, keep whisking gently. Be careful not to let it boil. When the mixture is warm, add in the maple syrup, vanilla extract, pumpkin pie spice, ground cinnamon, and salt. Whisk it all together until it’s mixed well. This step makes your creamer rich and flavorful. Keep an eye on your heat. If it gets too hot, the creamer can curdle. You want to heat it through, not cook it. Stir often to help it heat evenly. The goal is to create a cozy, warm mix that smells like fall. Once heated, take the saucepan off the heat. Let the creamer cool for about 10 to 15 minutes. This cooling time lets the flavors come together nicely. To make sure your creamer is smooth, strain it through a fine-mesh sieve. This removes any lumps from the pumpkin puree. Pour the strained creamer into a clean jar or pitcher. After that, let the creamer cool to room temperature. Once cooled, seal it with a lid and put it in the fridge. It will thicken a bit as it cools. Before use, give it a gentle shake. Now, it’s ready to add to your favorite coffee or tea for that perfect fall touch! For the full recipe, check out the instructions above. Enjoy your homemade treat! To get the best taste, focus on high-quality ingredients. Use fresh pumpkin puree for a rich flavor. If you prefer sweet, adjust the maple syrup to your liking. Adding a bit more pumpkin pie spice can enhance the fall flavor. Always taste as you mix. This helps you find your perfect balance. One big mistake is letting the mixture boil. Boiling can change the texture and flavor. Also, don’t skip the straining step. Straining helps remove any lumps, giving you a smooth creamer. Lastly, avoid using stale spices. Fresh spices make a huge difference in taste. For a thicker creamer, use more heavy cream and less milk. You can also let the creamer cool longer before storing. This allows it to thicken. If you find it too thick later, just whisk in a bit of milk until you reach your desired consistency. {{image_4}} You can make your pumpkin spice creamer even better! Try adding a few drops of almond extract for a nutty twist. If you want a richer flavor, add a spoonful of cocoa powder. This change adds depth and a hint of chocolate. You can also adjust the sweetness. If you love it sweeter, add more maple syrup or a bit of brown sugar. You have many options for milk alternatives. Almond milk, oat milk, and coconut milk all work well. Almond milk gives a light, nutty taste. Oat milk adds creaminess, making it feel rich. Coconut milk offers a tropical vibe that pairs well with spices. Just remember to choose unsweetened versions if you want more control over the sweetness. Want to switch things up with the seasons? Use fresh pumpkin puree in the fall for a vibrant flavor. In winter, try adding a touch of peppermint extract for a festive twist. During the summer, you can swap pumpkin for ripe bananas to make a banana spice creamer. Each change brings new flavors and keeps your coffee exciting. For the complete recipe, check out the [Full Recipe]. To keep your homemade pumpkin spice creamer fresh, pour it into a clean jar. Make sure the jar has a tight lid. This helps keep out air and light, which can spoil the creamer. Always let it cool to room temperature first. Once it’s cool, seal it and place it in the fridge. Store the creamer on a middle shelf in your fridge. This spot usually stays at a safe, stable temperature. Avoid putting it in the door, where temperatures change often. Always shake the jar gently before using. This helps mix the ingredients that may settle. Homemade pumpkin spice creamer lasts about one week in the fridge. After that, it may start to spoil. Look for signs like a sour smell or changes in color. If you see any lumps or strange texture, throw it away. Always trust your senses when it comes to food safety. For the full recipe, check the provided details above. Yes, you can! Non-dairy milk works great in this recipe. Almond, oat, or coconut milk will all add unique flavors. Just keep in mind that each milk has a different texture. Some may be creamier, while others are lighter. Choose one that you enjoy! Homemade pumpkin spice creamer lasts about one week in the fridge. Store it in an airtight container to keep it fresh. Always check for any off smells or changes in texture before using it. Yes, you can freeze pumpkin spice creamer! Pour it into ice cube trays for easy use later. When you need some, just pop a cube into your coffee. It will add flavor as it melts. Maple syrup is my favorite sweetener for this creamer. It adds a nice depth of flavor. You can also use sugar, honey, or agave syrup. Start with a small amount, then taste and adjust to your liking. Enjoy experimenting with different sweeteners! In this post, we explored how to make pumpkin spice creamer. We covered key ingredients, optional substitutes, and tips for choosing quality items. You learned step-by-step instructions to prepare, cook, and store your creamer. I shared tips to perfect flavor and avoid common mistakes. You can also discover ways to vary the recipe with different flavors and milk. Proper storage ensures your creamer stays fresh. Now you’re ready to create a delicious, customized pumpkin spice creamer that fits your needs! Enjoy your coffee or dessert with this tasty treat.](https://fastmealmate.com/wp-content/uploads/2025/07/58885fb5-0183-4e31-91f9-f6f3ea6e6529-768x768.webp)


![- 2 salmon fillets (approximately 6 oz each) - 1 pound large shrimp, peeled and deveined - 2 tablespoons Cajun seasoning (store-bought or homemade) - 2 tablespoons olive oil - 1 red bell pepper, diced - 1 green bell pepper, diced - 1 medium onion, diced - 3 cloves garlic, minced - 1 cup cherry tomatoes, halved - 1 cup coconut milk - 2 green onions, chopped (for garnish) - Fresh parsley, chopped (for garnish) - Salt and pepper to taste The ingredients for Cajun salmon and shrimp are simple yet packed with flavor. The salmon fillets and shrimp provide a great base. You can choose fresh or frozen shrimp, but I recommend fresh for the best taste. Cajun seasoning adds that unique kick. You can buy it or make your own with spices like paprika, cayenne, and garlic powder. Next, the colorful bell peppers and onion bring a sweet crunch. Garlic adds a nice aroma and flavor. Cherry tomatoes give a juicy burst. Coconut milk adds creaminess and balance to the spice. Finally, green onions and parsley brighten the dish. This dish is healthy and filling. Each serving has around 400 calories. You get about 30 grams of protein, 20 grams of fat, and 15 grams of carbs. It also has 3 grams of fiber, which is great for digestion. Pair this dish with fluffy rice or a fresh salad. Rice soaks up the sauce nicely. A crisp green salad adds freshness. For drinks, a cold white wine or iced tea works well. Enjoying this dish with a light beverage enhances the flavors. For the full recipe, check out the detailed cooking instructions. Start by patting the salmon and shrimp dry with paper towels. This helps them sear nicely. Season the salmon on both sides with one tablespoon of Cajun seasoning. For the shrimp, toss them with the remaining seasoning in a bowl. Make sure the shrimp are covered well. Set both aside while you prepare the rest. Heat one tablespoon of olive oil in a large skillet over medium heat. Add the diced onion, red bell pepper, and green bell pepper. Sauté these vegetables for about five minutes. Stir them occasionally until they soften. Then, add the minced garlic and sauté for one more minute. This brings out a lovely flavor. Push the veggies to one side of the skillet. Place the seasoned salmon fillets skin-side down in the other side. Cook them for about four to five minutes. When they are golden brown, carefully flip the fillets. Cook for another four minutes. The salmon should flake easily when done. Remove it and set it aside on a plate. In the same skillet, add the other tablespoon of olive oil. Next, toss in the seasoned shrimp. Cook them for about two to three minutes, stirring gently. They should turn pink and opaque. This shows they are done and ready for the next step. Now, add the halved cherry tomatoes to the skillet with the shrimp. Pour in one cup of coconut milk and stir well. Bring this mixture to a gentle simmer. Let it cook for another two to three minutes. Season with salt and pepper to your liking. This sauce is rich and creamy! Carefully return the cooked salmon fillets to the skillet. Nestle them among the shrimp and sauce. Spoon some sauce over the salmon to keep it moist. Let everything cook together for an additional two minutes. This melds the flavors beautifully. For the full recipe, check out the section above. Enjoy your Cajun salmon and shrimp! To cook salmon and shrimp just right, timing is key. Salmon takes about 8-10 minutes total. Cook it for 4-5 minutes on one side, then flip. For shrimp, cook for about 2-3 minutes until they turn pink. Use a fork to test the salmon. If it flakes easily, it’s ready. Shrimp should be opaque and firm. You can make your own Cajun seasoning at home. Use these basic spices: - Paprika - Cayenne pepper - Onion powder - Garlic powder - Black pepper - Oregano - Thyme Adjust the heat by adding more cayenne for spice or less for a milder flavor. This way, you control the heat level to fit your taste. Plating is important for making your dish pop. Serve the salmon and shrimp on a large platter. Drizzle some extra coconut sauce around the edge for flair. Add bright green garnishes like chopped parsley and green onions. They bring color and freshness. You can also add a side of fluffy rice or crusty bread to soak up that delicious sauce. {{image_4}} You can switch up the proteins in this dish. Try using cod or tilapia instead of salmon. Both of these fish cook well and soak up flavors nicely. For shrimp lovers, scallops can add a sweet touch. If you're looking for vegetarian choices, consider using hearty vegetables. Zucchini and bell peppers work great when grilled. You can also use firm tofu, which absorbs flavors and adds protein. Changing the seasoning can add a new twist. If you want a milder taste, reduce the Cajun seasoning. You can also blend in herbs like thyme or basil. For more heat, add cayenne pepper or sliced jalapeños. These spices will give your dish a nice kick. Experimenting with flavors can make each meal special. Pair this dish with tasty sides to make it shine. Fluffy rice or quinoa absorbs the sauce well. A fresh salad with greens and citrus can balance the spices. For gatherings, serve it family-style on a large platter. This way, everyone can dig in and share the joy of this delicious meal. Don't forget to have some crusty bread on the side. It’s perfect for soaking up the creamy sauce from the Cajun salmon and shrimp. For the full experience, check out the Full Recipe for details. To keep your Cajun salmon and shrimp fresh, refrigerate leftovers within two hours. Place them in airtight containers. This keeps moisture in and flavors intact. You can store them for up to three days. It’s best to separate salmon from shrimp if you want to maintain their textures. When reheating, avoid drying out your seafood. The best method is to use a skillet. Heat it over low heat, adding a splash of water or broth. Cover the pan to trap steam. This keeps the seafood moist and flavorful. You can also use a microwave. Just cover it with a damp paper towel to keep it from drying out. If you want to store your dish for a longer time, freezing is a good option. Let the dish cool completely first. Then, wrap it tightly in plastic wrap and foil to prevent freezer burn. You can freeze it for up to three months. When ready to eat, thaw it in the fridge overnight. Reheat it gently on the stove. This method preserves both taste and texture. Yes, you can use frozen shrimp. Just thaw them before cooking. This helps the shrimp cook evenly. I suggest placing them in cold water for about 20 minutes. This method keeps them firm and tasty. The salmon is done when it flakes easily with a fork. Check for a light pink color inside. It should not be translucent. If you have a food thermometer, aim for 145°F. This ensures it’s safe to eat. If you don't have coconut milk, try cream or milk. You can also use almond milk for a lighter option. Each substitute changes the dish's flavor a bit, but it will still be tasty. Absolutely! This recipe is perfect for meal prep. Cook a batch and store it in airtight containers. It keeps well in the fridge for up to three days. Reheat it gently to enjoy a quick meal. Cajun seasoning has a mild to medium spice level. It adds flavor without being too hot. If you prefer less heat, you can use less seasoning. For more spice, add a pinch of cayenne pepper. Yes, feel free to add more vegetables! Zucchini, mushrooms, or spinach are great choices. Just make sure to chop them small. Add them when you sauté the onions and peppers for even cooking. For the full recipe, click [Full Recipe]. This article covered a tasty seafood dish featuring salmon and shrimp, seasoned with Cajun flair. You learned about the ingredients, cooking steps, and ways to adapt the recipe. Remember to achieve perfect doneness with both the salmon and shrimp for the best result. Don't hesitate to play with flavors or pairings to suit your taste. Making this dish can impress family or friends while keeping it simple. Enjoy your cooking journey and share this recipe with others!](https://fastmealmate.com/wp-content/uploads/2025/06/17932171-8cf4-4553-ac77-c5634fbfd80e-768x768.webp)