Millionaire Peach Salad Fresh and Flavorful Delight

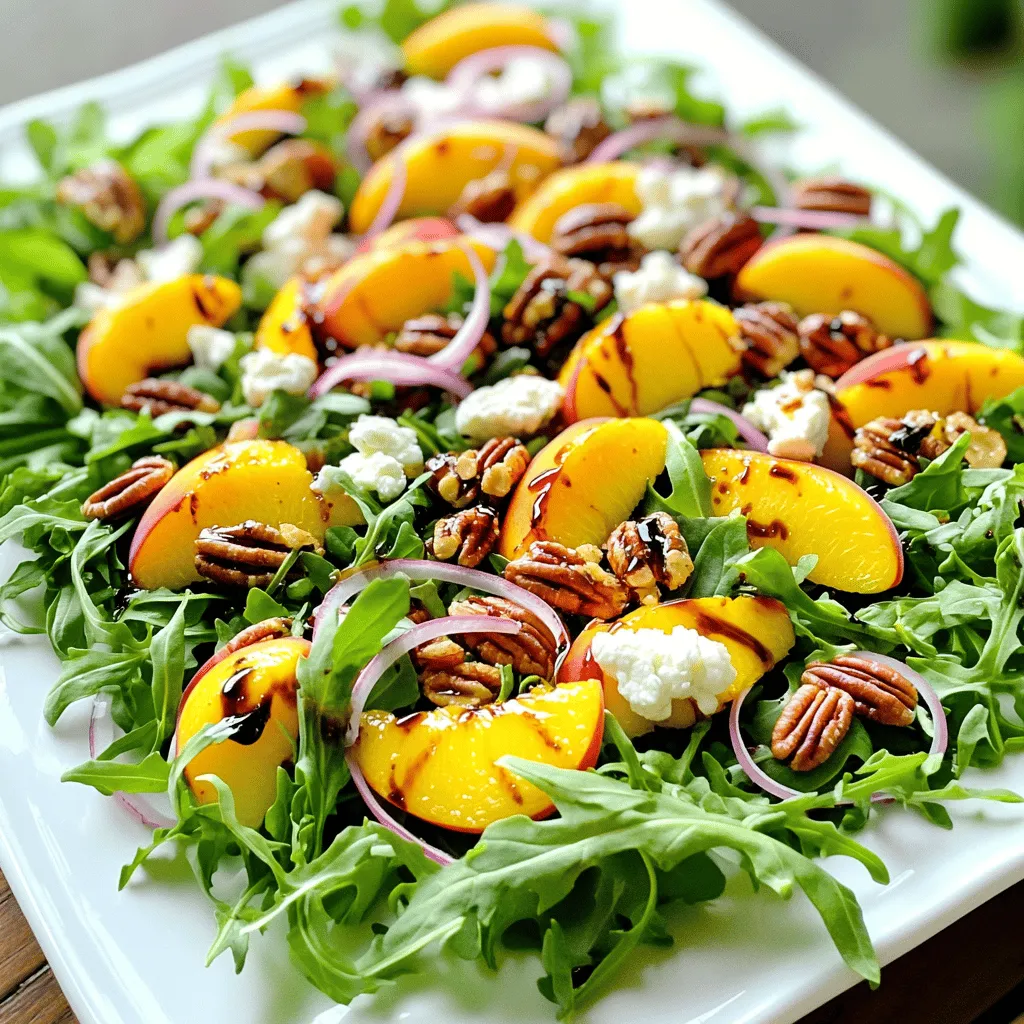
Welcome to my kitchen, where we elevate simple ingredients into a fresh and flavorful delight! Today, I’m excited to share my Millionaire Peach Salad recipe. This vibrant dish combines sweet peaches, creamy goat cheese, and crunchy pecans. It’s perfect for gatherings or a quick lunch. Ready to impress your taste buds? Let’s dive into the ingredients and make a salad that’s as delicious as it is beautiful!
Ingredients
The Millionaire Peach Salad bursts with fresh flavors and textures. Each ingredient plays a vital role in making this dish a delightful experience.
Here’s what you will need:
– 4 ripe peaches, sliced into wedges
– 2 cups fresh arugula or mixed greens
– 1 cup creamy goat cheese, crumbled
– 1/2 cup crunchy candied pecans
– 1/4 cup thinly sliced red onion
– 1/4 cup balsamic glaze
– 2 tablespoons extra virgin olive oil
– Salt and pepper to taste
– Fresh basil leaves for garnish
Why These Ingredients Matter
1. Peaches: Choose ripe peaches for sweetness. Their juicy flesh adds a vibrant flavor.
2. Greens: Arugula or mixed greens bring a fresh crunch. They balance the salad’s richness.
3. Goat Cheese: The creamy texture of goat cheese enhances the dish. It adds depth to each bite.
4. Candied Pecans: These nuts give a sweet crunch. They add a delightful contrast to the soft peaches.
5. Red Onion: Thin slices of red onion add a hint of sharpness. They brighten the flavors.
6. Balsamic Glaze: This glaze offers a sweet-tart finish. It ties all the flavors together beautifully.
7. Olive Oil: Extra virgin olive oil provides richness. It coats the greens and adds healthy fats.
8. Seasoning: Salt and pepper enhance every taste. They ensure the salad is well-balanced.
9. Basil: Fresh basil leaves bring a fragrant touch. They elevate the salad both in taste and appearance.
Using these fresh ingredients, your Millionaire Peach Salad will be a fresh and flavorful delight.
Step-by-Step Instructions
Preparation of Peaches
Start by washing the ripe peaches. Use cool water to clean them well. Once clean, slice each peach into wedges. Set the slices aside. This keeps their juices intact and ready for the salad.
Preparing the Salad Base
Next, grab a large mixing bowl. Combine the fresh arugula or mixed greens with the thinly sliced red onion. Be sure to mix them well for balanced flavor. Lightly drizzle with extra virgin olive oil. Season with salt and pepper to taste. Toss everything gently to coat the greens.
Arranging the Salad
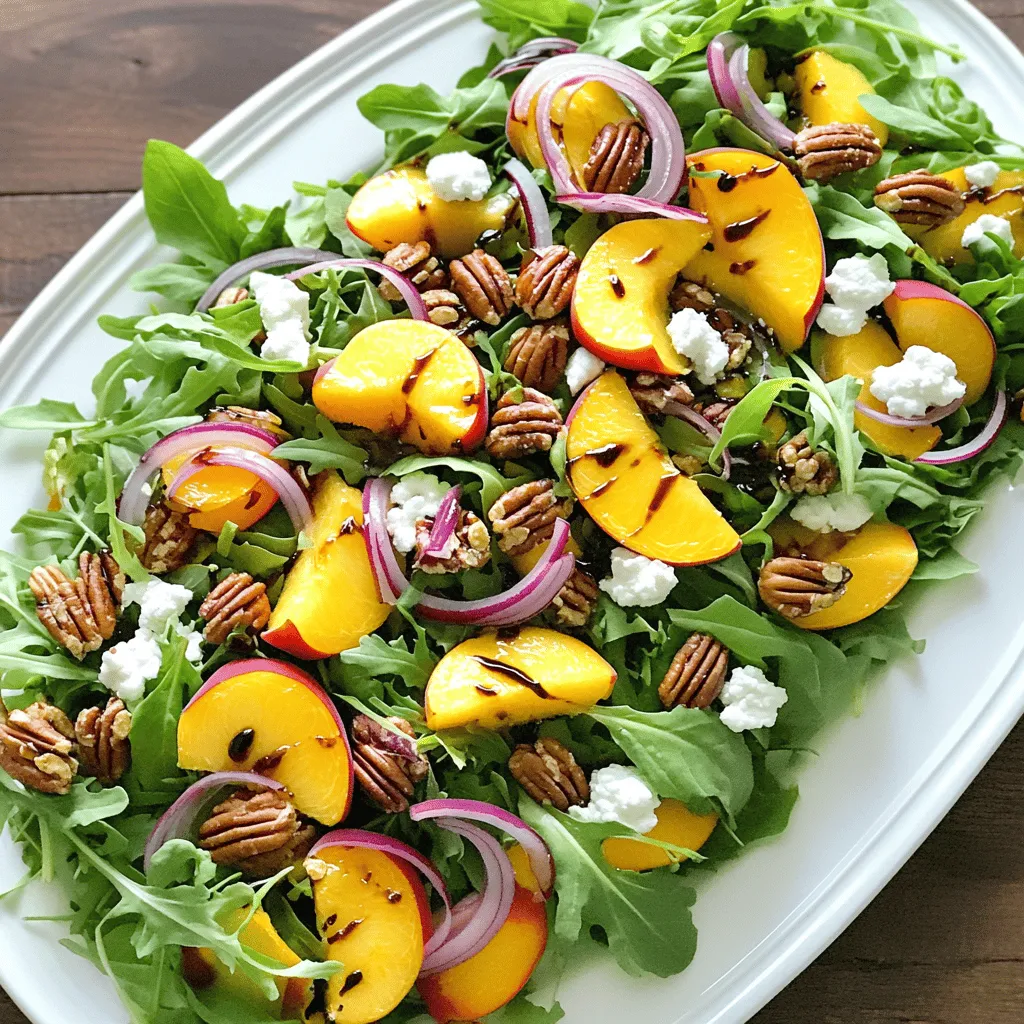
Now, it’s time to layer the salad. Place the tossed greens on a large serving platter. You can also use individual plates if you want to impress your guests. Artfully arrange the peach wedges on top of the greens. Sprinkle crumbled goat cheese and crunchy candied pecans over the salad. This adds both flavor and texture.
Final Touches
For the final touch, drizzle balsamic glaze over the entire salad. This adds a nice sweetness that pairs well with the savory elements. Lastly, scatter fresh basil leaves on top for a fragrant garnish. This will make your salad not just tasty, but also beautiful.
Follow these steps for a delightful Millionaire Peach Salad.
Tips & Tricks
Best Peaches to Use
To make the best Millionaire Peach Salad, choose ripe and juicy peaches. Look for peaches that are slightly soft to the touch, with a sweet aroma. Yellow or white peaches are great options. Avoid peaches with blemishes or hard spots. Fresh, ripe peaches will add the best flavor and sweetness to your salad.
Ingredient Substitutions
If you need to avoid goat cheese or nuts, there are tasty options. For cheese, try feta or a soft cream cheese. You can also use sunflower seeds or pumpkin seeds instead of pecans for crunch. These swaps keep your salad delicious while catering to dietary needs.
Presentation Tips
Make your salad shine when you serve it. Use a large, white platter to show off the colors of the salad. Layer the greens, peaches, cheese, and nuts in a way that is pleasing to the eye. Consider adding extra peach slices or a sprinkle of cheese on top. This small touch will impress your guests and make the dish more inviting.

Variations
Seasonal Additions
You can make the Millionaire Peach Salad unique by adding other fruits or nuts. In summer, try fresh blueberries or strawberries. They give a sweet touch and bright color. In fall, consider sliced apples or pears for a crisp bite. Nuts can also change the flavor. Swap candied pecans for walnuts or almonds for a different crunch.
Dressing Alternatives
While balsamic glaze is tasty, you can explore other dressings. A honey mustard vinaigrette adds a sweet and tangy kick. A citrus vinaigrette with lemon or lime brightens the salad. For creaminess, a yogurt-based dressing works well. Each dressing brings its own flair to the salad, making it feel new.
Serving Sizes
Adjust the recipe for larger gatherings easily. Double or triple the ingredients for a big bowl. You can also serve small portions as appetizers. Just use little cups or small plates for single servings. This makes it easy for guests to enjoy without sharing.
Storage Info
How to Store Leftovers
To keep your Millionaire Peach Salad fresh, store it in an airtight container. Cover the salad tightly to stop air from making it soggy. Place it in the fridge right away. This keeps the flavors bright and the greens crisp. If you can, store the dressing separately. This step helps prevent the greens from wilting.
Shelf Life
You can safely store the salad in the fridge for up to three days. After that, the peaches may brown and the greens may lose their crunch. Always check for any off smells or signs of spoilage before eating. If you see any, it’s best to toss it out for safety.
Re-serving Tips
When you’re ready to eat the leftovers, give the salad a gentle toss. This mixes up the ingredients nicely. If the salad seems dry, drizzle a bit of olive oil or balsamic glaze. You can also add fresh greens or extra peach slices to refresh the dish. Enjoy your salad as a side dish or a light lunch!
FAQs
What is Millionaire Peach Salad?
Millionaire Peach Salad is a fresh and vibrant dish. It features ripe peaches, greens, and creamy goat cheese. This salad has roots in Southern cuisine. It brings together sweet and savory flavors. The blend of textures makes it special. Each bite offers a mix of juicy peaches and crunchy pecans. It’s a perfect summer dish that is easy to prepare.
Can I make this salad in advance?
Yes, you can prepare parts of this salad in advance. Slice the peaches and store them in lemon juice to keep them fresh. You can also wash and dry the greens ahead of time. Mix the greens and onion just before serving. This keeps them crisp. Add the goat cheese and pecans at the last minute for the best flavor and texture.
Is Millionaire Peach Salad gluten-free?
Yes, Millionaire Peach Salad is gluten-free. All the main ingredients are naturally gluten-free. If you want to ensure it stays gluten-free, check labels on any packaged items. If you need a nut-free option, replace pecans with sunflower seeds. This keeps the salad tasty and safe for everyone.
How do I choose the best peaches?
To find the best peaches, look for ones that are ripe. They should feel slightly soft when gently squeezed. The skin should be smooth and vibrant. Avoid peaches with bruises or dark spots. If they are not quite ripe, let them sit at room temperature for a day or two. This will help them develop their sweet flavor.
This blog post walked you through creating a delicious Millionaire Peach Salad. You learned about fresh ingredients, easy steps, and smart tips for the best taste. Remember to pick juicy peaches and try different toppings for a fun twist. You can also store leftovers for later. Enjoy this tasty treat at your next gathering! Your friends will love it, and so will you.


![- 2 cups fresh or frozen cherries, pitted - 1 cup cherry cola - 1/2 cup granulated sugar - 1 tablespoon freshly squeezed lemon juice - 1 teaspoon pure vanilla extract - A pinch of salt When I make no churn cherry cola sorbet, I start with fresh or frozen cherries. I always pit the cherries first, as this makes blending easy. The cherry cola gives the sorbet a fun and fizzy flavor. I use granulated sugar to sweeten the mix. If you want a tart twist, add freshly squeezed lemon juice. I also add a teaspoon of pure vanilla extract for depth. A pinch of salt balances the sweetness and enhances the flavors. You can swap out granulated sugar for other sweeteners like honey or agave syrup. These can change the taste, making it unique. You might also try adding a splash of almond extract for a nutty flavor. Or, mix in a handful of mint leaves for a refreshing touch. Each variation leads to a new and exciting treat! For the full recipe, check out the [Full Recipe]. To start, you will blend the cherries and cola. Take your pitted cherries and add them to a high-speed blender. Pour in the cherry cola. Blend on high speed until the mixture is smooth. This smooth texture is key for your sorbet. If it’s too chunky, blend it a bit longer. Next, it's time to mix in the flavorings. Add in the granulated sugar, lemon juice, vanilla extract, and a pinch of salt. Blend again until all the ingredients are well combined. The sugar should dissolve completely. You can taste the mixture to see if you want it sweeter. If so, slowly add more sugar and blend until smooth. Now, you’ll prepare to freeze your mixture. Pour the cherry cola blend into a shallow dish. This shape helps it freeze faster. Place the dish in the freezer for about 2 hours. After 2 hours, take it out and scrape the mixture with a fork. This step breaks up ice crystals, giving a nice texture. Return the dish to the freezer. For the next 2 hours, scrape it every hour. This helps keep it light and fluffy. After about 6 hours, your sorbet should be ready. Let it sit at room temp for a few minutes before serving. Serve in chilled bowls for the best look. Enjoy your No Churn Cherry Cola Sorbet! To make a smooth sorbet, avoid ice crystals. After the first two hours of freezing, take the mixture out and scrape it with a fork. This breaks up any ice. Repeat this every hour for the next two hours. It helps create a light and fluffy texture. Use a shallow dish for freezing. This gives the mixture more surface area. A food processor or high-speed blender works best to blend the cherries and cola. These tools help achieve a creamy consistency. Taste your mixture after blending in the sugar. If it’s not sweet enough, add more sugar. Do this little by little. Blend until it’s smooth. You want the flavor to pop. Remember, the sweetness can change after freezing. Serve your sorbet in chilled bowls or glass cups. This keeps it cool longer. For a fun touch, garnish with fresh cherries or mint leaves. You can also drizzle a little chocolate sauce on top. It adds visual appeal and extra flavor. Enjoy showing off your beautiful dessert! {{image_4}} You can mix up this cherry cola sorbet by using different fruits. Here are some fun ideas: - Raspberry Cola: Swap cherries for raspberries. This gives a tart twist. - Peach Delight: Use fresh peaches for a sweet and juicy flavor. - Mixed Berry: Combine strawberries, blueberries, and blackberries for a berry blast. You can also enhance the flavor with simple extras: - Mint: Add fresh mint for a refreshing taste. - Lemon Zest: A bit of lemon zest can brighten the sorbet. - Coconut Milk: For a creamy texture, mix in coconut milk. If you want to make this sorbet healthier, there are easy swaps for sugar. Here are some options: - Honey: Use honey instead of granulated sugar for natural sweetness. - Agave Syrup: This works well for a lower glycemic option. - Stevia: This zero-calorie sweetener is a great choice for low-sugar diets. For those following a vegan diet, you can make this sorbet vegan-friendly. Just make sure to choose a vegan-friendly cola. The other ingredients are naturally plant-based, so you are all set! To keep your sorbet fresh, store it in an airtight container. This helps prevent ice crystals from forming. You can also use a shallow dish for freezing. This allows for quicker freezing and a smoother texture. If you have leftovers, let them cool before sealing. You can layer parchment paper on top to reduce air exposure. This extra step helps maintain its flavor and texture. No churn cherry cola sorbet lasts about two weeks in the freezer. After this time, the flavor may fade. The texture could change too, becoming icy and less smooth. To enjoy it at its best, try to eat it within this time frame. If you notice any signs of freezer burn, it’s best to toss it. Enjoy this sweet treat while it’s fresh! To make this sorbet, follow these simple steps: 1. Blend the Cherries: Start by mixing the pitted cherries with cherry cola in a blender. Blend until smooth. 2. Mix in Flavorings: Add sugar, lemon juice, vanilla, and salt. Blend until well combined. 3. Taste and Adjust Sweetness: Sample the mix and add more sugar if needed. Blend again. 4. Prepare to Freeze: Pour the mixture into a shallow dish. Spread it out evenly. 5. Initial Freezing: Freeze for about 2 hours, then scrape the mixture with a fork. 6. Scrape and Refine: Freeze again, scraping every hour for 2 more hours. 7. Final Freezing: After 6 hours, let it sit for a few minutes before scooping. This method creates a light and fluffy sorbet. For the full recipe, check out the section above. Yes, you can use diet or caffeine-free cherry cola. This option is great for those who want fewer calories or caffeine. The flavor may change slightly, but it will still be tasty. Many brands offer these choices, so look for one you like. If you don’t have fresh cherries, frozen cherries work well too. They are picked at peak ripeness and often taste just as good. Using frozen cherries saves prep time since they come pitted. Just blend them straight from the freezer for a smooth consistency. You can make this sorbet ahead of time. It stays fresh in the freezer for up to two weeks. Just be sure to store it in an airtight container. This makes it a perfect treat for parties or hot summer days. Prepare it a day in advance to let the flavors meld together nicely. This blog post covered how to make Cherry Cola Sorbet from start to finish. We explored essential ingredients and optional add-ons, ensuring you can personalize your treat. You learned about blending and freezing techniques to get the best texture. I shared tips on adjusting sweetness and creative ways to serve your sorbet. Finally, remember that this recipe is flexible. You can switch fruits, and modify sweetness, and dietary needs. Enjoy making your sorbet, and let your taste buds celebrate!](https://fastmealmate.com/wp-content/uploads/2025/07/14b20058-6f09-46d4-b73d-218062a29ce5-768x768.webp)


![For a perfect classic patty melt, you will need: - 1 lb ground beef - 1 medium onion, thinly sliced - 4 slices of Swiss cheese - 4 slices of hearty rye bread These ingredients bring together the rich flavors that make this dish so special. The ground beef forms the juicy patty, while the onion adds a sweet touch. Swiss cheese melts beautifully, making every bite creamy. Rye bread gives it a unique flavor and crunch. To take your patty melt to the next level, consider adding: - 1 tablespoon Worcestershire sauce - 1 teaspoon garlic powder - 1 tablespoon mayonnaise (for spreading) Worcestershire sauce adds a deep umami flavor. Garlic powder brings a hint of warmth without being overpowering. Mayonnaise can add a nice creamy texture if you choose to spread it on the bread. Don’t forget these key seasonings: - Salt and black pepper to taste - 2 tablespoons unsalted butter, divided Seasoning your beef with salt and pepper ensures that it tastes great. Butter is essential for grilling the bread to a golden crisp. It enhances the flavor and makes the outside crunchy, while the inside stays soft. For the full recipe, check out the details above! To start, I melt 1 tablespoon of butter in a skillet over medium heat. I add thinly sliced onions and a pinch of salt. Stir the onions often. This helps them caramelize nicely. The cooking time is about 15 to 20 minutes. Keep an eye on the heat. You want them golden brown and sweet. Once done, take them off the heat and set them aside. In a mixing bowl, I combine 1 pound of ground beef with Worcestershire sauce and garlic powder. I add salt and pepper for taste. Mix gently to keep the beef tender. Next, I divide the mixture into two equal parts. Shape each part into a patty, about ¾ inch thick. Now, it’s time to cook the patties. I return the skillet to the stove, adding the remaining butter. I turn the heat to medium-high. I cook the patties for about 4 to 5 minutes per side. You can adjust the time based on how you like your meat cooked. During the last minute, I add a slice of Swiss cheese on top of each patty. This makes it melt beautifully. If you like, spread mayonnaise on one side of each slice of rye bread. I take two slices and place a cheesy patty on the unbuttered side of each. Then, I add a generous helping of the caramelized onions. Finally, I close the sandwiches with the other slices of bread, making sure the buttered side is facing up. Next, I wipe the skillet to remove any bits left behind. I heat the skillet over medium-low heat. I grill the assembled sandwiches for about 3 to 4 minutes per side. I want them to be golden brown and crispy. Using a spatula, I press down gently on the sandwiches. This helps everything cook evenly and stay melty inside. For the full recipe, check the main article. - Best cooking temperatures: Start with medium-high heat. This helps to brown the outside and keep the inside juicy. - Checking for doneness: Use a meat thermometer. Aim for 160°F for ground beef. A quick poke with your finger can also help; if it feels firm, it’s likely done. - Choosing the right type of rye bread: Look for hearty rye bread with good texture. The flavor of the rye pairs well with the meat and cheese. - Alternative bread options: If rye isn't your favorite, try sourdough or whole wheat. Both provide a nice crunch and flavor. - Best side dishes to pair with patty melts: Crispy fries or sweet potato fries are classic choices. A fresh side salad adds a nice crunch. - Ideal garnish ideas for presentation: A sprinkle of fresh parsley or dill can brighten up your plate. You can also add pickles on the side for extra tang. For the complete recipe, check the Full Recipe section. {{image_4}} You can switch up the meat in your patty melt. Try ground turkey or even a veggie patty for a healthier twist. Both options keep the sandwich tasty. For cheese, Swiss is classic, but you can use cheddar or pepper jack for a kick. These swaps change the flavor, keeping it fresh and exciting. The patty melt has many faces. In classic forms, it stays true to its roots. But gourmet versions take it to new heights. Chefs add toppings like sautéed mushrooms or spicy sauces. You can find global inspirations too. Some cultures use different breads or spices. Each region puts its own spin on this beloved dish, making it unique. If you need a gluten-free option, choose gluten-free bread. Many brands make great choices that hold up well. For a vegan patty melt, use a plant-based patty and vegan cheese. These swaps keep the spirit of a patty melt while fitting dietary needs. Experiment with these variations to make your patty melt your own. Check out the Full Recipe for more ideas! To keep your leftover patty melts fresh, use proper refrigeration techniques. First, let the patty melts cool down to room temperature. This step helps avoid condensation, which can make your sandwiches soggy. Next, wrap each patty melt tightly in plastic wrap or aluminum foil. You can also place them in an airtight container. The best container types are glass or BPA-free plastic. These containers keep out moisture and protect from odors in the fridge. When you’re ready to enjoy leftovers, reheating correctly is key. You can use a skillet, oven, or microwave. The skillet method brings back the original texture and flavor. Heat the skillet over medium heat. Place the patty melt in the pan and cover it with a lid. This step helps the cheese melt without drying out the bread. Heat for about 3-4 minutes on each side. If you prefer the oven, preheat it to 350°F (175°C). Wrap the patty melt in foil to keep it from drying out. Heat for about 10-15 minutes. This keeps the bread crisp while warming the filling. Avoid the microwave if you want to keep your patty melt from getting soggy. Microwaving can make the bread soft and chewy. If you must use it, heat for only 30 seconds and check if it’s warm enough. Enjoy your delicious patty melts again! For the full recipe, refer back to the classic patty melt section. A burger is usually served on a bun. A patty melt uses bread like rye. In a burger, you find toppings like lettuce and tomato. In a patty melt, you get melted cheese and onions. The cooking method differs too. A burger is grilled, while a patty melt is cooked in a skillet. Yes, you can prepare the meat and onions in advance. Cook the patties and caramelize the onions. Store them in the fridge. When you're ready to eat, just assemble and grill the sandwich. This saves time on busy days. Some great sides include: - Crispy fries - Sweet potato fries - Coleslaw - Salad - Pickles These sides balance the rich flavors of the patty melt. You can use lean ground beef for fewer calories. Try whole grain rye bread instead of regular. Add fresh veggies like spinach or tomato. You can also skip the mayonnaise or use a light version. These changes make your meal tasty and healthier. The patty melt has roots in the United States. It gained popularity in diners during the 1940s. Many believe it started in California. The mix of flavors and textures made it a favorite comfort food. Absolutely! While Swiss is classic, you can try: - Cheddar - Pepper jack - American - Gouda Each cheese adds a unique taste to your patty melt. Experiment to find your favorite! For the complete recipe, check out the [Full Recipe]. A classic patty melt combines simple, tasty ingredients for a satisfying meal. We covered essential items like ground beef, Swiss cheese, and rye bread. You learned steps to prepare, assemble, and grill your sandwich for that perfect finish. Tips on customization and storage enhance your experience. Remember that variations let you make it your own. Enjoy your cooking and the delicious patty melts you create!](https://fastmealmate.com/wp-content/uploads/2025/06/2e833bb9-ccca-4b03-bda9-565aa6b9e8a1-768x768.webp)
