Millionaire Peach Salad Delightful and Fresh Recipe

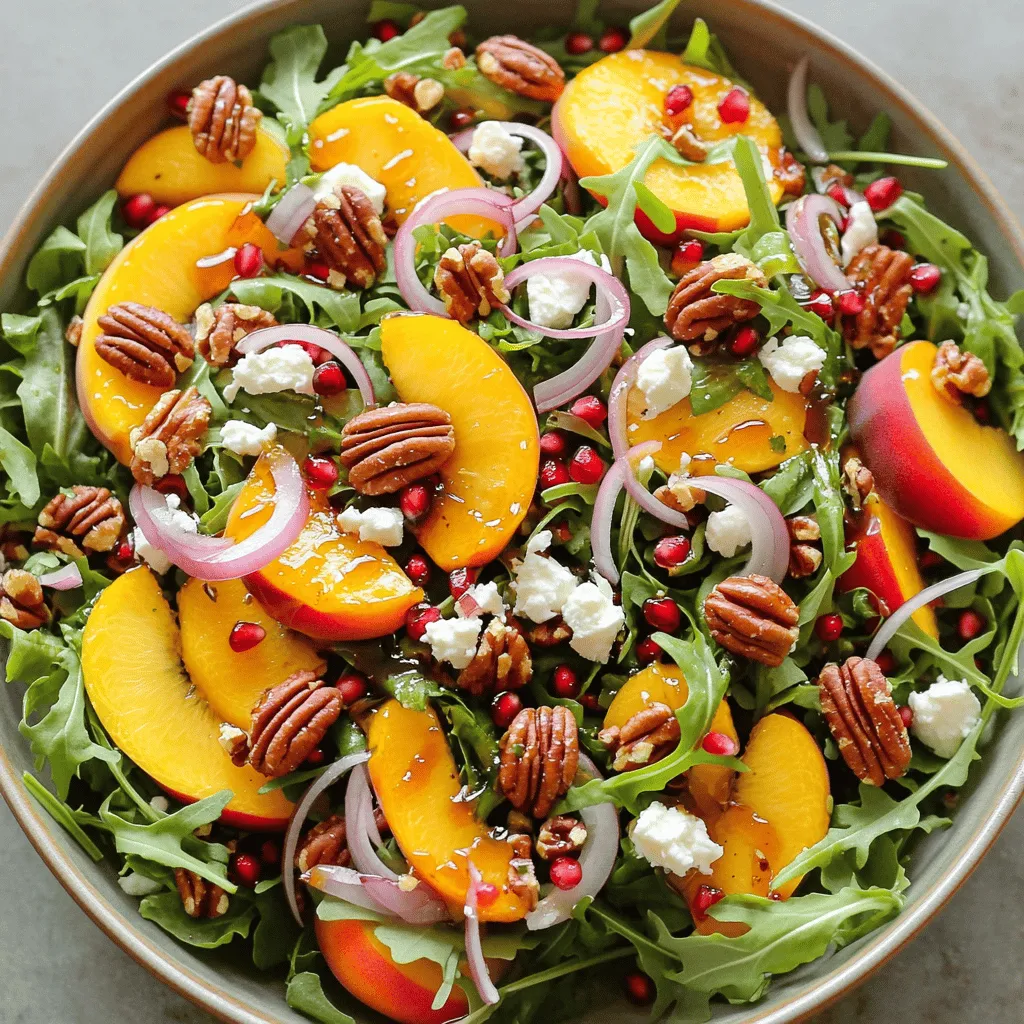
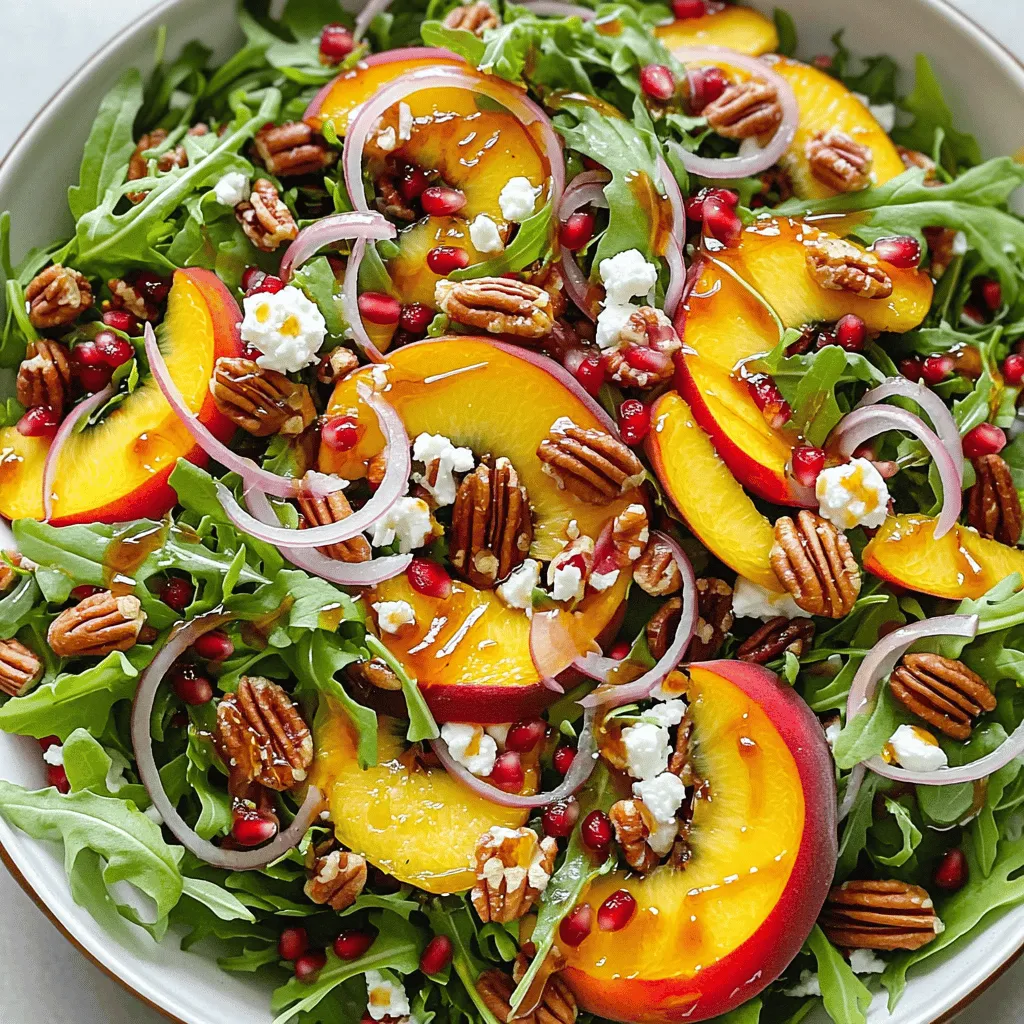
If you want a salad that feels like a million bucks, you’ve come to the right place! My Millionaire Peach Salad combines fresh peaches, rich feta, and crunchy pecans for a taste that bursts with flavor. Not only is this dish vibrant and delicious, but it’s also easy to make. Let’s dive into the ingredients and learn how to create this delightful, fresh recipe! You won’t want to miss it!
Ingredients
To make Millionaire Peach Salad, you will need fresh and tasty ingredients. Here’s the list:
– Fresh peaches
– Salad greens
– Feta cheese
– Candied pecans
– Red onion
– Pomegranate seeds
– Olive oil, balsamic vinegar, and honey
– Seasoning: salt and pepper
Fresh peaches are key. Choose ripe, juicy ones for the best flavor. The salad greens give a nice crunch. I love using arugula and mixed greens for variety. Feta cheese adds creaminess, while candied pecans provide a sweet, crunchy touch.
Red onion adds a sharp taste. Pomegranate seeds bring a burst of sweetness and color. For the dressing, mix olive oil, balsamic vinegar, and honey for balance. Finally, season with salt and pepper to enhance every bite.
Step-by-Step Instructions
Preparation of Ingredients
– Start by washing the peaches well under cold water.
– Pat them dry with a clean towel.
– Slice the peaches into wedges. Set them aside.
– Next, grab a large mixing bowl.
– Add fresh arugula or baby spinach leaves.
– Toss in assorted mixed greens like romaine or kale.
Assembling the Salad
– Gently mix the greens with the peach slices.
– Make sure the peaches are spread evenly among the greens.
– Sprinkle crumbled feta cheese on top of the salad.
– Add the crunchy candied pecans for texture.
– Include thin slices of red onion for a sharp taste.
– Finally, scatter pomegranate seeds over the salad for color.
Making the Dressing
– In a small bowl, whisk together extra virgin olive oil, balsamic vinegar, honey, salt, and pepper.
– Mix until the ingredients are well combined.
– Just before serving, drizzle the dressing over the salad.
– Toss gently to coat all the ingredients.
– Taste and adjust seasoning if needed.
Enjoy this fresh and vibrant Millionaire Peach Salad!
Tips & Tricks
How to Select Ripe Peaches
To choose perfect peaches, look for a few key signs. Ripe peaches feel slightly soft when you press them gently. Their skin should be smooth and free of blemishes. Check for a sweet scent, which means they are ready to eat. A nice golden color is also a good sign. Avoid peaches with green spots, as they may not ripen well.
Serving Suggestions
Millionaire Peach Salad works well with many dishes. You can serve it alongside grilled chicken or fish for a complete meal. It also pairs nicely with a light pasta dish. For a fun twist, try serving it with tacos or a charcuterie board. The flavors mix well and make each bite exciting.
Enhancing Flavor
You can adjust the salad’s sweetness and acidity easily. If you want it sweeter, add more honey to the dressing. For a tangier taste, increase the balsamic vinegar. Taste the dressing before adding it to the salad. This way, you ensure it has the perfect balance for your palate. Enjoy experimenting with different flavors to make it your own.

Variations
Ingredient Substitutions
You can easily change parts of this salad. Try using different greens like kale, romaine, or mixed baby greens. They all add unique flavors and textures. If you want a nutty crunch, swap candied pecans for walnuts or almonds. You can also use goat cheese or blue cheese instead of feta. These changes can make the salad special and fit your taste.
Seasonal Variants
Seasonal fruits can change the flavor of this salad. In spring, add fresh strawberries or blueberries. In summer, try ripe plums or cherries. In fall, diced apples or pears work nicely. Each fruit brings its own sweetness and charm to the dish. You can enjoy a new taste experience with each season!
Dietary Adjustments
If you want a gluten-free version, this salad is already great! Just ensure all your ingredients, especially the nuts and dressings, are certified gluten-free. For a vegan option, skip the feta cheese and use avocado for creaminess. You can also use a plant-based dressing instead of honey. These simple swaps make the salad fit for everyone.
Storage Info
How to Store Leftovers
To keep your Millionaire Peach Salad fresh, store it in an airtight container. Place the salad in the fridge. This will help maintain the crispness of the greens and the sweetness of the peaches. If possible, keep the dressing separate to prevent sogginess. The salad will stay fresh for up to two days.
Meal Prep Tips
If you want to prep this salad in advance, wash and slice the peaches ahead of time. Store them in a sealed bag with a bit of lemon juice to stop browning. You can also prepare the greens and toppings separately. This way, you can easily mix and dress the salad on busy days.
Reheating vs. Serving Cold
Millionaire Peach Salad tastes best when served cold. If you have leftovers, enjoy them straight from the fridge. This salad does not need reheating, as it loses its fresh crunch when warmed. For the best flavor, serve it cold and enjoy the mix of sweet and savory notes.
FAQs
What can I substitute for feta cheese?
You can use several creamy options. Here are a few ideas:
– Goat cheese: It has a similar tangy flavor.
– Cream cheese: It adds a rich, smooth texture.
– Ricotta: This cheese is soft and light.
– Cotija: It offers a salty and crumbly bite.
These options help keep your salad tasty and creamy.
Can I make Millionaire Peach Salad ahead of time?
Yes, you can prepare parts of the salad in advance. I recommend these tips:
– Wash and slice peaches but keep them in lemon juice.
– Make the dressing a day early. Store it in the fridge.
– Mix the greens but wait to add toppings until serving.
This way, your salad stays fresh and crunchy.
How long can I keep the salad in the fridge?
You can store the salad for about 1 to 2 days. Use these guidelines:
– Keep the dressing separate until you serve.
– Store the salad in an airtight container.
– Check for freshness before eating. Discard if it looks wilted.
Following these tips helps maintain the best taste.
This blog post explored making a delicious Peach Salad. We covered all the ingredients, preparation steps, and assembling the dish. Remember to pick ripe peaches for the best taste. You can customize the salad with different ingredients for your liking. Store leftovers properly or prep in advance for busy days. Enjoy your healthy, tasty salad! Experiment with flavors and enjoy every bite.


. - Bring salted water to a boil. - Add rotini pasta and cook until al dente. - This usually takes about 7 to 9 minutes. - Drain the pasta and rinse it under cold water to cool. - Chop the cherry tomatoes in half. - Dice the cucumber and red bell pepper. - Finely chop the red onion. - If you use fresh corn, cook it lightly for 2-3 minutes. - Cool the corn under cold water. - In a bowl, combine olive oil and lemon juice. - Add Dijon mustard and minced garlic. - Whisk the mixture until it is smooth. - Season it with salt and pepper to taste. - In a large bowl, mix the cooled pasta with the chopped vegetables. - Add crumbled feta cheese, basil, and parsley. - Drizzle the lemon vinaigrette over the pasta mixture. - Toss gently to coat all the ingredients evenly. - Cover the salad with plastic wrap. - Chill in the refrigerator for at least 30 minutes. - This helps the flavors blend together nicely. This refreshing summer pasta salad with lemon vinaigrette is perfect for hot days. For the complete recipe, check the [Full Recipe]. - Use fresh, seasonal vegetables for better flavor. Fresh veggies taste brighter and more delicious. They also add color and crunch. Look for ripe tomatoes, crisp cucumbers, and sweet bell peppers. - Adjust dressing ingredients according to personal preference. This salad is flexible. If you like tangy, add more lemon juice. If you prefer creamy, a bit of yogurt can work wonders. - Serve in a chilled bowl and garnish with basil leaves and lemon wedges. This adds a lovely touch and makes your dish pop. - Consider colorful serving dishes to enhance visual appeal. Bright colors make the salad inviting. Use a vibrant bowl to catch the eye and draw people in. {{image_4}} You can make your summer pasta salad even more filling. Adding proteins boosts nutrition and flavor. Grilled chicken, shrimp, or chickpeas work well. Grilled chicken adds a smoky taste. Shrimp gives a fresh ocean flavor. Chickpeas offer a hearty, plant-based option. Each choice makes your salad special and satisfying. While lemon vinaigrette is zesty, you can switch it up. Try balsamic vinaigrette for a sweet-tangy twist. A yogurt-based dressing adds creaminess and a slight tang. Both options change the salad's vibe while keeping it fresh. Feel free to experiment to find your favorite taste. Using seasonal vegetables makes your salad vibrant. Swap in zucchini for a crunchy bite. Asparagus adds a touch of elegance. Bell peppers bring sweetness and color. You can mix and match based on what’s fresh and available. This keeps your salad exciting and full of flavor. For the full recipe, check out the detailed instructions above. After enjoying your summer pasta salad, store any leftovers in an airtight container. This keeps the salad fresh. You can keep it in the refrigerator for up to 3 days. Freezing this pasta salad is not a good idea. The texture of the pasta and vegetables changes when frozen. They become mushy when thawed, which affects the taste. I recommend eating the salad cold straight from the fridge. This keeps the flavors bright and fresh. Don’t reheat it, as it tastes best when chilled. For more details, check out the Full Recipe. Use a gluten-free pasta option available in stores. Many brands offer good choices. Just check the label to ensure it's truly gluten-free. This way, everyone can enjoy the dish without worry. Yes, it’s best to make the salad a few hours before serving for best flavor. This time lets the ingredients blend together. You can chill it in the fridge, which enhances the taste. Just remember to toss it gently before serving. Try goat cheese, mozzarella, or skip cheese entirely for a dairy-free option. Each cheese gives a different flavor. Goat cheese adds creaminess, while mozzarella is mild and stretchy. Picking one that fits your taste makes the salad even better! This summer pasta salad is fresh, simple, and easy to make. You learned how to prepare a tasty dish with rotini pasta, colorful vegetables, and a zesty lemon vinaigrette. We discussed tips to enhance flavor and presentation. Remember, you can add proteins or swap ingredients for variety. This salad makes a great side or light meal. Enjoy making your own version and impress your guests this warm season!](https://fastmealmate.com/wp-content/uploads/2025/07/167fa52b-6c37-4fee-aa24-5fa64edc3341-768x768.webp)
![To make this Southern fried okra, start with 1 pound of fresh okra. Look for bright green pods that feel firm. Avoid any that show signs of browning or softness. Slice the okra into 1/2 inch rounds. This size helps them cook evenly and keeps their crunch. Next, prepare the coating. You will need: - 1 cup buttermilk - 1 cup cornmeal - 1/2 cup all-purpose flour - 1 teaspoon garlic powder - 1 teaspoon onion powder - 1 teaspoon smoked paprika - 1/2 teaspoon cayenne pepper (you can adjust this for spice) - Salt and pepper to taste Mix the cornmeal, flour, and spices in a bowl. This blend adds flavor and crunch. The buttermilk will help the coating stick well to the okra. For frying, use vegetable or canola oil. You need enough to fill your skillet by about 1 inch. This depth helps fry the okra evenly. Heat the oil to 350°F (175°C). A thermometer is handy for this step. Getting the oil hot enough is key for that crispy texture. Check the Full Recipe for detailed steps on cooking. Enjoy making this tasty dish! To start, you need fresh okra. Rinse it well under cold water. This cleans any dirt off the pods. Next, slice the okra into 1/2 inch rounds. Make sure each piece is uniform in size. This helps them cook evenly. Once sliced, set the okra aside on a clean plate. Now, grab a mixing bowl and pour in 1 cup of buttermilk. Add the sliced okra to the bowl. Make sure each piece is well-coated with buttermilk. Soak the okra for about 15 minutes. This step adds moisture and flavor. In another bowl, mix the dry ingredients. Combine 1 cup of cornmeal and 1/2 cup of all-purpose flour. Add 1 teaspoon each of garlic powder, onion powder, and smoked paprika. For extra heat, mix in 1/2 teaspoon of cayenne pepper. Lastly, add salt and pepper to taste. Whisk everything together well. This will create a tasty coating for the okra. For the complete recipe, check out the [Full Recipe]. Start by heating the oil in a skillet. Pour about an inch of vegetable or canola oil into a large skillet. Set the heat to medium-high. You want the oil to reach 350°F (175°C). Use a cooking thermometer for accuracy. This temperature is key for a crispy texture. After soaking the okra in buttermilk, lift it out carefully. Allow the excess buttermilk to drip off. Now, place each piece in the cornmeal mixture. Coat them well, but shake off any extra coating. This step helps avoid clumps. Once the oil is hot, add the coated okra in small batches. Avoid overcrowding the pan to keep the oil hot. Fry the okra for 3-4 minutes. Turn them occasionally to get an even golden color. When they look crispy and brown, use a slotted spoon to transfer them to a plate lined with paper towels. This removes any excess oil for a light bite. For the full experience, serve your Southern Fried Okra warm with your favorite dipping sauce. Enjoy the crunch and flavor that comes from this classic dish! {{image_4}} To make your Southern Fried Okra crispy, follow these steps: - Use fresh okra. Freshness matters for flavor and crunch. - Soak in buttermilk. This adds moisture and helps the coating stick well. - Mix dry ingredients well. A good mix of cornmeal and flour creates a great crust. - Heat oil properly. The oil should be around 350°F (175°C). Use a thermometer for accuracy. - Don't overcrowd the pan. Fry in small batches to keep the oil hot. Dipping sauces can enhance your okra’s flavor. Here are my favorites: - Creamy ranch dressing. This classic pairs well with the crunch. - Spicy remoulade. For a kick, this sauce adds a nice zest. - Honey mustard sauce. A sweet twist that complements the savory fried okra. Avoid these errors for the best okra: - Skipping the buttermilk soak. This step is key for flavor and texture. - Using cold oil. Cold oil makes the okra soggy, not crispy. - Not draining excess oil. Place fried okra on paper towels to remove oil. - Frying too many pieces at once. This lowers the oil temperature and makes the coating soggy. With these tips, your Southern Fried Okra will shine! For the full recipe, check the Southern Fried Okra Delight section above. To add some heat, use cayenne pepper. You can adjust the amount to your taste. For more spice, mix in some finely chopped jalapeños. Add them to the buttermilk soak for a spicy kick. You can also sprinkle hot sauce in the buttermilk. This brings out the zest in the dish. Spicy Southern fried okra pairs well with creamy dips. Want a lighter option? Try baking instead of frying. Coat the okra in the same buttermilk and cornmeal mix. Then, place them on a baking sheet lined with parchment. Spray a little oil on top for crispiness. Bake at 425°F (220°C) for about 20-25 minutes. Turn them halfway through to ensure even cooking. You’ll still enjoy the great flavor with less oil. Get creative with your okra! Try adding cheese to the coating. Grated Parmesan or cheddar blends well with cornmeal. You can also add herbs like thyme or dill for a fresh taste. For a sweet twist, sprinkle some brown sugar in the coating mix. This gives a nice contrast to the okra's natural flavor. Each version brings new excitement to your meal. Don’t forget to try these variations when following the Full Recipe! To keep your fried okra fresh, let it cool first. Place it in an airtight container. You can store it in the fridge for up to three days. For longer storage, freeze it in a freezer-safe bag. Just remember to remove as much air as you can. This way, your okra stays tasty and avoids freezer burn. When you are ready to enjoy your leftovers, you can reheat them easily. The best method is to use an oven. Preheat your oven to 350°F (175°C). Spread the fried okra on a baking sheet. Bake for about 10-15 minutes until hot and crispy again. You can also use an air fryer for a quick reheating. Set it to 350°F (175°C) for about 5-7 minutes. Serve your Southern Fried Okra warm for the best taste. It pairs well with several dips. Try ranch dressing for a creamy option or a spicy remoulade for some heat. You can also serve it as a side dish with fried chicken or barbecue. For a fun twist, add it to salads or tacos for extra crunch. Enjoy your crispy and flavorful delight! Yes, you can use frozen okra. Just thaw it first. Pat it dry with a kitchen towel. This helps remove excess moisture. Too much water can make the coating soggy. For the best flavor, fresh okra is still the top choice. Frozen okra works in a pinch, though! To keep your okra crispy, follow these tips: - Soak the okra in buttermilk. This adds moisture and flavor. - Make sure to coat each piece well in the cornmeal mixture. - Do not overcrowd the pan when frying. This keeps the oil hot. - Drain the fried okra on paper towels. This removes excess oil. These steps help you get that crunchy texture every time! Southern Fried Okra has roots in the American South. It came from African culinary traditions. Okra traveled with enslaved people to the U.S. They used it in many dishes. Over time, it became a staple in Southern cooking. Today, it is loved for its unique flavor and crispy texture. Enjoying Southern Fried Okra connects us to this rich history. We explored how to make Southern Fried Okra from fresh ingredients. We covered the best ways to prepare okra, soak it properly, and fry it for crispiness. You learned tips for tasty dipping sauces and ways to avoid common mistakes. Variations let you spice things up or make a healthier version. Lastly, we discussed how to store leftovers and serve them well. Enjoy this fun treat as a snack or side dish! Your fried okra will impress everyone!](https://fastmealmate.com/wp-content/uploads/2025/06/ecd84e34-27de-41dd-a177-4579a9f233b7-768x768.webp)
