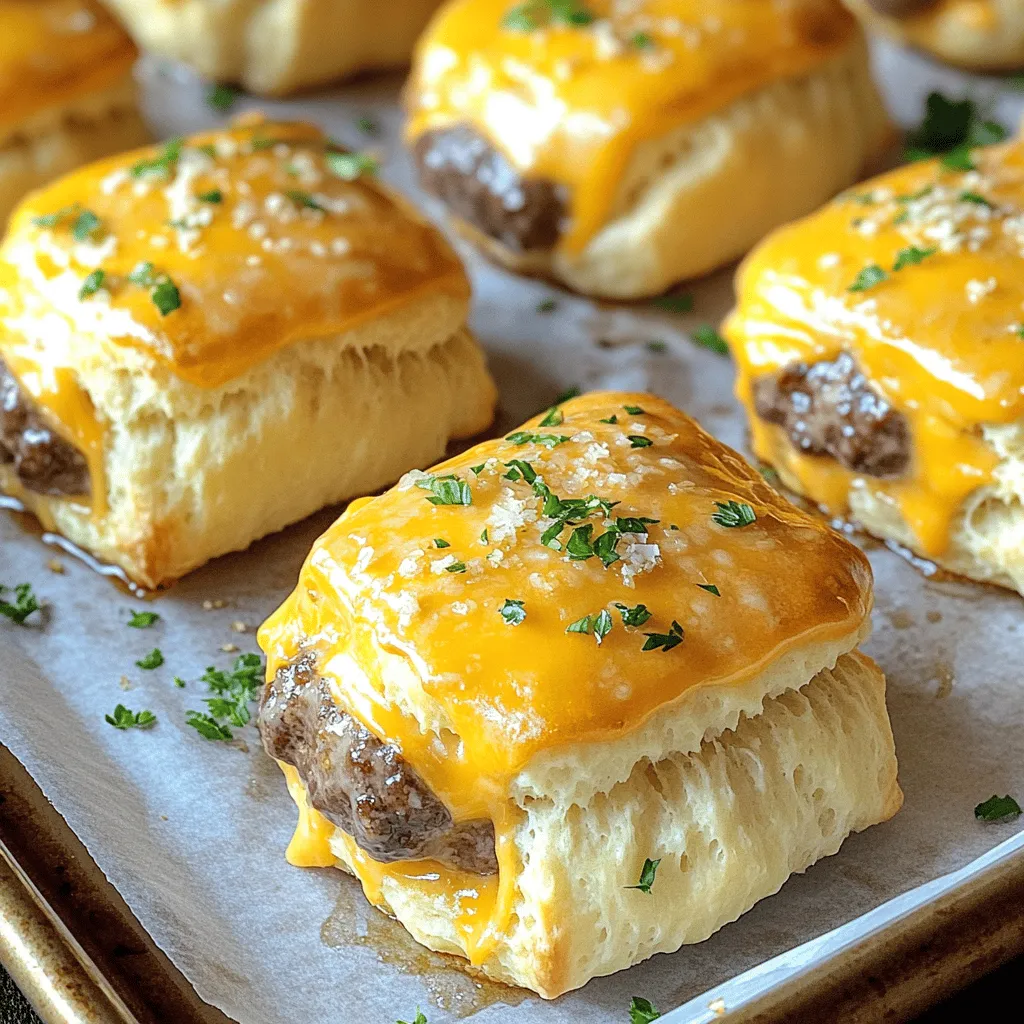
Get ready for a flavorful treat with my Garlic Parmesan Cheeseburger Bombs! These tasty bites mix juicy ground beef, sharp cheddar, and that irresistible garlic-Parmesan crunch. Perfect for game day or a family gathering, they are easy to make and even easier to devour. Let’s jump into the ingredients and learn how to whip up this savory snack delight that will wow your friends and family!
Ingredients
List of Ingredients
– 1 pound ground beef
– 1 teaspoon garlic powder
– 1 teaspoon onion powder
– 1/2 teaspoon black pepper
– 1 teaspoon salt
– 4 ounces sharp cheddar cheese, cut into small cubes
– 1 package of refrigerated biscuit dough (8 biscuits)
– 1/4 cup grated Parmesan cheese
– 3 tablespoons unsalted butter, melted
– 2 tablespoons fresh parsley, finely chopped
– 1 clove garlic, minced
Ingredient Substitutions
If you want to change up the meat, turkey or plant-based options work great. For cheese, you can swap sharp cheddar for mozzarella or pepper jack for a spicy kick.
Equipment Needed
You will need a baking sheet, mixing bowls, and measuring spoons and cups. These tools make cooking easy and fun!
These ingredients create the perfect balance of flavors for your Garlic Parmesan Cheeseburger Bombs.
Step-by-Step Instructions
Preparation of Ingredients
– Preheat the oven to 375°F (190°C).
– Line a baking sheet with parchment paper.
First, I set my oven to 375°F (190°C). This makes sure the bombs cook evenly. Next, I take a baking sheet and line it with parchment paper. This step keeps the bombs from sticking. It also makes cleanup easier.
Mixing and Shaping the Meatballs
– Combine ground beef with seasonings.
– Form meatballs around cheese cubes.
In a big bowl, I mix 1 pound of ground beef with garlic powder, onion powder, salt, and black pepper. I use my hands to mix it well. This ensures the flavors blend nicely.
Next, I take about 1 tablespoon of the beef mix and flatten it in my palm to form a small patty. I place a cube of cheddar cheese in the center. Then, I fold the beef around the cheese, making a tight meatball. I repeat this with all the beef mixture and cheese cubes until I have a nice batch of meatballs.
Assembling the Bombs
– Flatten biscuit dough.
– Encase meatballs with biscuit dough.
Now, I grab the package of biscuit dough. I carefully separate the biscuits. I take one biscuit and flatten it into a circle, about 4 inches wide. Then, I place one meatball in the center. I fold the edges of the biscuit over the meatball, sealing it tight. I make sure there are no gaps. I do this with all the biscuits and meatballs.
Baking Process
– Brush garlic-Parmesan mixture on top.
– Bake until golden brown and cooked through.
In a small bowl, I mix melted butter, minced garlic, grated Parmesan cheese, and chopped parsley. I brush this tasty mix over the tops of each bomb. It adds great flavor! Then, I place the bombs seam-side down on my baking sheet.
Finally, I bake them for 15 to 20 minutes. I watch them closely until they turn golden brown. I check the internal temperature to ensure it reaches at least 160°F (71°C). When they are ready, I let them cool for a few minutes. Now, they are ready to enjoy.
Tips & Tricks
Perfecting the Recipe
To ensure a full cheese experience, make sure to seal each meatball well. If you don’t, cheese will leak out during baking. Start with just enough beef to cover the cheese entirely. For seasoning, taste the beef mixture before forming the balls. Adjust salt and pepper to match your preference.
Cooking Tips
Always check the internal temperature of your cheeseburger bombs. They should reach 160°F (71°C) for safe eating. Use a meat thermometer to make sure they are cooked through. For even baking, space the bombs apart on the baking sheet. This allows hot air to circulate around them.
Serving Suggestions
Get creative with your serving ideas! Serve these bombs on a rustic wooden platter for a cozy look. For a fun touch, offer different dipping sauces like marinara or ranch. These sauces add a tasty element and enhance the overall flavor. Enjoy your Garlic Parmesan Cheeseburger Bombs with friends or family for a delightful snack!

Variations
Flavor Variations
You can easily change the taste of your Garlic Parmesan Cheeseburger Bombs. Here are two fun ideas:
– BBQ cheeseburger bombs: Mix barbecue sauce into the beef mix for a sweet twist. You can also add a slice of cooked bacon for extra flavor.
– Spicy cheeseburger bombs with jalapeños: Add chopped jalapeños to the beef mixture to kick up the heat. This adds a nice zing and pairs well with the creamy cheese.
Vegetarian/Vegan Options
You can enjoy these bombs without meat. Here are some tasty swaps:
– Using veggie patties: Replace the ground beef with your favorite veggie patties. They work well and keep the bombs satisfying.
– Substituting cheese with dairy-free options: Use dairy-free cheese to make these bombs vegan-friendly. It melts nicely and keeps the cheesy goodness.
Customizable Add-ins
Make your bombs special by adding extra ingredients:
– Additional ingredients: Try adding cooked bacon bits or sautéed mushrooms. Both options add great taste and texture.
– Herbs and spices for a unique twist: Experiment with herbs like thyme or spices like smoked paprika. These can enhance the flavor and make each bite exciting.
Feel free to explore these variations to create your perfect Garlic Parmesan Cheeseburger Bombs!
Storage Info
Storing Leftovers
When you have leftover Garlic Parmesan Cheeseburger Bombs, store them in an airtight container. The fridge is the best place for them. Make sure they cool down first. Proper cooling helps keep their texture. You can enjoy them within three days. When reheating, place them on a baking tray. Heat them in the oven at 350°F (175°C) for about 10 minutes. This keeps them crispy and warm inside.
Freezing Instructions
You can freeze these bombs before or after baking. If you freeze them before baking, wrap each bomb in plastic wrap. Then, place them in a freezer bag. This way, they stay fresh for up to three months. When you’re ready, you can bake them straight from the freezer. Just add a few extra minutes to the baking time.
If you freeze them after baking, let them cool first. Then, place them in a container or freezer bag. To thaw, just put them in the fridge overnight. Reheat in the oven at 350°F (175°C) for about 15 minutes. This method keeps the bombs tasty and warm.
FAQs
How long do Garlic Parmesan Cheeseburger Bombs last in the fridge?
Garlic Parmesan Cheeseburger Bombs can last for about 3 to 4 days in the fridge. Store them in an airtight container to keep them fresh. To check for spoilage, look for any changes in color or smell. If they feel slimy or have an off odor, it’s best to throw them away.
Can I make Garlic Parmesan Cheeseburger Bombs in advance?
Yes, you can make these bombs in advance! Prepare them up to the baking step. Keep them in the fridge until you’re ready to bake. This way, you save time and still enjoy fresh, hot bombs. Just remember to bake them within 24 hours for the best taste.
What can I serve with these cheeseburger bombs?
These cheeseburger bombs pair well with many sides. Try serving them with a fresh salad or crispy fries. You can also add some dipping sauces like ketchup or ranch. For a twist, marinara sauce adds a nice touch, too!
Is there a way to make these gluten-free?
Yes! To make Garlic Parmesan Cheeseburger Bombs gluten-free, use gluten-free biscuit dough. Many brands sell this option in stores. You can also make your own with gluten-free flour. Just check the labels to ensure all ingredients are gluten-free.
You now know how to make delicious Garlic Parmesan Cheeseburger Bombs. We discussed the ingredients you need, including ground beef and cheese. You learned versatile options, like alternative meats and cheese types. We also went through the step-by-step process for preparation, mixing, and baking.
These flavorful bombs are fun to create and customize. Whether you prefer classic or spicy flavors, there’s a choice for you. Remember to store any leftovers properly. I hope you enjoy making this simple recipe!


