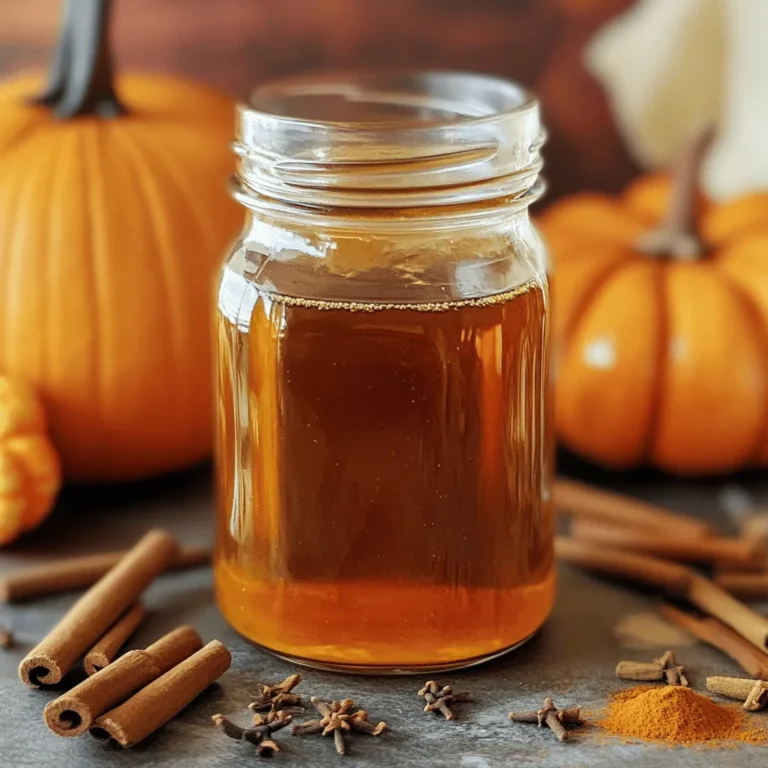
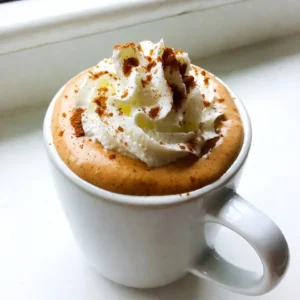
Pumpkin Spice Eggnog Creamy Holiday Drink Delight
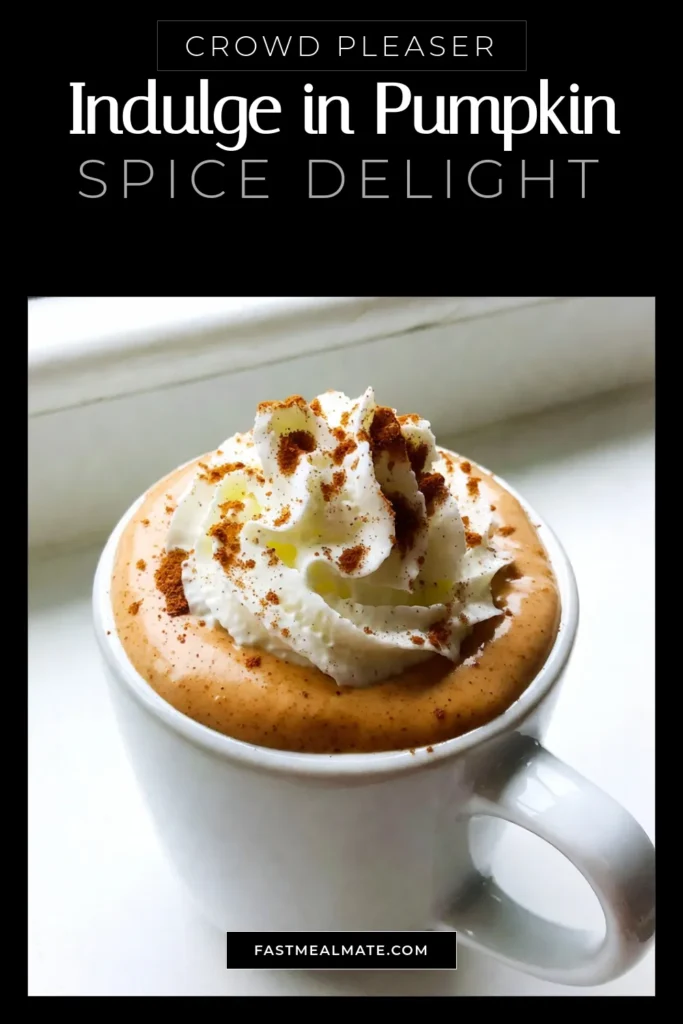
Get ready to sip on the ultimate holiday treat—Pumpkin Spice Eggnog! This creamy drink combines the cozy flavors of pumpkin and spices for a rich, festive experience. Whether you want to impress your guests or enjoy a tasty night in, this recipe is a must-try. I’ll guide you through each step, from ingredients to serving tips, so you can enjoy this delightful drink all season long. Let’s dive in!
Why I Love This Recipe
- Rich Flavor: This pumpkin spice eggnog combines the creaminess of milk and heavy cream with the warm spices of cinnamon, nutmeg, and ginger, creating a rich and indulgent drink.
- Perfect for the Season: With its delightful pumpkin and spice flavors, this eggnog is perfect for cozy gatherings and holiday celebrations, bringing a festive touch to any occasion.
- Customizable: You can easily adjust the sweetness or spice levels to suit your taste, making this recipe versatile and accommodating for everyone.
- Homemade Goodness: Making eggnog from scratch allows you to control the ingredients, ensuring a fresh and wholesome beverage that tastes far superior to store-bought options.
Ingredients
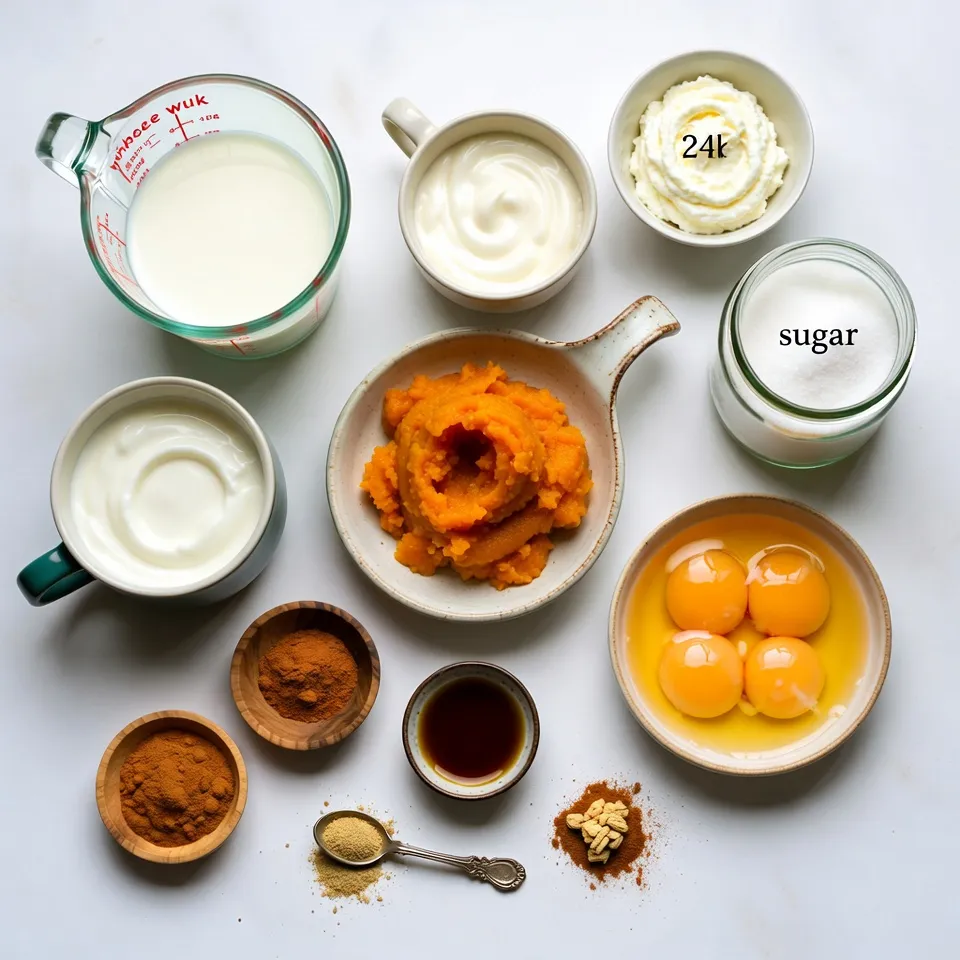
Main ingredients for Pumpkin Spice Eggnog
To make a tasty Pumpkin Spice Eggnog, you need these main ingredients:
– 2 cups whole milk
– 1 cup heavy cream
– 3/4 cup pumpkin puree
– 1/2 cup granulated sugar
– 4 large egg yolks
– 1 teaspoon vanilla extract
– 1 teaspoon ground cinnamon
– 1/2 teaspoon ground nutmeg
– 1/4 teaspoon ground ginger
These items create a rich and creamy base. The pumpkin puree gives it that warm fall flavor. The spices add depth, making each sip delightful.
Optional ingredients for variations
You can also try these optional ingredients to mix things up:
– Almond milk (for a lighter version)
– Coconut milk (for a tropical twist)
– Maple syrup (as a natural sweetener)
– Whipped topping (for extra creaminess)
Using these substitutes can change the taste. They can also suit different dietary needs.
Recommended garnishes and toppings
To make your eggnog look and taste even better, consider these garnishes:
– Whipped cream (for a fluffy top)
– Ground cinnamon (for a spicy finish)
– Nutmeg (for a classic touch)
– Crushed graham crackers (for a crunchy texture)
These toppings add a nice touch. They can make your drink festive and fun!
Step-by-Step Instructions
Detailed preparation process
To make pumpkin spice eggnog, start by warming 2 cups of whole milk and 1 cup of heavy cream in a medium saucepan. Heat it on medium until it’s warm, about 150°F. Stir it gently, but do not let it boil.
In a separate bowl, mix 3/4 cup of pumpkin puree, 1/2 cup of granulated sugar, and 4 large egg yolks. Add 1 teaspoon of vanilla extract, 1 teaspoon of ground cinnamon, 1/2 teaspoon of ground nutmeg, and 1/4 teaspoon of ground ginger. Whisk these ingredients until smooth.
Next, slowly pour the warm milk and cream into the pumpkin mix while whisking. This helps the eggs warm up without curdling. Once combined, pour the mixture back into the saucepan.
Cook it over low heat, stirring constantly for about 5-7 minutes. You want it to thicken enough to coat the back of a spoon. Avoid boiling it, as this can ruin the texture.
Important tips during cooking
Make sure to heat the milk and cream slowly. If it gets too hot, it can boil, which is not good. When mixing the warm liquid with the egg mixture, whisk continuously. This step is key to prevent the eggs from cooking too fast and turning into scrambled eggs.
Keep stirring while cooking on low heat. This helps the eggnog thicken evenly. If you stop stirring, it can stick to the bottom of the pan and burn.
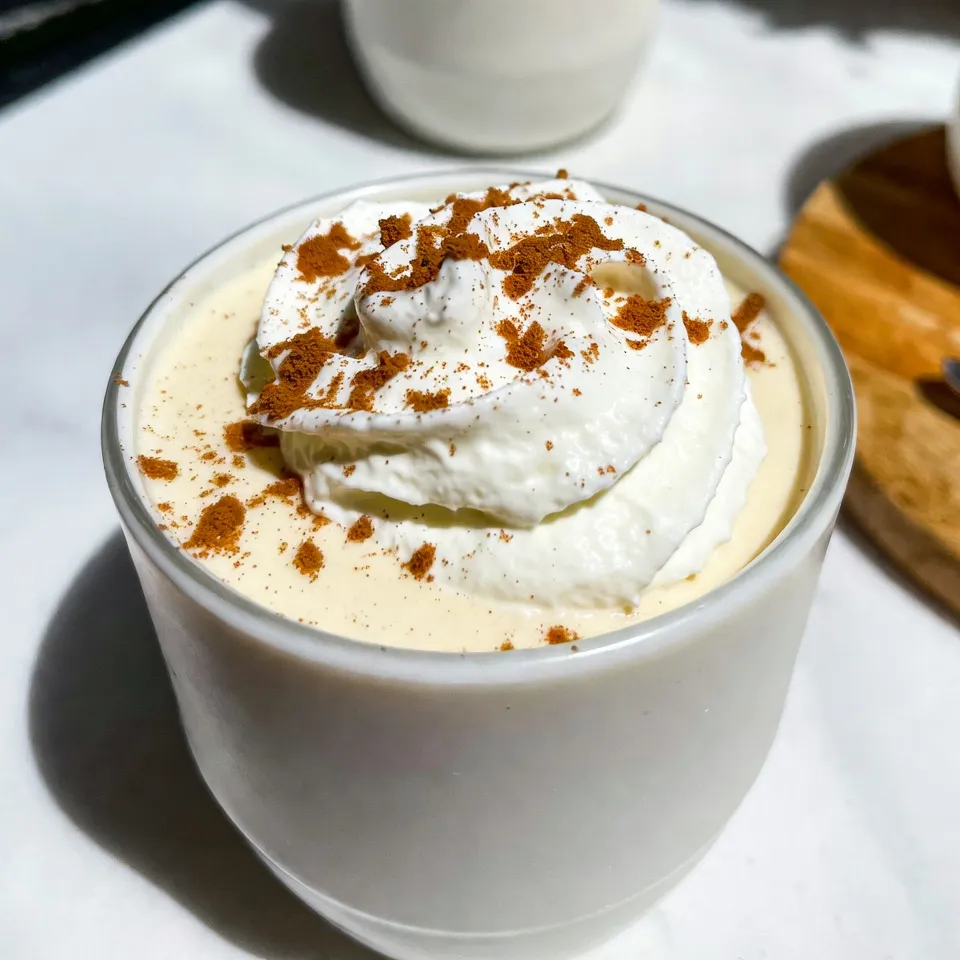
Cooling and serving instructions
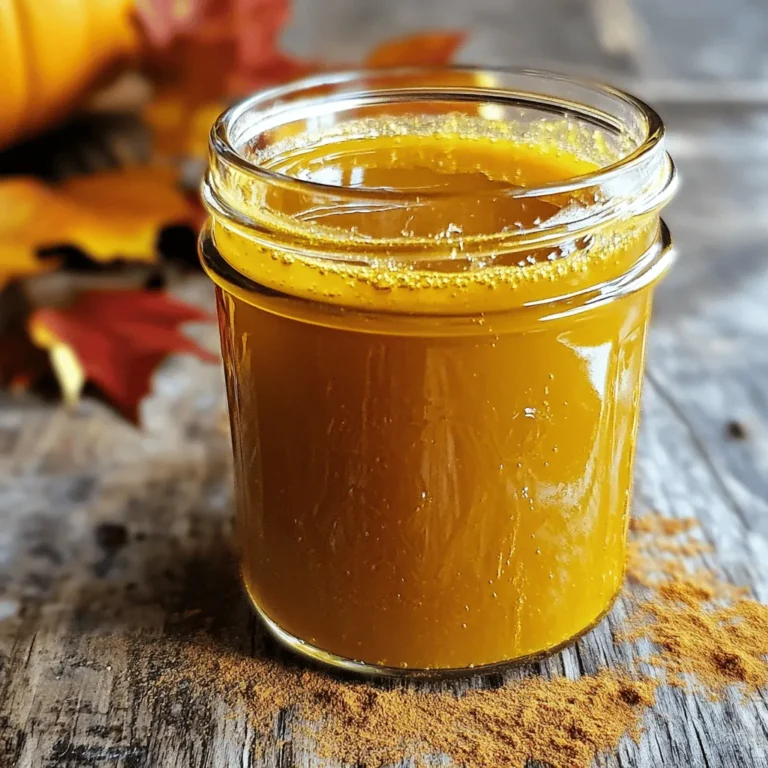
After thickening, take the saucepan off the heat and let the eggnog cool for about 15 minutes at room temperature. Then, strain it through a fine-mesh sieve into a bowl or pitcher. This step ensures a smooth drink by removing lumps.
Chill the strained eggnog in the fridge for at least 2-3 hours. Once it’s fully cold, serve it in festive glasses. Top each serving with whipped cream and a sprinkle of ground cinnamon for a lovely finish. Enjoy the delicious, spiced flavor!
Tips & Tricks
Best practices for a smooth texture
To get a silky smooth pumpkin spice eggnog, use these tips:
– Heat slowly: Warm the milk and cream gently. Stir often to prevent scorching.
– Whisk well: Blend the pumpkin puree and egg yolks until creamy. This mixes air in.
– Temper the eggs: Pour warm milk into the pumpkin mix slowly while whisking. This keeps the eggs from cooking too fast.
Avoiding common mistakes
Here are a few common hiccups to avoid:
– Do not boil: Boiling the mixture can turn it grainy. Keep the heat low and steady.
– Watch the time: Stir the mixture constantly while it thickens. This takes about 5-7 minutes.
– Strain carefully: Use a fine-mesh sieve to catch lumps. This step is key for smoothness.
Customizing sweetness and spice levels
You can make this eggnog your own by adjusting flavors:
– Sweetness: Start with 1/2 cup of sugar. Taste it, and add more if you like.
– Spices: For more warmth, add extra cinnamon or nutmeg. Start with 1/4 teaspoon more.
– Pumpkin puree: For a stronger pumpkin flavor, increase the puree to 1 cup.
Feel free to play around with these ideas to make your perfect pumpkin spice eggnog!
Pro Tips
- Use Fresh Pumpkin Puree: For the best flavor, opt for homemade pumpkin puree instead of canned. It enhances the taste and freshness of your eggnog.
- Whisk Constantly: When combining the warm milk with the egg mixture, whisk continuously to prevent the eggs from curdling. This ensures a smooth and creamy texture.
- Chill Thoroughly: Allow the eggnog to chill in the fridge for at least 2-3 hours. This not only improves the flavor but also ensures it’s refreshing when served.
- Garnish Creatively: Elevate your presentation by garnishing with whipped cream and a sprinkle of ground cinnamon or even a cinnamon stick for added flair.
Variations
Dairy-free and vegan options
You can easily make a dairy-free version of pumpkin spice eggnog. Use almond milk or coconut milk instead of whole milk. For creaminess, opt for canned coconut cream. Replace egg yolks with silken tofu or a banana. This keeps the rich texture. Sweeten it with maple syrup or agave nectar. Add your spices for flavor, and enjoy a vegan treat.
Alcoholic version suggestions
If you want to add a kick, try spiking your eggnog. Rum or bourbon works well here. Add about 1 cup of your chosen spirit to the mix. This gives the drink a warm, cozy vibe. You can also try flavored liqueurs like butterscotch. This adds a new taste dimension. Just remember to adjust sweetness as needed.
Flavor enhancements (e.g., chocolate, caramel)
Feel free to get creative with flavors! For a chocolate twist, mix in chocolate syrup or cocoa powder. Start with 1 to 2 tablespoons. If you prefer caramel, drizzle some caramel sauce into the mix. This adds sweetness and a rich flavor. You can also blend in a pinch of espresso powder for a coffee kick. Each of these options makes your eggnog unique and fun!
Storage Info
How to store leftover eggnog
To store leftover Pumpkin Spice Eggnog, you need a clean, sealed container. A glass jar or a plastic pitcher works well. Pour the eggnog into the container and close it tightly. Place it in the fridge. This keeps the eggnog fresh and safe to drink.
Freezing options and limitations
You can freeze Pumpkin Spice Eggnog, but it may change texture. To freeze, pour eggnog into freezer-safe bags. Leave some space for expansion. When ready to use, thaw the eggnog in the fridge overnight. Stir well before serving, as it may separate.
Recommended shelf life and safety tips
Pumpkin Spice Eggnog lasts about 3-5 days in the fridge. If you freeze it, it can last up to 3 months. Always check for any off smell or changes in texture before drinking. If you see any signs of spoilage, it’s best to toss it out. Enjoy your eggnog safely!
FAQs
What is the history of eggnog?
Eggnog has a long history. It dates back to the 14th century. Early forms included milk, eggs, and alcohol. This drink was popular among the rich. It often appeared at holiday feasts. The name “eggnog” likely comes from two words: “egg” and “noggin,” a small cup. Over time, it became a holiday favorite for many.
Can I use pumpkin pie spice instead of individual spices?
Yes, you can use pumpkin pie spice. It combines cinnamon, nutmeg, and ginger. This makes it easy to add flavor. Use about 2 teaspoons of pumpkin pie spice. Adjust based on your taste. It simplifies the recipe while keeping it tasty.
How to make Pumpkin Spice Eggnog ahead of time?
You can make Pumpkin Spice Eggnog a day ahead. Follow the recipe and chill it. Store it in a pitcher in the fridge. This allows the flavors to blend well. Just remember to stir before serving. Garnish with whipped cream and cinnamon. Enjoy it cold and festive!
This blog post covered how to make Pumpkin Spice Eggnog using key ingredients and steps. You learned about optional elements and garnishes that can enhance your drink. I shared tips for smooth texture and customization. We explored variations, including dairy-free options and flavor boosts. Lastly, I provided storage information to keep your eggnog fresh.
Enjoying your homemade eggnog can be a festive treat. Follow these steps to impress your friends and famil
Pumpkin Spice Eggnog
Ingredients
- 2 cups whole milk
- 1 cup heavy cream
- 3.75 cups pumpkin puree
- 0.5 cups granulated sugar
- 4 large egg yolks
- 1 teaspoon vanilla extract
- 1 teaspoon ground cinnamon
- 0.5 teaspoon ground nutmeg
- 0.25 teaspoon ground ginger
- 1 serving Whipped cream (for topping)
- 1 serving Ground cinnamon (for garnish)
Instructions
- In a medium saucepan, combine the whole milk and heavy cream over medium heat. Stir occasionally and heat just until the mixture is warm (around 150°F), making sure not to let it come to a boil.
- In a separate mixing bowl, whisk together the pumpkin puree, granulated sugar, egg yolks, vanilla extract, ground cinnamon, ground nutmeg, and ground ginger until you achieve a smooth and homogenous mixture.
- Slowly and carefully pour the warm milk and cream mixture into the pumpkin mixture while whisking continuously. This step is crucial as it helps temper the eggs, preventing them from curdling.
- Once combined, pour the mixture back into the saucepan. Cook over low heat, stirring constantly with a wooden spoon or heat-resistant spatula until the mixture thickens slightly, enough to coat the back of the spoon (this should take about 5-7 minutes). Avoid boiling the mixture, as this could ruin the texture.
- After thickening, remove the saucepan from the heat and let the eggnog cool for approximately 15 minutes at room temperature.
- Strain the eggnog through a fine-mesh sieve into a large bowl or pitcher to ensure a smooth texture and to eliminate any lumps.
- Let the strained eggnog chill in the refrigerator for at least 2-3 hours until it is completely cold.
- Serve the chilled eggnog in festive glasses, topped with a generous dollop of whipped cream and a light dusting of ground cinnamon for an elegant finish. Enjoy the rich, spiced flavor!
![- 1 cup brewed Earl Grey tea (cooled) - 1 cup frozen blueberries - 1 ripe banana - 1 tablespoon honey or maple syrup (to taste) - 1/2 cup almond milk (or milk of choice) - 1 cup ice cubes - 1/2 teaspoon vanilla extract - A small pinch of salt The Blueberry Earl Grey Frappe is a treat. Each ingredient plays a key role in flavor and health. Benefits of Earl Grey tea: Earl Grey tea comes from black tea mixed with bergamot oil. This blend gives it a lovely flavor. It also offers health perks like antioxidants. These can help protect your cells. Nutritional value of blueberries: Blueberries are tiny superfoods. They are low in calories yet high in vitamins. They also have fiber, which helps digestion. Their antioxidants may support heart health too. Advantages of using bananas: Bananas add natural sweetness to your frappe. They provide potassium, which is good for your heart. Plus, they help create a creamy texture when blended. Alternatives for almond milk: If you don't have almond milk, try oat or soy milk. These options work well and keep the frappe creamy. Sweetener options: You can swap honey for agave or stevia. Each sweetener adds a unique taste. Adjust the amount based on your liking. Using fresh vs. frozen blueberries: Frozen blueberries keep the frappe cold and thick. Fresh blueberries can be used, but they will change the texture. If using fresh, add more ice to keep it cool. For the full recipe, check the above details. Enjoy creating this refreshing drink! Start by brewing a strong cup of Earl Grey tea. Choose high-quality loose leaf or bagged tea. Use boiling water for the best flavor. Once brewed, let it cool to room temperature. This takes about 10 to 15 minutes. For faster cooling, pour the tea into a wide bowl. You can also prepare the tea ahead of time. Just refrigerate it for at least one hour. Once your tea is cool, gather your ingredients for the frappe. Add the cooled tea to a blender. Include one cup of frozen blueberries, one ripe banana, and one tablespoon of honey or maple syrup. Pour in half a cup of almond milk and one cup of ice cubes. Don’t forget half a teaspoon of vanilla extract and a small pinch of salt. Blend everything on high speed. Aim for a smooth and creamy texture. If you find it too thick, add more almond milk. Blend again until well mixed. Now it’s time to serve your Blueberry Earl Grey Frappe. Pour the frappe into chilled glasses. For a nice touch, garnish with fresh blueberries on top. You can also sprinkle some lemon or orange zest for added brightness. This will enhance the flavor and make it look beautiful. Enjoy your refreshing drink! Check the [Full Recipe] for all details. To get the best texture in your Blueberry Earl Grey Frappe, blend well. I recommend mixing until smooth and creamy. If the drink feels too thick, add a splash more almond milk. If it's too thin, add a few more ice cubes. Sweetness is key to balance. Start with one tablespoon of honey or maple syrup. Taste it after blending. If you want it sweeter, add more syrup and blend again. Adjust to your taste! You can brew Earl Grey tea in advance. Store it in the fridge for up to three days. This way, your frappe is quick to make. Just remember to cool it down first. For freezing blueberries, spread them in a single layer on a baking sheet. Freeze for a couple of hours. Once frozen, transfer them to a bag. This keeps them fresh and ready for your frappe. This frappe pairs well with light snacks. Think of yogurt, granola, or even a slice of lemon cake. The flavors mix well together! To boost the taste, add a little citrus zest. A sprinkle of lemon or orange zest adds a bright twist. It enhances the drink’s flavor and makes it even more refreshing. For more tips, check out the Full Recipe. {{image_4}} You can play with your Blueberry Earl Grey Frappe! Try adding other fruits. Strawberries add a sweet punch. Mango gives a tropical flair. Both will mix well with the blueberry flavor. Next, think about spices. A dash of cinnamon adds warmth. Nutmeg gives a nice twist too. Just a pinch is enough to elevate your drink. Be bold and experiment to find your favorite mix! Making this frappe dairy-free is easy. Use almond milk, oat milk, or coconut milk. They all work great. If you want it sweeter, try agave syrup or coconut sugar. These are great vegan substitutes for honey. For a vegan drink, ensure all your ingredients are plant-based. Double-check your sweetener. Always look for options that suit your diet. This way, you can enjoy your treat without worry. Want a different take? Try making a cold brew version! Start by steeping your Earl Grey tea in cold water. Let it sit in the fridge for 6 to 12 hours. This method brings out a smoother flavor. Once you’re ready, blend the cold brew with your ingredients. You can add some extra fruit for a fun twist. The cold brew style will give your frappe a unique taste. It’s perfect for hot summer days! You can find the full recipe for this refreshing drink to get started. To keep your brewed Earl Grey tea fresh, store it in an airtight container. Place it in the fridge. It stays good for about three days. If you want to keep its flavor strong, don’t add any sweeteners yet. They might make the tea taste off after a day. For frozen blueberries, keep them in their original bag. Seal it tightly to avoid freezer burn. Use them within six months for the best taste. If you buy fresh blueberries, wash and dry them first. Then, freeze them in a single layer on a baking sheet. Once frozen, transfer them to a sealed bag. If you have leftover frappe, store it in the fridge. Use a tightly sealed jar or container. It stays fresh for about one day. The frappe might separate a bit, but that’s okay. Just give it a good shake before drinking. For longer storage, you can freeze the leftover frappe. Pour it into ice cube trays or freezer-safe containers. This way, it can last for up to a month. When you want a quick drink, blend a few cubes with some almond milk, and enjoy. You can reblend any leftover frappe. Just pour it back into the blender. Add a splash of milk to help it blend smoothly again. This makes it creamy and delicious once more. If you stored the frappe in the fridge, drink it cold. For a refreshing treat, consider adding fresh fruit or a dollop of yogurt. You can also mix in a bit of honey or maple syrup for added sweetness. Enjoy your Blueberry Earl Grey Frappe! For the full recipe, check the details above. To make your Blueberry Earl Grey Frappe vegan, you can easily swap a few ingredients. Use plant-based milk, like almond or oat milk, in place of dairy milk. For sweetening, choose maple syrup instead of honey. This keeps the flavor vibrant while ensuring it's plant-friendly. Yes, you can use fresh blueberries! However, the texture may change. Frozen blueberries give a thicker, frostier drink. Fresh blueberries will make the frappe lighter but may not chill it as well. You might want to add extra ice to cool it down. The flavor will still be delicious, though! You can often find this refreshing drink at specialty coffee shops or tea cafes. Look for places that focus on creative beverages. Chains like Starbucks may offer seasonal versions. Always ask if they can make it with Earl Grey and blueberries. It's a great way to try this unique flavor combo before making your own. For the full recipe, check the detailed ingredients and instructions in the earlier section! In this article, we explored how to make a Blueberry Earl Grey Frappe. We covered the key ingredients, from brewed tea to blueberries and bananas, and highlighted their health benefits. You learned simple steps to blend and serve your frappe, along with helpful tips for perfecting it. Lastly, we shared variations and storage tips to keep it fresh. Try this recipe at home, and enjoy a tasty and healthy drink that refreshes and energizes! Your taste buds will thank you!](https://fastmealmate.com/wp-content/uploads/2025/06/c77c6fd4-2277-427b-99cf-97ef587db48b-768x768.webp)
![- 2 ripe mangoes, peeled and diced - 1 cup freshly squeezed lemon juice (approximately 4-5 lemons) - 4 cups cold water - 1/2 cup honey or agave syrup (adjust for sweetness) - 1/4 teaspoon sea salt - Ice cubes - Fresh mint leaves and lemon slices for garnish In this recipe, ripe mangoes are key. They give the drink a rich, sweet flavor. Fresh lemon juice adds a tangy twist that balances the sweetness. I recommend using cold water for a refreshing drink. Honey or agave syrup allows you to control the sweetness level. Adding a pinch of sea salt enhances the taste and brings out the flavors. Don't forget the ice cubes! They keep your drink cool and refreshing. Lastly, fresh mint leaves and lemon slices make a beautiful garnish. They add a nice touch to your glass and make it look appetizing. For the complete recipe, check out the [Full Recipe]. To start, you need ripe mangoes. Peel and dice two mangoes. Place the diced mangoes in a blender. Add 1 cup of cold water. Blend on high until smooth and creamy. This mango puree gives your drink a rich flavor. Next, grab a large pitcher. Pour in 1 cup of freshly squeezed lemon juice. Use about 4-5 lemons for this. Add 3 cups of cold water. Mix in 1/2 cup of honey or agave syrup. Stir until everything is well combined. This mixture will be your refreshing lemonade base. Now, it’s time to combine. Gently pour the mango puree into the pitcher with the lemonade. Stir carefully until everything is mixed. You want the mango and lemonade to blend perfectly for a smooth taste. Take a moment to taste your mixture. If it’s too sweet, add more lemon juice. If you want it sweeter, mix in more honey or agave. Don't forget the salt! Stir in 1/4 teaspoon of sea salt to balance the flavors. Adjust until it tastes just right for you. It’s almost time to serve! Fill your glasses with ice cubes. Carefully pour the mango lemonade over the ice. Each glass should be full of that bright, fruity goodness. For a nice touch, garnish with fresh mint leaves and a lemon slice on the rim. This makes your drink look inviting and fresh. For the full recipe, check out the detailed steps above! To make your mango lemonade sweet, you can adjust the honey or agave syrup. Start with the half cup stated in the recipe. After mixing, taste it. If it’s not sweet enough, add more sweetener a little at a time. This way, you control the flavor. Remember, mangoes also add some natural sweetness. So, your lemonade may not need much more. Want to add some extra flavor? Fresh herbs like mint or basil work great. Just chop them up finely and mix them into the lemonade. You can also try adding a pinch of ginger or a dash of cinnamon. These spices bring a new twist to your drink. They can brighten the mango's flavor and make it even more refreshing. Mango lemonade pairs well with light snacks. Think about serving it with fresh fruit or a light salad. It also goes perfectly with grilled chicken or fish. For a fun twist, try it with spicy tacos. The sweet and tangy lemonade cools down the heat. Serve it over ice for a refreshing treat. Enjoy the colorful look with mint and lemon slices on top, making your table even more inviting. {{image_4}} You can make mango lemonade even better by adding other fruits. Try mixing in fresh berries like strawberries or blueberries. Pineapple also works great. These fruits add extra color and fun flavors. To do this, simply blend the fruits with the mango before mixing with the lemonade. Each fruit brings its own unique taste, making your drink more exciting. Want to spice things up? You can turn mango lemonade into a fun adult drink. Add rum or vodka for a spiked version. Use about 1 to 2 ounces of your favorite spirit per glass. This addition gives the drink a kick, perfect for parties or summer gatherings. Just remember to drink responsibly! Get creative by using flavored teas or herbal infusions in your mango lemonade. You can brew a light green tea or a refreshing mint tea. Once it cools, mix it into your lemonade base. This adds a whole new layer of flavor. You can even try herbal infusions like chamomile for a soothing twist. Explore these options to find your favorite mix. The full recipe will guide you through making this delightful drink. To keep your mango lemonade fresh, store it in an airtight container. A glass jar or a pitcher works well. Make sure to seal it tightly to prevent any odors from the fridge from mixing in. Always place it in the coldest part of the fridge, usually towards the back. This helps keep it cool and refreshing. Your mango lemonade will stay fresh for about 3 to 5 days. After that, the flavors may start to fade. If it starts to taste less vibrant, you might want to add a little more lemon juice or honey to revive it. Always check for any changes in smell or color before drinking. If you want to save some for later, freezing is a great option. Pour the mango lemonade into ice cube trays or freezer-safe bags. Leave a little space at the top, as liquids expand when frozen. When you want to enjoy it again, just thaw it in the fridge overnight. You can also blend the frozen cubes into smoothies for an instant fruity treat. For the full recipe, check out the [Full Recipe]. Mango lemonade is packed with vitamins. Mangoes are rich in vitamin C, which helps boost your immune system. They also contain vitamin A, good for your eyes and skin. The lemon juice adds more vitamin C and antioxidants. Together, they help you stay hydrated and healthy. Drinking mango lemonade can also support digestion due to its natural enzymes. Yes, you can use frozen mangoes! They make a great substitute. When you use frozen mango, it still blends well into a smooth puree. You do not need to thaw them first. Just add them to the blender with some water and blend until smooth. This makes it easy for you to enjoy mango lemonade anytime, even when fresh mangoes aren't available. To make your mango lemonade less tart, add more sweetness. You can increase the honey or agave syrup. Start with a little, then taste and add more if needed. If it’s still too sour, you can add more mango puree. A pinch of salt can also help balance the flavors. This way, you will enjoy a sweeter, more balanced drink. This mango lemonade recipe is sure to refresh you. We covered the ingredients, step-by-step instructions, and variations to try. Don't forget to adjust sweetness and explore fun combos. You can enjoy this drink fresh or store it for later. Whether you sip it by itself or with snacks, it's a bright treat. I hope you’re excited to make this delicious drink and share it with others!](https://fastmealmate.com/wp-content/uploads/2025/07/c517a603-1516-4e83-8a0a-b9bae852f1a0-768x768.webp)