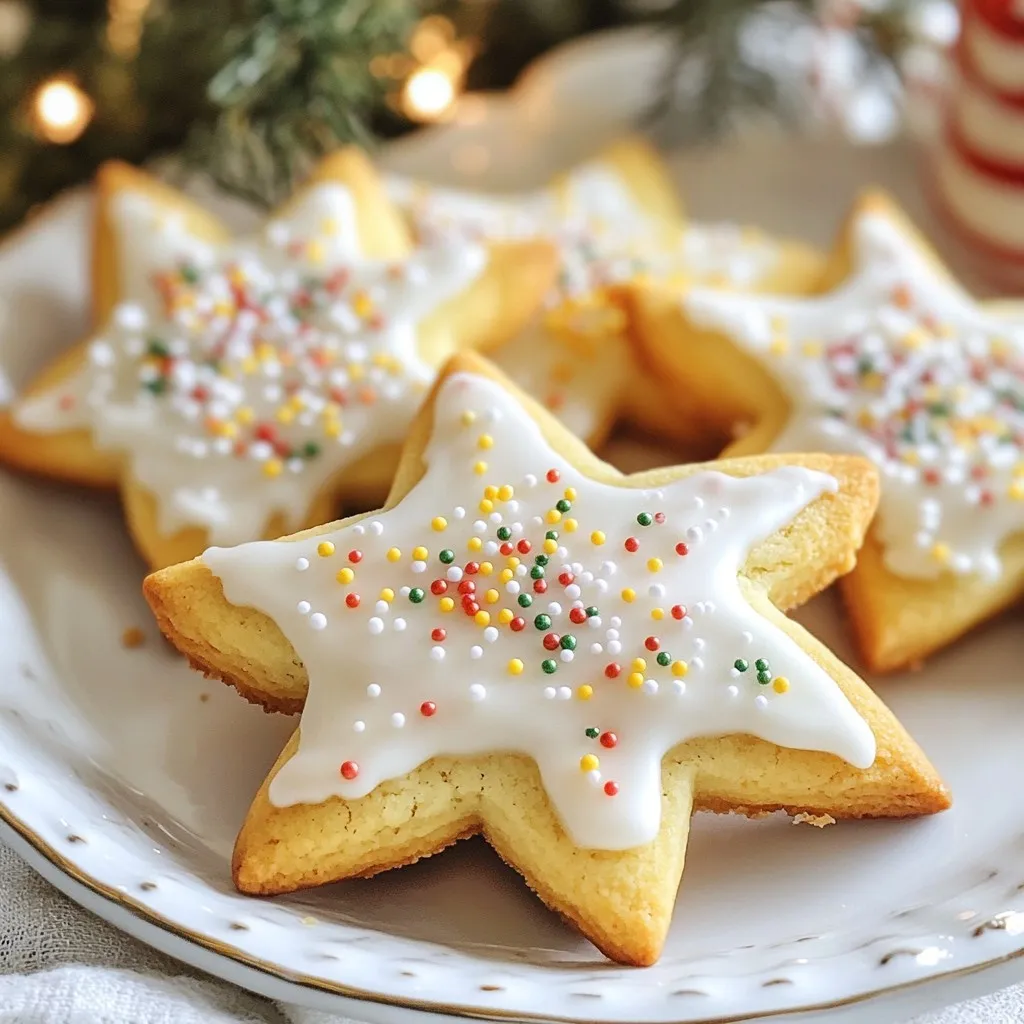
Nutmeg Spiced Christmas Cookies Festive and Flavorful
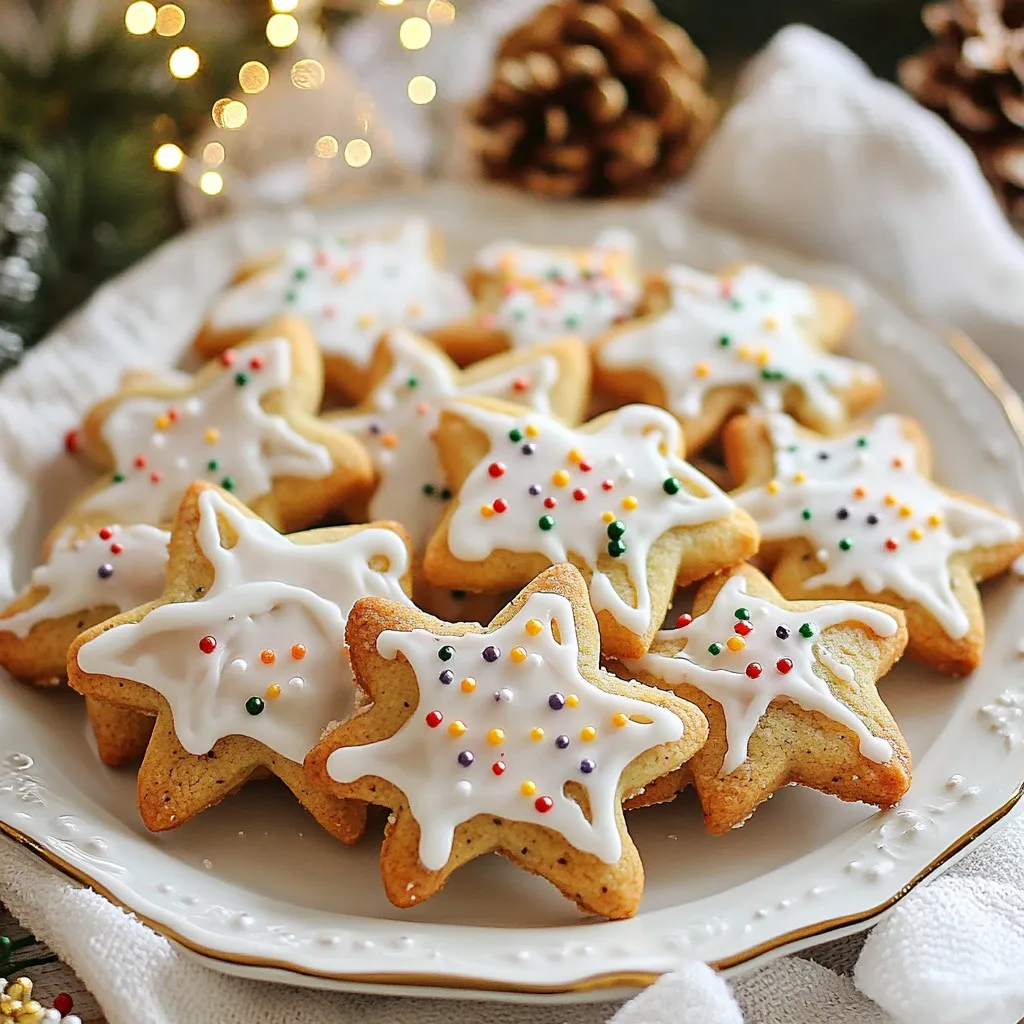

Get ready to fill your home with the warm, comforting scent of Nutmeg Spiced Christmas Cookies. In this blog post, I’ll guide you through every step of creating these festive treats. From choosing the best ingredients to perfecting the dough, we’ll make sure your cookies are delicious. You’ll also discover tips for storage and fun variations to try. Let’s bake something special this holiday season!
Why I Love This Recipe
- Festive Flavors: This recipe captures the essence of the holiday season with warm spices like nutmeg, cinnamon, and ginger, making each bite a delightful celebration of festive flavors.
- Easy to Make: With simple ingredients and straightforward steps, this cookie recipe is perfect for bakers of all levels, allowing you to create delicious treats with minimal effort.
- Customizable Decorations: The icing and colorful sprinkles let you unleash your creativity, making each cookie uniquely yours and perfect for holiday gifting or parties.
- Perfect for Sharing: With 24 cookies in a batch, these treats are ideal for sharing with family and friends, spreading joy and sweetness during the holiday season.
Ingredients
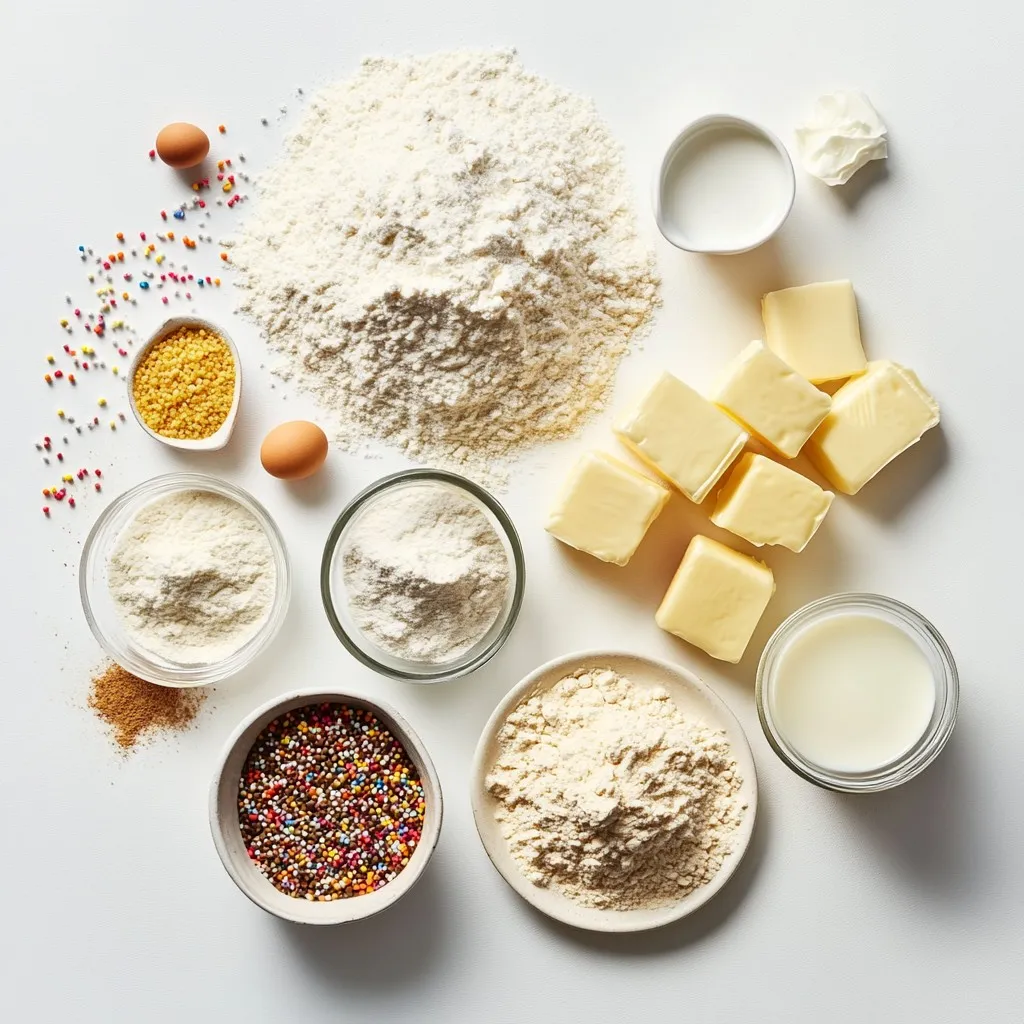
Complete list of ingredients for Nutmeg Spiced Christmas Cookies
To make Nutmeg Spiced Christmas Cookies, gather these ingredients:
– 2 ½ cups all-purpose flour
– 1 teaspoon baking powder
– ½ teaspoon baking soda
– 1 teaspoon ground nutmeg
– 1 teaspoon ground cinnamon
– ½ teaspoon ground ginger
– ½ teaspoon salt
– ¾ cup unsalted butter, softened
– 1 cup packed brown sugar
– ½ cup granulated sugar
– 1 large egg
– 1 teaspoon vanilla extract
– 1 cup powdered sugar (for icing)
– 2-3 tablespoons milk (for icing)
– Colored sprinkles or edible glitter (for decoration)
Measurements and substitutions
Each ingredient plays a key role in flavor and texture. If you need substitutes:
– Use coconut oil instead of butter for a dairy-free version.
– Swap brown sugar with coconut sugar for a different taste.
– You can replace all-purpose flour with gluten-free flour for a gluten-free option.
Importance of ingredient quality
Using high-quality ingredients makes a big difference. Fresh spices like nutmeg and cinnamon add vibrant flavor. Unsalted butter gives you control over salt content. Choose organic, fresh eggs for the best results. Quality ingredients lead to cookies that taste great and look beautiful. Treat your cookies well, and they will shine on your holiday table!
Step-by-Step Instructions
Detailed instructions for mixing dough
Start by preheating your oven to 350°F (175°C). Get two baking sheets ready with parchment paper. This helps the cookies come off easily after baking. In a medium bowl, mix together the flour, baking powder, baking soda, ground nutmeg, ground cinnamon, ground ginger, and salt. Whisk this well to blend all the dry ingredients. Set this bowl aside.
Now, grab a large mixing bowl. Use an electric mixer to cream the softened butter, brown sugar, and granulated sugar. Mix for about 3 to 4 minutes until it is light and fluffy. This step is key! It makes the cookies tender. Add the egg and vanilla extract into the butter-sugar mix. Beat well until it is smooth and combined.
Next, slowly add the dry mix to the wet mix. Stir gently until combined. Be careful not to overmix. That can make the cookies dense. Using a tablespoon, scoop some dough and roll it into a ball. Place the dough balls on your baking sheets, leaving about 2 inches apart. Press each ball down gently to flatten them just a bit.
Baking and cooling process
Now, it’s time to bake. Put the baking sheets in the preheated oven. Bake for 10 to 12 minutes. The edges should look lightly golden brown. It’s okay if the centers seem a bit soft. They will firm up as they cool.
Once baked, let the cookies cool on the sheets for about 5 minutes. Then, move them to a wire rack to cool completely. This helps them stay crisp and not soggy.
Icing and decorating tips
For the icing, mix the powdered sugar and milk in a small bowl. Whisk well until you get a smooth and slightly runny mix. Once the cookies are cool, drizzle the icing over them. You can use a spoon for this or a piping bag for more control.
Before the icing sets, add colored sprinkles or edible glitter. This will give your cookies a festive look and taste. Enjoy the fun of decorating and get creative!
Tips & Tricks
Perfecting the cookie texture
To get the right texture, start with softened butter. Cold butter won’t mix well. Cream the butter and sugars until fluffy. This adds air, making the cookies light. When mixing dry ingredients, whisk them well. This ensures even spice distribution. Don’t overmix once you combine wet and dry. Stop as soon as you see no flour.
Common mistakes to avoid
One common mistake is using cold butter. This can lead to dense cookies. Another error is overbaking. Check your cookies at 10 minutes. They should look slightly soft in the center. Let them cool on the sheet for five minutes before moving. This helps them set without breaking.
Best practices for using spices
Always measure spices carefully. Fresh spices have stronger flavors. Store your spices in a cool, dark place. For nutmeg, consider grating it fresh. This adds depth to your cookies. Mix spices with the flour to ensure a balanced taste. Don’t skip the salt; it enhances the flavors.
Pro Tips
- Chill the Dough: For even better flavor and texture, refrigerate the cookie dough for at least 30 minutes before baking. This helps the spices meld together and results in a chewier cookie.
- Perfectly Baked Cookies: Keep an eye on your cookies while they bake. They should be lightly golden at the edges but still soft in the center. They will continue to firm up as they cool.
- Experiment with Spices: Feel free to adjust the spice levels to your preference! Adding a pinch of cloves or allspice can give your cookies an extra holiday twist.
- Decorative Icing: For a more polished look, use a piping bag for icing. This allows for more intricate designs and precise control when decorating your cookies.
Variations
Alternative spices and flavorings
You can switch up the spices for a new twist. Try using cardamom or allspice instead of nutmeg. Each spice offers a unique flavor and aroma. You might also add a bit of orange zest for a bright note. This adds freshness and a hint of citrus to your cookies.
Gluten-free and vegan options
To make gluten-free cookies, swap regular flour for a gluten-free blend. Make sure the blend has xanthan gum for the right texture. For a vegan option, replace the butter with coconut oil or a vegan butter substitute. Use a flax egg instead of a regular egg. Mix one tablespoon of ground flaxseed with three tablespoons of water, let it sit, and use it in the dough.
Creative decorating ideas
Get creative with decorations to make your cookies pop! You can use royal icing for detailed designs. Pipe shapes like stars, trees, or even snowflakes. Edible glitter adds sparkle for a festive look. You can also use candy canes or chocolate chips for embellishments. Arrange your cookies on a decorative platter with fresh mint or holly for an extra touch.
Storage Info
How to store cookies for freshness
To keep your nutmeg spiced Christmas cookies fresh, place them in an airtight container. This helps maintain their soft texture and flavor. You can stack them in layers, but separate each layer with parchment paper. This prevents sticking and keeps them looking nice.
Freezing instructions
If you want to save some cookies for later, freezing is a great option. Let the cookies cool completely. Place them in a single layer on a baking sheet and freeze for about one hour. Once frozen, transfer the cookies to a freezer-safe bag or container. They can last in the freezer for up to three months. When you’re ready to enjoy, simply thaw at room temperature.
Best containers for storage
The best containers for storing cookies are glass jars, plastic containers, or resealable bags. Glass jars look nice and keep cookies fresh. Plastic containers are great for stacking. Resealable bags take up less space and are easy to use. Make sure whatever container you choose seals tightly to keep air out.
FAQs
Can I use different types of sugar?
Yes, you can use various types of sugar in this recipe. Brown sugar gives a nice flavor and moisture. You can also use white sugar for a lighter texture. If you want a healthier option, try coconut sugar. Keep in mind that each type will slightly change the cookie’s taste and texture.
How long do these cookies last?
These cookies can last about one week if stored properly. Place them in an airtight container to keep them fresh. If you want them to last longer, you can freeze them. Just make sure they are in a freezer-safe container. They can stay good for up to three months if frozen.
What other holidays can I make these cookies for?
While these cookies are great for Christmas, they work well for other holidays too. You can enjoy them during Thanksgiving, Halloween, or even Easter. Just change the decorations to match the theme. Use different colored sprinkles or icing to make them festive for any occasion.
These nutmeg spiced Christmas cookies use quality ingredients to bring out rich flavor. I shared steps for mixing, baking, and decorating, plus tips for perfect texture. Don’t forget the creative variations to suit everyone’s taste, including gluten-free options. Proper storage keeps your cookies fresh for longer.
Baking brings joy during the holidays. Use these ideas to make cookie magic. Enjoy every bit

Nutmeg Spiced Christmas Cookies
Ingredients
- 2.5 cups all-purpose flour
- 1 teaspoon baking powder
- 0.5 teaspoon baking soda
- 1 teaspoon ground nutmeg
- 1 teaspoon ground cinnamon
- 0.5 teaspoon ground ginger
- 0.5 teaspoon salt
- 0.75 cup unsalted butter, softened to room temperature
- 1 cup packed brown sugar
- 0.5 cup granulated sugar
- 1 large egg
- 1 teaspoon vanilla extract
- 1 cup powdered sugar (for icing)
- 2 tablespoons milk (for icing)
- 1 serving colored sprinkles or edible glitter (for decoration)
Instructions
- Begin by preheating your oven to 350°F (175°C). Prepare two baking sheets by lining them with parchment paper to ensure easy cookie removal.
- In a medium-sized mixing bowl, combine the all-purpose flour, baking powder, baking soda, ground nutmeg, ground cinnamon, ground ginger, and salt. Whisk together thoroughly to mix the dry ingredients evenly, then set this bowl aside.
- In a large mixing bowl, use an electric mixer to cream together the softened unsalted butter, packed brown sugar, and granulated sugar until the mixture is light and fluffy, approximately 3 to 4 minutes.
- Add the large egg and vanilla extract to the butter-sugar mixture, beating well until everything is thoroughly combined and smooth.
- Gradually introduce the dry ingredient mixture to the wet mixture, stirring gently until just incorporated. Take care not to overmix.
- Using a tablespoon, scoop out portions of dough and roll each into a ball. Place the dough balls on the prepared baking sheets, leaving about 2 inches of space between them.
- With the palm of your hand, gently press down on each dough ball to flatten them slightly.
- Bake the cookies in the preheated oven for 10-12 minutes, or until the edges are lightly golden brown.
- Once baked, let the cookies cool on the baking sheets for about 5 minutes. After that, carefully transfer them to a wire rack to cool completely.
- For the icing, whisk together the powdered sugar and milk in a small bowl until the mixture is smooth and has a slightly runny consistency.
- Drizzle the icing over the cooled cookies using a spoon or a piping bag for precision.
- Before the icing hardens, decorate the cookies with colored sprinkles or edible glitter.
![- 1 cup grated zucchini - ½ cup unsweetened applesauce - ½ cup brown sugar - ¼ cup white sugar The main ingredients in these brownies are simple and nutritious. Zucchini adds moisture and keeps the brownies soft. The applesauce replaces some fat while adding sweetness. Using both brown and white sugar gives the brownies a rich flavor and a nice texture. - ⅓ cup vegetable oil or melted coconut oil - 2 large eggs - 1 teaspoon vanilla extract - 1 cup all-purpose flour - ⅓ cup unsweetened cocoa powder - ½ teaspoon baking soda - ¼ teaspoon baking powder - ¼ teaspoon salt - ½ cup chocolate chips - Optional: ¼ cup chopped nuts (e.g., walnuts or pecans) The additional ingredients help create a great structure in the brownies. The oil keeps them moist, while the eggs bind everything together. Flour and cocoa powder provide the base, giving that rich, chocolate flavor. Baking soda and baking powder help the brownies rise. The chocolate chips melt into sweet pockets of goodness. If you like nuts, they add a nice crunch and flavor. You can find the complete list of ingredients in the Full Recipe section for more details on how to get started. - Preheat your oven to 350°F (175°C). - Prepare an 8x8 inch baking pan. You can grease it or line it with parchment paper. - In a large bowl, combine the wet ingredients. Mix grated zucchini, applesauce, brown sugar, white sugar, oil, eggs, and vanilla extract until well blended. - In another bowl, mix the dry ingredients. Whisk flour, cocoa powder, baking soda, baking powder, and salt together. - Now, add the dry mixture to the wet ingredients. Stir gently until just combined. Be careful not to overmix. - Pour the brownie batter into the prepared pan. Use a spatula to smooth the top. - Bake in the preheated oven for 25-30 minutes. Check for doneness by inserting a toothpick. It should come out with a few moist crumbs. - Let the brownies cool in the pan for about 10 minutes. Then transfer them to a wire rack to cool completely. You can find the full recipe in the earlier sections. Enjoy your delicious zucchini brownies! To make perfect zucchini brownies, focus on two key tips: - Avoid overmixing: Mix just enough until the dry and wet ingredients blend. Overmixing can make brownies tough. - Drain excess moisture from zucchini: Zucchini holds a lot of water. Grate it, then put it in a clean cloth. Squeeze out the extra moisture. This step helps achieve a fudgy texture. Baking these brownies is simple. Here are two tips to ensure the best results: - Check for doneness with a toothpick: Insert a toothpick into the center. If it comes out with moist crumbs, your brownies are done. If it comes out clean, they might be overbaked. - Cooling suggestions for optimal texture: After baking, let the brownies cool in the pan for about 10 minutes. Then, transfer them to a wire rack to cool completely. This cooling method helps keep the brownies soft and chewy. For more details, check the Full Recipe. {{image_4}} You can make these brownies gluten-free! Just swap regular flour for a gluten-free flour blend. This simple change works well without affecting taste. Look for blends that contain rice flour, almond flour, or coconut flour. These options hold moisture and keep the brownies soft. Want to mix it up? Try different types of chocolate in your brownies. You can use milk chocolate, dark chocolate, or even white chocolate. Each type adds its own unique taste. Adding spices like cinnamon or nutmeg can enhance the flavor too. A pinch of cinnamon gives warmth, while nutmeg adds a hint of sweetness. You can also add dried fruits or seeds for more texture. Try mixing in chopped nuts, like walnuts or pecans, for a nice crunch. Dried cherries or raisins can add a burst of sweetness. These additions make your brownies even more delightful and fun to eat. For the full recipe, check out the Chocolate Zucchini Brownies Full Recipe! To keep your zucchini brownies fresh, use an airtight container. This helps seal in moisture and flavor. Place them in the container after they cool down. You can store them at room temperature for up to four days. If you want them to last longer, keep them in the fridge. They can stay fresh for about a week in the fridge. Just make sure they are well-covered to avoid drying out. Freezing zucchini brownies is a great way to save some for later. First, let the brownies cool completely. Then, cut them into squares. Wrap each square in plastic wrap, and place them in a freezer bag. Make sure to remove as much air as possible from the bag. You can freeze them for up to three months. When you're ready to eat them, simply thaw them in the fridge overnight. This way, they will keep their great taste and soft texture. For the full recipe, check out the Chocolate Zucchini Brownies full recipe. Yes, you can use sugar substitutes. Common options are stevia, erythritol, or monk fruit. These substitutes can make your brownies lower in calories. However, they may change the taste and texture. Some might be sweeter, so adjust the amount. Always check the package for the right measurement. This way, your brownies will still taste great. To check if your brownies are done, look for a few signs. The edges will pull away from the pan. The top should look set and have a slight sheen. You can also use a toothpick. Insert it into the center of the brownies. If it comes out with a few moist crumbs, they are ready. If it has wet batter, bake a few more minutes. Yes, you can make these brownies vegan. Replace eggs with flax eggs or applesauce. Use 1 tablespoon of flaxseed meal mixed with 2.5 tablespoons of water for each egg. For dairy, substitute with plant-based milk or yogurt. You can also use coconut oil instead of butter. These swaps will keep the brownies moist and tasty. Each brownie has about 150 calories. They contain around 6 grams of fat and 20 grams of sugar. The exact numbers can change based on the ingredients used. For example, using less sugar or different oils can lower calories. Adding nuts can increase healthy fats and protein. Always check the recipe for detailed info. Zucchini brownies can last up to a week when stored properly. Keep them in an airtight container at room temperature. If you want them to last longer, freeze them. They can stay fresh in the freezer for up to three months. Just remember to wrap them well in plastic wrap or foil. For the complete recipe, check out the Chocolate Zucchini Brownies [Full Recipe]. Zucchini brownies blend health and taste. We covered key ingredients, easy steps, and tips. Think alternatives like gluten-free flour or added spices for fun flavors. Proper storage keeps them fresh, while freezing maintains taste and texture. With answers to common questions, you now have all you need for success. Try making these tasty brownies soon! You'll enjoy a delicious treat that also sneaks in some veggies.](https://fastmealmate.com/wp-content/uploads/2025/06/6955e8e8-deef-478f-bc92-a4114a14f9ca-768x768.webp)