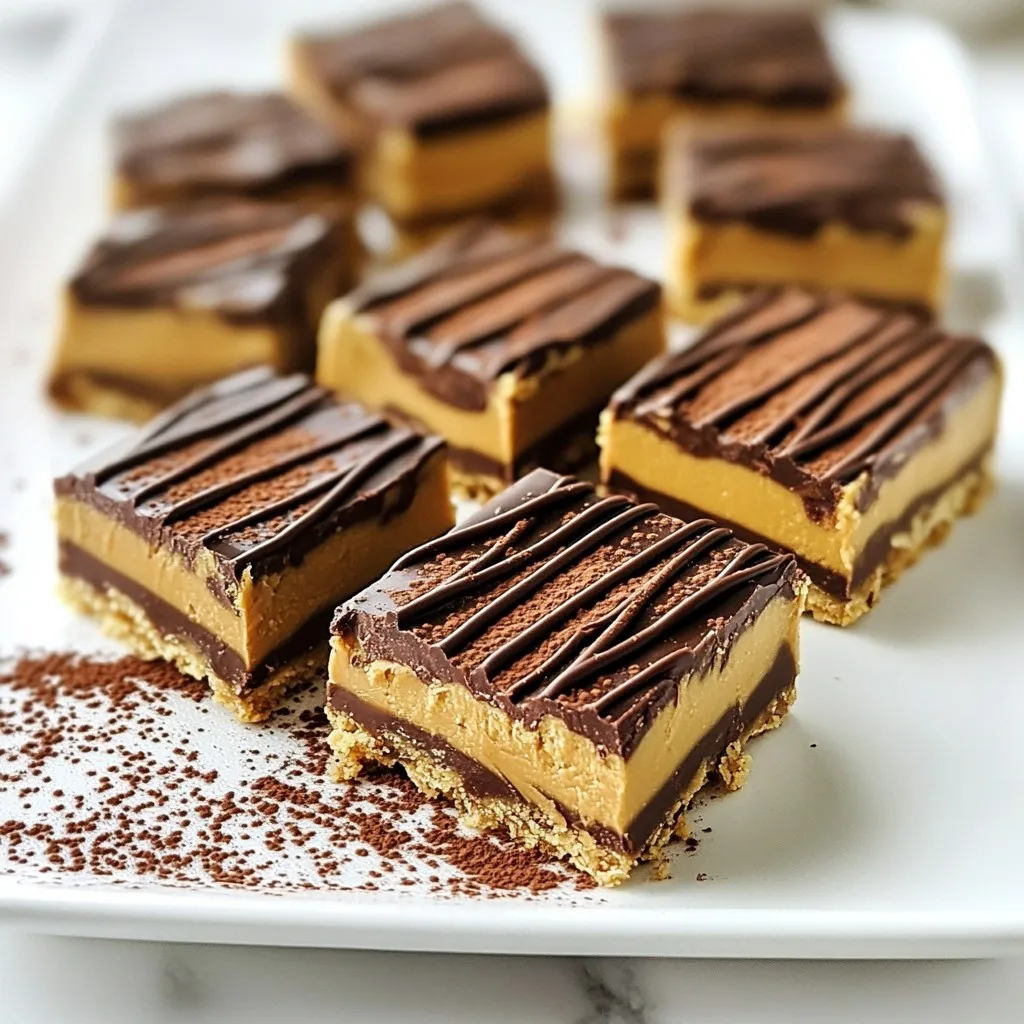
No-Bake Peanut Butter Bars Simple & Sweet Treat
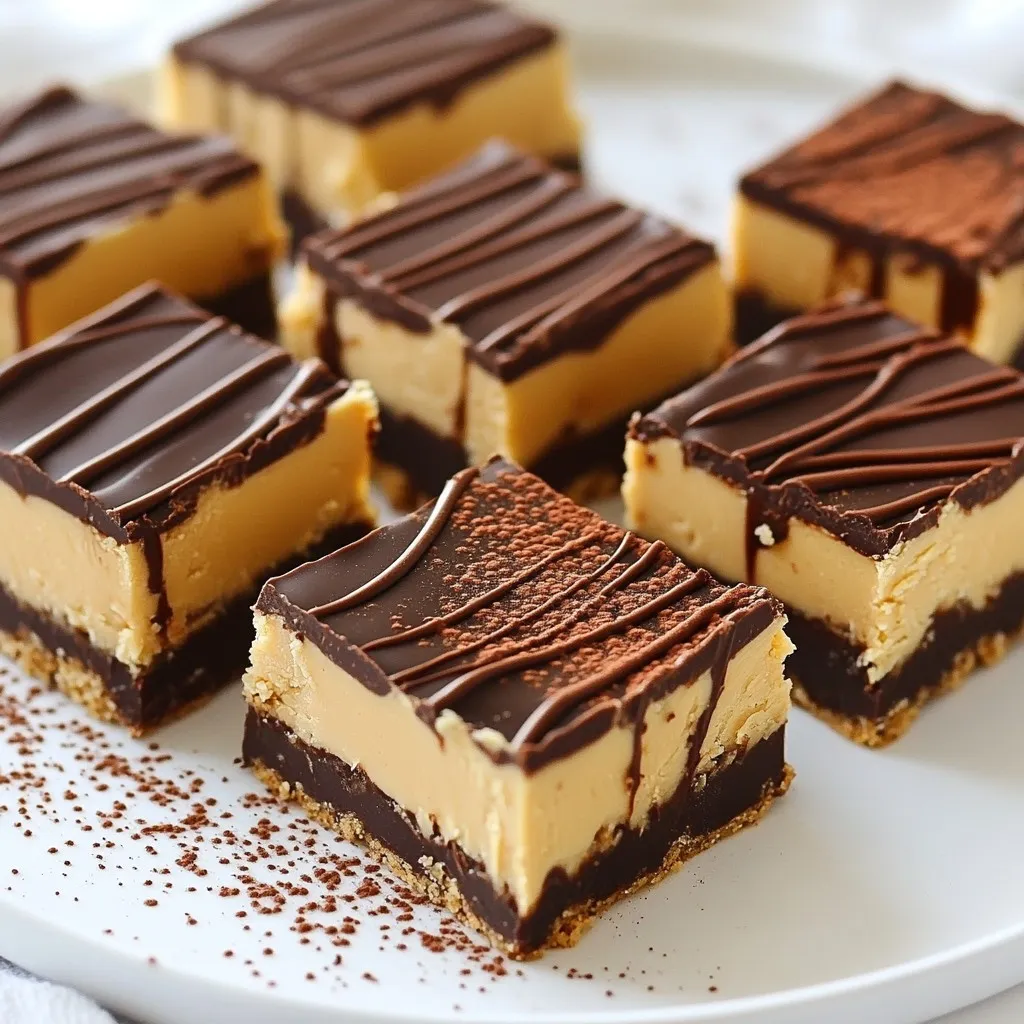
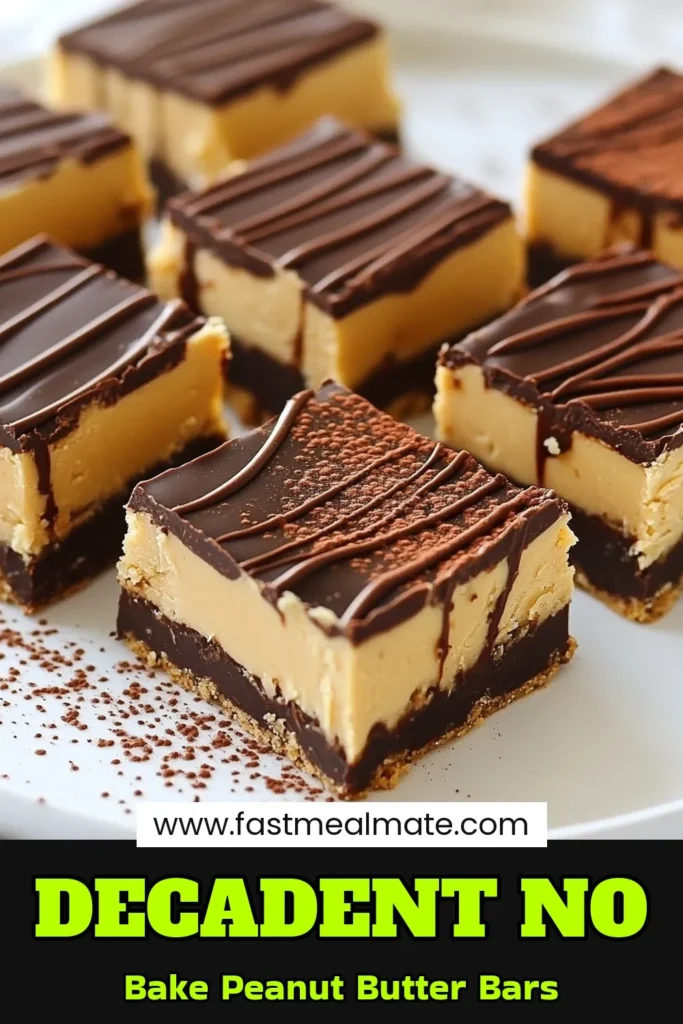
Are you craving a sweet treat but short on time? I’ve got you covered with my No-Bake Peanut Butter Bars. These simple, no-bake goodies are quick to make and oh-so-delicious! Perfect for snack time or dessert, you can customize them to fit your taste. Let’s dive into the steps to make your own batch of these easy bars that everyone will love. You won’t want to miss this recipe!
Why I Love This Recipe
- Simple & Quick: This recipe requires only 10 minutes of prep time, making it perfect for a last-minute sweet treat.
- No Baking Required: Skip the oven! These bars set in the fridge, allowing you to enjoy them without the hassle of baking.
- Healthy Ingredients: Packed with wholesome ingredients like oats and peanut butter, these bars are a delicious guilt-free indulgence.
- Customizable: Feel free to add your favorite mix-ins, such as nuts or dried fruit, to make these bars your own!
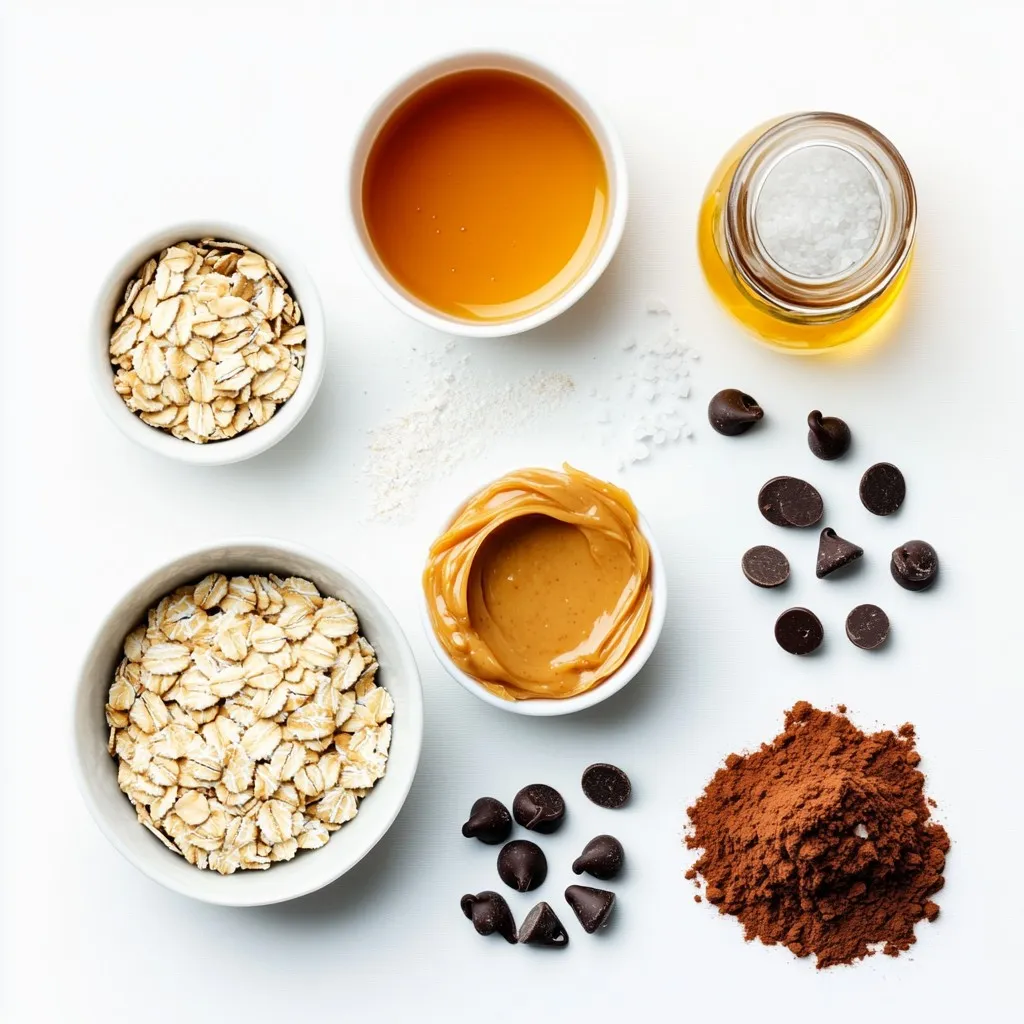
Ingredients
Essential Ingredients for No-Bake Peanut Butter Bars
– 1 cup creamy or crunchy peanut butter
– 1/2 cup honey or pure maple syrup
– 1 cup rolled oats
– 1/2 cup coconut flour
– 1/2 cup chocolate chips (choose dairy-free if preferred)
– 1/4 cup unsweetened cocoa powder
– 1/4 teaspoon sea salt
– 1 teaspoon pure vanilla extract
These ingredients make a rich and tasty treat. The peanut butter gives it a creamy base. Honey or maple syrup adds natural sweetness. Rolled oats provide a good texture. Coconut flour helps bind the bars and adds flavor. Chocolate chips add a lovely chocolatey touch. The cocoa powder gives a nice depth of flavor. Sea salt enhances all the tastes, and vanilla brings it all together.
Optional Ingredients for Customization
You can add a few fun touches to your bars. Here are some ideas:
– Chopped nuts like almonds or walnuts for crunch.
– Dried fruits like cranberries or raisins for sweetness.
– A pinch of cinnamon for warmth.
– A scoop of protein powder for extra nutrition.
These options let you make the bars your own. Feel free to mix and match based on what you love.
Substitutions for Dietary Preferences
You can easily adapt this recipe for different diets:
– Use almond butter if you want a nut-free option.
– Swap honey for agave syrup to make it vegan.
– Replace coconut flour with almond flour for a different taste.
– Choose gluten-free oats if needed.
These substitutions help you create a treat that fits your needs. Enjoy experimenting with the ingredients!
Step-by-Step Instructions
Preparing the Peanut Butter Mixture
Start by grabbing a large mixing bowl. Add 1 cup of creamy or crunchy peanut butter. Next, pour in 1/2 cup of honey or maple syrup. Use a spatula or spoon to mix these two until they are smooth. This step creates a sweet and sticky base. Then, add 1 teaspoon of pure vanilla extract to the bowl. Stir it in well to spread the flavor.
Combining Dry Ingredients
In another bowl, whisk together the dry ingredients. Combine 1 cup of rolled oats, 1/2 cup of coconut flour, and 1/4 cup of unsweetened cocoa powder. Sprinkle in 1/4 teaspoon of sea salt. Mix them well until they are evenly blended. This mix adds texture and flavor to your bars.
Assembling the Bars
Now, slowly add the dry mixture to the peanut butter mix. Stir continuously until the two mixtures blend into a thick dough. Once it is well mixed, gently fold in 1/2 cup of chocolate chips. This adds a sweet surprise in each bite. Line an 8×8-inch baking dish with parchment paper. Leave some paper hanging over the edges. This helps when you take the bars out later.
Transfer your mixture into the dish. Press it down firmly and evenly using your hands or a spatula. Make sure the top is flat. Cover the dish with plastic wrap and place it in the fridge for at least 2 hours. This helps the bars set. After they firm up, lift them out using the overhang. Finally, slice them into squares or rectangles to enjoy!
Tips & Tricks
How to Achieve the Perfect Texture
To get the best texture, mix your peanut butter and sweetener well. This step is key. Use a spatula or spoon to blend until smooth. When adding dry ingredients, do it slowly. Stir until you see a dough-like consistency. This tells you it’s ready for the pan. If it’s too crumbly, add a splash of water. This helps bind it better.
Storage Tips for Freshness
Keep your bars fresh by storing them in an airtight container. Place parchment paper in between layers if stacking. This helps prevent sticking. You can store them in the fridge for up to a week. If you want to keep them longer, freeze them. Wrap each bar tightly in plastic wrap. They will last for about three months in the freezer.
Serving Suggestions and Presentation Ideas
For a fun presentation, slice the bars into squares or rectangles. Arrange them on a nice platter. Drizzle melted dark chocolate over the top for flair. You can also sprinkle some sea salt for an extra kick. These bars taste great chilled or at room temperature. Enjoy them as a snack or dessert anytime!
Pro Tips
- Storage Tip: Keep these bars stored in an airtight container in the refrigerator for up to a week for maximum freshness.
- Texture Tip: For a chewier texture, consider adding some chopped nuts or seeds to the mixture before pressing it into the dish.
- Sweetness Tip: Adjust the sweetness by using less honey or maple syrup if you prefer a less sweet treat, or add extra chocolate chips for a richer flavor.
- Serving Tip: For a fancier presentation, sprinkle some sea salt on top of the bars before refrigerating for an added layer of flavor.
Variations
Flavor Variations (Chocolate, Vanilla, etc.)
You can have fun with flavors in these bars. They taste great with chocolate and peanut butter. If you want a lighter flavor, try adding vanilla instead. Just swap half of the cocoa powder for extra vanilla. You could also use almond or cashew butter for a different taste. Each change gives you a new treat.
Add-ins for Extra Flavor and Texture
Want to make your bars even better? Think about adding nuts or seeds. Chopped walnuts or almonds give a nice crunch. You can also add dried fruits like raisins or cranberries for sweetness. If you love coconut, sprinkle in some shredded coconut. These add-ins make your bars unique and delicious.
Gluten-Free and Vegan Options
If you need gluten-free bars, use gluten-free oats and coconut flour. Both are safe for gluten-free diets. For a vegan option, swap honey for pure maple syrup. This keeps it sweet without animal products. These choices let everyone enjoy these tasty bars. You can share them at any gathering!
Storage Info
Best Practices for Storing No-Bake Peanut Butter Bars
To keep your no-bake peanut butter bars fresh, store them in an airtight container. Use parchment paper between layers to prevent sticking. Place the container in the fridge. This keeps them cool and tasty.
Freezing for Long-Term Storage
You can freeze these bars for later use. Cut them into squares first. Then, wrap each square in plastic wrap. Place them in a freezer-safe bag. This method helps them stay fresh for up to three months. When you’re ready to enjoy, simply thaw them in the fridge overnight.
How Long Do They Last?
These bars will last about one week in the fridge. Check for any signs of spoilage, like changes in smell or texture. If they look good, they should taste great! Keeping them in an airtight container helps maintain their flavor.
FAQs
Can I use almond butter instead of peanut butter?
Yes, you can use almond butter. It works well in this recipe. Just keep in mind that the flavor will change. Almond butter has a milder taste than peanut butter. If you like almonds, this swap is great!
How do I make these bars vegan?
To make these bars vegan, swap honey for pure maple syrup. All other ingredients are vegan-friendly. Make sure to choose dairy-free chocolate chips. This way, you will have a tasty treat that fits a vegan diet.
What is the best way to cut the bars into squares?
The best way to cut the bars is to chill them first. After they set in the fridge, lift them out using the parchment paper. Use a sharp knife for clean cuts. Wipe the knife with a damp cloth between cuts to keep the edges neat.
Are there any nut-free alternatives available?
Yes, you can try sun butter or soy nut butter. These nut-free spreads taste great in the bars. They will give you similar creaminess and texture. Always check labels to ensure they meet your dietary needs.
You learned about the key ingredients for no-bake peanut butter bars, along with some fun options. We explored step-by-step instructions for making these tasty treats and added tips for the perfect texture. You also saw some tasty variations, storage advice, and answers to common questions.
No-bake peanut butter bars are quick and easy. With a few tweaks, you can make them just right for you. Enjoy crafting your own delicious bars and sharing them with friend

No-Bake Chocolate Peanut Butter Dream Bars
Ingredients
- 1 cup creamy or crunchy peanut butter
- 1/2 cup honey or pure maple syrup
- 1 cup rolled oats
- 1/2 cup coconut flour
- 1/2 cup chocolate chips
- 1/4 cup unsweetened cocoa powder
- 1/4 teaspoon sea salt
- 1 teaspoon pure vanilla extract
Instructions
- In a spacious mixing bowl, combine the peanut butter and honey (or maple syrup) using a spatula or spoon until the mixture is smooth and well blended.
- Mix in the vanilla extract thoroughly to ensure that the flavor is evenly distributed throughout the mixture.
- In a separate bowl, whisk together the rolled oats, coconut flour, cocoa powder, and sea salt until well combined and uniform in texture.
- Gradually incorporate the dry mixture into the peanut butter mixture, stirring continuously until everything is well integrated. You should end up with a thick, dough-like consistency.
- Gently fold in the chocolate chips, making sure they are evenly dispersed throughout the mixture.
- Prepare an 8x8-inch square baking dish by lining it with parchment paper, allowing some paper to hang over the sides for easy removal later.
- Transfer the mixture into the lined baking dish, pressing it down firmly and evenly into the bottom using your hands or a spatula for a flat surface.
- Cover the dish with plastic wrap or a lid and place it in the refrigerator for a minimum of 2 hours to allow the bars to firm up.
- Once the bars have set, use the overhanging parchment paper to lift them out of the dish. Slice into squares or rectangles as desired.
![- 1 ½ cups graham cracker crumbs - ½ cup unsalted butter, melted - 2 tablespoons granulated sugar - 8 oz cream cheese, softened - ½ cup powdered sugar - ½ cup heavy whipping cream - Zest and juice of 1 lemon - 1 teaspoon pure vanilla extract - Assorted fresh berries (for topping) - Fresh mint leaves (for garnish) Gathering the right ingredients is key. The graham cracker crumbs form a sweet and crunchy crust. Unsalted butter adds richness, while granulated sugar gives a touch of sweetness. Cream cheese provides that classic cheesecake texture. Powdered sugar balances the filling's flavor. Next, I add heavy whipping cream for lightness. The zest and juice from the lemon bring bright flavor. Pure vanilla extract adds depth. For garnishing, I use fresh berries on top for color and mint leaves for a fresh touch. These ingredients come together to create a treat that is light, creamy, and bursting with flavor. You can find the detailed steps in the Full Recipe. - Combine 1 ½ cups of graham cracker crumbs, ½ cup melted unsalted butter, and 2 tablespoons granulated sugar in a bowl. - Press this mixture firmly into mini tart molds. Ensure it is even and tight. - Chill the crusts in the refrigerator for 10-15 minutes to help them set. - In a large bowl, beat 8 oz of softened cream cheese until it is smooth. - Mix in ½ cup powdered sugar, zest and juice of 1 lemon, and 1 teaspoon vanilla extract. Blend until there are no lumps. - In a separate bowl, whip ½ cup heavy cream with an electric mixer until stiff peaks form. - Gently fold the whipped cream into the cream cheese mixture using a spatula. Be careful not to deflate the whipped cream. - Take the chilled crusts out of the refrigerator. - Fill each crust with the lemon cheesecake filling, smoothing the tops evenly. - Place the filled tarts back in the refrigerator. Chill for at least 2 hours to let the filling set. - Gently remove the tarts from their pans. - Top each tart with fresh berries and a mint leaf for a lovely touch. For the full recipe, please refer to the earlier section. Enjoy making these delightful mini no-bake lemon cheesecake tarts! To make the crust strong, pack the mixture tightly. This helps keep the shape. You can also try different cookies. For example, use chocolate cookies or gingersnaps. Each cookie gives a unique flavor. For a smooth filling, use cream cheese at room temperature. Cold cream cheese can make lumps. You can adjust the lemon juice to find your perfect tartness. If you love tart, add more lemon. For a milder taste, use less juice. To fill the tarts neatly, use a piping bag. This gives a professional look. You can also sprinkle extra lemon zest on the plate. It adds color and makes your dessert pop. For a fun touch, place fresh mint leaves around the tarts. It looks great and adds freshness! You can find the Full Recipe for these delightful tarts to explore more tips. {{image_4}} You can change up the taste of these mini tarts easily. Swap lemon for lime for a zesty twist. The tartness from lime adds a fresh kick. If you want something rich, use chocolate or fruit purees for a unique filling. Chocolate brings sweet indulgence, while fruit purees add a fruity burst. Not everyone can eat the same way. You can make a gluten-free crust with gluten-free crumbs. This way, everyone can enjoy these tarts. For those avoiding dairy, substitute with vegan cream cheese and coconut cream. These options keep the creamy texture while being dairy-free. Garnishing can elevate your dessert. Top your tarts with seasonal fruits like strawberries or raspberries. The colors and flavors will pop! You can also use edible flowers for an elegant presentation. They add a touch of beauty and whimsy to your tarts. For the full recipe, check out the [Full Recipe]. You can store the mini no-bake lemon cheesecake tarts in the refrigerator. They will last for up to three days if covered. To keep them fresh, make sure to cover them well. It’s best to keep the tarts separate from any garnishes until you are ready to serve them. This way, they stay fresh and look great. If you want to save some for later, you can freeze the unfilled crusts. This is a great option if you plan to make them ahead of time. The filled tarts can also be frozen for up to a month. Just remember to thaw them before serving. This will help keep their creamy texture. To prevent the tarts from drying out, use airtight containers. This keeps them fresh and tasty. It’s also smart to label your containers with dates. This way, you can easily track how long they have been stored. Yes, you can prepare these tarts a day in advance and chill them. This makes them great for parties or busy days. Just keep them in the fridge until you are ready to serve. Lightly grease the tart pans before filling them. You can also use silicone molds. Both methods help the tarts pop out without breaking. You can use bottled lemon juice in a pinch. However, fresh lemons give the best flavor. The zest adds a bright taste that makes these tarts stand out. Yes, Greek yogurt or vegan cream cheese works well as substitutes. These options can change the flavor slightly, but they still taste great. This recipe yields 12 mini tarts. Perfect for sharing or enjoying over a few days! Pair your mini tarts with coffee or tea. This makes for a delightful dessert experience that everyone will love. For the full recipe, check out the details above! This blog post covers how to make delicious mini lemon cheesecake tarts. We discussed each ingredient, from the crust to the creamy filling, and shared tips for a perfect dessert. You can customize flavors and garnishes to suit your taste. Remember, storage is key for keeping them fresh. Enjoy making these tarts for any occasion. Your friends and family will love them!](https://fastmealmate.com/wp-content/uploads/2025/06/a8bd9651-0c39-4151-9790-24600a8eb0ea-768x768.webp)
![- 2 cups all-purpose flour - 1 teaspoon baking powder - 1/2 teaspoon baking soda - 1/2 teaspoon salt - 1 teaspoon ground cinnamon - 3/4 cup granulated sugar - 1/2 cup packed brown sugar - 1/2 cup unsalted butter, melted - 2 large eggs, at room temperature - 1 teaspoon pure vanilla extract - 1 cup plain yogurt (or sour cream) - 2 cups apples, peeled and diced (approximately 2 medium apples) - 1/2 cup old-fashioned rolled oats When you measure your ingredients, use proper tools. For dry ingredients, a dry measuring cup is best. Press flour down slightly to avoid gaps. For liquids, use a liquid measuring cup and check at eye level. This ensures you get the right amounts for recipes. Accurate measurements lead to better results. You can switch some ingredients if needed. Use whole wheat flour for a healthier option. If you want a dairy-free muffin, try almond or coconut yogurt instead. Apples are key, but you can use pears or peaches too. For a nutty touch, add chopped walnuts or pecans. Always feel free to adjust! Make sure to check the [Full Recipe] for detailed instructions and baking times! Preheating the Oven Start by preheating your oven to 350°F (175°C). This step is key for even baking. Preparing the Muffin Tin Line a standard muffin tin with paper liners. You can also spray each cup with non-stick cooking spray. This helps the muffins release easily after baking. Dry Mixture Preparation In a large bowl, whisk together 2 cups of all-purpose flour, 1 teaspoon of baking powder, 1/2 teaspoon of baking soda, 1/2 teaspoon of salt, and 1 teaspoon of ground cinnamon. Mix well and set it aside. Sugar and Butter Mixture In another bowl, combine 3/4 cup of granulated sugar, 1/2 cup of packed brown sugar, and 1/2 cup of melted butter. Stir until this mixture is smooth and creamy. Wet and Dry Ingredient Integration Gently pour the sugar-butter mixture into the bowl with the dry ingredients. Use a spatula to mix just until combined. Be careful not to overmix, as this keeps the muffins light and fluffy. Folding in Apples Next, fold in 2 cups of peeled and diced apples. Use a spatula to distribute them evenly without overmixing the batter. Preparing the Crumb Topping In a small bowl, mix 1/2 cup of old-fashioned rolled oats with 1/4 cup of flour, 1/4 cup of brown sugar, and 1/4 cup of melted butter. Blend until it becomes crumbly. This topping adds a nice crunch. Filling Muffin Liners Spoon the muffin batter into the lined muffin cups. Fill each about two-thirds full. This allows room for the muffins to rise while baking. Baking Instructions Place the muffin tin in your preheated oven. Bake for 20 to 25 minutes. To check if they are done, insert a toothpick into the center of a muffin. It should come out clean. These steps will guide you to make delicious apple crumb muffins. For more details, check the Full Recipe. Preventing Overmixing To keep your muffins light, mix gently. After adding the wet ingredients to the dry, stir just until combined. If you see some flour lumps, that’s okay. Overmixing can make your muffins dense, not fluffy. Ensuring Proper Baking Time Baking time is key. Set your timer for 20 minutes. Check doneness by inserting a toothpick in the center. If it comes out clean, they’re ready. If not, check every minute. Be careful not to open the oven too often, as it can affect the rise. Adding a pinch of nutmeg can boost flavor. You might also try mixing in some chopped walnuts or pecans. They add a nice crunch and depth. If you love spice, a dash of ginger pairs well with apple too. Presentation makes your muffins shine. Arrange them on a rustic wooden platter. A light dusting of powdered sugar adds charm. For an extra touch, place slices of fresh apples around the muffins. This creates a warm and inviting look. {{image_4}} Choosing the right apple makes a big difference. Sweet apples like Fuji or Honeycrisp work well. They add a nice balance of flavor. Tart apples like Granny Smith give a refreshing zing. You can mix different apples for a unique taste. This adds layers of flavor to your muffins. Adding nuts or dried fruits can enhance your muffins. Chopped walnuts or pecans add a nice crunch. Dried cranberries or raisins bring a burst of sweetness. Just fold them in with the apples to keep it simple. Consider adding spices for extra flavor. A pinch of nutmeg gives warmth. You can also try cardamom for a unique twist. Just remember to balance the spices so they don’t overpower the apples. You can make these muffins gluten-free. Substitute all-purpose flour with a gluten-free blend. This works well and keeps the texture light. Just ensure your baking powder is gluten-free too. If you want to cut back on sugar, try using applesauce. It keeps the muffins moist and sweet. You can also use less butter or switch to a lighter oil. This way, you enjoy a tasty treat without the guilt. For the complete recipe, check out the Full Recipe section. Store your leftover muffins in an airtight container. This keeps them fresh for up to four days. If you want to keep them longer, consider freezing them. To freeze muffins, let them cool completely. Wrap each muffin in plastic wrap and place them in a freezer bag. They can last up to three months in the freezer. When you're ready to enjoy, just take them out and let them thaw at room temperature. Reheat muffins in the oven for the best taste. Preheat your oven to 350°F (175°C). Place the muffins on a baking sheet and warm them for about 10 minutes. You can also use the microwave. Heat each muffin for about 20-30 seconds. Enjoy them warm for the best flavor! For more details on making these muffins, check out the Full Recipe. You can use sour cream instead of yogurt. It gives a similar texture and flavor. Another option is to use buttermilk, which makes the muffins moist. Yes, you can make mini muffins. Just adjust the baking time to 12-15 minutes. Keep an eye on them, so they don’t overbake. Check for doneness by inserting a toothpick into the center of a muffin. If it comes out clean, they are ready. You can also lightly press the top; it should spring back. These muffins stay fresh for about 3 days at room temperature. Store them in an airtight container to keep them soft. Yes, you can prepare the batter the night before. Cover it and store it in the fridge. When you're ready, bake them fresh in the morning. For the full recipe, check the earlier section. You’ll find all the steps and ingredients needed to make these tasty Apple Crumb Muffins. You now have all the key steps to make delicious Apple Crumb Muffins. We covered ingredients, preparation, and baking instructions to ensure your muffins turn out great. Remember to follow the tips for flavor and presentation. With these easy instructions, you can enjoy warm muffins at home. Whether you share them or keep them all, they are sure to impress. Happy baking!](https://fastmealmate.com/wp-content/uploads/2025/07/c8d25f82-9d23-458d-8a15-e1a22d6eabb0-768x768.webp)