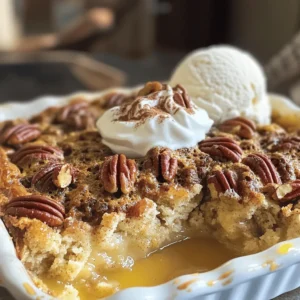
Pecan Pie Dump Cake Irresistible Dessert Delight

Are you ready to treat yourself to a simple yet mouthwatering dessert? Pecan Pie Dump Cake is the perfect blend of flavors and textures. With just a few easy steps, you can create an irresistible dessert that will wow your friends and family. This cake is not only delicious but also full of rich pecan goodness. Let’s dive in and learn how to make this tasty treat from start to finish!
Ingredients
To make Pecan Pie Dump Cake, gather these simple ingredients. Each one adds to the yummy flavor.
– 1 cup chopped pecans
– 1 cup packed brown sugar
– 1 cup granulated white sugar
– 1 teaspoon pure vanilla extract
– 1 cup unsalted butter, melted
– 1 cup evaporated milk
– 1 box yellow cake mix (15.25 oz)
– 1/2 teaspoon ground cinnamon
– Whipped cream or vanilla ice cream for serving (optional)
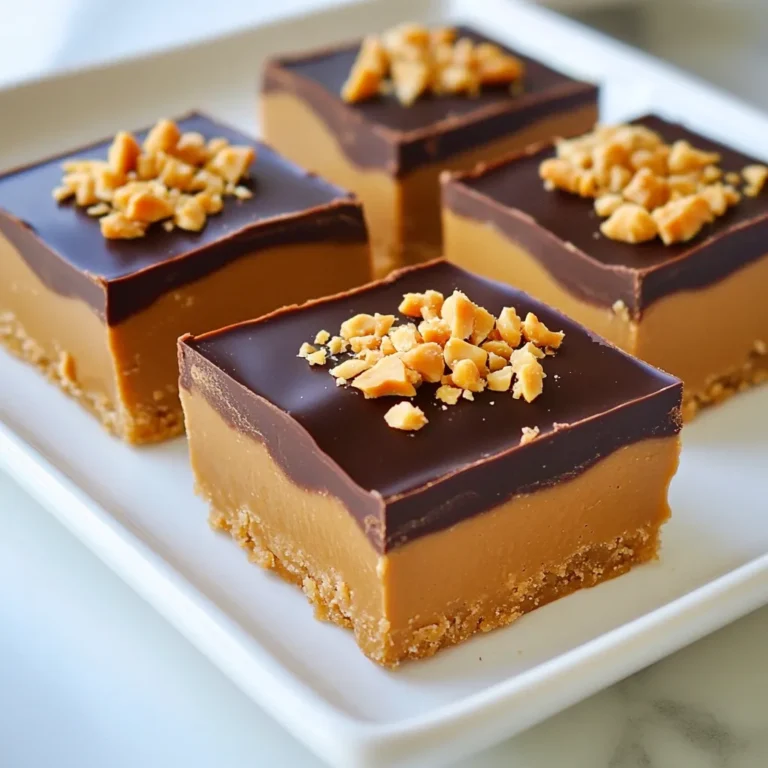
Each ingredient plays a key role in creating the delightful taste and texture of this dessert. The chopped pecans give a nice crunch, while the buttery goodness from the melted butter adds richness. Remember, the cake mix is what makes this recipe easy. You can add whipped cream or ice cream on top for an extra treat!
Step-by-Step Instructions
Preheat the Oven
Set your oven temperature to 350°F (175°C). This step is key for baking.
Prepare the Pecan Mixture
In a large bowl, mix 1 cup of chopped pecans, 1 cup of packed brown sugar, and 1 cup of granulated white sugar. Use a whisk or spoon to combine these dry ingredients well. This mixture adds the sweet, nutty flavor you love.
Combine Wet Ingredients
In another bowl, blend 1 cup of melted butter, 1 cup of evaporated milk, and 1 teaspoon of pure vanilla extract. Whisk until smooth. This creamy mix brings moisture to the cake.
Mix and Assemble
Gradually pour the butter mixture into the bowl with the sugars and pecans. Stir gently until just combined. This step is important; overmixing can change the texture. Now, spread the mixture evenly into a greased 9×13 inch baking dish.
Add Cake Mix and Cinnamon
Layer 1 box of yellow cake mix evenly over the top of the pecan mixture. Do not stir! This keeps the layers distinct. Next, dust the top lightly with 1/2 teaspoon of ground cinnamon. This adds a lovely spice to your dessert.
Bake
Bake in your preheated oven for 40-45 minutes. Check for a golden brown top and bubbling edges. This means your cake is ready. Allow it to cool for a few minutes before serving. Enjoy the warm, sweet aroma as you prepare to dig in!
Tips & Tricks
Perfecting Your Pecan Pie Dump Cake
To get the best texture in your pecan pie dump cake, avoid overmixing. When you combine the wet and dry ingredients, mix just until combined. If you stir too much, it can make the cake dense.
Here are some common baking issues you might face:
– Cake too dry: This can happen if you bake it too long. Keep an eye on it in the oven.
– Not enough flavor: Ensure you use pure vanilla extract for the best taste.
Serving Suggestions
For a perfect serving, I recommend garnishing with whipped cream or a few extra pecans. These touches make the cake look great and taste even better.
Pair your slice with a nice cup of coffee or a sweet dessert wine. The flavors blend well and make for a delightful treat after dinner. Enjoy your baking!

Variations
Nut Alternatives
You might wonder if you can swap pecans for other nuts. Yes, you can! Walnuts or almonds work well. They add different flavors and textures. Walnuts give a slightly bitter taste, while almonds have a sweet crunch. Try them in your dump cake for a fun twist!
Flavor Twists
Want to make your pecan pie dump cake even more exciting? Add chocolate chips or caramel sauce. Both ingredients melt into the cake as it bakes. The chocolate adds a rich flavor, and the caramel gives a sweet touch. You can even mix in both if you want a treat that is truly special!
Healthier Versions
If you’re looking for healthier options, consider some easy swaps. Substitute white sugar with coconut sugar or honey. This change can lower the overall sugar content. You can also use a whole grain cake mix for added nutrition. These small changes can make your dessert a bit lighter while keeping the taste delicious!
Storage Info
Keeping Your Dump Cake Fresh
Store your pecan pie dump cake at room temperature for 2 days. If you want it to last longer, move it to the fridge. In the fridge, it will stay fresh for about a week. Just cover it with plastic wrap or foil to keep it moist. If you leave it out, the top may dry out. So, keep it covered!
Reheating Instructions
When you want to enjoy leftover dump cake, reheating is simple. The best method is to use the oven. Preheat it to 350°F (175°C), then place the cake in a safe dish. Heat it for about 10 to 15 minutes. You can also use a microwave for a quick option. Heat a slice for about 30 seconds. For a warm treat, add some whipped cream or ice cream on top!
Freezing Your Cake
If you want to save some for later, freezing works great! First, let the cake cool completely. Then, cut it into slices. Wrap each slice in plastic wrap. Place the wrapped slices in a freezer bag. Make sure to remove as much air as possible. When you’re ready to eat, take a slice out and thaw it in the fridge overnight. You can also reheat it from frozen, but it may take a bit longer. Enjoy your delicious pecan pie dump cake whenever you like!
FAQs
Can I make Pecan Pie Dump Cake ahead of time?
Yes, you can prepare this cake in advance. Mix the ingredients and store them in the fridge. Just bake it when you are ready to serve. This cake tastes great fresh, but it also holds well for a day or two.
What can I use instead of evaporated milk?
If you need a dairy-free option, use almond milk or coconut milk. You can also use regular milk. Just remember, the flavor may change a bit. If you want a creamier texture, try using coconut cream.
How long does the dump cake stay fresh?
Pecan Pie Dump Cake stays fresh for about three to five days. Store it in an airtight container. Keep it at room temperature for up to two days. After that, move it to the fridge to keep it longer.
Is it necessary to use a certain type of cake mix?
You can use any cake mix, but yellow cake mix works best. It gives the right flavor and texture. A white cake mix can also work, but it may lack the depth of yellow cake. Experiment to find what you like.
Can I use fresh pecans instead of chopped?
Yes, you can use whole pecans. Just chop them a bit for better mixing. Whole pecans give a nice crunch. You can also use pecan halves for a nice look on top.
You now have all you need to create a delicious Pecan Pie Dump Cake. We explored essential ingredients, easy steps, and helpful tips to ensure perfect results. Don’t forget the tasty variations and smart storage methods for leftovers. Bake this treat for any gathering, or just enjoy it yourself. With the right care, this cake will delight you time and again. Enjoy baking and sharing your new favorite dessert!
![- 1 cup unsalted butter, melted - 1 ½ cups brown sugar - 2 large eggs - 1 teaspoon vanilla extract - Zest and juice of 1 lemon To make these strawberry lemon blondies, we start with some key players. The butter gives a rich base, while brown sugar adds sweetness and depth. Eggs bind everything together, and vanilla extract enhances flavor. The zest and juice of one lemon bring a bright, zesty punch to the mix. - 2 cups all-purpose flour - 1 teaspoon baking powder - ½ teaspoon salt Next, we mix in our dry ingredients. All-purpose flour provides structure. Baking powder helps the blondies rise, making them light and fluffy. A little salt balances the sweetness. - 1 cup fresh strawberries, diced - Optional: Powdered sugar for dusting Finally, we fold in the star of the show: fresh strawberries! Their juicy sweetness pairs perfectly with the lemon. If you want a touch of elegance, consider dusting the blondies with powdered sugar before serving. This simple step adds a nice visual touch and a hint of extra sweetness. For the complete recipe, refer to the [Full Recipe]. First, set your oven to preheat at 350°F (175°C). This step is key to getting that perfect bake. Next, grab a 9x9 inch baking pan. Grease it well and line it with parchment paper. Leave some paper hanging over the edges. This will help you lift the blondies out later. You will need a few mixing bowls. One should be large enough for the wet ingredients. Another bowl should be used for the dry ingredients. Also, keep a whisk and spatula nearby. They make mixing easier. In your large bowl, pour in 1 cup of melted butter. Add 1 ½ cups of brown sugar to it. Stir well until it looks smooth. Next, crack in 2 large eggs. Add 1 teaspoon of vanilla extract, the zest of 1 lemon, and 1 tablespoon of fresh lemon juice. Whisk until everything is mixed well and smooth. Now, take your second bowl. In it, whisk together 2 cups of all-purpose flour, 1 teaspoon of baking powder, and ½ teaspoon of salt. Mix these dry ingredients well. Gradually add them to your wet mixture. Stir gently until you see no dry flour. Be careful not to overmix here. Next, fold in 1 cup of diced strawberries using a spatula. Do this gently to keep the fruit pieces whole. Pour the batter into your prepared pan. Use your spatula to spread it evenly. Then, place the pan in your preheated oven. Bake for 25 to 30 minutes. Keep an eye on the edges; they should turn lightly golden brown. To check for doneness, insert a toothpick in the center. It should come out with a few moist crumbs. After baking, let the blondies cool completely in the pan. A wire rack works great for this. Once they are cool, use the parchment overhang to lift them out. Transfer them to a cutting board and cut them into squares. If you like, lightly dust the tops with powdered sugar before serving. This adds a nice touch and makes them look pretty. Enjoy your strawberry lemon blondies! For the full recipe, check out the details above. To get perfect strawberry lemon blondies, avoid overmixing the batter. Overmixing can make your blondies tough. Mix just until you don’t see dry flour anymore. This keeps them soft and chewy. Also, ensure you measure your ingredients correctly. Use dry measuring cups for flour and sugar. Level them off with a knife for accuracy. This small step helps your blondies turn out just right. To enhance the lemon flavor, use fresh lemon juice and zest. Fresh ingredients make a big difference. The zest gives a bright, bold taste. For an extra kick, add a bit more lemon juice if you like it zesty. When using fresh strawberries, choose ripe ones. Look for bright red berries with no soft spots. Cut them into small, even pieces. This way, they mix evenly into the batter, spreading flavor throughout. To ensure even baking, rotate your pan halfway through. Ovens can have hot spots, so this helps. Keep an eye on the edges. They should look golden brown but not burnt. For storage, use an airtight container. A metal or glass container works best. This keeps your blondies fresh for days. If you have extra, you can freeze them. Wrap them well in plastic wrap before placing them in the freezer. This way, you’ll enjoy them later. For the full recipe, check out the full recipe section. {{image_4}} You can easily adapt the strawberry lemon blondies to fit different diets. For a vegan or dairy-free option, replace the butter with coconut oil or a vegan butter substitute. Instead of eggs, use flax eggs or applesauce. This keeps the texture while making it plant-based. For gluten-free alternatives, swap out the all-purpose flour with a gluten-free blend. Many brands offer mixes that work well in baking. Just make sure your baking powder is gluten-free, too, to keep everything safe for those with allergies. To add more fruit flavors, consider mixing in blueberries or raspberries for a twist. These berries pair nicely with lemon and add vibrant colors. You can also try adding different extracts, like almond or coconut, to change the taste. Cinnamon or nutmeg can give a warm touch to your blondies. Pairing your blondies with a scoop of vanilla ice cream makes for a delightful treat. The cold ice cream complements the warm blondies beautifully. For a fun twist, create a blondie sundae by stacking a blondie with ice cream and drizzling it with chocolate or caramel sauce. You can also serve them with whipped cream and fresh strawberries on top. This not only looks appealing but also enhances the flavors. For the full recipe, check out the Sweet & Zesty Strawberry Lemon Blondies. To store strawberry lemon blondies at room temperature, place them in a cool, dry area. Use a plate or a baking dish. Cover them lightly with foil or wax paper. This keeps them fresh for about three days. Avoid direct sunlight to prevent them from drying out. For long-term storage, you can freeze the blondies. First, let them cool completely. Then, cut them into squares. Wrap each square tightly in plastic wrap. Place the wrapped blondies in a freezer bag or airtight container. They can last up to three months in the freezer. When you want to enjoy them, you can thaw them. For the best texture, place the blondies in the fridge overnight. If you're in a hurry, let them sit at room temperature for a few hours. This way, they stay soft and tasty. To keep your blondies fresh, always use airtight containers. This prevents air from drying them out. If you don't have one, use plastic wrap tightly. Keep blondies away from strong odors, as they can absorb them. Enjoy your strawberry lemon blondies at their best! For the full recipe, check out the detailed instructions above. To cut blondies neatly, first let them cool. Use a sharp knife for clean cuts. Warm the knife in hot water, then wipe it dry. This helps slice through the soft blondies. Cut in straight lines for even squares. For a nice finish, dust the top with powdered sugar after cutting. Yes, you can make these blondies ahead of time. Bake and cool them completely. Wrap them tightly in plastic wrap. Store them in an airtight container at room temperature. They stay fresh for a few days. For longer storage, freeze them in an airtight container. Thaw at room temperature before serving. Strawberry lemon blondies last about 3 to 5 days at room temperature. Keep them in an airtight container to maintain freshness. If you store them in the fridge, they may last up to a week. For best taste, enjoy them within a few days of baking. Yes, you can use frozen strawberries in this recipe. Thaw and drain them before adding to the batter. This prevents excess moisture in the blondies. While fresh strawberries taste great, frozen ones work well too. They still provide that sweet and tart flavor we love. You now have a complete guide to making delicious strawberry lemon blondies. We covered key ingredients, step-by-step instructions, and helpful tips. Remember to avoid overmixing for the best texture and to store them properly. Feel free to customize with different fruits or flavors to make this treat your own. Enjoy your baking and share these delights with friends and family. The joy of homemade desserts is unbeatable!](https://fastmealmate.com/wp-content/uploads/2025/06/d01b8b31-fd8b-4a7a-a702-50bce4a43ad8-768x768.webp)