
Vegan Pumpkin Spice Coffee Syrup Tasty Homemade Delight
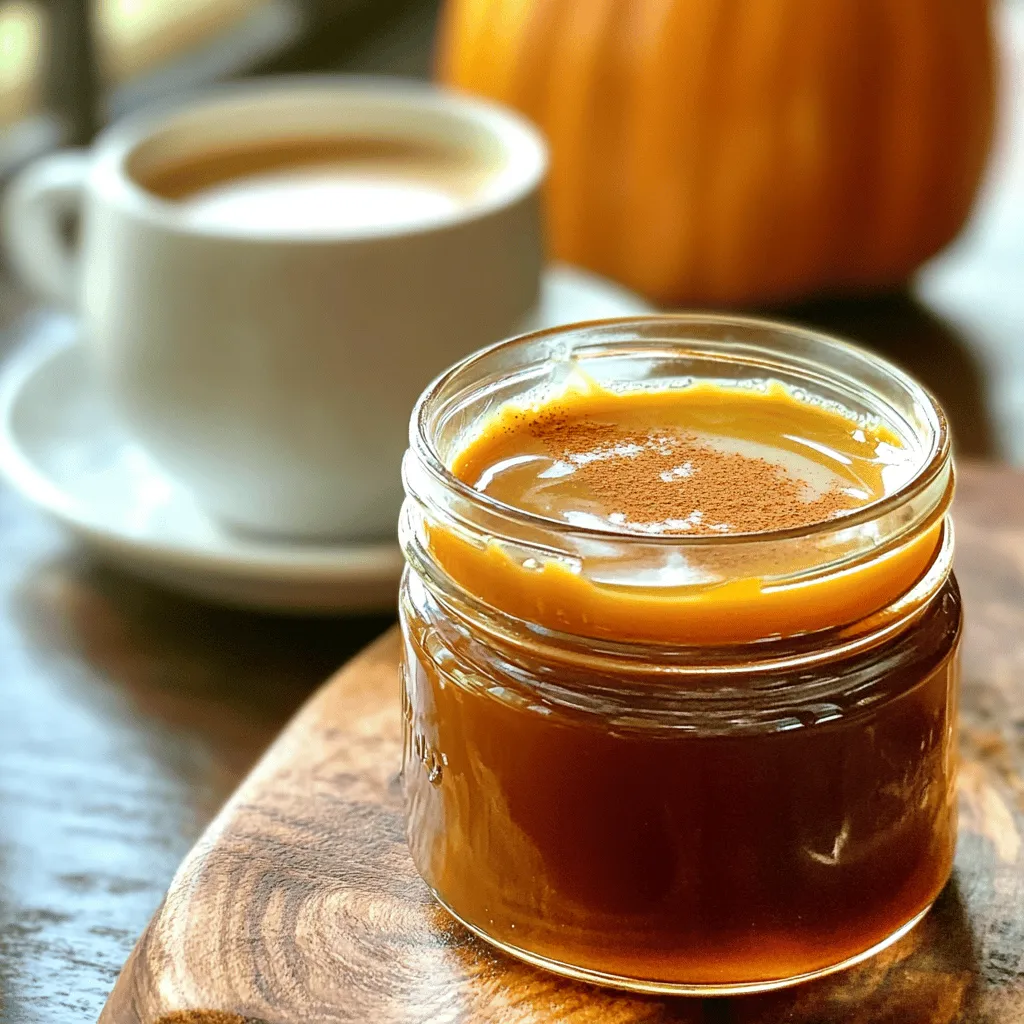
Fall is here, and that means it’s time to indulge in cozy flavors! My Vegan Pumpkin Spice Coffee Syrup is the perfect way to spice up your morning brew. This homemade delight not only adds warmth and sweetness but also keeps it plant-based. Whether you enjoy it hot or iced, this syrup is easy to make and oh-so-delicious! Let’s dive into the simple steps to create your new favorite coffee treat.
Ingredients
Main Ingredients for Vegan Pumpkin Spice Coffee Syrup
To make this syrup, you need a few main ingredients. Here’s the list:
– 1 cup pure pumpkin puree
– 1 cup coconut sugar (or substitute with brown sugar)
– 1 cup water
– 1 teaspoon pure vanilla extract
– 1 teaspoon pumpkin pie spice
– 1/4 teaspoon fine sea salt
Pure pumpkin puree is key. It gives the syrup its rich flavor and creamy texture. Coconut sugar adds a nice sweetness and a hint of caramel. If you can’t find coconut sugar, brown sugar works well too. The water helps blend everything together, making it easy to whisk.
Alternative Sweeteners and Their Benefits
You can also try other sweeteners. Maple syrup is a great choice. It adds a warm, earthy flavor. Agave nectar is another option. It is lighter and has a mild taste. Each sweetener brings its own flavor and sweetness level. Just keep in mind that some may alter the syrup’s texture.
Tips for Selecting Quality Pumpkin Puree
When choosing pumpkin puree, look for a can that says “100% pumpkin.” Some brands mix in other ingredients, which can change the taste. You can also use fresh pumpkin. Cook it, scoop out the flesh, and blend it until smooth. This way, you get a fresh taste in your syrup. If you want to get really fancy, roast your pumpkin to enhance its sweetness.Enjoy making this cozy, flavorful syrup!
Step-by-Step Instructions
How to Combine Ingredients
First, grab a medium saucepan. Add 1 cup of pure pumpkin puree, 1 cup of coconut sugar, and 1 cup of water. Use a whisk or spoon to mix them well. Keep stirring until everything blends into a smooth mixture. This step is key for a tasty syrup!
Tips for Heating and Stirring
Set the stove to medium heat and bring your mixture to a gentle boil. Once you see bubbles, lower the heat to low. Stir often to stop the syrup from sticking to the pan. This helps the syrup cook evenly and thickens it just right.
Perfecting Flavor with Extracts and Spices
When your mix simmers, add 1 teaspoon of pure vanilla extract and 1 teaspoon of pumpkin pie spice. Don’t forget the 1/4 teaspoon of fine sea salt! These ingredients boost the flavor and make it taste amazing. Cook for another 10-15 minutes, stirring now and then. This lets the flavors blend and the syrup thicken.
Tips & Tricks
How to Achieve the Right Syrup Consistency
Getting the right syrup thickness is key. Start by simmering your mixture. Stir often to prevent burning. After about 10-15 minutes, check the consistency. If it coats the back of a spoon, you’re on track! If you want it thicker, just simmer a bit longer. Remember, it will thicken more as it cools.
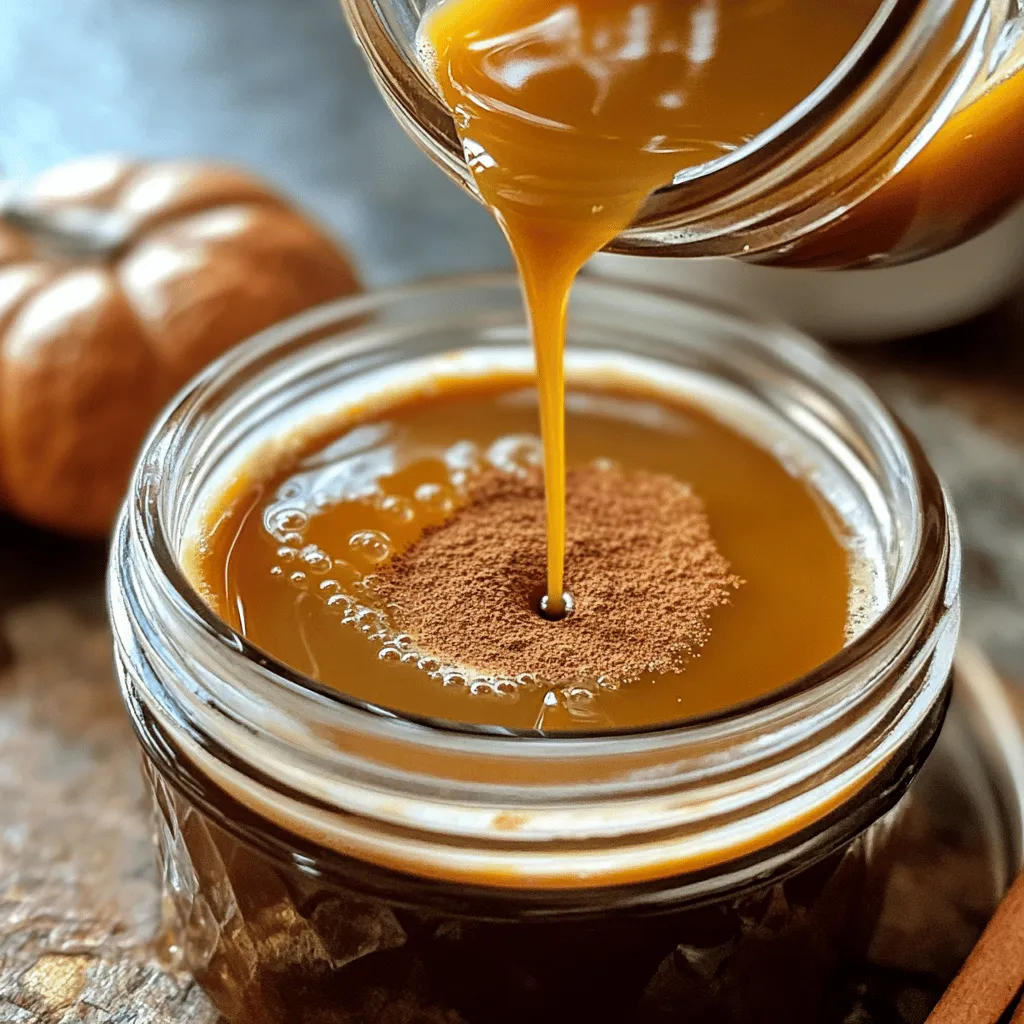
Presentation Ideas for Serving
To make your drink pop, drizzle the syrup over coffee or lattes. Use a squeeze bottle for easy pouring. You can also add a sprinkle of cinnamon on top for a cozy touch. If you want a fun twist, try it on pancakes or waffles. It adds a great flavor and looks beautiful.
Using Leftover Ingredients Effectively
Don’t let any ingredients go to waste! Use leftover pumpkin puree in smoothies or baked goods. Mix it into oatmeal for a tasty breakfast. The coconut sugar can sweeten many dishes, too. Try it in baked treats or as a topping for yogurt. This way, you make the most of your ingredients while enjoying every bite.
Variations
Creating an Iced Vegan Pumpkin Spice Coffee
To make an iced vegan pumpkin spice coffee, start with brewed coffee. Let it cool to room temperature. In a glass, add ice cubes and pour in the coffee. Next, drizzle in your homemade vegan pumpkin spice coffee syrup. Stir well to mix the flavors. If you want it sweeter, add more syrup. This drink is refreshing and perfect for warm days.
Adding Dairy-Free Milk Options
Adding dairy-free milk can change your drink. Almond milk, oat milk, or soy milk works well. Choose one that you enjoy. Pour a splash into your brewed coffee before adding the syrup. This makes the drink creamy and smooth. Adjust the amount of milk to fit your taste. Each type of milk brings its own flavor, so feel free to experiment!
Other Flavor Combinations to Try
You can create new flavors with your syrup. Try adding a hint of maple syrup for extra sweetness. A sprinkle of nutmeg can also enhance the fall taste. If you enjoy chocolate, mix in some cocoa powder. For a spicier kick, add a dash of cayenne pepper. Each twist will give your drink a unique flair. Don’t be afraid to mix and match!
Storage Info
How to Properly Store Vegan Pumpkin Spice Coffee Syrup
To keep your vegan pumpkin spice coffee syrup fresh, store it in a clean glass jar. Make sure to use a jar with a tight lid. This helps to keep out air and moisture. After making the syrup, let it cool completely at room temperature. Once cool, seal the jar tightly and refrigerate it. Always use a clean spoon when scooping out syrup to avoid contamination.
Shelf Life and Usage Recommendations
When stored correctly, your syrup lasts up to two weeks in the fridge. I recommend using it within this time for the best flavor. You can drizzle it over coffee, pancakes, or even oatmeal. If you want a stronger taste, try adding more syrup to your drink. Remember, a little goes a long way in bringing that cozy pumpkin spice flavor to your favorite meals.
Signs of Spoilage to Look For
Check your syrup for signs of spoilage before using. If you see mold, discard it right away. A strange smell or off-taste is also a sign that the syrup is no longer good. Always trust your senses. If in doubt, it’s better to be safe and throw it out. Keeping an eye on these signs will help you enjoy your homemade delight for as long as possible.
FAQs
Can I use other types of sugar instead of coconut sugar?
Yes, you can! Brown sugar works well as a substitute. It gives a nice, rich flavor. You may also try maple syrup or agave nectar. These options add their own unique taste to the syrup. Feel free to experiment and find what you like best!
How long does the syrup last in the fridge?
This syrup lasts up to two weeks in the fridge. Store it in a sealed jar or bottle. Just make sure it cools down completely before sealing. If you notice any changes in smell or color, it’s best to toss it.
What are some creative uses for vegan pumpkin spice coffee syrup?
There are so many ways to enjoy this syrup! Here are a few ideas:
– Coffee: Add it to your morning cup for a sweet kick.
– Lattes: Mix it into your favorite dairy-free milk for a creamy treat.
– Oatmeal: Drizzle over warm oatmeal for extra flavor.
– Baking: Use it in baked goods like muffins or pancakes.
– Desserts: Top your vegan ice cream with this syrup for a fall twist.
You can buy vegan pumpkin spice coffee syrup at specialty stores or online. Look for it in the coffee aisle or health food sections.
Vegan pumpkin spice coffee syrup is simple and fun to make. We’ve covered everything from the key ingredients, like pumpkin and sweeteners, to perfecting flavors with extracts. I shared tips on achieving the right consistency and creative ways to serve. You can even try ice versions and dairy-free options!
In the end, this syrup will add warm flavors to your coffee and treats. Enjoy your tasty creations, and don’t forget to store them right for lasting freshness. Embrace the spice and enjoy every sip!


![For the dry mix, gather these items: - 1 ½ cups all-purpose flour - 1 teaspoon baking powder - 1 teaspoon baking soda - ½ teaspoon salt - 1 teaspoon ground cinnamon - ½ teaspoon ground nutmeg - ¼ teaspoon ground ginger These ingredients help create the loaf's structure and flavor. The spices add warmth and depth. Next, collect these wet items: - 1 cup granulated sugar - ½ cup packed brown sugar - 1 cup vegetable oil - 3 large eggs - 1 teaspoon vanilla extract These components bring moisture and sweetness. The combination of sugars gives a rich taste. Now, let's spice it up with these add-ins: - 2 cups finely shredded carrots (approximately 4 medium carrots) - ½ cup crushed pineapple, well-drained - ½ cup chopped walnuts (optional) These add-ins bring texture and flavor. The carrots keep the loaf moist, while the pineapple adds a touch of sweetness. If you like crunch, toss in the walnuts. For the full recipe, you can explore the step-by-step instructions in [Full Recipe]. - Preheat the oven to 350°F (175°C). - Prepare your 9x5-inch loaf pan. Use non-stick spray or line it with parchment paper. This helps the loaf come out easily after baking. - In a medium bowl, combine the dry ingredients. Whisk together the flour, baking powder, baking soda, salt, and spices. Set this mixture aside for later. - In a large bowl, mix the sugars and oil. Beat them together until smooth. - Add the eggs one at a time to the sugar mixture. Mix well after each addition. Stir in the vanilla extract. - Gradually blend the dry ingredients with the wet ingredients. Stir gently until just combined. Avoid overmixing to keep your loaf tender. - Carefully fold in the finely shredded carrots, well-drained crushed pineapple, and chopped walnuts if you’re using them. Make sure they are evenly spread throughout the batter. - Pour the batter into your prepared loaf pan. Use a spatula to smooth the top. - Place the loaf pan in the oven. Bake for 50-60 minutes. Check for doneness by inserting a toothpick in the center. It should come out clean. If the top browns too fast, cover it loosely with aluminum foil. Use freshly grated carrots for the best flavor and moisture. Fresh carrots add a sweet crunch. You can also adjust the sugar based on your taste. If you prefer a sweeter cake, add a bit more sugar. If you want it less sweet, cut back. Mixing just until combined keeps the cake tender and moist. If you overmix, the loaf can turn out dense. When you add dry ingredients to the wet mix, stir gently. The batter should look slightly lumpy; that’s okay! To get a smooth cream cheese frosting, start with room temperature cheese and butter. Cold ingredients can lead to lumps. Beat the cream cheese and butter until creamy. Gradually add powdered sugar to avoid a cloud of sugar. Remember to mix until smooth, and then add a pinch of salt for flavor. For the full recipe, check out the [Full Recipe]. {{image_4}} You can easily change the flavor of your carrot cake loaf with different add-ins. If you want to swap nuts, try using raisins or shredded coconut instead. Both options add a sweet, chewy texture that pairs well with the spices. You can also adjust spices for a unique flavor. Add a little more cinnamon for warmth or some cardamom for a fragrant twist. This way, you can create a taste that fits your mood. If you need gluten-free options, consider almond or oat flour. Both flours work well and keep the loaf moist. For vegan substitutions, use flax eggs instead of regular eggs. Just mix one tablespoon of ground flaxseed with three tablespoons of water for each egg. You can also replace the cream cheese with a vegan cream cheese spread. These small changes keep the cake delicious while meeting your dietary needs. Pair your carrot cake loaf with a warm cup of coffee or tea. The rich flavors balance perfectly with a hot drink. To make your loaf look fancy, arrange slices on a beautiful platter. You can sprinkle chopped walnuts on top and add edible flowers for color. This makes your dessert not just tasty but also a feast for the eyes. For a fun touch, serve it with a scoop of vanilla ice cream for a delightful contrast. Make sure to check out the Full Recipe for more details on creating this delicious treat! To keep your carrot cake loaf fresh, store it in the fridge. Place it in an airtight container. This helps keep moisture in and prevents it from drying out. The cream cheese frosting also needs special care. To keep the frosting fresh, cover it with plastic wrap. This stops air from making it hard or crusty. You can freeze the carrot cake loaf both ways. First, freeze it before frosting. Wrap it in plastic wrap and then foil. This helps keep the cake moist. If you already frosted it, freeze the loaf on a plate. Once frozen, wrap it tightly. To thaw the loaf, place it in the fridge overnight. This helps keep the texture nice and soft. The carrot cake loaf can last about three days at room temperature. Keep it in a cool, dry place. If you see any mold or smell a sour scent, it’s best to throw it away. Always trust your senses when checking if food is safe to eat. Enjoy your delicious treat while it's fresh! For the full recipe, check the complete guide. Baking a carrot cake loaf takes about 50-60 minutes at 350°F (175°C). To test for doneness, insert a toothpick into the center. If it comes out clean, your loaf is ready. If the top browns too quickly, cover it with foil. This tip helps keep the top soft and moist. Yes, you can prepare this loaf ahead of time. You can mix the dry ingredients and store them in an airtight container. The wet ingredients can also be combined a day before. Just keep them in the fridge. Bake the loaf when you are ready. It keeps well and tastes fresh. If you need a dairy-free option, use vegan cream cheese. Another choice is to blend silken tofu with a bit of vanilla and powdered sugar. This gives you a smooth frosting that still tastes great. You can also try coconut cream for a tropical twist. Yes, this carrot cake loaf is great for kids. It contains nutritious carrots and pineapple, which add vitamins. The loaf is moist and flavorful, making it appealing to young eaters. Just be sure to watch for any nut allergies if you use walnuts. To check if the loaf is done, look for a golden brown top. You can also gently press the top; it should spring back. Use a toothpick to test the center. If it comes out clean, your carrot cake loaf is perfect. These cues help ensure a delicious result. This blog post covered all the essential steps to make a delicious carrot cake loaf. We explored the key ingredients, from dry and wet components to tasty add-ins. I shared tips to keep your cake moist and flavorful, along with ways to customize your loaf. Lastly, we discussed storage and FAQs to help you perfect your baking. Embrace your baking journey and enjoy each slice of your creation!](https://fastmealmate.com/wp-content/uploads/2025/06/8b09a955-a057-4b29-b3fd-380f10cea1b9-768x768.webp)

![- Cheese tortellini - Flank steak - Provolone cheese The main stars of Cheesesteak Tortellini Bliss are cheese tortellini, flank steak, and provolone cheese. The cheese tortellini adds a rich, creamy texture. Flank steak gives a hearty, meaty flavor. Provolone cheese melts beautifully, making everything delightfully gooey. - Green bell pepper - Onion - Garlic Next, we have the veggies. The green bell pepper adds a nice crunch and sweetness. Onions bring out a savory note when sautéed. Garlic adds a burst of flavor that elevates the dish. Together, they create a great base for our cheesesteak twist. - Beef broth - Worcestershire sauce - Olive oil Now, let’s talk about the liquids. Beef broth adds depth and richness to the sauce. Worcestershire sauce brings umami and a hint of tang. Olive oil helps to sear the steak and sauté the veggies, making everything come together nicely. For the full recipe, check the [Full Recipe]. To start, fill a large pot with water. Add a generous pinch of salt. Bring the water to a rolling boil. Once it boils, gently add the cheese tortellini. Cook according to the package instructions, usually about 3-5 minutes. You want the tortellini to be al dente, not too soft. After cooking, drain the tortellini in a colander. Keep it warm by covering it with a kitchen towel while you prepare the rest. Next, heat a large skillet over medium-high heat. Add one tablespoon of olive oil to the hot skillet. Season the thinly sliced flank steak with salt and pepper. Make sure to coat all sides. Carefully place the steak slices in the skillet. Avoid overcrowding the pan, as this will steam the meat. Sear for about 3-4 minutes on each side. You want a golden-brown crust to form. Once cooked, remove the steak from the skillet and place it on a plate. Cover it loosely with foil to keep it warm. In the same skillet, add the sliced green bell pepper and onion. Don’t clean the skillet; this adds flavor. Sauté the vegetables over medium heat for about 5 minutes. You want them to soften and start to caramelize. Stir occasionally to prevent burning. Once they are soft, add the minced garlic. Cook for another minute, just until fragrant. Be careful not to let the garlic burn, as it can turn bitter. Now, you are ready to move on to combining all the tasty elements! For the complete recipe, check out the Full Recipe. To get the best flavor from your steak, sear it well. Here are my tips: - Heat your skillet: Use a large skillet and heat it to medium-high. This helps create a great crust on the steak. - Don’t overcrowd: Place only a few slices in the pan at once. This keeps the heat high and allows each piece to sear nicely. - Check doneness: For a medium-rare steak, aim for a temperature of 130-135°F. Use a meat thermometer for accuracy. Understanding how you like your steak cooked is key. Here’s a quick guide: - Rare: 120-125°F - Medium-rare: 130-135°F - Medium: 140-145°F - Medium-well: 150-155°F - Well-done: 160°F and above Want to take your cheesesteak tortellini to the next level? Try these flavor tips: - Add spices: A pinch of smoked paprika or crushed red pepper can give it a nice kick. - Experiment with herbs: Fresh thyme or oregano adds a lovely aroma. - Pair with sides: Serve with a fresh salad or garlic bread for a complete meal. The crunch balances the creamy tortellini. Cooking can have its hiccups. Here’s how to avoid common problems: - Overcooked tortellini: Keep an eye on the cooking time. Drain them as soon as they are al dente. This usually takes about 3-5 minutes. - Clumpy cheese: If your cheese gets clumpy, add a splash of milk or broth. This helps it melt evenly. For the full recipe of Cheesesteak Tortellini Bliss, check out the details shared above! {{image_4}} You can change this recipe with different proteins. If you want a lighter option, use chicken or turkey. Ground beef also works well in this dish. For a vegetarian twist, try mushrooms or tofu. These swaps keep the flavor rich and satisfying. Cheese is another area for creativity. Provolone is classic, but you can try cheddar for a sharper taste. Gouda adds a smoky feel, while mozzarella gives a creamy texture. Mix and match to find your favorite combo. Need gluten-free options? You can find gluten-free tortellini at many stores. Just check the package to ensure it fits your needs. Use cornstarch or arrowroot instead of regular flour to thicken the sauce. Dairy-free? Swap provolone for vegan cheese. There are many tasty brands that melt well. You can also use nutritional yeast for a cheesy flavor without the dairy. Want to switch up the presentation? Turn this dish into a baked delight. Transfer everything to a baking dish. Top it with more cheese and bake until golden and bubbly. This makes for a cozy meal perfect for sharing. Looking for a lighter option? Serve the cheesesteak tortellini as a salad. Toss it with greens, tomatoes, and a light dressing. This turns your dish into a fresh and vibrant meal option, perfect for warm days. For the full recipe, check the details above. After you enjoy your cheesesteak tortellini, store leftovers right away. Let the dish cool down for about 30 minutes. Avoid leaving it out longer, as this can cause bacteria to grow. Use airtight containers to keep your meal fresh. Store it in your fridge for up to three days. To freeze the cheesesteak tortellini, first, let it cool completely. Transfer it into freezer-safe containers or bags. Make sure to remove as much air as possible to avoid freezer burn. You can keep it frozen for up to three months. When you're ready to eat, thaw it overnight in the fridge. Reheat it gently on the stove over low heat, adding a splash of beef broth to keep it moist. Stir often to ensure even heating. Enjoy your delicious meal just like the first time! For the complete cooking instructions, check the Full Recipe. To cook tortellini, first, boil a large pot of water. Add salt to the water for flavor. When the water boils, add the cheese tortellini. Cook them according to the package instructions, usually around 3-5 minutes. Make sure they are al dente, which means they should be firm but cooked through. Drain the tortellini in a colander and keep them warm. This step ensures they stay soft and tasty for your dish. You can prepare Cheesesteak Tortellini Bliss ahead of time! Cook the tortellini and steak as directed, then let them cool. Store the dish in an airtight container in the fridge. When you're ready to eat, reheat it on the stove over medium heat. Add a splash of broth to keep it moist. Stir until everything is warm, and enjoy! This makes it easy for busy days. You can easily customize the flavors in this recipe! Try adding different vegetables like mushrooms or spinach for a twist. Swap the flank steak for chicken or shrimp if you want. For a spicier kick, add red pepper flakes or diced jalapeños. You can also mix in different cheeses like cheddar or mozzarella. Get creative and make this dish your own! This blog post covered a delicious recipe combining cheese tortellini and flank steak. You learned about essential ingredients, such as provolone cheese and beef broth. I shared steps for cooking beautiful tortellini and flavor-packed steak with sautéed veggies. Tips for perfecting your dish and creative variations ensured your meal stands out. In conclusion, enjoy the flexibility of this recipe. Please feel free to customize it to fit your tastes. Happy cooking!](https://fastmealmate.com/wp-content/uploads/2025/06/d6ee9c88-ae52-41f7-bd2d-f571c0560d46-768x768.webp)