Peach Cobbler Delight Easy and Delicious Dessert Recipe
Are you ready to indulge in a warm, sweet treat? My Peach Cobbler Delight Recipe is easy, quick, and bursting with flavor! Using fresh peaches and simple ingredients, you’ll create a dessert that impresses everyone. Whether it’s a family gathering or a cozy night in, this cobbler is sure to satisfy. Let’s dive into baking this irresistible dish and fill your home with delightful scents of sweet peaches!
Ingredients
Fresh Ingredients
– 4 cups fresh peaches, peeled and sliced
– 1 tablespoon fresh lemon juice
– 1 teaspoon pure vanilla extract
Dry Ingredients
– 1 cup granulated sugar, divided
– 1 cup all-purpose flour
– 1 teaspoon baking powder
– 1/2 teaspoon salt
– 1 teaspoon ground cinnamon
– 1/2 teaspoon ground nutmeg
Liquids
– 1/2 cup milk (preferably whole)
– 1/2 cup unsalted butter, melted
When making peach cobbler, fresh ingredients are key. I love using ripe peaches. They bring a sweet and juicy flavor. You will need four cups of peaches. Make sure they are peeled and sliced. A splash of lemon juice brightens the dish. It adds a nice tang that balances the sweetness.
Next, you will need one teaspoon of vanilla extract. This adds a rich and warm note to your cobbler.
Now, let’s talk about dry ingredients. You will need one cup of granulated sugar. Divide this sugar into two halves. One half sweetens the peaches, while the other mixes with the batter.
You will also need one cup of all-purpose flour. This gives the cobbler its structure. One teaspoon of baking powder makes it rise. A little salt, along with one teaspoon of ground cinnamon and half a teaspoon of ground nutmeg, adds warmth and depth.
For the liquids, use half a cup of milk, preferably whole. This keeps the batter moist. Finally, melt half a cup of unsalted butter. It adds richness and flavor to the batter.
These ingredients combine to make a delightful peach cobbler.Happy baking!
Step-by-Step Instructions
Baking Preparation
– Preheat your oven to 375°F (190°C).
– Grease a 9×13 inch baking dish.
Preparing the Peach Mixture
– Combine sliced peaches with 1/2 cup of sugar, lemon juice, and vanilla extract.
– Allow the mixture to marinate. This step brings out the peach flavor and makes it sweeter.
Making the Batter
– Mix dry ingredients together in a bowl.
– Add remaining sugar, milk, and melted butter; combine gently. This creates a smooth batter for your cobbler.
Assembling the Cobbler
– Pour batter into the greased dish and top with the peach mixture.
– Do not stir; allow peaches to rest on top. This layering helps with texture.
Baking
– Bake for 35-40 minutes until golden brown.
– Let cool for a few minutes before serving. This cooling time helps the cobbler set.
This recipe is simple and fun to make!
Tips & Tricks
Perfecting the Cobbler
Using ripe, fresh peaches is key for great flavor. Look for peaches that are firm but slightly soft. They should smell sweet and fragrant. If your peaches are not very sweet, you can adjust the sugar. Taste the peach mixture before baking. If it needs more sweetness, add a little more sugar.
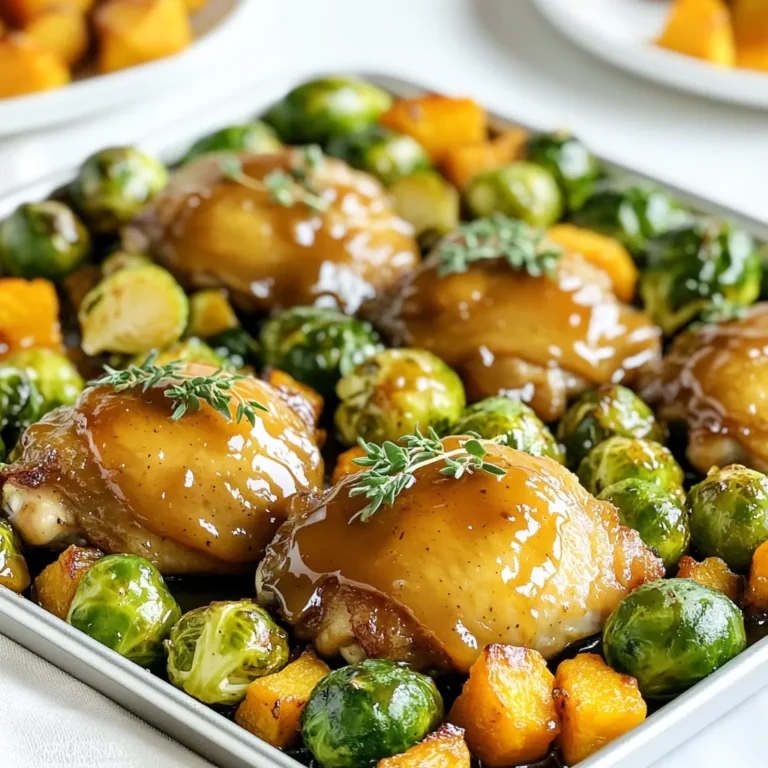
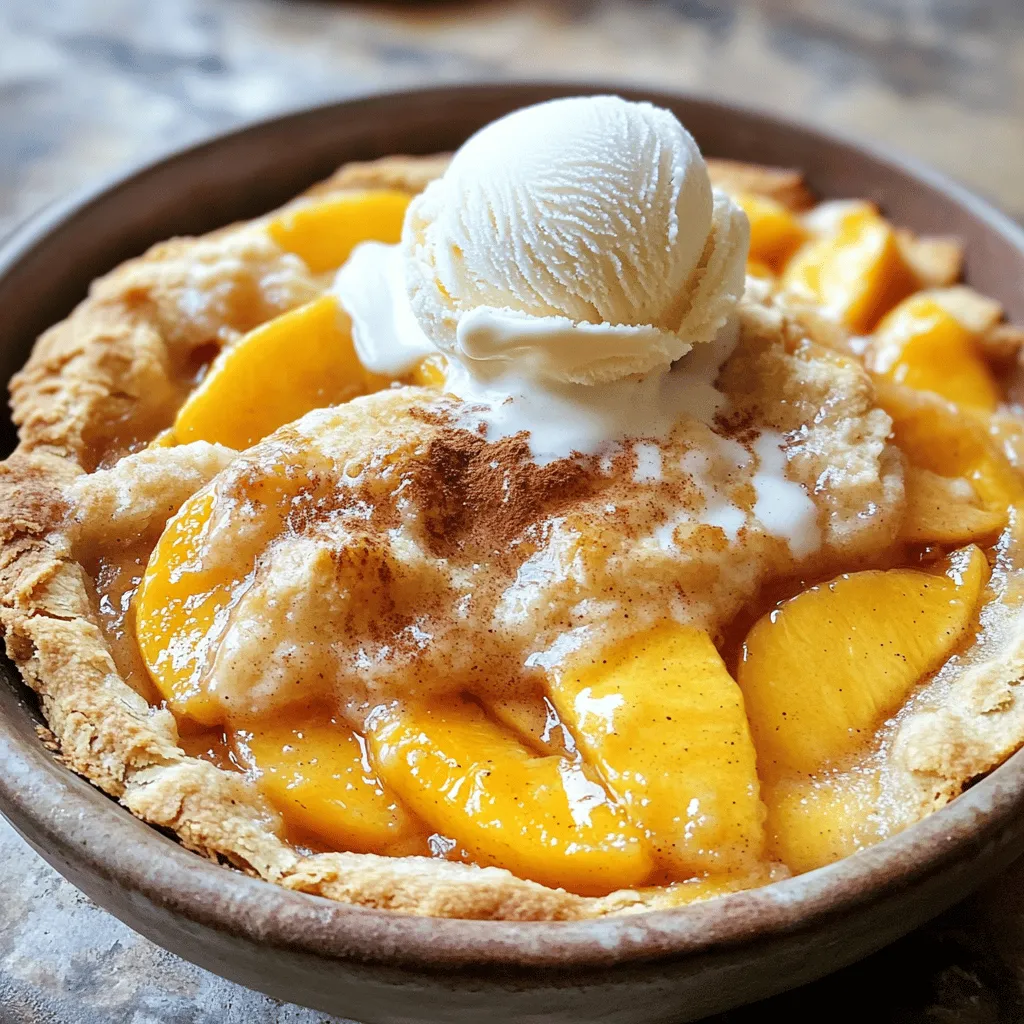
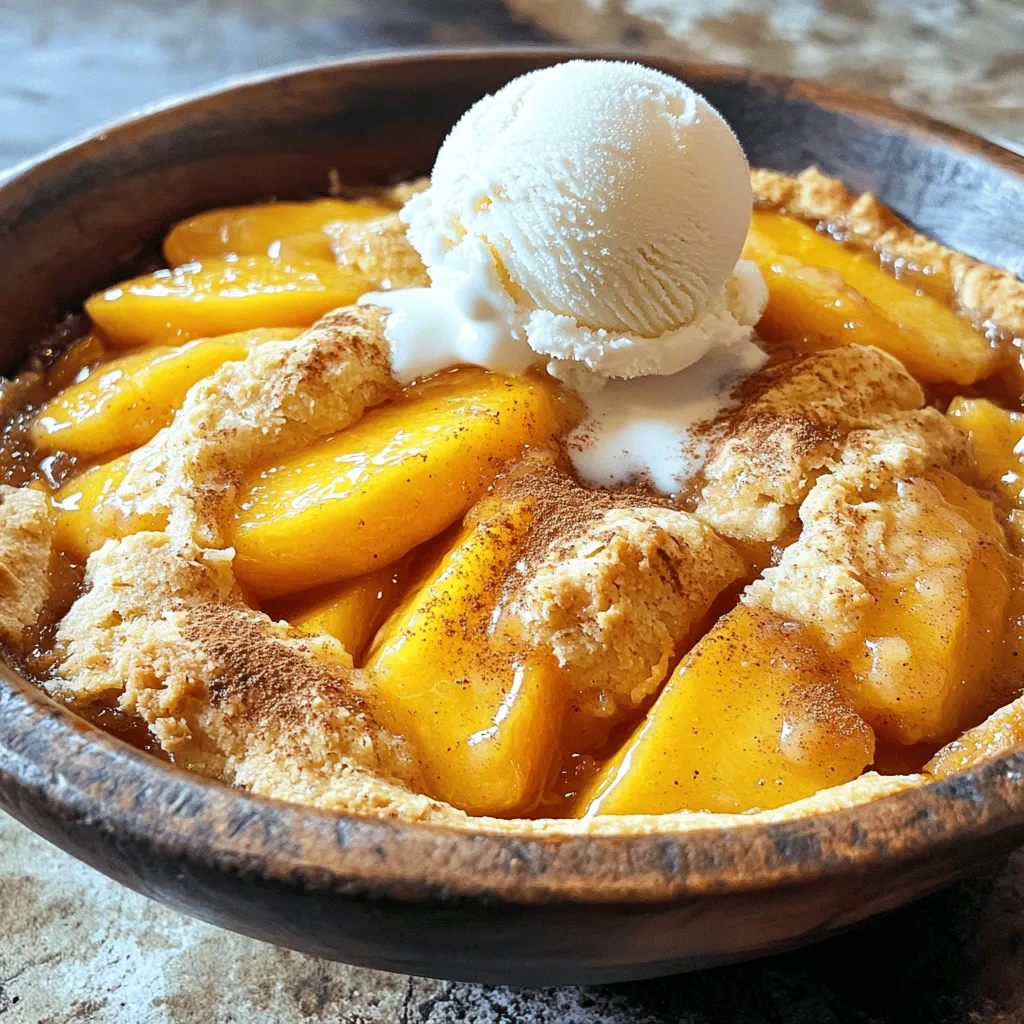
Serving Suggestions
Serve your cobbler warm for the best taste. A scoop of vanilla ice cream on top is a classic choice. The cold ice cream melts into the warm cobbler, creating a wonderful mix. You can also dust the cobbler with cinnamon. This adds a nice flavor that pairs well with the peaches.
Baking Tips
Make sure your oven is fully preheated before baking. This helps the cobbler rise and bake evenly. Keep an eye on the baking time, too. Check the cobbler after 35 minutes. You want it golden brown and bubbling. If it looks done, take it out to avoid overbaking.
Variations
Peach cobbler is a wonderful dessert, but you can change it up! Here are some fun ideas.
Gluten-Free Peach Cobbler
Do you need a gluten-free option? Easy! Just swap all-purpose flour for a gluten-free blend. This keeps your cobbler tasty while being kind to those with gluten issues. Most blends work well, so find one you like.
Vegan Peach Cobbler
Want a vegan version? It’s simple! Use almond milk instead of regular milk for creaminess. Next, swap the butter for coconut oil or a vegan butter. This change keeps the rich taste while being plant-based. You won’t miss the dairy one bit!
Adding Flavors
Want to get creative? Try adding herbs! Mint or thyme can give your cobbler a fresh twist. If you like warm spices, add cardamom. It gives a unique flavor that surprises your taste buds. These little tweaks make your cobbler even more special.
Storage Info
Short-term Storage
Store leftovers in an airtight container in the refrigerator for up to 4 days. This keeps your cobbler fresh and tasty. When ready to enjoy, just scoop out a portion and warm it up.
Long-term Storage
Freeze portions in freezer-safe containers for up to 3 months. Make sure to label each container with the date. This way, you can easily track how long it has been stored. To enjoy later, simply thaw it overnight in the fridge before reheating.
Reheating Instructions
Reheat in the oven for best results, or microwave for quick serving. If using the oven, set it to 350°F (175°C) and cover the cobbler with foil to prevent burning. Heat for about 15-20 minutes. If you’re in a hurry, the microwave works too! Just heat for about 1-2 minutes, checking to ensure it warms evenly. Enjoy your delicious peach cobbler again!
FAQs
How to make Peach Cobbler from scratch?
To make peach cobbler, follow these steps:
1. Preheat your oven to 375°F (190°C).
2. In a bowl, mix 4 cups of sliced peaches with 1/2 cup of sugar, lemon juice, and vanilla.
3. Let the peach mix sit while you prepare the batter.
4. In another bowl, whisk 1 cup of flour, baking powder, salt, cinnamon, and nutmeg.
5. Add the remaining sugar, milk, and melted butter to the dry mix. Stir until just combined.
6. Pour the batter into a greased 9×13 inch baking dish.
7. Spoon the peach mixture over the batter without stirring.
8. Bake for 35-40 minutes until the top is golden brown and bubbling.
This easy recipe will give you a delicious peach cobbler!
Can I use frozen peaches for this recipe?
Yes, you can use frozen peaches. Just make sure to thaw them first. Drain any extra liquid that comes from thawing. This helps keep your cobbler from getting too watery and ensures a tasty dessert.
What to serve with Peach Cobbler?
Peach cobbler tastes great with different toppings. I love serving it with:
– Vanilla ice cream
– Whipped cream
– A drizzle of caramel sauce
These add creaminess and sweetness to the warm cobbler.
How do I know when my Peach Cobbler is done?
You can tell when your cobbler is ready by looking for a golden brown top. Check for bubbling juices around the edges. If both of these signs are there, your peach cobbler is done!
This blog post shared a simple way to make delicious peach cobbler. We covered fresh and dry ingredients, step-by-step instructions, and tips for perfection. Remember, ripe peaches make a big difference in flavor. You can even try variations like gluten-free or vegan options. Store leftovers properly to keep them tasty. With these tips, you’ll bake a cobbler that impresses everyone. Enjoy your sweet creation!

![- 4 boneless, skinless chicken breasts - 1 cup coconut milk (preferably full-fat for creaminess) - 2 tablespoons freshly squeezed lime juice - Zest of 1 lime - 2 tablespoons honey - 2 cloves garlic, minced - 1 teaspoon fresh ginger, grated - 1 teaspoon ground cumin - Salt and pepper to taste - 1 tablespoon olive oil The main ingredients in Coconut Lime Chicken create a perfect balance of flavors. The chicken breasts are the star, providing a solid base. Coconut milk adds creaminess and richness. Lime juice brings bright acidity and zest. Honey balances the tanginess. Garlic and ginger enhance depth, while cumin adds warmth. - Fresh cilantro leaves - Lime wedges for serving Garnishes can elevate your dish. Fresh cilantro adds a pop of color and freshness. Lime wedges provide an extra burst of citrus when served. - Grill or skillet - Resealable plastic bag for marinating A grill or skillet works great for cooking the chicken. The resealable bag is perfect for marinating. It helps the chicken soak up all those delicious flavors. For the Full Recipe, check out the detailed instructions that guide you through the steps to make this delicious Coconut Lime Chicken. To start, gather your ingredients. Combine 1 cup of coconut milk, 2 tablespoons of lime juice, lime zest, 2 tablespoons of honey, 2 minced garlic cloves, 1 teaspoon of grated ginger, and 1 teaspoon of ground cumin in a medium bowl. Add a pinch of salt and pepper to boost the flavor. Whisk these ingredients together until they blend well. This creates a creamy and fragrant marinade. - Tip: Use a sturdy whisk to mix. It helps create a smooth consistency without clumps. Next, it's time to marinate the chicken. Place 4 boneless, skinless chicken breasts into a large resealable plastic bag. Pour the marinade over the chicken. Make sure each piece is coated evenly. Seal the bag tightly and press out any air. For the best flavor, marinate in the fridge for at least 30 minutes. You can marinate for up to 4 hours for a richer taste. - Tip: Flip the bag halfway through marinating. This ensures all sides soak up the flavor. Now, let’s cook the chicken. Preheat your grill or a large skillet over medium-high heat. If using a skillet, drizzle in 1 tablespoon of olive oil. Let it heat until it shimmers but does not smoke. Carefully remove the chicken from the marinade. Allow any excess marinade to drip off. Place the chicken on the grill or in the skillet. Cook each piece for about 6-7 minutes on each side. The chicken is done when it is no longer pink inside and reaches an internal temperature of 165°F. - Tip: If using a skillet, turn the chicken often for even cooking. Once cooked, transfer the chicken to a plate. Let it rest for about 5 minutes. Resting helps the juices stay inside. Finally, slice the chicken and serve it with leftover marinade, fresh cilantro, and lime wedges. For the Full Recipe, check the complete details in the earlier section. Enjoy your Coconut Lime Chicken! Marinating your chicken is key for great taste. I recommend marinating for at least 30 minutes. For deeper flavors, let it sit for up to 4 hours. The coconut milk and lime juice work wonders together. You can also add spices like paprika or herbs like thyme. These will give your dish a unique twist. Resting your chicken after cooking is crucial. Let it sit for 5 minutes before slicing. This helps the juices stay inside. The ideal internal temperature for fully cooked chicken is 165°F (75°C). Use a meat thermometer to check. This step ensures your chicken stays juicy and tender. A great plate makes your meal more inviting. Arrange the sliced chicken on a bright platter. Sprinkle fresh cilantro over the top for color. Serve lime wedges on the side for extra zest. You can also add a side of coconut rice or a fresh salad. These choices elevate your dish, making it visually appealing and delicious. For the full recipe, check out the Coconut Lime Chicken recipe. {{image_4}} You can change the protein in this dish. Try shrimp or tofu for a fun twist. Each option offers a unique taste while soaking up the coconut and lime flavors. If you want to switch up the marinade, use pineapple juice instead of lime juice. This swap adds a sweet touch that works well. You can cook Coconut Lime Chicken in different ways. Oven-baking gives a nice, even cook. Set the oven to 375°F and bake for 25-30 minutes. Slow-cooking is great for busy days. Just put the marinated chicken in a slow cooker for 4-6 hours on low. Grilling adds a smoky flavor that many people love. It gives nice grill marks and a bit of char. Pan-searing is quick and keeps the chicken juicy. Use medium-high heat and watch it closely for great results. Coconut Lime Chicken pairs well with many sides. Coconut rice is a perfect fit. The creaminess of the rice matches the chicken's flavors. A fresh garden salad with lime vinaigrette adds brightness. You can also serve it with roasted vegetables for a colorful plate. For drinks, try a light white wine like Sauvignon Blanc. It complements the lime well. Coconut water is also refreshing and ties in with the meal. If you want a fun twist, mix a tropical cocktail with rum and pineapple juice. For the full recipe, check the earlier section. Enjoy your cooking adventure! To keep your Coconut Lime Chicken fresh, follow these simple steps. First, let the chicken cool completely after cooking. Place any leftover chicken in an airtight container. You can store it in the fridge for up to four days. If you want to keep it longer, freeze the chicken. Wrap it tightly in plastic wrap, then place it in a freezer bag. This helps prevent freezer burn. It can last up to three months in the freezer. When you're ready to eat, remember to label your container with the date. This will help you track how long it's been stored. Reheating your Coconut Lime Chicken is easy, but do it carefully. To keep it moist, I suggest using the oven. Preheat it to 350°F (175°C). Place the chicken in a baking dish, cover it with foil, and heat for about 15 to 20 minutes. Make sure it reaches an internal temperature of 165°F (75°C). You can also reheat in the microwave. Use a microwave-safe dish and cover it with a damp paper towel. Heat for one minute, then check if it's warm. If not, heat in 30-second bursts until hot. Avoid overheating, as this can dry out the chicken. If you want to enjoy your leftovers, consider adding them to salads or wraps for a tasty twist. I recommend marinating the chicken for at least 30 minutes. This time gives the chicken a nice flavor boost. If you have more time, you can marinate it for up to 4 hours. Longer marinating allows the flavors to soak in deeper. Just remember, do not marinate for more than 4 hours. The acid in lime juice can make the chicken tough if left too long. Yes, you can use canned coconut milk for this recipe. I suggest using full-fat coconut milk for the best results. Full-fat coconut milk adds creaminess and richness to the dish. It also helps create a smooth marinade that clings well to the chicken. Low-fat coconut milk can work, but it may not have the same depth of flavor. Coconut Lime Chicken pairs well with many side dishes. Here are some great options: - Coconut rice: It complements the flavor beautifully. - Fresh garden salad: A light salad adds crispness. - Grilled vegetables: They add color and nutrition. - Quinoa: A healthy grain that absorbs flavors well. You can also serve it with lime wedges for an extra citrus kick! For a refreshing drink, consider coconut water or a light mojito. For the full recipe, check out the [Full Recipe]. This blog post covered the key ingredients and steps for making Coconut Lime Chicken. We discussed the main ingredients, marinade tips, and cooking techniques. I shared ways to enhance flavor and ensure juicy chicken, plus creative serving ideas. You can explore variations and proper storage tips for leftovers. Remember, using quality ingredients and following these steps leads to tasty meals. Enjoy experimenting with this recipe to create your perfect dish!](https://fastmealmate.com/wp-content/uploads/2025/06/fb549dd5-9e1c-4fac-867b-0fcc137097f2-768x768.webp)

![- 1 cup unsalted butter, softened to room temperature - 1/2 cup powdered sugar, plus additional for dusting - 1 teaspoon pure vanilla extract - 1/2 teaspoon almond extract - 2 cups all-purpose flour - 1/2 cup finely chopped almonds - 1/4 teaspoon salt - 1/2 cup raspberry preserves When making Raspberry Almond Snowball Cookies, each ingredient plays a key role. The butter makes the cookies rich and tender. Powdered sugar adds a sweet touch and helps with that snowy look. Vanilla and almond extracts give the cookies a warm, nutty flavor. The flour gives structure to the cookies. Chopped almonds add a nice crunch. Salt balances the sweetness. Finally, raspberry preserves are the surprise inside. They burst with flavor when you take a bite. - For a different sweet taste, try using honey or maple syrup instead of powdered sugar. - If you want a dairy-free option, use vegan butter. It works well in this recipe. - For a gluten-free treat, swap all-purpose flour with almond flour or a gluten-free mix. These substitutions can change the flavor and texture, but they keep the spirit of the cookies alive. Experimenting with these ingredients can lead to fun and tasty variations! For the full recipe, check out the detailed steps to create this delightful treat. First, preheat your oven to 350°F (175°C). This step helps your cookies bake evenly. While the oven heats, line a baking sheet with parchment paper. This keeps the cookies from sticking, making cleanup easy. Next, in a large bowl, mix 1 cup of softened butter with 1/2 cup of powdered sugar. Then, add 1 teaspoon of pure vanilla extract and 1/2 teaspoon of almond extract. Beat this mixture with an electric mixer until light and fluffy. This takes about 2-3 minutes. Now, gradually add 2 cups of all-purpose flour and 1/4 teaspoon of salt to the butter mixture. Mix on low speed until just combined. Be careful not to overmix; we want a nice texture. Gently fold in 1/2 cup of finely chopped almonds. For the fun part, scoop about 1 tablespoon of dough. Flatten it slightly in your hand. Add 1/2 teaspoon of raspberry preserves in the center. Carefully fold the dough edges around the preserves, sealing it tightly into a ball. Place the cookie balls on your prepared baking sheet. Make sure they are about 2 inches apart. This spacing allows them to spread while baking. Bake the cookies for 12-15 minutes. Keep an eye on them; you want the bottoms to turn lightly golden. After baking, let the cookies cool on the baking sheet for about 5 minutes. This helps them firm up a bit. Then, gently transfer them to a wire rack to cool completely. Once cool, take some extra powdered sugar and dust it generously over the cookies. This adds a lovely snowy look. Enjoy these delightful treats with your friends or family! For the full recipe, check out the details provided. To make the best cookies, start with room temperature butter. Soft butter mixes well, creating a light and fluffy dough. Cold butter makes it hard to blend. Another tip is to prevent cookies from spreading too much. Chill your cookie dough for at least 30 minutes before baking. This helps them keep their shape while baking. When you arrange your cookies, think about a nice display. Use a decorative plate to showcase them beautifully. You can also garnish with fresh raspberries or a sprinkle of almond slices. This adds color and makes them look even more inviting. A light-colored dish contrasts nicely with the snowy dusting of sugar. Want to boost the flavor? Try adding a pinch of cinnamon or a dash of lemon zest. This can give your cookies a unique twist. You can also adjust the sweetness by using different types of raspberry preserves. For a tart flavor, opt for low-sugar preserves. For a sweeter taste, choose regular preserves. You can find the full recipe [here]. {{image_4}} You can play with flavors in your Raspberry Almond Snowball Cookies. Try different fruit preserves like strawberry or apricot. Each fruit adds a unique twist. You might also add chocolate chips or cocoa powder. This makes the cookies richer and more indulgent. Mixing in these flavors can make each batch fun and exciting. For those with dietary needs, there are great options. You can make gluten-free cookies by using almond flour or a gluten-free flour blend. These swaps keep the cookies light and tasty. If you want a vegan version, substitute the butter with coconut oil or vegan butter. Use a plant-based milk in place of any dairy. These changes keep the spirit of the cookies while catering to different diets. You can make themed cookies for special occasions. For holidays, add colorful sprinkles or food coloring to the dough. This gives the cookies a festive touch. For parties, consider making mini cookie versions. Smaller cookies are great for sharing and look lovely on a platter. Each theme allows you to share the joy of baking with your loved ones. If you want the full recipe, check out the details above! To keep your Raspberry Almond Snowball Cookies fresh, store them in an airtight container. This helps to lock in moisture and flavor. You can use glass jars or plastic containers with tight lids. Place parchment paper between layers of cookies to prevent sticking. Keep the cookies at room temperature for up to a week. If you want to keep them longer, then freezing is a great option. You can freeze both unbaked and baked cookies. For unbaked cookies, scoop them onto a baking sheet lined with parchment paper. Freeze until solid, then transfer them to a freezer bag. This way, you can bake fresh cookies anytime. For baked cookies, let them cool completely first. Place them in a freezer-safe container or bag, separating layers with parchment paper. When you are ready to enjoy them, thaw baked cookies at room temperature. If you want a warm treat, pop them in the oven at 350°F for a few minutes. Reheating brings back their delightful texture. For unbaked cookies, just bake them straight from the freezer. Add a couple of extra minutes to the bake time to ensure they cook through. How long do Raspberry Almond Snowball Cookies last? These cookies stay fresh for about one week. Store them in an airtight container. If you want them to last longer, you can freeze them. Can I make the dough ahead of time? Yes, you can make the dough and chill it in the fridge. Wrap it tightly in plastic. This way, you can bake them later. What can I do if my cookies turn out too crumbly? If your cookies are too crumbly, you might need more butter. Add a little melted butter to the dough. Mix gently until it holds together. Can I substitute almond extract with something else? Yes, you can use vanilla extract or even a bit of coconut extract. Each will give a different flavor but will still taste great. What is the best way to measure flour for this recipe? Use the spoon and level method. Scoop flour into a measuring cup, then level it off with a knife. Don’t pack it down for the best results. What to serve with these cookies? These cookies pair well with fresh fruit, like raspberries or strawberries. You can also serve them with vanilla ice cream for a tasty treat. Ideal beverages to pair with Raspberry Almond Snowball Cookies Enjoy these cookies with a warm cup of tea or coffee. A glass of milk also complements their sweet and nutty flavor nicely. In this blog post, I covered how to make Raspberry Almond Snowball Cookies. We explored the key ingredients and tips for perfecting texture and flavor. You can use alternatives like vegan butter and gluten-free flour too. I shared storage methods for keeping cookies fresh and ways to freeze them. Try different fruit preserves or chocolate chips for fun variations. Remember, cookies taste best when shared and enjoyed fresh. Give this recipe a try, and I bet you will love it!](https://fastmealmate.com/wp-content/uploads/2025/07/7fd5f108-97a5-4fb0-86b3-b9219b799aa8-768x768.webp)
![Fresh strawberries are the star of this drink. They give a sweet and tart flavor. Choose ripe, bright red strawberries. They should smell sweet and feel firm. Slice them into small pieces for easy mixing. You will need 2 cups of fresh strawberries, hulled and sliced. Dried apricots add depth to the tea. They bring a chewy texture and a rich sweetness. Make sure to pick soft, bright apricots for the best taste. Chop them into small pieces to help them blend with the strawberries. You will need 1 cup of dried apricots, chopped into small pieces. These flavor enhancers boost the tea's taste. Black tea gives a strong base. Use either 2 tablespoons of loose black tea or 4 tea bags. Honey adds sweetness, so adjust to your taste. You will need 2 tablespoons of honey. Fresh lemon juice brightens the flavors and balances the sweetness. Squeeze juice from 1 lemon into the mix. Finally, fresh mint leaves provide a refreshing touch for garnish. For the full recipe, check the details above. Start by gathering your ingredients. You need fresh strawberries and dried apricots. - 2 cups fresh strawberries, hulled and sliced - 1 cup dried apricots, chopped into small pieces In a large heatproof bowl or pitcher, combine the sliced strawberries and chopped apricots. This mix brings together sweet and tart flavors. Pour 4 cups of boiling water over the fruit. Make sure all the fruit is under the water. Let it steep for about 10 minutes. This waiting time helps the flavors blend nicely. Next, we add the tea. You can use either loose black tea or tea bags. - 2 tablespoons loose black tea or 4 individual black tea bags Add the tea to the fruit mixture after the first steep. Let it sit for an extra 5 minutes. This step mixes the bold tea taste with the fruity flavor. After steeping, remove the tea bags or strain it through a fine mesh sieve. Press the fruit gently with a spoon to get all the good flavors out. While the tea is still warm, it’s time to add sweetness and zest. - 2 tablespoons honey (adjust according to your sweetness preference) - Juice of 1 fresh lemon Stir in the honey and lemon juice. Mix well until the honey dissolves. Let the tea cool at room temperature for about 10-15 minutes. Then, chill it in the fridge for at least 30 minutes. This chilling time enhances the taste. Serve the tea over ice in glasses. For a nice touch, add fresh mint leaves on top. This drink is a colorful and tasty way to enjoy a sunny day. For the full recipe, check out the [Full Recipe]. Using fresh and high-quality ingredients makes your tea stand out. Choose ripe strawberries with bright red color. Avoid any that look dull or have brown spots. For apricots, select dried ones that feel soft and moist, not hard or dry. These choices help create a sweet and fruity taste in your drink. When using tea, opt for loose black tea for a richer flavor. Sweetness is key to balancing flavors. If you like it sweeter, add more honey. Start with two tablespoons, then taste. You can always add more if needed. For a different twist, try using agave syrup or maple syrup. They both add a unique flavor. Always mix well until the sweetener dissolves, ensuring a smooth blend. Leftover strawberries and apricots can be stored. Place them in an airtight container in the fridge. They last for about three days. You can use leftover fruit in smoothies or yogurt. For leftover tea, store it in a sealed jar. Keep it in the fridge for up to a week. Enjoy it cold or heat it up for a warm drink. {{image_4}} You can swap strawberries and apricots for other fruits. Try peaches, raspberries, or mangoes. Each fruit will give a new twist to the tea. Peaches add a sweet, juicy taste, while raspberries bring a tart kick. Mangoes offer a tropical flair. Use what you love or what’s in season. I enjoy both iced and hot Strawberry Apricot Sunrise Tea. Serve it hot for a cozy feel. It warms you up on chilly days. For a refreshing treat, serve it iced. Pour the tea over ice and add mint leaves. This makes a perfect summer drink. You can enjoy it any time of year. Honey is great, but you can use other sweeteners too. Maple syrup adds a unique flavor. Agave nectar is another option, as it dissolves easily. For a sugar-free choice, try stevia. Adjust the amount to suit your taste buds. Sweetness can change the whole drink. You can store Strawberry Apricot Sunrise Tea in the fridge for up to three days. Use a clean, airtight container. This keeps the tea fresh and tasty. If you have leftovers, pour them into a pitcher. Seal it well, and place it in the fridge. Cold tea is perfect for hot days. If you want to keep the tea longer, freeze it. Pour the cooled tea into ice cube trays. Once frozen, pop the cubes into a freezer bag. This way, you can enjoy the tea later. Just remember, frozen tea is best used within three months. To serve chilled tea, just pour it over ice. If you want warm tea, heat it gently. Use a pot on low heat. Avoid boiling, as this can change the flavor. Stir in fresh mint for extra taste when serving. Enjoy the refreshing flavor of Strawberry Apricot Sunrise Tea! Strawberry Apricot Sunrise Tea is not just tasty; it also offers many health benefits. Strawberries are high in vitamin C, which boosts your immune system. They also have antioxidants that can help fight inflammation. Apricots provide vitamin A, which is great for your skin and eyes. Plus, they add natural sweetness without too much sugar. Black tea can improve heart health and boost focus. When you mix all these ingredients, you create a drink that is both delicious and good for you. Yes, you can use different types of tea! While black tea is the main choice here, you have options. Green tea adds a lighter flavor and more antioxidants. Herbal teas, such as chamomile or hibiscus, can offer unique tastes. If you prefer caffeine-free, herbal blends are perfect. Just adjust steeping times based on the type of tea you choose. Each tea will change the flavor and health benefits, so feel free to experiment. To make this tea more refreshing in summer, try a few simple tricks. First, serve it over ice, as it cools you down quickly. You can also add more lemon juice for a zesty kick. Fresh mint leaves not only add flavor but also a cooling effect. For a fruity twist, toss in additional fresh fruit slices, like peaches or citrus. Lastly, consider blending the tea with ice for a slushy drink. These tips will elevate your Strawberry Apricot Sunrise Tea to a perfect summer drink. This blog post covered how to make Strawberry Apricot Sunrise Tea. You learned about fresh strawberries, dried apricots, and flavor enhancers. We looked at preparing the fruit, steeping the tea, and tips for best quality. You now know variations, storage methods, and answers to common questions. Enjoy making this tasty tea. Experiment with different fruits and flavors. Treat yourself to a drink that's both fun and healthy. Enjoy every sip!](https://fastmealmate.com/wp-content/uploads/2025/06/c3c6e810-3cfa-4a88-aebb-572649891222-768x768.webp)