Roasted Yellow Squash Flavorful and Simple Dish
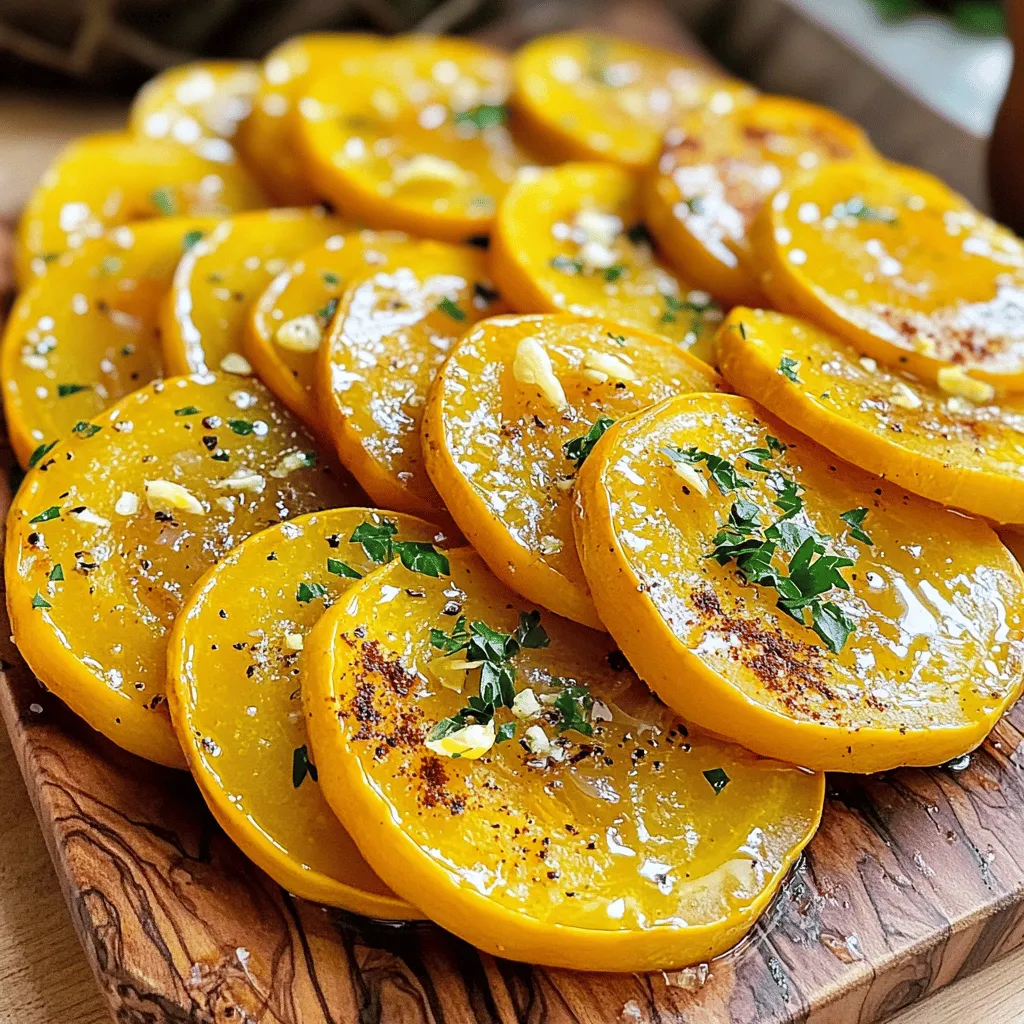
Looking for a quick, tasty dish? Roasted yellow squash is a simple choice! With bright flavors and a satisfying texture, this dish is perfect for any meal. In just a few steps, you can transform fresh yellow squash into a delicious side. Follow me as I share easy ingredients and tips to make your roasting experience a success. Let’s get cooking, and elevate your dinner tonight!
Ingredients
Essential Ingredients for Roasted Yellow Squash
– 4 medium yellow squash
– 2 tablespoons extra-virgin olive oil
– 1 teaspoon garlic powder
– 1 teaspoon smoked paprika
– 1/2 teaspoon sea salt
– 1/2 teaspoon freshly ground black pepper
– 1 tablespoon fresh thyme leaves (or 1 teaspoon dried thyme)
– 1/4 cup grated Parmesan cheese (optional)
Roasting yellow squash is simple and fun. You only need a few key ingredients. Each item adds flavor and texture to the dish. The yellow squash shines with its bright color and mild taste.
The extra-virgin olive oil helps the squash cook evenly. Garlic powder gives a gentle kick. Smoked paprika adds a warm, smoky flavor. Sea salt and black pepper enhance all the tastes. Fresh thyme brings a hint of earthiness to the mix.
You can sprinkle Parmesan cheese on top if you like. It adds a creamy touch that makes the dish even better. Each ingredient plays a role in making roasted yellow squash a tasty delight.The combination of these ingredients will surely impress your family and friends. Enjoy cooking!
Step-by-Step Instructions
Preparing the Squash
1. Preheat your oven to 400°F (200°C). This step warms the oven for roasting.
2. Slice the yellow squash into 1/4-inch rounds. This thickness helps it cook evenly.
Mixing and Coating
1. Grab a large mixing bowl. Combine the sliced squash with olive oil, garlic powder, smoked paprika, sea salt, black pepper, and thyme.
2. Toss the squash until each slice is evenly coated. You want every piece to soak in that flavor.
Roasting the Squash
1. Line a baking sheet with parchment paper. This keeps the squash from sticking.
2. Arrange the squash in a single layer on the sheet. Avoid overlapping to ensure even roasting.
3. Roast in the preheated oven for 20-25 minutes. Flip the squash halfway through to help it cook evenly. You know it’s done when it’s tender and caramelized at the edges.
For a special touch, sprinkle Parmesan cheese on top in the last five minutes of cooking. Zest some lemon over the warm squash right after roasting. This adds a bright flavor.
Tips & Tricks
Achieving Perfect Roasting
To get the best flavor and texture from your yellow squash, flip the slices halfway through cooking. This step ensures even roasting on both sides. If you skip this, one side might burn while the other stays raw.
Also, avoid overlap when placing slices on the baking sheet. Overlapping can lead to steaming instead of roasting. Spread the squash in a single layer. This allows the heat to circulate and caramelize the edges, giving you that delicious golden color.
Flavor Enhancements
Adding herbs and spices can elevate your roasted squash. Try fresh thyme, rosemary, or even a sprinkle of chili flakes for some heat. Mix these in with your olive oil before coating the squash.
If you want a creamy texture, consider adding cheese. In the last few minutes of roasting, sprinkle grated Parmesan on top. The cheese melts beautifully and adds a rich flavor.
Presentation Suggestions
Serve your roasted squash warm for the best taste. I love adding lemon wedges on the side. This gives a bright, zesty kick to each bite.
For a pop of color, garnish your dish with fresh parsley. It not only looks great but adds a fresh taste. Presenting your dish well makes it even more inviting for your guests.

Variations
Herb Infusion
You can add fresh herbs to change the flavor. Try rosemary or basil for a twist. These herbs give the squash a nice Mediterranean taste. Just chop them up and mix them in with the squash. Fresh herbs add a bright, fresh note that elevates the dish.
Cheese Alternatives
If you love cheese, try feta or goat cheese. These cheeses add a tangy flavor. You can also use vegan cheese for a dairy-free option. Sprinkle it on the squash before roasting. This gives a nice creamy touch to the dish.
Seasonal Additions
Feel free to mix in other veggies. Bell peppers and zucchini add color and taste. You can also add nuts or seeds. They give a nice crunch and extra nutrition. These seasonal additions make your dish more exciting and fun.
Storage Info
Storing Leftovers
To keep your roasted yellow squash fresh, store it in an airtight container. Place the container in the fridge. Proper storage helps maintain its taste and texture. Roasted yellow squash lasts for about 3 to 5 days in the fridge. If you want to enjoy it later, consider freezing it.
Reheating Tips
When reheating, you’ll want to keep the squash tender and tasty. The best method is using the oven. Preheat your oven to 350°F (175°C) and place the squash on a baking sheet. Heat for about 10 to 15 minutes. This method helps the squash stay crispy.
You can use a microwave, but it may not keep the same texture. If you choose the microwave, heat in short bursts. Check often to avoid overcooking. Enjoy your tasty roasted yellow squash again!
FAQs
How do I know when roasted yellow squash is done?
You can tell if your roasted yellow squash is done by several signs. First, look for a golden-brown color on the edges. The squash should also be tender when you poke it with a fork. If it feels soft but not mushy, it’s perfect. I usually roast it for 20 to 25 minutes. Make sure to flip it halfway for even cooking.
Can I use frozen yellow squash for roasting?
You can use frozen yellow squash, but it won’t taste the same. Frozen squash has more water, which can make it soggy. If you want to roast frozen squash, try to thaw it first and drain any excess water. Fresh squash tastes better and has a firmer texture when roasted.
Are there any health benefits to roasted yellow squash?
Roasted yellow squash is not just tasty; it’s also good for you! It’s low in calories and high in vitamins. This squash is rich in vitamin C, which helps your immune system. It also contains vitamin A, which is great for your eyes. Plus, you get fiber that helps your digestion. Eating roasted yellow squash can be a healthy choice.
What can I serve with roasted yellow squash?
Roasted yellow squash pairs well with many dishes. You can serve it with grilled chicken or fish for protein. It also goes nicely with grains like quinoa or brown rice. For a complete meal, add a fresh salad or some crusty bread. These sides will make your meal colorful and delicious.
Roasted yellow squash is simple and delicious. We covered the key ingredients, steps, and tips to make it perfect. You learned how to enhance flavors with herbs and cheese, and even how to store leftovers. This dish is versatile and pairs well with many meals. Don’t hesitate to experiment with variations based on your taste. Enjoy roasting, and make this dish a staple in your kitchen!


![To make these tasty bars, you need a few simple ingredients: - 1 cup creamy peanut butter - 1/2 cup honey or maple syrup - 1 1/2 cups rolled oats - 1/2 cup almond flour - 1/4 cup unsweetened cocoa powder - 1/2 teaspoon vanilla extract - A pinch of salt - 1/3 cup dark chocolate chips (optional) These ingredients blend well together. The peanut butter gives a rich flavor. Honey or maple syrup adds sweetness. Oats provide a hearty base, making them filling. You may want to add some extra touches for more flavor: - A sprinkle of cinnamon for warmth - Chopped nuts for crunch - Dried fruits for sweetness These options can change the taste and texture. Feel free to mix and match based on your preferences. If you have allergies, here are some easy swaps: - Use sunflower seed butter instead of peanut butter - Substitute maple syrup for honey if needed - Replace almond flour with oat flour or coconut flour These substitutions keep the recipe safe and delicious. You can still enjoy the bars while avoiding allergens. Just remember to follow the same steps, and you’ll be good to go! Start by gathering your ingredients. Place the creamy peanut butter and honey in a large bowl. Use a spatula or wooden spoon to mix them. Stir until the mix is smooth and creamy. This step is key to a tasty bar. Next, add the rolled oats, almond flour, cocoa powder, vanilla, and salt. Mix everything together well. You want to see no dry spots. This creates a thick and sticky dough that holds together nicely. Now, take an 8x8 inch baking dish and line it with parchment paper. Leave some paper hanging over the edges. This makes it easy to lift out the bars later. Transfer your peanut butter mixture into the dish. Use your hands or a spatula to press it down. Make sure it’s even and firm across the bottom. If you want to add a chocolate drizzle, melt the dark chocolate chips next. Place them in a microwave-safe bowl. Heat in 15-second bursts, stirring each time. Once melted, drizzle the chocolate over the pressed mixture. Use a spoon or piping bag for a nice look. Finally, place your baking dish in the fridge. Chill for at least 1-2 hours. This helps the bars set firmly. Once ready, lift them out by the parchment paper. Cut into squares or bars as you like. You can find the full recipe [Full Recipe]. To get the best texture, mix the peanut butter and honey well. You want it smooth and creamy. If your mixture seems too dry, add a bit more honey or a splash of water. This helps bind everything together. The rolled oats should be well coated to hold the bars nicely. When you press the mixture into the dish, use damp hands. This prevents sticking. Start at the center and push outward. Press firmly and evenly to avoid air pockets. A flat spatula can help smooth the top. Make sure the layer is compact and even for better bars. For a great look, cut the bars into squares or rectangles. Place them on a colorful plate. You can add fresh fruit like berries or banana slices on the side. For a fun touch, sprinkle some extra cocoa powder or crushed nuts on top. This makes your treat look even more inviting. {{image_4}} You can make these bars even better with fun mix-ins. Chopped nuts add crunch. Walnuts or almonds work great. Dried fruits like cranberries or raisins give a sweet touch. Mix in about 1/2 cup of these before you press the mixture into the dish. This way, each bite has a surprise! Want to change the flavor? Use coconut or almond extract! Just add a teaspoon to the mix. Coconut gives a tropical twist. Almond makes it rich and nutty. You can also add shredded coconut for extra texture. It’s easy to make each batch unique! You can swap honey for maple syrup if you want. Both sweeteners work well, but they taste different. Maple syrup has a deep flavor. Honey is sweeter and lighter. You can also use agave nectar if you prefer. Just remember, the texture may change slightly with each choice. Use the one that you love best for your no-bake peanut butter bars. For the full recipe, check the details above! To keep your no-bake peanut butter bars fresh, use an airtight container. This helps lock in moisture. Place a piece of parchment paper between layers if you stack them. This prevents sticking and makes them easy to grab. Store them in the refrigerator for the best taste and texture. You can freeze these bars for later. Cut them into squares first and wrap each one in plastic wrap. Then, place them in a freezer-safe bag. Squeeze out as much air as you can before sealing. They will last up to three months in the freezer. When you're ready to enjoy, thaw them in the fridge overnight. These bars can last up to one week in the fridge. Keep them cool and away from heat. Check for any changes in smell or texture before eating. If you notice anything off, it's best to toss them. Following these tips ensures you always have a tasty treat on hand. If you want the full recipe, you can check it out for more details! Yes, you can use crunchy peanut butter. It will add some nice texture to the bars. The flavor will be the same, but the crunch gives a fun bite. If you like a little crunch, go for it! The bars need to chill for at least 1-2 hours. This time helps them set well. If you can wait longer, they will be even firmer and easier to cut. Just make sure they are cold before slicing. They can be vegan if you use maple syrup instead of honey. Just check your peanut butter, too, to ensure it doesn’t have added ingredients. With the right swaps, you can enjoy this treat without any animal products! You can use any nut flour, like hazelnut or cashew flour. If you need a nut-free option, try oat flour or even whole wheat flour. Just remember that different flours may change the texture a bit. The bars are set when they are firm to the touch. They should hold their shape when you lift them out of the pan. If they feel soft, give them more time in the fridge. Once set, they are ready to cut into pieces. These no-bake peanut butter bars are simple and tasty. We covered ingredients, steps, and great tips. You can customize them with different flavors and mix-ins. Remember to store them well for freshness. Feel free to experiment with substitutes and variations. Enjoy making these treats for yourself or to share. They are quick to whip up, perfect for any snack. Now, it’s your turn to enjoy this easy, delicious recipe!](https://fastmealmate.com/wp-content/uploads/2025/07/4c36effc-71ba-4d9d-bf30-f4c7732f2b92-768x768.webp)