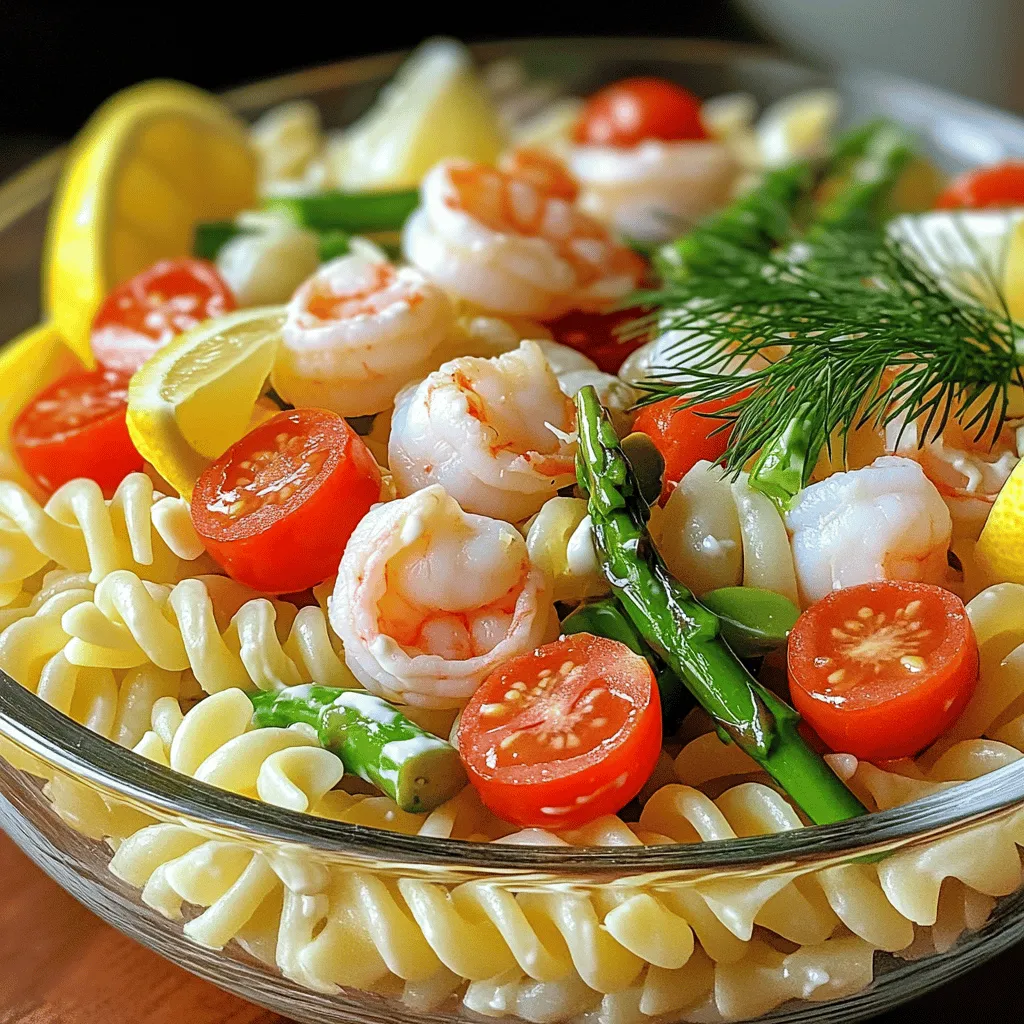
Savory Seafood Pasta Salad Fresh and Flavorful Dish
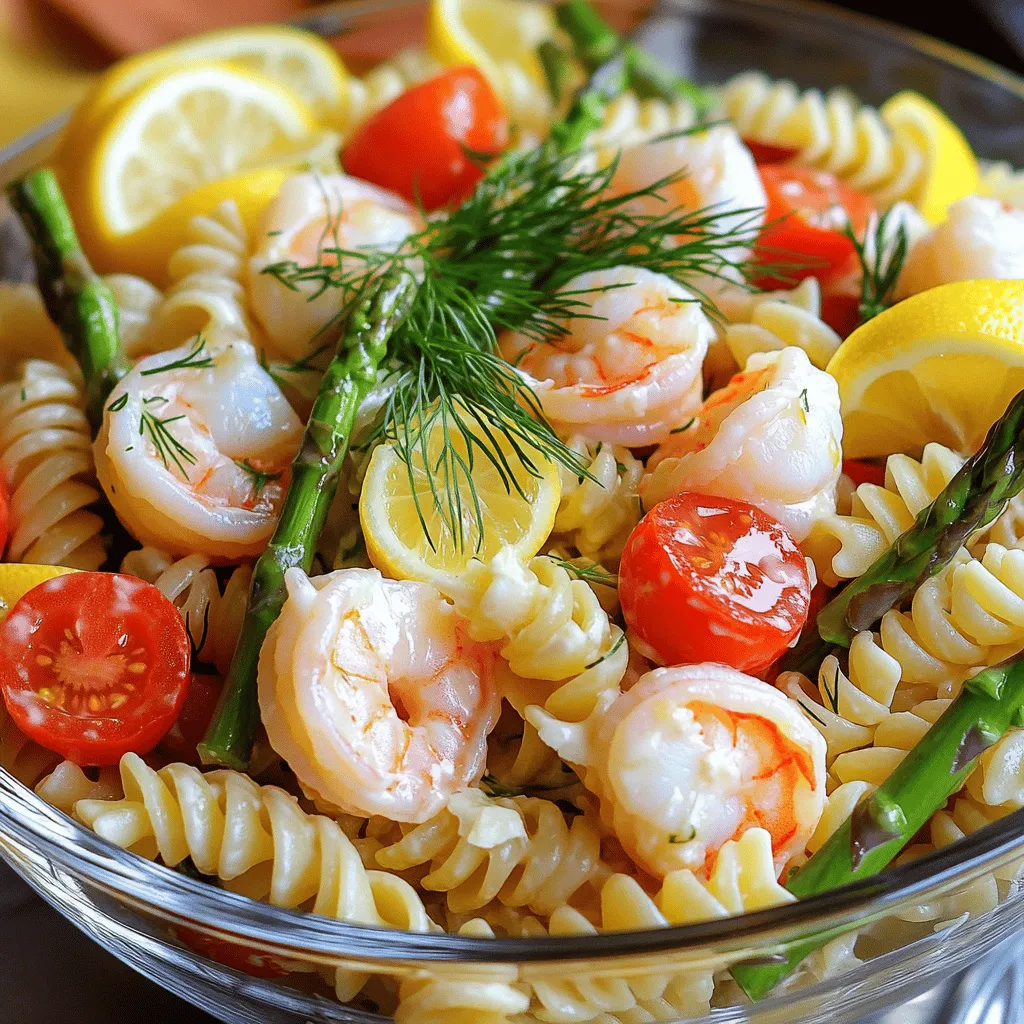
Are you ready to impress your friends with a delicious and colorful Seafood Pasta Salad? This dish combines fresh flavors and tender seafood, making it perfect for any occasion. Whether it’s a summer picnic or a cozy dinner at home, this pasta salad will be a hit. In this post, I’ll share the best ingredients, step-by-step instructions, and helpful tips to create a savory seafood delight that’s easy and fun to make!
Ingredients
List of Ingredients for Seafood Pasta Salad
To make a delicious seafood pasta salad, gather these ingredients:
– 8 oz fusilli pasta
– 1 cup cooked shrimp, peeled and deveined
– 1 cup cooked scallops, sliced
– 1 cup cherry tomatoes, halved
– 1/2 cup asparagus, blanched and cut into 1-inch pieces
– 1/4 cup red onion, finely chopped
– 1/2 cup cucumber, diced
– 1/4 cup black olives, sliced
– 1/3 cup mayonnaise
– 2 tablespoons freshly squeezed lemon juice
– 1 tablespoon extra virgin olive oil
– 1 teaspoon garlic powder
– 1 teaspoon dried dill
– Salt and freshly ground pepper to taste
– Fresh dill sprigs for garnish
Additional Ingredients for Optional Variations
You can tweak your seafood pasta salad with these optional ingredients:
– Avocado for creaminess
– Bell peppers for crunch
– Spinach for extra greens
– Feta cheese for tangy flavor
Recommended Seafood Types for Best Flavor
For the best flavor, choose these seafood options:
– Shrimp: Sweet and tender.
– Scallops: Mild and buttery.
– Crab: Sweet and flaky.
– Lobster: Rich and luxurious.
These seafood choices elevate your salad and provide a burst of flavors.
Step-by-Step Instructions
Cooking the Fusilli Pasta
To start, grab a large pot and fill it with water. Add a generous pinch of salt, then bring it to a boil. Once the water is bubbling, add the fusilli pasta. Cook it according to the package instructions until it’s al dente, which usually takes about 8 to 10 minutes. After cooking, drain the pasta and rinse it under cold water. This step stops the cooking and cools the pasta quickly. Let it sit and cool completely before you use it.
Preparing Each Ingredient for the Salad
In a large mixing bowl, combine the cooled fusilli with the seafood and veggies. Start by adding the cooked shrimp and scallops, which add a lovely texture. Next, toss in the halved cherry tomatoes, blanched asparagus, chopped red onion, diced cucumber, and sliced black olives. Use a spatula or wooden spoon to gently mix everything together. Be careful not to break the seafood; you want it to stay whole for the best presentation.
Making the Creamy Dressing
Now, let’s whip up the dressing. In a small bowl, add the mayonnaise, fresh lemon juice, extra virgin olive oil, garlic powder, dried dill, salt, and pepper. Whisk everything together until it’s smooth and well combined. The dressing should taste bright and flavorful. If it seems too thick, you can add a splash of water or more lemon juice to thin it out. This creamy dressing will tie all the flavors together beautifully.
Tips & Tricks
Best Practices for Cooking Seafood
To cook seafood well, start with fresh ingredients. Fresh shrimp and scallops make a huge difference. When cooking shrimp, look for that bright pink color. It shows they are ready. Don’t overcook them. They become tough. For scallops, sear them for just a few minutes on each side. This gives them a nice golden crust. Always check for doneness. The inside should be opaque.
How to Achieve the Perfect Pasta Texture
For perfect pasta, always use a large pot of salted water. This adds flavor to the pasta. Cook the fusilli until it is al dente. This means it should be firm but tender. After draining, rinse the pasta under cold water. This stops the cooking and keeps it from becoming mushy. Let it cool completely before mixing it with the seafood.
Adjusting Flavor and Seasoning
Taste your salad as you go. Start with the dressing; it should be balanced. If it’s too tangy, add a pinch of sugar. If it needs more zing, add more lemon juice. You can also play with herbs. Fresh dill gives a nice touch. Always add salt and pepper to bring out the flavors. Remember, the salad gets better after chilling. Let it rest in the fridge for at least 30 minutes. This helps the flavors blend nicely.
Variations
Alternative Pasta Types to Use
You can switch up the pasta for more fun. Try penne, rotini, or even orzo. Each shape holds the dressing and flavors well. You might also use whole wheat or gluten-free pasta for different diets. Each option adds a unique twist to the dish.
Seafood Substitutions for Different Tastes
If you want to change the seafood, use crab, lobster, or even canned tuna. Each option gives a new taste to the salad. For a vegetarian version, consider adding artichoke hearts or grilled veggies. These can bring great flavor without the seafood.
Dressing Alternatives and Add-ins
You can play with the dressing to change up the taste. Instead of mayonnaise, try Greek yogurt for a lighter option. A splash of vinegar adds a tangy kick. You might also add capers, fresh herbs, or even a hint of mustard for depth. These add-ins make your seafood pasta salad even more exciting.
Storage Info
Best Ways to Store Leftover Seafood Pasta Salad
To keep your seafood pasta salad fresh, store it in the fridge. Place it in an airtight container. This keeps moisture in and prevents odors from other foods. If you have extra dressing, keep it separate to avoid soggy pasta.
Recommended Storage Containers
Use glass or plastic containers with tight-fitting lids. Glass containers are great because they do not stain. They also do not hold odors. If you plan to eat the salad within a few days, a plastic container works well too. Just ensure it seals tightly.
Shelf Life and Reheating Suggestions
Seafood pasta salad stays fresh for about three days in the fridge. After that, the seafood may lose its taste and texture. When ready to eat, you can serve it cold. There is no need to reheat this dish, as it tastes best chilled. If you prefer warmth, gently heat it in a pan on low heat. Stir often to avoid overcooking the seafood.
FAQs
Can I use frozen seafood for this recipe?
Yes, you can use frozen seafood in this dish. Just make sure to thaw it fully before cooking. This helps maintain the seafood’s texture and flavor. Frozen shrimp and scallops work well. You can simply run them under cold water until thawed. After that, follow the recipe as usual.
How long can Seafood Pasta Salad sit out at room temperature?
Seafood Pasta Salad can sit out for up to two hours. After this time, it’s best to refrigerate it. Bacteria can grow quickly in seafood at room temperature. If it’s a hot day, keep it chilled to ensure safety. Always prioritize food safety for a worry-free meal.
What are some side dishes to serve with Seafood Pasta Salad?
Several side dishes pair nicely with Seafood Pasta Salad. Here are a few ideas:
– Garlic bread for a crunchy contrast
– A fresh green salad for added crunch
– Grilled vegetables for a smoky flavor
– Fruit skewers for a sweet touch
– Coleslaw for a creamy, tangy side
These options will round out your meal nicely and keep things fresh and flavorful. Enjoy!
This blog post covered key steps to make a tasty seafood pasta salad. We explored ingredients, cooking methods, and tips for delicious results. You learned how to choose the best seafood and make tasty variations. Remember to store leftovers properly to keep them fresh. Enjoy experimenting with flavors and sharing your dish. Cooking can be fun! You can impress your friends and family with this easy recipe. Happy cooking!

![To make a rich and tasty pumpkin spice syrup, gather these key ingredients: - 1 cup water - 1 cup granulated sugar - 1/2 cup pure pumpkin puree These ingredients form the base of your syrup. The water helps dissolve the sugar, while the pumpkin puree adds that classic pumpkin flavor. Spices are what truly make this syrup special. You’ll need: - 1 teaspoon ground cinnamon - 1/2 teaspoon ground nutmeg - 1/4 teaspoon ground ginger - 1/4 teaspoon ground cloves These spices bring warmth and depth to your syrup. Each spice adds its own unique note, creating a perfect fall blend. To round out the flavor, don't forget this important ingredient: - 1 teaspoon vanilla extract Vanilla extract adds a sweet aroma and enhances the other flavors. This small addition makes a big difference in taste. This recipe combines all these ingredients to create a syrup that brightens up any dish or drink. For the complete preparation steps, check out the Full Recipe. To start, you need to dissolve the sugar in water. Pour 1 cup of water into a medium saucepan. Add 1 cup of granulated sugar. Set the heat to medium. Stir the mixture until the sugar fully dissolves. You want the liquid to be clear and smooth. Next, add the pumpkin puree. Use 1/2 cup of pure pumpkin puree. Gently whisk it into the sugar-water mix. Make sure there are no lumps. It should blend nicely into a creamy base. Now, it’s time to add the spices. Measure out 1 teaspoon of ground cinnamon, 1/2 teaspoon of ground nutmeg, 1/4 teaspoon of ground ginger, and 1/4 teaspoon of ground cloves. Whisk these spices into the syrup base. This step gives your syrup that cozy fall flavor. Make sure to whisk thoroughly. You want all the spices to mix evenly. This will ensure every drop of syrup bursts with flavor. Next, bring your syrup to a gentle simmer. Slightly increase the heat until you see small bubbles. Once it starts simmering, reduce the heat to low. Allow the syrup to cook for 10-15 minutes. Stir occasionally to prevent sticking. This simmering step will help the flavors meld together. After the time is up, remove the saucepan from the heat. Stir in 1 teaspoon of vanilla extract for a lovely aroma. Allow the syrup to cool for a few minutes. Then strain it through a fine-mesh sieve or cheesecloth. This will remove any pumpkin pulp and keep the texture smooth. Once it cools completely, store it in a clean glass jar. Your homemade pumpkin spice syrup is ready to enjoy! For the full recipe, refer to the earlier section. To get the best texture for your syrup, start by straining it. After simmering, pour the syrup through a fine-mesh sieve or cheesecloth. This step removes any pumpkin pulp, giving you a smooth finish. If you skip this, you might end up with a chunky syrup that doesn’t mix well in drinks. You can customize your syrup to match your taste. If you love more spice, add an extra pinch of cinnamon or nutmeg. For a sweeter syrup, consider using brown sugar or honey instead of granulated sugar. Remember, the balance of flavors can make or break your syrup. Adjust it until it feels just right for you. This syrup shines in so many ways. Drizzle it over pancakes or waffles for a tasty breakfast treat. You can also add it to your coffee or hot chocolate for a cozy drink. Feeling adventurous? Mix it into cocktails for a fall twist. Your friends will love the rich flavors! You can find the full recipe here for more details. {{image_4}} You can switch up the main ingredients in your syrup. If you want to skip the pumpkin puree, you can use butternut squash puree instead. It gives a similar flavor and texture. Just make sure it is smooth for the best results. Another option is to use maple syrup instead of granulated sugar. This change adds a rich, warm flavor that pairs well with the spices. You can mix it with water to make the syrup thinner. This way, you still enjoy the sweet taste without all the white sugar. Why stick to just pumpkin spice? You can create themed syrups for other seasons too. In winter, try adding peppermint or gingerbread flavors. For spring, consider using fresh fruits like strawberries or lemons. Each season brings a chance to change the flavors. You can also infuse other flavors into your syrup. Adding vanilla gives it a creamy taste. If you love chocolate, mix in some cocoa powder. This creates a unique twist that makes your drinks even more special. If you follow a vegan diet, it’s easy to adapt this recipe. Just use maple syrup or agave nectar instead of sugar. This choice keeps it sweet and plant-based. For low-sugar options, you can use stevia or monk fruit sweetener. These alternatives provide sweetness without the extra calories. Adjust the amount based on your taste. If you need a gluten-free syrup, you’re in luck! All the ingredients are naturally gluten-free. So, enjoy this syrup in your favorite recipes without worry. For a complete guide on making this syrup, check out the Full Recipe. Store your homemade pumpkin spice syrup in a glass jar. Glass helps keep the syrup fresh longer. Make sure to seal the jar tightly after each use. Refrigerate the syrup to maintain its flavor and quality. Cold storage slows down spoilage. Your syrup will stay fresh for about two weeks in the fridge. Check it for any off-smells or mold. If the syrup looks cloudy or has an unusual texture, toss it out. Always trust your senses when it comes to freshness. Once you finish the syrup, don’t throw away the jar! You can use it for other sauces or spices. Clean the jar with hot soapy water. To sterilize it, you can boil the jar in water for a few minutes. This way, you keep your kitchen eco-friendly and tidy. For the full recipe and tips on making your own delicious pumpkin spice syrup, check out the [Full Recipe]. Homemade pumpkin spice syrup lasts about two weeks in the fridge. You want to store it in a clean glass jar. Always check for any off smells or mold before using. If it looks or smells strange, it’s best to toss it out. Yes, you can use this syrup in both hot and cold drinks. It adds a cozy flavor to your morning coffee or lattes. You can also mix it into iced tea or smoothies for a fall twist. The syrup blends well in any drink you choose. The best way to use pumpkin spice syrup is in your favorite beverages. You can drizzle it over pancakes or waffles for a sweet touch. It also tastes great in yogurt or oatmeal. Try mixing it into cocktails for a festive flavor. For the full recipe, check out the entire guide! In this blog post, we explored how to make homemade pumpkin spice syrup. We covered key ingredients like pumpkin puree, sugar, and essential spices. I shared step-by-step instructions to help you create this tasty syrup. Remember, you can adjust flavors and even try different ingredients for fun twists. Store your syrup properly for long-lasting freshness. Enjoy adding this syrup to drinks or breakfast dishes. Making your own syrup is easy and delicious—give it a try!](https://fastmealmate.com/wp-content/uploads/2025/07/fc2a1fa2-a46c-4404-8cf7-6e2e63d61871-768x768.webp)