Zucchini Pizza Boats Tasty and Easy Family Meal

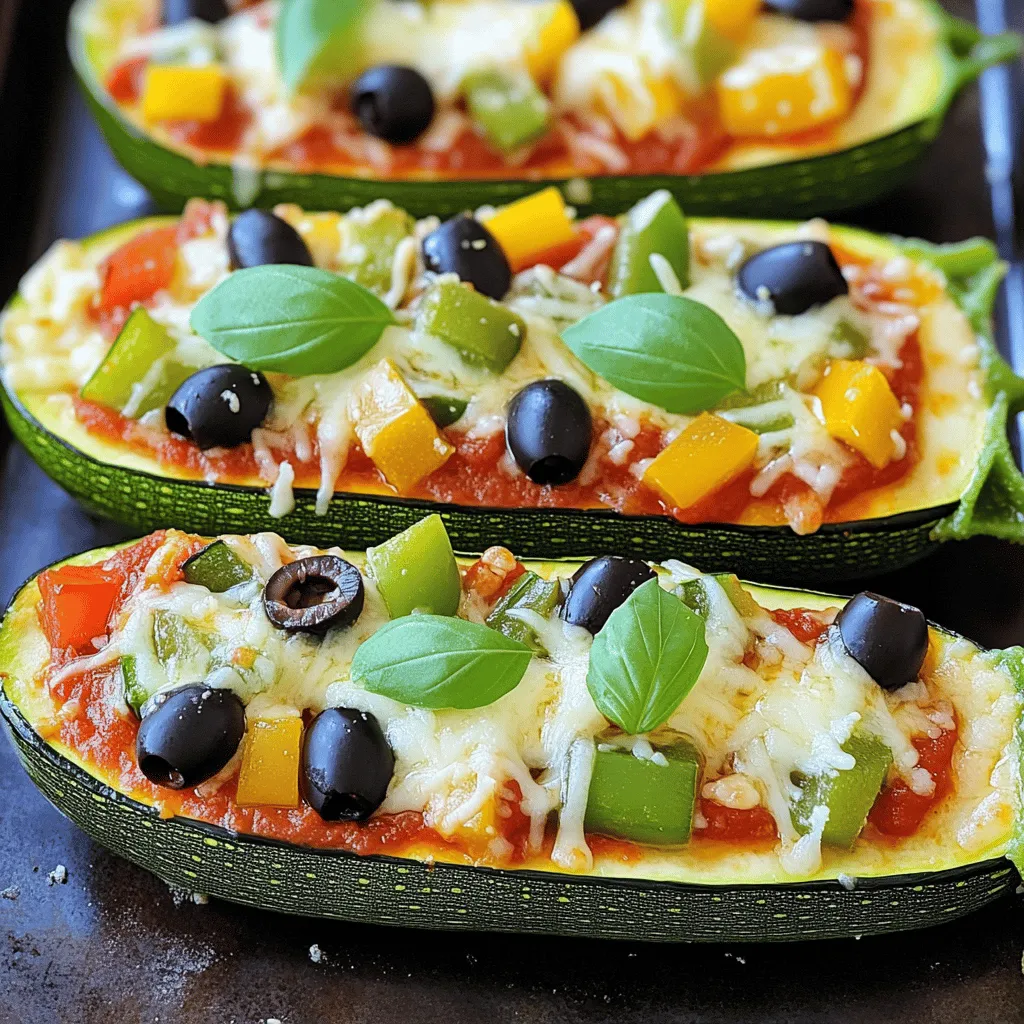
Looking for a fun dinner idea that’s easy to make? Zucchini pizza boats are your answer! They are simple to prepare and packed with flavor. You can fill them with your favorite pizza toppings and keep it healthy too. In this post, I will share everything you need to create these tasty meals for your family. Let’s dive into the ingredients and get cooking!
Ingredients
Main Ingredients for Zucchini Pizza Boats
To make delicious zucchini pizza boats, you need fresh and simple items. Here are the main ingredients:
– 4 medium zucchinis
– 1 cup marinara sauce
– 1 cup shredded mozzarella cheese
– 1/2 cup assorted bell peppers, thinly sliced (red, yellow, or green)
– 1/2 cup black olives, sliced
– 1/2 teaspoon Italian seasoning
– 1/4 teaspoon red pepper flakes (optional for heat)
– Fresh basil leaves, for garnish
– Salt and freshly ground pepper to taste
These ingredients create a tasty base. The zucchinis become soft and hold all the flavors.
Optional Add-ins and Toppings
You can customize your zucchini pizza boats with various add-ins. Here are some fun options:
– Ground turkey or beef for added protein
– Spinach or kale for more veggies
– Cherry tomatoes for a fresh twist
– Different cheese like feta or cheddar
– Fresh herbs like oregano or thyme
Adding different toppings makes each boat unique. Feel free to get creative with your choices!
Nutritional Information per Serving
Zucchini pizza boats are not only tasty but also healthy. Here’s a brief look at the nutritional info per serving:
– Calories: Approximately 250
– Protein: 12g
– Carbohydrates: 20g
– Fat: 15g
– Fiber: 3g
These boats pack a good mix of protein and fiber. They keep you full without too many carbs. Enjoy a guilt-free meal that the whole family loves!
Step-by-Step Instructions
Preparation of Zucchini
To start, you need to prepare the zucchinis. First, wash them well. Dry them with a towel. Next, slice each zucchini in half lengthwise. Use a small spoon to scoop out the inner flesh. This creates the boat shape. Make sure to leave about 1/4 inch of the zucchini flesh. This helps the boats keep their shape while baking. After scooping, sprinkle a little salt and freshly ground pepper inside each half. This adds flavor.
Making the Pizza Filling
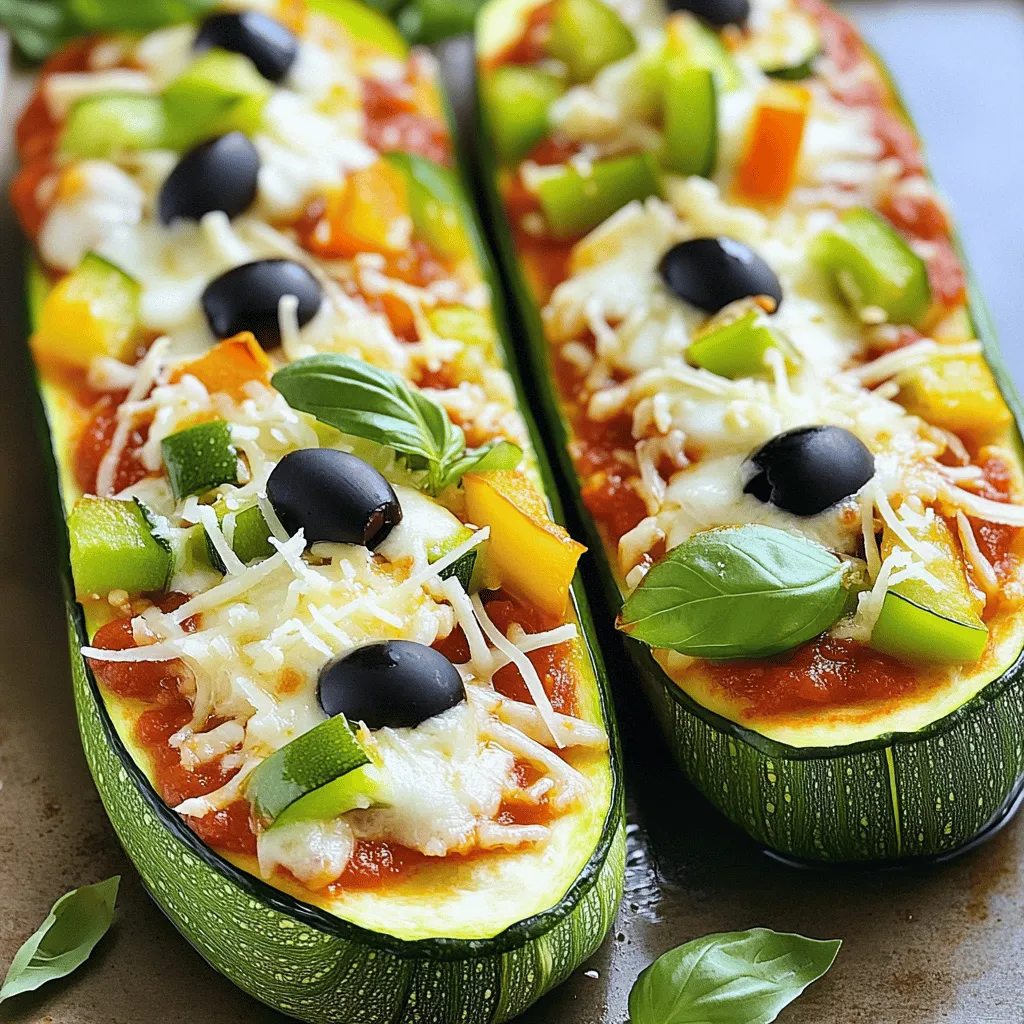
Now it’s time for the pizza filling. In a mixing bowl, combine 1 cup of marinara sauce with 1/2 teaspoon of Italian seasoning. If you like heat, add 1/4 teaspoon of red pepper flakes. Stir the mixture well. This helps spread the flavors. Once mixed, generously spoon the seasoned sauce into each zucchini boat. Fill them to the top for a delicious bite. Next, sprinkle 1 cup of shredded mozzarella cheese over the sauce. Add 1/2 cup of thinly sliced bell peppers and 1/2 cup of sliced black olives for extra flavor and color.
Baking the Zucchini Boats
Next, it’s time to bake the zucchini boats. Preheat your oven to 375°F (190°C). Place the stuffed zucchini boats on a baking sheet with the cut side facing up. Bake them for 20-25 minutes. You’ll know they are done when the zucchini is tender and the cheese is melted, bubbly, and lightly golden. After baking, let them cool for a few minutes. This makes them easier to handle. Just before serving, add fresh basil leaves on top for a nice touch. These Zucchini Pizza Boats are now ready to enjoy!
Tips & Tricks
How to Make Perfect Zucchini Boats
To create perfect zucchini boats, choose firm zucchinis. Look for ones that feel heavy for their size. Slice them in half lengthwise and scoop out the insides. Leave about 1/4 inch of flesh to hold the shape. This keeps them sturdy while baking. Sprinkle a little salt and pepper inside to add flavor. Don’t skip this step; it enhances the taste!
Best Cheese Options for Zucchini Pizza Boats
Mozzarella is the classic choice for zucchini pizza boats. Its meltiness makes it perfect. You can also mix in provolone or fontina for extra flavor. For a sharp bite, try adding some Parmesan on top. If you want a dairy-free option, use vegan cheese. Just ensure it melts well for the best results.
Serving Suggestions and Pairings
Zucchini pizza boats are great on their own, but you can pair them with a salad. A fresh green salad adds a nice crunch. You can also serve them with garlic bread for a complete meal. For drinks, consider iced tea or sparkling water. If you want to spice things up, serve them with a side of marinara for dipping.

Variations
Vegetarian Variations
You can make zucchini pizza boats vegetarian with simple swaps. Use your favorite vegetables like mushrooms, spinach, or artichokes. You can mix these with the marinara sauce for great flavor. Top the boats with extra cheese for a cheesy delight. You can also try different herbs like oregano or thyme to add more zest.
Protein-Packed Additions
Want to add some protein? You can include cooked chicken, turkey, or sausage. Just chop the meat into small pieces and mix it into your marinara sauce. This gives your pizza boats a hearty texture. You can also use beans, like black beans or chickpeas, for a plant-based protein boost.
Gluten-Free Options
For gluten-free options, stick with the basic zucchini. The recipe is naturally gluten-free as is. If you want extra crunch, use gluten-free breadcrumbs on top. This adds a nice texture without the gluten. Always check your sauces and toppings to ensure they are gluten-free as well.
Storage Info
How to Store Leftover Zucchini Pizza Boats
To keep your leftover zucchini pizza boats fresh, place them in an airtight container. Make sure to let them cool down first before sealing. Store them in the fridge for up to three days. This way, you can enjoy them again without losing flavor.
Reheating Instructions
When you’re ready to eat your leftovers, preheat your oven to 350°F (175°C). Place the zucchini boats on a baking sheet. Cover them with foil to keep them moist. Heat for about 15 minutes, or until they are warm throughout. You can also use a microwave, but the oven keeps them crispier.
Freezing Tips for Meal Prep
If you want to save your zucchini pizza boats for later, freezing is a great option. First, let them cool completely. Wrap each boat tightly in plastic wrap. Then, place them in a freezer-safe bag or container. They can last up to three months in the freezer. To reheat, follow the instructions above after thawing them overnight in the fridge.
FAQs
How do you prevent zucchini from getting soggy?
To stop zucchini from being soggy, salt them first. After slicing and scooping, sprinkle salt inside. Let them sit for about 15 minutes. This draws out excess water. Pat them dry before adding sauce and toppings. With less moisture, your zucchini pizza boats stay firm and tasty.
Can you use other vegetables as a pizza base?
Yes, you can! Many veggies work well as pizza bases. Eggplant slices make great bases. Bell peppers can hold toppings nicely too. Portobello mushrooms are fun for mini pizzas. You can even use sweet potatoes for a twist. Each option adds its own flavor and texture.
What are some quick side dishes to serve with zucchini pizza boats?
Zucchini pizza boats pair well with many sides. Here are a few quick ideas:
– Simple salad: Toss greens with olive oil and lemon.
– Garlic bread: Toast slices of bread with garlic butter.
– Steamed veggies: Broccoli or green beans add color and nutrients.
– Fruit platter: Fresh fruit like berries or melon is refreshing.
These sides are easy and complement the main dish nicely.
Zucchini pizza boats are a tasty and healthy dish. We covered how to make them, from ingredients to cooking. You can customize toppings or choose gluten-free options too. Finding the right cheese improves flavor and texture. Store leftovers properly for easy meals later. With all these tips, you can make perfect zucchini boats every time. Dive into this fun twist on pizza, and enjoy experimenting with flavors and textures!


![- 4 medium cucumbers, sliced into rounds - 1 teaspoon sea salt - 1 teaspoon freshly ground black pepper - 1 teaspoon smoky chili powder - 1 tablespoon freshly squeezed lime juice - 1/4 cup crumbled queso fresco (or feta) - 1/4 cup fresh cilantro, finely chopped - 1 jalapeño, finely chopped (optional) - 1 tablespoon extra virgin olive oil When I make Mexican-style cucumbers, I focus on fresh, vibrant ingredients. Each item plays a key role in flavor and texture. The cucumbers are crisp and refreshing. They are the star of this dish. The sea salt enhances their natural taste. Black pepper adds a nice kick, while smoky chili powder gives it depth. Fresh lime juice brings brightness. It balances the flavors perfectly. Queso fresco adds a creamy touch, and cilantro gives a fresh burst. If you like heat, jalapeño adds a nice spicy twist. The extra virgin olive oil ties everything together, making it rich and smooth. - Mixing bowl - Cutting board and knife - Measuring spoons - Serving bowl Using the right tools makes cooking easier. A good knife helps slice cucumbers evenly. A mixing bowl is perfect for combining all the ingredients. Measuring spoons ensure you get the flavors just right. Finally, a nice serving bowl makes your dish look great at the table. You can find the full recipe for Mexican-style cucumbers to guide you through this process. - Rinse cucumbers under cold water. - Trim ends and slice into 1/4 inch rounds. Start by washing your cucumbers. Cold water helps remove dirt and any residue. After rinsing, trim off the ends. Now, slice each cucumber into rounds about 1/4 inch thick. This size gives a nice bite and ensures even seasoning. - Combine cucumber slices with salt, pepper, and chili powder. - Toss gently to coat evenly. In a big bowl, mix the cucumber slices with sea salt, black pepper, and smoky chili powder. The salt enhances the cucumber's natural flavor. The chili powder adds a great kick. Toss the cucumbers gently. You want every slice to be coated well without breaking them. - Drizzle lime juice and olive oil over the cucumbers. - Fold in queso fresco and cilantro. - Optionally add jalapeño for extra spice. - Let marinate for 10 minutes before serving. Next, drizzle fresh lime juice and olive oil over the cucumbers. This adds brightness and richness. Fold in crumbled queso fresco and chopped cilantro. If you like spice, add jalapeño. Mix everything gently so the flavors blend well. Let it sit for at least 10 minutes. This waiting time helps the cucumbers soak up all those delicious flavors. Enjoy your vibrant and tasty dish! For the full recipe, refer back here. To make your Mexican style cucumbers shine, use fresh lime juice. The juice brightens the taste and adds a zesty kick. You can also experiment with different types of peppers. If you like heat, try serrano or habanero peppers. Each pepper brings a unique taste and spice level, making your dish fun and exciting. For a stunning look, serve your cucumbers in a stylish bowl. Top them with lime wedges and fresh cilantro. This not only adds color but also enhances the flavor. You might sprinkle extra chili powder for even more appeal. This small touch can make your dish look gourmet and inviting. Use a mandoline to slice your cucumbers evenly. This tool helps create uniform rounds, making them look professional. You can also prepare your ingredients in advance. Chop everything and store them separately. This way, you can quickly assemble your dish when you're ready. These shortcuts save time and make cooking more enjoyable. For the full recipe, check out the [Full Recipe]. {{image_4}} To add heat to your dish, try these tips: - Increase the jalapeño or add serrano peppers for more spice. - Include chopped red onions for extra crunch and flavor. These changes create a perfect balance of spice and freshness. You can adjust the heat level to match your taste. The spicy version pairs well with grilled meats or tacos. For a rich, creamy twist, consider these ideas: - Add Greek yogurt or sour cream for a smooth texture. - Mix in avocado for added creaminess and nutrition. This creamy variation is great for those who enjoy a thicker dressing. It also makes the dish more filling and satisfying. Serve it with pita chips or as a dip for veggies. Want to try something sweet? Here’s how: - Incorporate diced mango or pineapple for a fruity twist. - Drizzle with honey to create a unique flavor combo. This sweet and tangy version is refreshing and fun. It's perfect for summer gatherings or as a light snack. Each bite bursts with flavor, making it a hit with kids and adults alike. For the full recipe, check out the details above. To store leftover Mexican style cucumbers, place them in an airtight container. This keeps them fresh and safe. You should eat them within 2-3 days for the best taste and crunch. Freezing cucumbers is not a good idea. The texture changes when frozen, making them watery and mushy. Instead, enjoy them fresh! To keep your cucumbers fresh, wait to add dressing until you serve. This prevents them from getting soggy. You can also store them with paper towels. The towels soak up extra moisture, keeping your dish crisp and tasty. Mexican-style cucumbers stand out due to their unique seasoning blends. I use fresh, vibrant ingredients like lime juice, smoky chili powder, and cilantro. These flavors combine to create a refreshing taste that dances on your palate. The mix of spices gives a fun twist to simple cucumbers, making them a delightful dish. Yes, you can easily make this recipe vegan. Just replace queso fresco with a plant-based cheese alternative. This change keeps the dish creamy and delicious while fitting a vegan diet. You can still enjoy all the flavors without dairy. These cucumbers shine as a side dish with grilled meats. They also work well as a standalone salad. Pair them with tacos, chicken, or fish for a complete meal. Their crispness complements rich dishes perfectly. Letting cucumbers marinate for at least 10 minutes is best. This time allows the flavors to meld together. However, if you let them sit longer, the taste gets even better. Just be sure to keep them at room temperature, and they will be ready to serve. Mexican-style cucumbers are low in calories and rich in vitamins. They provide hydration, making them perfect for hot days. This dish is also great for weight loss, as it fills you up without adding many calories. Enjoy the freshness guilt-free! This blog post covered the core ingredients and step-by-step instructions to make delicious Mexican-style cucumbers. We discussed how to enhance flavors and provided tips for presentation. You can easily vary the recipe to suit your taste or dietary needs. Remember to store leftovers properly for the best taste. Enjoy refreshing, healthy cucumbers as a side or salad! Making them at home is simple, fun, and sure to impress anyone you serve. Your kitchen can be a hub of fresh taste!](https://fastmealmate.com/wp-content/uploads/2025/06/eb69b124-1af5-44a9-95ae-72c395866c25-768x768.webp)

 to guide you through each step. - Preheat your oven to 375°F (190°C). - Rinse and prepare the quinoa and vegetables. To start, turn on your oven and set it to 375°F (190°C). This step ensures your oven is hot and ready when it’s time to bake. While it heats, take one cup of quinoa and rinse it under cool water. This helps remove any bitterness. Next, chop your zucchinis and bell pepper. Dice the zucchini into small cubes and chop the bell pepper into bite-sized pieces. Don’t forget to finely dice one small onion and mince three cloves of garlic. - Sauté onion and garlic in olive oil until translucent. - Add zucchini and bell pepper, cooking until softened. Next, grab a medium saucepan. Add one tablespoon of olive oil and heat it over medium. Once the oil is warm, toss in your diced onion and minced garlic. Stir them for about 3-4 minutes. You want the onion to turn translucent and smell great. After that, add the diced zucchini and chopped bell pepper. Cook these veggies for around 5 minutes, stirring often. They should soften but still have a little crunch. - Mix in quinoa, cherry tomatoes, broth, and seasonings. - Transfer to a casserole dish and bake for 20-25 minutes. Now comes the fun part! Mix in your rinsed quinoa, one cup of halved cherry tomatoes, and two cups of vegetable broth into the pan. Add one teaspoon of dried oregano, one teaspoon of dried basil, and sprinkle salt and pepper to taste. Stir everything well to combine. Bring this mix to a gentle boil. Once it bubbles, reduce the heat to low, cover the pan, and let it simmer for 15 minutes. This allows the quinoa to absorb the broth. Once done, transfer the mixture into a lightly greased 9x13 inch casserole dish. If you love cheese, sprinkle one cup of shredded mozzarella on top. Place the dish in your preheated oven and bake for 20-25 minutes. You’ll know it’s ready when it bubbles and the cheese is golden brown. To make fluffy quinoa, rinse it well before cooking. This removes the bitter coating called saponin. Use two cups of vegetable broth for one cup of quinoa. Bring it to a boil, then lower the heat and cover. Let it simmer for 15 minutes. After cooking, let it rest for five minutes before fluffing with a fork. This will keep it light and airy. For the vegetables, sauté onion and garlic first in olive oil. Cook them until they are soft and fragrant. Then add zucchini and bell pepper. Stir them for about five minutes until they soften. This builds a great flavor base for your casserole. To elevate the dish, try adding a pinch of red pepper flakes for heat. Fresh herbs like thyme or parsley can add brightness. You can also swap out the dried oregano and basil for fresh herbs. Fresh herbs bring a stronger flavor. If you want to change ingredients, use brown rice instead of quinoa. You can also add cooked beans for a protein boost. For a creamier texture, mix in some ricotta cheese or yogurt before baking. Pair the casserole with a light side salad or some crusty bread. A fresh garden salad with lemon vinaigrette works well. It adds a nice contrast to the warm casserole. For gatherings, serve the casserole directly from the dish. Garnish with fresh basil leaves to make it look inviting. You can also sprinkle some extra cheese on top just before serving for a melty touch. {{image_4}} You can easily change the vegetables in this casserole. Try using bell peppers, spinach, or even eggplant. These swaps keep the dish vibrant and fresh throughout the summer. You can also mix in seasonal veggies like corn or cherry tomatoes for a burst of flavor. If you need a quinoa substitute, consider using brown rice or farro. These grains add a nice texture and flavor. Other options include couscous or even cauliflower rice for a low-carb choice. To make this casserole vegan, simply skip the cheese or use a plant-based cheese. You'll still get a creamy texture from the cooked veggies and broth. For a gluten-free option, use certified gluten-free quinoa. This way, everyone can enjoy the dish. If you're looking to cut calories, reduce the olive oil or skip the cheese. You can also use less quinoa and bulk up with more veggies. This keeps the dish light, tasty, and full of nutrients. Each of these variations allows you to enjoy this Summer Zucchini Quinoa Casserole in your own way. For the full recipe, check out the detailed instructions above. To keep your summer zucchini quinoa casserole fresh, first let it cool. Once cool, store it in an airtight container. You can refrigerate it for up to five days. If you want to save it for later, freeze it. Use a freezer-safe container or heavy-duty freezer bags. This way, it can last for up to three months. Remember to label the container with the date. This helps you track how long it has been stored. When you want to enjoy the casserole again, reheating is easy. For the best texture, use an oven. Preheat the oven to 350°F (175°C). Place the casserole in an oven-safe dish and cover it with foil. Heat for about 20 minutes or until warm. If you're in a hurry, you can use the microwave. Place a single serving in a microwave-safe dish. Heat for 1-2 minutes, checking every 30 seconds. This will keep the flavors and texture intact. Enjoy your delicious meal! Can I prepare the Summer Zucchini Quinoa Casserole in advance? Yes, you can prepare it ahead of time. Make the casserole, then cover and refrigerate it. When you're ready to eat, just bake it straight from the fridge. You may need to add a few more minutes to the cooking time. How to customize the recipe to suit my taste preferences? Feel free to swap out the veggies. For instance, you can use spinach, carrots, or even corn. You can also change the cheese or add some cooked chicken for extra protein. What are the best herbs to use for added flavor? Fresh herbs like basil and thyme work great. You can also try parsley or cilantro. These herbs add a fresh taste and brighten up your dish. Is this recipe suitable for a low-carb diet? This recipe is not low-carb due to the quinoa. Quinoa has more carbs than other grains but is also high in protein. If you want a lower carb option, you can use cauliflower rice instead of quinoa. What are the main nutritional benefits of zucchini and quinoa? Zucchini is low in calories and high in vitamins A and C. It also has a lot of water, which keeps you hydrated. Quinoa is a complete protein, meaning it has all nine essential amino acids. It’s also high in fiber, which is good for digestion. What should I do if my casserole is too watery? If your casserole is watery, try draining some liquid before baking. You can also bake it longer to help it thicken up. How can I prevent the quinoa from sticking together? To prevent sticking, rinse the quinoa well before cooking. This removes excess starch. Also, fluff the quinoa with a fork after it cooks to keep it separate. For the full recipe, check out the details above! You learned how to make a tasty Summer Zucchini Quinoa Casserole. We covered the ingredients, simple steps, and tips for perfect results. You can adjust the recipe to fit your taste and needs. Explore flavor swaps and storage tips to keep it fresh. With this dish, enjoy a healthy meal that is easy to make. I hope you try it and enjoy every bite!](https://fastmealmate.com/wp-content/uploads/2025/07/552d1654-693f-4b1b-8ee9-d91b85ff9950-768x768.webp)

![- 1 lb (450g) boneless, skinless chicken thighs, cut into bite-sized pieces - 4 tablespoons unsalted butter, divided - 4 cloves garlic, minced finely - 1 large lemon, zested and juiced - 1 teaspoon dried thyme - 1 teaspoon paprika - Salt and freshly ground black pepper to taste - Fresh parsley, chopped (for garnish) These ingredients make the dish shine. The chicken thighs give a tender bite. Garlic adds a strong aroma. Lemon brings brightness and tang. Butter makes everything rich and smooth. Thyme and paprika add depth and warmth. - Red pepper flakes for heat - Fresh herbs like basil or cilantro - A splash of white wine for extra richness - Honey for a touch of sweetness Adding some of these can make your dish unique. Red pepper flakes can spice things up. Fresh herbs can add a pop of freshness. A splash of wine creates a deeper flavor. Honey can balance the tartness of lemon. - Large skillet for cooking - Cutting board for prepping the chicken - Sharp knife for cutting the chicken - Measuring spoons for accuracy - Tongs for turning the chicken These tools will help you cook efficiently. A large skillet allows even cooking. A cutting board keeps the workspace tidy. A sharp knife ensures safe and quick cutting. Measuring spoons keep your flavors balanced. Tongs help with easy flipping and serving. For the detailed cooking steps and more, check the Full Recipe. Start by gathering your ingredients. You will need: - 1 lb boneless, skinless chicken thighs, cut into bite-sized pieces - 4 tablespoons unsalted butter, divided - 4 cloves garlic, minced finely - 1 large lemon, zested and juiced - 1 teaspoon dried thyme - 1 teaspoon paprika - Salt and freshly ground black pepper to taste - Fresh parsley, chopped (for garnish) Next, melt 2 tablespoons of butter in a skillet over medium heat. As it melts, season the chicken thighs with paprika, salt, and pepper. This step adds great flavor. Once the butter is bubbling, add the chicken pieces to the skillet. Spread them out evenly for the best sear. Sear the chicken for 5-7 minutes. Turn the chicken occasionally until it turns golden brown on all sides. This browning adds depth to the dish. When done, remove the chicken and set it aside on a plate. In the same skillet, melt the remaining 2 tablespoons of butter. Add the minced garlic and sauté it for about 30 seconds. Stir constantly to prevent burning. Once fragrant, stir in the lemon juice and zest, along with the dried thyme. Let this simmer for 1-2 minutes. This step melds all the flavors together. Now, return the cooked chicken to the skillet. Toss it in the lemon garlic butter sauce until well coated. Cook everything together for another 2 minutes. This helps the chicken absorb the sauce and heat through completely. Once finished, remove the skillet from the heat. Sprinkle fresh parsley over the chicken bites for a vibrant look. Serve the chicken bites in a large dish or individual bowls. Drizzle any remaining garlic butter sauce over the top. Add lemon wedges and extra parsley for an inviting presentation. For the full recipe, check the earlier section. To get juicy chicken, use boneless, skinless thighs. They cook faster and stay moist. Cut the chicken into even pieces for uniform cooking. Sear the chicken in a hot skillet. This gives a nice brown crust. Cook it for 5-7 minutes, flipping halfway through. Always check for doneness; the chicken should reach 165°F (75°C) inside. For a richer sauce, use high-quality butter. Add fresh herbs like rosemary or basil. If you like heat, toss in red pepper flakes. A splash of white wine adds depth, too. For extra zing, use fresh lemon juice instead of bottled. Don’t forget to taste and adjust seasoning. Every bite should burst with flavor. Prep your ingredients before you start cooking. Chop garlic and zest the lemon ahead of time. Use a sharp knife for quick cutting. Consider using a pre-made garlic butter if you’re short on time. You can also marinate the chicken a few hours before cooking. This step adds flavor and cuts down on cooking time. Feel free to explore the [Full Recipe] for complete instructions! {{image_4}} You can swap chicken thighs for other proteins. Try shrimp for a quick cook. Just sauté until they turn pink. You can use pork tenderloin, cut into small pieces. It cooks fast and absorbs flavor well. Even beef cubes work if you like a heartier bite. Adjust cooking time to match the protein you choose. For a vegetarian version, use mushrooms or tofu. Both soak up flavors like a sponge. Sauté mushrooms until golden brown. For tofu, press to remove water, then cut into cubes. Cook until crispy on all sides. Toss these in the lemon garlic butter sauce just like the chicken. If you have allergies, there are easy swaps. Use olive oil instead of butter for a dairy-free option. You can replace garlic with garlic powder if you're sensitive to fresh garlic. For a low-sodium version, use less salt and a salt substitute. Adjust the recipe to fit your taste and needs. Check out the Full Recipe for more ideas and details! To keep your leftover chicken bites fresh, place them in an airtight container. Make sure to let them cool to room temperature first. Store the container in the refrigerator. They will stay good for up to three days. Label the container with the date for easy tracking. Reheating is simple! You can use a skillet or microwave. For the skillet, heat a little butter over medium heat. Add the chicken bites and stir until warmed through. This keeps the flavors intact. If using a microwave, place the chicken in a microwave-safe dish. Cover it with a damp paper towel and heat in 30-second intervals until hot. If you want to freeze the chicken bites, make sure they are cool first. Place them in a freezer-safe bag or container. Remove as much air as possible to avoid freezer burn. They can last for up to three months in the freezer. When ready to eat, thaw them in the fridge overnight. Then reheat them as mentioned above. Enjoy your Lemon Garlic Butter Chicken Bites again! For the full recipe, check out the earlier section. Yes, you can use chicken breast instead of thighs. Chicken breast is leaner and will cook faster. Just make sure to cut it into similar bite-sized pieces. You may need to adjust the cooking time to keep it juicy. Lemon Garlic Butter Chicken Bites pair well with many sides. Here are a few ideas: - Steamed rice - Pasta with olive oil - Roasted vegetables - A fresh green salad - Garlic bread These options balance the rich flavors of the chicken and add variety to your meal. This recipe is not spicy. It focuses on lemon, garlic, and herbs for flavor. If you want some heat, you can add red pepper flakes. Start with a small amount and taste as you go. To keep the chicken juicy, follow these tips: - Do not overcook the chicken. Use a meat thermometer to check for doneness. - Let the chicken rest for a few minutes after cooking. This helps keep the juices inside. - Use the butter and garlic sauce generously. It adds moisture and flavor. Following these steps will help you achieve tender and juicy chicken bites. For the complete recipe, check out the [Full Recipe]. This blog covered how to make Lemon Garlic Butter Chicken Bites. We looked at key and optional ingredients, as well as the tools you need. I provided step-by-step cooking instructions and tips for perfect chicken. We explored variations, storage methods, and answered common questions. Now, you have all the tools to whip up this dish with ease. Enjoy cooking and share your tasty results!](https://fastmealmate.com/wp-content/uploads/2025/05/97cbb791-292c-4238-a79b-781f43956dc5-768x768.webp)