
If you’re craving a dessert that’s rich and creamy, look no further! My Velvety Chocolate Hazelnut Panna Cotta is a treat you won’t want to miss. This smooth dessert blends the deep flavor of chocolate with the nutty taste of hazelnuts, creating a delightful experience for your taste buds. Let’s dive into the ingredients, tips, and easy steps to whip up this elegant treat. Your dessert game is about to get a delicious upgrade!
Ingredients
List of Ingredients for Velvety Chocolate Hazelnut Panna Cotta
– 2 cups heavy cream
– 1/2 cup whole milk
– 1/2 cup granulated sugar
– 1 tablespoon gelatin powder
– 3 tablespoons cold water
– 1/2 cup semi-sweet chocolate, finely chopped
– 1/4 cup hazelnut spread (such as Nutella)
– 1 teaspoon vanilla extract
– Pinch of salt
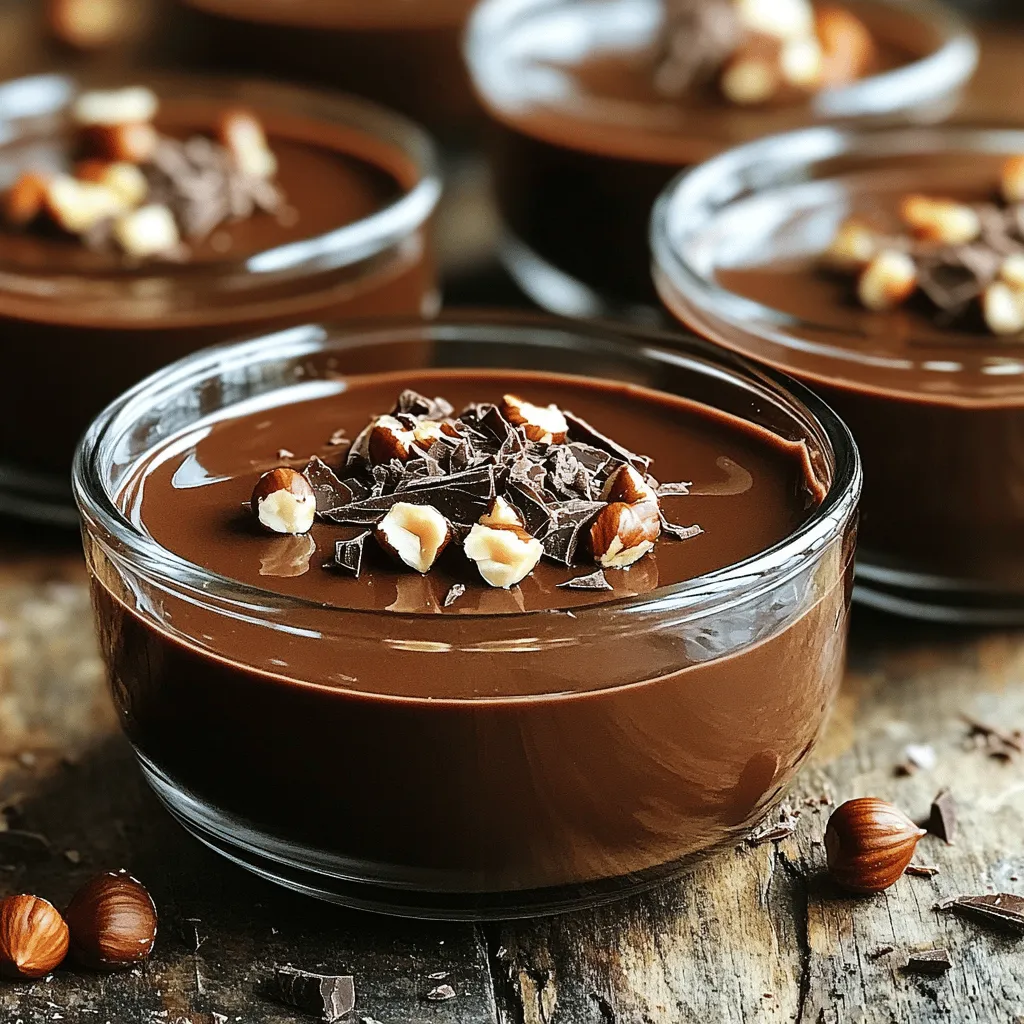
– Crushed hazelnuts or chocolate shavings for garnish
Importance of Each Ingredient
Each ingredient plays a key role in making panna cotta perfect. Heavy cream gives the dessert its rich and creamy texture. Whole milk balances the fat, keeping it smooth. Granulated sugar adds sweetness, making every bite delightful.
Gelatin is crucial; it helps the panna cotta set. Without it, you’d have a chocolate soup. Cold water is used to bloom the gelatin, ensuring it dissolves well. Semi-sweet chocolate and hazelnut spread provide deep, luscious flavors that define this dessert.
Vanilla extract adds warmth, while a pinch of salt enhances all the flavors. Lastly, crushed hazelnuts or chocolate shavings add a lovely crunch and visual appeal.
Possible Ingredient Substitutions
You can make some swaps if you need to. For a lighter version, use half-and-half instead of heavy cream. Almond milk is a good choice for those who want a dairy-free option.
Coconut cream can replace heavy cream for a tropical twist. You can also use dark chocolate if you prefer a richer taste. If you don’t have hazelnut spread, peanut butter or almond butter can work too.
Just remember, each change may alter the flavor and texture slightly, but that’s part of the fun in cooking!
Step-by-Step Instructions
Detailed Cooking Process for Panna Cotta
To make the panna cotta, start by blooming the gelatin. In a small bowl, sprinkle the gelatin powder over cold water. Let it sit for about 5 minutes. This helps the gelatin soften.
Next, take a medium saucepan. Combine heavy cream, whole milk, and granulated sugar in it. Heat this over medium-low heat. Stir gently until the sugar dissolves. Make sure it stays warm but does not boil.
Once the sugar is dissolved, take the pan off the heat. Add finely chopped semi-sweet chocolate and hazelnut spread. Also add vanilla extract and a pinch of salt. Stir until it’s smooth and well mixed.
Now, add the bloomed gelatin into the warm chocolate mix. Stir continuously until the gelatin fully dissolves.
Carefully pour the mixture into individual cups or ramekins. Fill each about three-quarters full. Let them cool at room temperature for a bit.
Cover the cups with plastic wrap and place them in the fridge. Chill for at least 4 hours. For the best results, let it set overnight.
When ready to serve, gently unmold the panna cotta. Dip the bottoms of the ramekins in warm water for a few seconds. Carefully invert them onto plates. A gentle tap helps release them.
Finish by garnishing with crushed hazelnuts or chocolate shavings. This adds a nice crunch and makes it look beautiful.
Tips for Achieving the Perfect Texture
To get the perfect panna cotta texture, keep a few things in mind. First, don’t let the cream mixture boil. Boiling can change the texture.
Make sure to stir the mixture well after adding the gelatin. This helps it dissolve fully. If the mixture is too warm, the gelatin may not set right.
Chill the panna cotta long enough. At least 4 hours is good, but overnight is better. This gives it time to set properly.
If you want a creamier panna cotta, you can add more cream. Or try using a mix of whole milk and cream for a richer taste.
Suggested Kitchen Tools for Preparation
Here are some kitchen tools that make making panna cotta easier:
– Small bowl for blooming gelatin
– Medium saucepan for heating the mixture
– Whisk for stirring the ingredients
– Measuring cups for accuracy
– Ramekins or serving cups for the panna cotta
– Plastic wrap to cover the cups
– Serving plates for presentation
These tools help ensure your panna cotta turns out just right.
Tips & Tricks
Common Mistakes to Avoid
When making Velvety Chocolate Hazelnut Panna Cotta, avoid these common mistakes:
– Not blooming gelatin properly: Always let gelatin sit in cold water first.
– Boiling the cream: Heat it gently to keep the panna cotta smooth.
– Skipping the chilling time: Patience is key for the perfect set.
How to Customize Flavor Profiles
You can play with flavors to make this dish your own:
– Add espresso: Mix in a shot for a coffee flavor.
– Use different chocolates: Try dark or milk chocolate for unique tastes.
– Infuse with spices: A dash of cinnamon or nutmeg gives warmth.
Techniques for a Smooth Finish
For a silky texture, follow these tips:
– Whisk well: Stir the chocolate mixture until fully combined.
– Strain the mixture: Pour through a fine sieve to catch any lumps.
– Control the pouring: Fill cups gently to avoid bubbles.
Variations
Alternative Flavors to Try
You can switch up the flavor of your panna cotta easily. Try using white chocolate for a sweeter treat. You can also add coffee for a rich, bold taste. Matcha adds a lovely green color and earthy flavor. For fruit lovers, a berry puree can create a fresh twist. Just blend your favorite berries and swirl them in before chilling. Each option brings a new layer of taste to your dessert.
Seasonal Ingredient Ideas
Seasonal ingredients can enhance your panna cotta. In spring, fresh strawberries or lavender can lighten the dish. Summer brings ripe peaches or zesty citrus for a refreshing bite. Fall lets you use pumpkin or spices like cinnamon and nutmeg. Winter calls for rich flavors like peppermint or toasty nuts. Using seasonal ingredients keeps your panna cotta exciting and fresh all year long.
Presentation Techniques for Different Occasions
Presentation is key to impressing guests. For casual gatherings, serve panna cotta in clear cups to show off the layers. For fancy dinners, unmold the panna cotta onto a plate. Add a drizzle of sauce or a fruit compote around it. Use edible flowers or fresh herbs for a pop of color. For a fun twist, layer different flavors in one cup for a striped look. Each style makes your panna cotta not just a treat, but a feast for the eyes.
Storage Info
Best Practices for Storing Panna Cotta
To keep your panna cotta fresh, store it in the fridge. Use airtight containers or cover each cup with plastic wrap. This helps avoid any weird smells or flavors from other foods. Always let the panna cotta cool fully before covering it. This prevents condensation, which can affect texture.
How Long Can It Be Stored?
Your velvety chocolate hazelnut panna cotta can last up to 5 days in the fridge. Make sure it stays well-covered. If it starts to smell off or looks strange, it’s best to throw it away. Freshness is key to enjoying this dessert.
Freezing Options and Tips
You can freeze panna cotta, but it may change the texture. To freeze, place it in a freezer-safe container. Leave some space at the top for expansion. It can last for about 2 months in the freezer. When ready to eat, thaw it in the fridge overnight. Avoid refreezing after thawing to keep the best texture.
FAQs
What is Panna Cotta?
Panna cotta is a creamy dessert from Italy. It means “cooked cream” in Italian. This dish combines cream, sugar, and gelatin to form a smooth, silky texture. You can flavor it with many ingredients, like chocolate or fruit. The result is a light and rich treat that melts in your mouth.
Can I make Panna Cotta ahead of time?
Yes, you can make panna cotta ahead of time. It actually needs time to set properly. I recommend making it the day before you plan to serve it. Chill it for at least 4 hours, but overnight is best. This makes it easy to enjoy a tasty dessert without stress.
How can I troubleshoot a runny Panna Cotta?
A runny panna cotta often means not enough gelatin. Make sure to measure your gelatin accurately. If you notice it is runny after chilling, you can try to fix it. Heat the panna cotta mixture gently, add more bloomed gelatin, and chill it again. This should help it set properly.
In this post, we explored how to make velvety chocolate hazelnut panna cotta. We discussed essential ingredients, cooking steps, and common pitfalls. I shared tips to enhance the flavor and texture of your panna cotta. We also explored fun variations for special times and how to store leftovers.
Finally, making panna cotta can be simple and rewarding. Enjoy creating this delightful treat while impressing family and friends.


