Triple Crust Peach Cobbler Simple and Delicious Treat

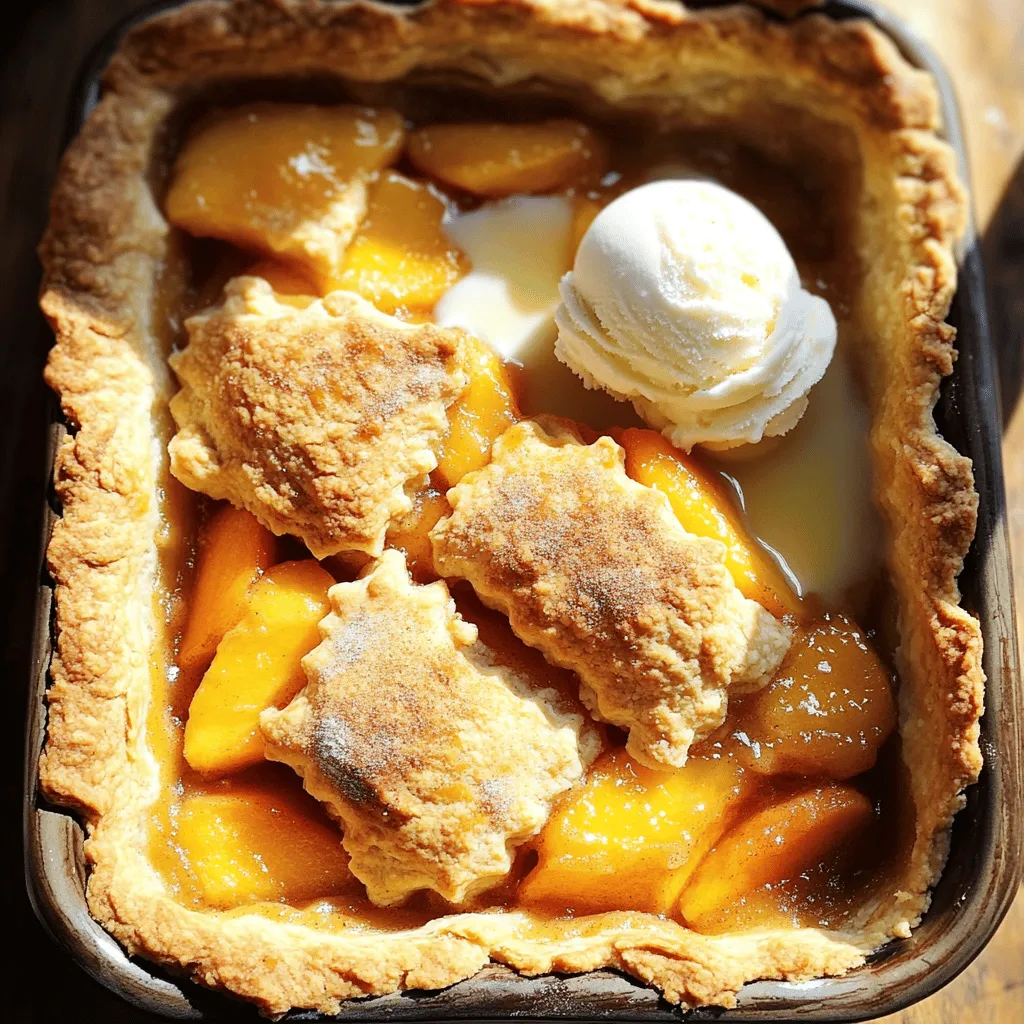
Are you ready to make a dessert that will impress everyone? My Triple Crust Peach Cobbler is your new go-to treat. With layers of sweet peaches and a crunchy, flaky crust, it’s simple and delicious! In this article, you will find easy steps and tips to create this amazing cobbler. Your taste buds will thank you, and your friends will want seconds. Let’s dive into the joy of baking!
Ingredients
Fresh Peach Requirements
For this delightful cobbler, you need six ripe peaches. Choose peaches that feel firm but yield slightly when pressed. These peaches should have a vibrant color and a sweet aroma. Peel and slice them for the best flavor and texture in your dish.
Pantry Staples Needed
You will also need some basic ingredients from your pantry. Here’s a quick list:
– 1 cup granulated sugar
– 1 tablespoon lemon juice
– 1 teaspoon ground cinnamon
– 1 tablespoon cornstarch
– 1 cup all-purpose flour
– 1/2 teaspoon baking powder
– 1/4 teaspoon salt
– 1/2 cup unsalted butter, melted
– 1/2 cup milk
– 1 teaspoon vanilla extract
– 1/4 cup brown sugar (for topping)
– 1 teaspoon additional cinnamon (for topping)
These staples create the rich and sweet base for the cobbler.
Optional Toppings for Serving
To make your peach cobbler even better, consider these tasty toppings:
– Vanilla ice cream
– Whipped cream
– Caramel sauce
– Fresh mint leaves
These toppings add flavor and visual appeal to your dish. Enjoy experimenting with different combinations!
Step-by-Step Instructions
Preheat the Oven and Prepare Peaches
First, preheat your oven to 350°F (175°C). This step is key for a well-cooked cobbler. While the oven heats, grab six ripe peaches. Peel and slice them, then place the peach slices in a large bowl. Add one cup of granulated sugar, one tablespoon of lemon juice, one teaspoon of ground cinnamon, and one tablespoon of cornstarch. Mix gently with a spatula, making sure each slice gets coated. Let the peaches sit for about 10 minutes. This allows the flavors to mix and the juices to flow.
Making the Batter
In another bowl, combine one cup of all-purpose flour, half a teaspoon of baking powder, and a quarter teaspoon of salt. Whisk these dry ingredients until they blend well. Gradually add half a cup of melted unsalted butter. Then, pour in half a cup of milk and one teaspoon of vanilla extract. Stir this mix until it forms a thick and smooth batter. It should feel dough-like.
Layering and Assembling the Cobbler
Now, grease a 9×13 inch baking dish. Pour half of your batter into the dish. Spread it evenly as the bottom layer. Next, layer the marinated peaches over this batter. Make sure the peaches are evenly spread out. Finally, pour the rest of the batter over the peaches. Do this carefully to keep the layers intact.
Baking Instructions
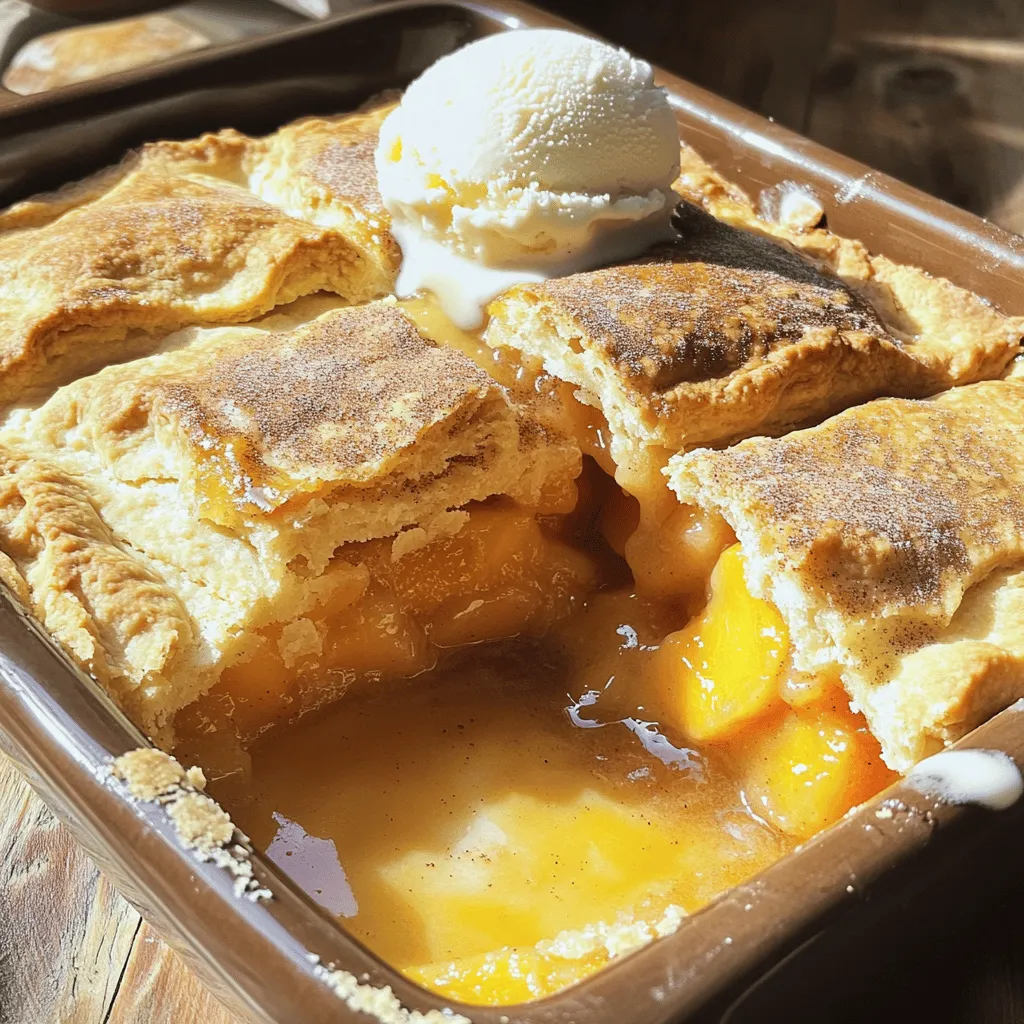
In a small bowl, mix a quarter cup of brown sugar with an additional teaspoon of cinnamon. Sprinkle this mixture on top of the last layer of batter. This will create a sweet crust as it bakes. Place the dish in your preheated oven. Bake for 45 to 50 minutes. You know it’s done when the top is golden brown and the peach juices bubble around the edges. To check, insert a toothpick into the batter. It should come out clean. After baking, let the cobbler cool for 10 to 15 minutes. This helps the juices set, making it easy to serve. Enjoy warm, topped with vanilla ice cream for an extra treat!
Tips & Tricks
How to Choose the Best Peaches
Choosing the right peaches is key. You want to select ripe, juicy peaches for the best flavor. Here are some tips:
– Look for peaches with a sweet smell. This shows they are ripe.
– Check for slight softness when you gently squeeze. They should yield a bit, but not be mushy.
– Aim for peaches with a rich color. Bright yellow or orange often means they are sweet.
Perfecting the Cobbler Crust
The crust makes your cobbler special. Here’s how to get it just right:
– Use cold butter to create a flaky texture. Cut it into the flour until it looks like crumbs.
– Don’t overmix the batter. Stir just until combined for a light and airy crust.
– Layer the batter carefully. Pour it slowly over the peaches to keep the layers intact.
Serving Suggestions for Triple Crust Peach Cobbler
You can make your dessert even better with great serving ideas. Here are my favorites:
– Serve warm with a scoop of vanilla ice cream. The cold ice cream melts into the warm cobbler.
– Drizzle caramel sauce on top for a sweet touch. It adds a nice flavor contrast.
– For a lovely look, use ramekins. Serve individual portions with whipped cream on top.Enjoy your delicious creation!

Variations
Alternate Fruits for Cobbler
You can switch peaches for other fruits. Try ripe nectarines or juicy pears. Berries like blueberries or raspberries also work well. The key is to use fresh, sweet fruit. Their flavors mix with the batter, making a tasty treat.
Gluten-Free and Dairy-Free Options
If you need gluten-free options, use almond flour or oat flour. Both work great in this recipe. For a dairy-free choice, swap the milk with almond or coconut milk. Use vegan butter instead of regular butter for the best results. This way, everyone can enjoy the dessert.
Spicing It Up: Unique Flavor Additions
Want to make your cobbler special? Add a dash of nutmeg or ginger for warmth. A splash of almond extract gives a nice twist. You can even mix in some chopped nuts for a crunchy texture. These small changes can elevate your cobbler from simple to stunning.
Storage Info
How to Store Leftover Cobbler
To keep your cobbler fresh, allow it to cool down first. Once cool, cover it with plastic wrap or aluminum foil. You can also place it in an airtight container. Store it in the fridge for up to four days. This keeps flavors intact and prevents it from drying out.
Reheating Instructions
When you want to enjoy your cobbler again, take it out of the fridge. Preheat your oven to 350°F (175°C). Place the cobbler in a baking dish and cover it with foil to avoid burning the top. Heat for about 20-25 minutes or until it’s warm throughout. For a crispy top, remove the foil for the last 5 minutes.
Freezing Your Cobbler
You can freeze your cobbler for later enjoyment. First, let it cool completely, then slice it into portions for easy serving. Wrap each piece tightly in plastic wrap and place them in a freezer-safe bag. Label it with the date. It can last up to three months in the freezer. To enjoy, simply thaw it in the fridge overnight and reheat as mentioned above.
This way, you can savor your Triple Crust Peach Cobbler anytime!
FAQs
How do I know when the cobbler is done?
You can tell when the cobbler is done by looking for a golden brown top. The peach juices should bubble around the edges. A toothpick inserted into the batter should come out clean. This shows that the batter has cooked through and is ready to enjoy.
Can I make Triple Crust Peach Cobbler ahead of time?
Yes, you can make this cobbler ahead of time. Prepare the cobbler and cover it well. Store it in the fridge for up to 24 hours before baking. When ready to bake, let it sit at room temperature for a few minutes, then bake as directed.
What to serve with Triple Crust Peach Cobbler?
I love serving this peach cobbler warm with a scoop of vanilla ice cream. You can also add whipped cream or a drizzle of caramel sauce for extra sweetness. Fresh mint leaves can add a nice touch too. It pairs well with a cup of coffee or tea.You can find it all listed above in the article. Enjoy making this delicious treat!
In this post, we explored how to create a delicious Triple Crust Peach Cobbler. You learned about selecting the right peaches and key pantry staples. I shared step-by-step instructions for making your cobbler. We also covered tips for perfecting the crust and variations for different tastes.
Now, you have the tools and knowledge to bake a tasty treat. Enjoy every bite, share it with loved ones, and make it your own!


![- 2 ripe peaches, cut into wedges - 1 cup cherry tomatoes, rinsed and dried - 1 cup fresh basil leaves, gently washed and dried - 8 oz fresh mozzarella balls (bocconcini), drained - 3 tablespoons balsamic glaze - 2 tablespoons extra-virgin olive oil - Salt and freshly ground black pepper, to taste - 12-15 (6-inch) wooden skewers Peach Caprese skewers blend sweet and savory flavors. The ripe peaches add natural sweetness. Use firm yet soft peaches for the best taste. Cherry tomatoes bring a burst of juiciness. Fresh basil adds aromatic freshness that complements the fruit. For the creamy element, fresh mozzarella balls are ideal. They provide a soft texture and mild flavor. Drizzle balsamic glaze for sweetness and tang. Extra-virgin olive oil enhances all the flavors. You’ll need salt and black pepper to season. They add depth to your dish. Finally, grab some wooden skewers to assemble your tasty bites. For the complete list of ingredients and measurements, refer to the Full Recipe. 1. Cutting peaches into wedges: Start with two ripe peaches. Cut them into even wedges. Make sure they are sweet and juicy for the best flavor. 2. Rinsing cherry tomatoes and drying: Take one cup of cherry tomatoes. Rinse them well under cool water. After rinsing, use a clean towel to dry them gently. This helps keep the skewers from getting soggy. 3. Draining mozzarella balls: Use eight ounces of fresh mozzarella balls. Drain them to remove excess liquid. This keeps the skewers light and fresh. 1. Step-by-step threading process: Grab a six-inch wooden skewer. Start by threading a fresh basil leaf onto the skewer. Then, add a peach wedge. Next, slide on a cherry tomato, followed by a mozzarella ball. 2. Layering pattern for vibrant colors: Repeat the pattern: basil, peach, tomato, mozzarella. This layering creates a colorful and appealing look. Aim for a mix of colors on each skewer. 3. Tips for an appealing presentation: Leave some space at the end of each skewer. This makes them easy to handle. Arrange the finished skewers on a platter or in a jar for a fun touch. 1. Drizzling olive oil: Once your skewers are ready, drizzle them lightly with extra-virgin olive oil. This adds richness and enhances the flavors of the fresh ingredients. 2. Adding seasoning: Sprinkle a little salt and freshly cracked black pepper over the skewers. This adds a nice kick and brings out the taste of each ingredient. 3. Applying balsamic glaze: Finally, drizzle balsamic glaze over the skewers. This sweet and tangy glaze adds a wonderful finish to the dish. For the full recipe, check out the instructions I shared earlier. When making Peach Caprese Skewers, the first step is choosing ripe peaches. Look for peaches that feel slightly soft when you press them. Their color should be vibrant and rich. Ripe peaches add natural sweetness, making your skewers delicious. Next, consider the mozzarella and basil. You want fresh mozzarella balls, called bocconcini. They should be firm and moist. Fresh basil leaves should be bright green and fragrant. If they look wilted, they won't taste good. Using fresh ingredients elevates your dish. For easy skewering, start with a wooden skewer. Grab a fresh basil leaf and thread it onto the skewer first. This helps anchor the other ingredients. Next, add a peach wedge, then a cherry tomato, and finish with a mozzarella ball. Repeat this pattern to create a colorful skewer. To make your skewers visually appealing, mix up the colors. Alternate between peach, tomato, and mozzarella. This creates a beautiful display. You can also arrange the skewers in a jar for a fun presentation. When serving, think about your platter. A large, decorative platter can be eye-catching. You can also arrange the skewers in a tall vase. This adds a unique touch to your table. Pair your Peach Caprese Skewers with drinks like lemonade or sparkling water. They also go well with other appetizers, like bruschetta. This way, you create a delightful spread for your guests. For the full recipe, check out the detailed instructions to help you on your cooking adventure! {{image_4}} You can switch out the peaches for other fruits. Strawberries add sweetness, while figs bring a rich taste. Both work well with the cheese. For cheese, try feta or goat cheese instead of mozzarella. Feta adds a salty kick, while goat cheese offers creaminess. To boost flavors, add spices or herbs. A sprinkle of black pepper can elevate taste. Fresh mint or thyme can also add a nice twist. Experiment with different glazes too. A honey glaze can add sweetness, while a spicy chili glaze can bring heat. You can easily make these skewers vegan. Use tofu or avocado in place of cheese. For low-carb or keto options, skip the fruit and focus on cheese and herbs. Cherry tomatoes still fit well in this version. This allows everyone to enjoy the dish, no matter their diet. To keep your Peach Caprese Skewers fresh, store them in the fridge. Use an airtight container to avoid drying out. Place a damp paper towel inside the container. This helps keep the ingredients moist. Try to eat leftovers within two days for the best taste. Reheat your skewers in a pan on low heat. This warms them gently without losing flavor. Avoid using a microwave, as it can make the cheese rubbery. Heat just until the cheese is warm, about 2-3 minutes. Freezing these skewers is tricky. I do not recommend it because the peaches and mozzarella lose texture. If you must freeze, assemble them without the balsamic glaze. Wrap the skewers tightly in plastic wrap. Store them in a freezer-safe bag. Use within a month for best results. Yes, you can prepare these skewers a few hours in advance. Keep them in the fridge until serving. This helps the flavors blend. - Storage timelines: Store them for up to 4 hours. After that, the peaches may get mushy. - Ingredients that keep well: Mozzarella and cherry tomatoes hold up nicely. Fresh basil gets a bit wilty but will still taste great. For this dish, use yellow or white peaches. Both are sweet and juicy. Yellow peaches have a nice tang, while white peaches are sweeter. - Recommended varieties for sweetness and texture: Look for Freestone peaches. They come off the pit easily and have great flavor. Absolutely! You can mix and match ingredients to fit your taste. Try using different fruits or cheeses. - Suggestions for personalizing flavors and textures: Substitute peaches with strawberries or figs. You can also use feta or goat cheese instead of mozzarella. These skewers are perfect for gatherings. You can set them up on a big platter for guests to grab. - Ideas for large gatherings and events: Arrange them in a tall vase for fun. Add a small bowl of balsamic glaze for dipping. This will impress your guests! For the complete recipe, check out the [Full Recipe]. Peach Caprese skewers bring together fresh produce, creamy mozzarella, and bold flavors. Using ripe peaches, cherry tomatoes, and basil makes them a vibrant choice. Adding olive oil, balsamic glaze, and a touch of seasoning elevates every bite. You can easily swap ingredients for different tastes or dietary needs. Remember, these skewers are fun and simple to make. They are perfect for summer gatherings or a light snack. Enjoy crafting your own skewers, and let your creativity shine!](https://fastmealmate.com/wp-content/uploads/2025/07/b9012ea0-d5e7-459d-b2ed-b5a660c32588-768x768.webp)
. To reheat grilled chicken sliders, I suggest using an oven. Preheat your oven to 350°F. Place the sliders on a baking sheet. Cover them with foil to keep moisture in. Heat for about 10-15 minutes. This keeps the chicken juicy and the buns soft. You can also use a microwave, but they might get soggy. If you choose the microwave, cover the sliders with a damp paper towel. Heat in short bursts of 30 seconds. Check often to avoid overcooking. Yes, you can prep these sliders in advance. First, cook the chicken and let it cool. Then, store it in the fridge for up to two days. To save time, you can also bread the chicken and freeze it. When you're ready to cook, just thaw and grill. This way, you’ll have tasty sliders ready in no time. Assemble them just before serving for the best flavor and texture. Definitely! You can use eggplant or portobello mushrooms instead of chicken. Slice the eggplant or mushrooms thickly. Bread and grill them just like the chicken. Use the same marinara and cheese for that classic taste. You can also try store-bought veggie patties as a quick option. This way, everyone can enjoy delicious sliders, no matter their diet. You now know how to make delicious grilled chicken Parmesan sliders. We covered the ingredients, cooking steps, and tips to ensure success. Remember to use fresh ingredients and monitor the grill for perfect results. These sliders can impress at any meal or gathering. Feel free to experiment with variations to suit your taste. When stored properly, leftovers taste great, too. Enjoy trying this recipe and make it your own. Happy cooking!](https://fastmealmate.com/wp-content/uploads/2025/06/2b1da996-745c-44b5-a796-c9c3c581ce53-768x768.webp)

![Fresh figs are the star of this jam. Choose ripe, sweet figs for the best taste. Look for figs that are soft to the touch and have a deep color. First, wash the figs under cold water. Then, remove the stems and cut them into quarters. This helps them break down easily while cooking. You should have about 2 pounds of prepared figs for this recipe. Sugar is key in making fig jam thick and sweet. It not only adds sweetness but also helps the jam set. As the figs cook, they release their natural juices. The sugar dissolves and mixes with these juices, forming a syrup. This syrup thickens as it cooks, giving your jam that perfect spreadable texture. Use 1 cup of granulated sugar for this recipe. Adding lemon juice brightens the flavor. It helps balance the sweetness of the figs. You’ll need the juice of one lemon, which is about 2 tablespoons. Vanilla extract adds a warm, sweet note. Use just 1/2 teaspoon for a subtle hint. A pinch of sea salt (1/4 teaspoon) enhances all the flavors. Together, these ingredients create a delightful taste in your fig jam. For the full recipe, check out the Sweet Fig Bliss Jam. First, gather your fresh figs. You need 2 lbs of ripe figs. Remove the stems and cut them into quarters. Place them in a large bowl. Add 1 cup of granulated sugar. Squeeze the juice of one lemon into the bowl. This adds a nice zing to the jam. Pour in 1/2 teaspoon of vanilla extract and 1/4 teaspoon of sea salt. Toss everything together gently. Let it sit for about 30 minutes. This resting time helps the figs release their juices, making a sweet syrup. Now, transfer your fig mixture to a medium pot. Place the pot on medium heat. Stir the mixture often. You want the sugar to dissolve fully and the figs to soften. This should take around 10 minutes. Once everything is mixed well, turn the heat to medium-high. Bring the mixture to a gentle boil. Keep stirring regularly for 20 to 30 minutes. Watch closely as it thickens. It’s ready when it looks spreadable and thick. To check the jam's thickness, take a spoonful and place it on a chilled plate. Let it cool for a minute. Run your finger through the jam. If it holds its shape, it’s done. If it’s too runny, cook it a few more minutes. Once it’s just right, take the pot off the heat. Let it cool for about 10 minutes. Then, ladle the warm jam into clean jars. Seal them tightly while they are warm. This helps create a vacuum seal. Allow the jars to cool completely at room temperature. Enjoy your homemade fig jam! To make your fig jam shine, try adding a bit of spice. A dash of cinnamon can bring warmth. You can also add fresh herbs like rosemary for an earthy twist. Another great tip is to let your figs sit with sugar for 30 minutes. This helps to draw out the juices. The more juice, the better the flavor. Don't skip the lemon juice; it balances the sweetness and brightens the taste. If your jam is too runny, don’t worry! Just cook it a bit longer. Keep stirring to prevent burning. Test the consistency by spooning some onto a chilled plate. If it runs, give it more time. If you overcooked it and it’s too thick, you can fix it! Add a little water and reheat gently, stirring to combine. This will bring back some moisture without losing flavor. Sterilizing jars is key to keeping your jam fresh. Start by washing them in hot, soapy water. Rinse well and place them in a large pot of boiling water. Let them boil for 10 minutes. This kills any germs. You can also use your oven. Preheat it to 225°F (110°C) and place clean jars inside for 10-15 minutes. Always fill jars with warm jam to create a good seal. This keeps your fig jam safe and tasty for weeks! Don’t forget to check the [Full Recipe] for all the details! {{image_4}} You can spice up your fig jam easily. Adding a touch of cinnamon gives warmth. Just a pinch can change the flavor. Try adding rosemary for a fresh twist. This herb adds a nice depth. Experimenting with spices makes your jam unique. Mixing figs with other fruits offers fun flavors. You can try adding apples or pears. Their sweetness pairs well with figs. Another option is to use berries. Blueberries or raspberries create a bright taste. This mix can surprise your taste buds. You get more variety and fun in every jar. You can adjust sweetness based on your taste. If granulated sugar is not your choice, try honey or maple syrup. They give a different flavor and health benefits. For lower sugar, use stevia or monk fruit. These options keep the jam sweet without extra calories. Just remember to balance the flavors as you go. You can find the full recipe [here](#). Store your fig jam in clean, sterilized jars. Make sure to seal the jars tightly. I recommend using glass jars, as they help keep the jam fresh. Place the jars in the refrigerator right after they cool down. This keeps your jam tasty and safe to eat. Fig jam lasts about 2-3 weeks in the fridge. If you want to keep it longer, consider freezing it. When frozen, fig jam can last for up to a year. Just remember to label the jars with the date. This way, you’ll know exactly when you made it. Look for signs of spoilage before using your fig jam. If you see mold on the surface, throw it away. If the jam smells off or has an unusual color, it’s best not to eat it. Another sign is if the jam has a change in texture or consistency. Always trust your senses. If something seems off, it’s better to be safe. Yes, you can use frozen figs. Thaw them first and drain any excess liquid. Frozen figs can still taste great. They might be softer, but they will work well in your jam. Just follow the same steps as with fresh figs. Making jam without pectin lets the fruit shine. You get a pure fig flavor. It’s also a simple process. You only need figs, sugar, and a few extras. Plus, you can control the sweetness better. This method gives a lovely, spreadable texture. Leftover fig jam has many uses. Spread it on toast or pancakes for a sweet treat. You can swirl it into yogurt or oatmeal. Use it as a filling for pastries. It also pairs well with cheese on a charcuterie board. The options are endless! For more ideas, check out the Full Recipe for inspiration. This guide shows you how to make fig jam from start to finish. We explored ingredients like fresh figs, sugar, and flavor enhancers. Step-by-step, you learned to prepare and cook the mixture. Tips helped you fix issues and enhance texture. Variations allowed you to play with spices and fruits. Remember to store your jam safely for the best shelf life. Making fig jam can be fun and rewarding. Enjoy sharing your delicious creation with friends and family!](https://fastmealmate.com/wp-content/uploads/2025/06/9fb41919-1a88-423c-ae1c-6a52e554671e-768x768.webp)