If you’re craving a delicious meal that’s both simple and packed with flavor, look no further! Tandoori Chicken Over Rice combines juicy, spiced chicken with fluffy basmati rice for a mouth-watering dish. In this guide, I’ll share easy steps, essential tips, and a few variations to elevate your cooking. Get ready to impress your family and enjoy a taste of India right at home!
Ingredients
Main Ingredients for Tandoori Chicken
– 500g chicken thighs, skinless and boneless
– 1 cup plain yogurt
– 2 tablespoons tandoori masala
– 1 tablespoon lemon juice
– 1 tablespoon ginger-garlic paste
– 1 teaspoon turmeric powder
– 1 teaspoon cumin powder
– Salt to taste
Tandoori chicken is all about the marinade. I love using skinless chicken thighs for their rich taste and juiciness. The plain yogurt forms a creamy base and helps the spices stick. Tandoori masala is the star here, giving it that deep flavor. Lemon juice brightens the dish, while ginger-garlic paste adds warmth. Turmeric and cumin bring earthiness and depth. Don’t forget the salt; it ties everything together.
Ingredients for Rice
– 2 cups basmati rice
– 4 cups water
– 1 tablespoon vegetable oil
Basmati rice is perfect for this dish. It’s fluffy and has a nice nutty taste. Rinsing the rice is key; it removes extra starch and makes it less sticky. I use water and a bit of vegetable oil to cook the rice. This keeps it light and fluffy.
Garnishing Ingredients
– Fresh cilantro, chopped (for garnish)
– Lemon wedges (for serving)
Garnishing adds a pop of color and freshness. Fresh cilantro brightens the dish and complements the spices. Lemon wedges give you a tangy kick right when you need it. It’s a simple touch, but it makes a big difference.
Step-by-Step Instructions
Preparing the Chicken Marinade
To start, you need to mix the yogurt and spices. In a large bowl, whisk together 1 cup of plain yogurt, 2 tablespoons of tandoori masala, 1 tablespoon of lemon juice, 1 tablespoon of ginger-garlic paste, 1 teaspoon of turmeric powder, 1 teaspoon of cumin powder, and salt to taste. This mixture creates a smooth and tasty marinade.
Now, it’s time to marinate the chicken. Add 500 grams of skinless, boneless chicken thighs to the bowl. Make sure every piece is coated well with the marinade. Cover the bowl with plastic wrap or a lid. Place it in the refrigerator for at least 1 hour. For the best flavor, let it marinate overnight.
Cooking the Tandoori Chicken
Next, preheat your oven to 220°C (428°F). Take the marinated chicken out of the fridge. Arrange the chicken thighs on a baking sheet lined with parchment paper. Bake them for 25 to 30 minutes. This ensures the chicken cooks fully and gets a nice char. Flip the chicken halfway through cooking for even results.
Cooking the Basmati Rice
While the chicken bakes, rinse the basmati rice. Use a fine-mesh sieve or bowl. Rinse until the water runs clear. This step removes extra starch and makes the rice fluffy.
In a medium saucepan, heat 1 tablespoon of vegetable oil over medium heat. Once hot, add the rinsed basmati rice. Sauté for 2 to 3 minutes. Stir occasionally until the rice is lightly toasted and smells great.
Now, add 4 cups of water to the saucepan. Raise the heat until it boils. Then reduce to low heat, cover with a tight-fitting lid, and simmer for 15 minutes. The rice will absorb all the water and become fluffy.
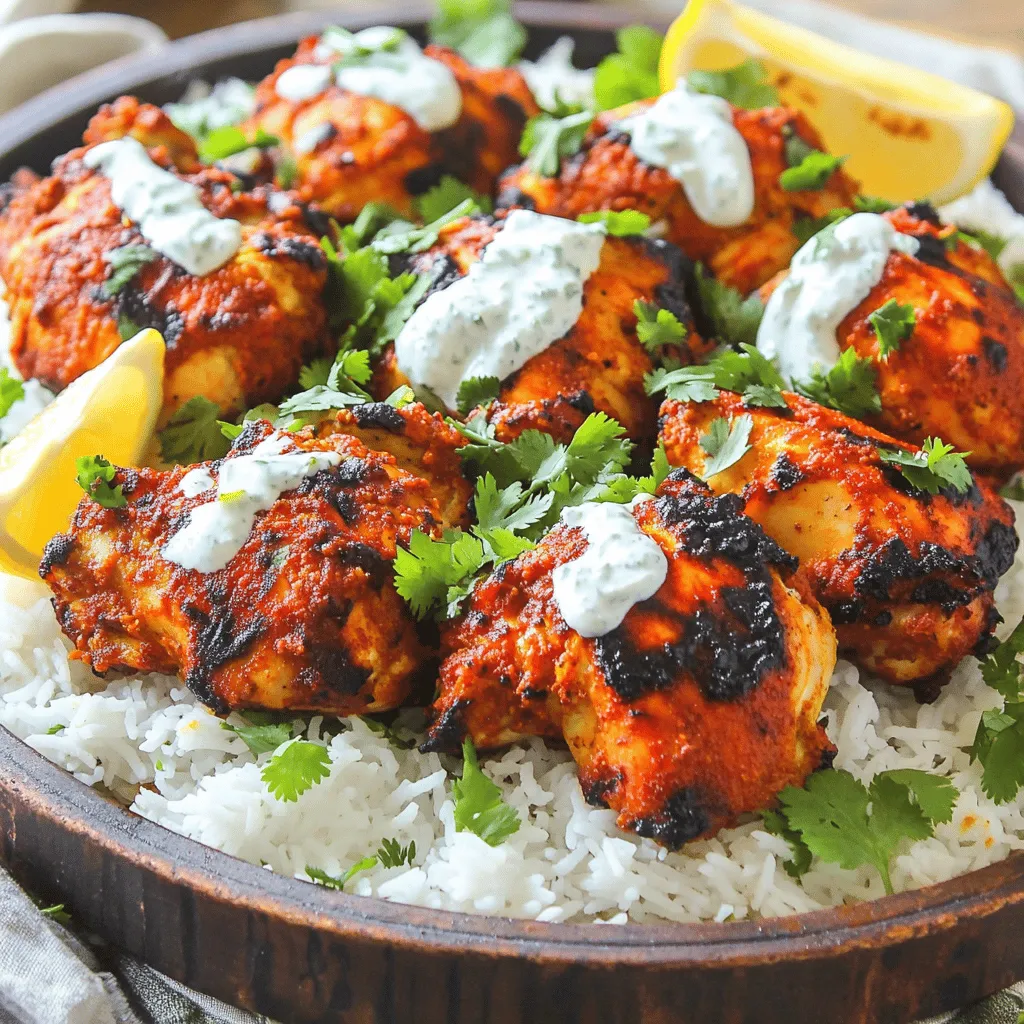
Once the chicken is done, let it rest for 5 minutes. Slice it into strips to make it easy to eat. Serve a generous scoop of fluffy basmati rice on each plate. Layer the sliced tandoori chicken on top. Garnish with fresh cilantro and lemon wedges for added flavor.
Tips & Tricks
Achieving Authentic Flavors
Marinating your chicken is key for great taste. It helps the spices soak in deeply. Use plain yogurt as a base. This makes the chicken tender and juicy. I always add freshly squeezed lemon juice. It brightens the flavors and adds a nice tang.
Cooking Tips
To check if the chicken is done, use a meat thermometer. The internal temperature should reach 75°C (165°F). This ensures the chicken is safe to eat. For fluffy rice, rinse the basmati rice well in cold water. This removes excess starch. Toast the rice in oil for a few minutes before boiling. This adds flavor and helps keep the grains separate.
Serving Suggestions
For a lovely presentation, use a large platter. Start with a base of fluffy rice. Then, layer the sliced tandoori chicken on top. Garnish with chopped cilantro and lemon wedges. These add color and freshness. You can pair this dish with a simple cucumber salad or yogurt sauce. Both complement the spicy chicken well.

Variations
Spicy Tandoori Chicken
You can make your tandoori chicken hotter. Just adjust the spice levels to suit your taste. Adding chili powder is a simple way to kick up the heat. Start with a small amount, then taste and adjust. This way, you control the spice without overwhelming the dish.
Vegetarian Alternatives
Not everyone eats meat, and that’s okay! You can swap chicken for paneer. Paneer absorbs flavors well and gives a nice texture. Another option is using chickpeas. Cook them until soft for good protein. Both options make a tasty and filling meal.
Rice Variations
Rice can be more than just a side. Try coconut rice for a sweet twist. Just cook the rice with coconut milk instead of water. You can also add vegetables like peas or carrots. This makes the rice colorful and adds nutrients. These variations make your meal even more exciting!
Storage Info
Storing Leftovers
To keep your tandoori chicken fresh, store it in an airtight container. Place it in the fridge right after the meal. This method helps keep the flavors intact. For best results, use the chicken within three days. If you want to save it for longer, freezing is a great option. Wrap the chicken tightly in plastic wrap and then place it in a freezer bag. This way, it won’t get freezer burn.
Reheating Instructions
When reheating, the oven works best. Preheat it to 180°C (350°F). Place the chicken on a baking sheet, cover it with foil, and heat for about 15 minutes. This keeps the chicken moist and flavorful. You can also use a microwave, but it may dry out the chicken. If you choose the microwave, add a splash of water to help keep moisture.
Shelf Life
Tandoori chicken can last in the fridge for up to three days. If frozen, it can last for about three months. Remember to check for any off smells or changes in texture before eating. Always prioritize your health and safety when it comes to food storage.
FAQs
Can I marinate the chicken overnight?
Yes, marinating chicken overnight is a great idea. It allows the flavors to soak deep into the meat. This makes the chicken more tender and juicy. Longer marination enhances the taste and gives you a richer flavor. It also helps develop that nice char during cooking. If you’re short on time, even a one-hour marinade works, but the overnight method truly shines.
What can I use instead of tandoori masala?
If you can’t find tandoori masala, don’t worry! You can create a simple spice mix at home. Combine these spices for a tasty alternative:
– 1 teaspoon cumin
– 1 teaspoon coriander
– 1 teaspoon paprika
– ½ teaspoon turmeric
– ½ teaspoon garam masala
– Salt to taste
This blend will give you a similar warmth and depth of flavor. Feel free to adjust the spices based on your taste.
Is this dish gluten-free?
Yes, tandoori chicken over rice is naturally gluten-free. The main ingredients, like chicken, yogurt, and basmati rice, do not contain gluten. Just be sure to check the labels on your yogurt and spices. Some pre-packaged spices may have gluten as a filler. Always confirm that your ingredients are safe for your dietary needs.
You’ve learned how to make a tasty tandoori chicken meal. We discussed the key ingredients like chicken, yogurt, and spices. You also saw the step-by-step process for marinating and cooking. Tips for perfect rice and serving ideas can elevate your dish. Remember, variations exist for spice and vegetarian options. Storing and reheating properly helps keep flavors fresh. Enjoy experimenting and mastering this delicious recipe! Happy cooking!


