Skip to content
About
Contact
Cookie Policy
Copyright Policy
Disclaimer
Search
Home
Dinner
Appetizer
Desserts
Drinks
About
Contact
Privacy Policy
Toggle Menu
Home
/
NO-ING-IMG
- Page 52
NO-ING-IMG
Crispy Hot Honey Chicken Simple and Flavorful Meal
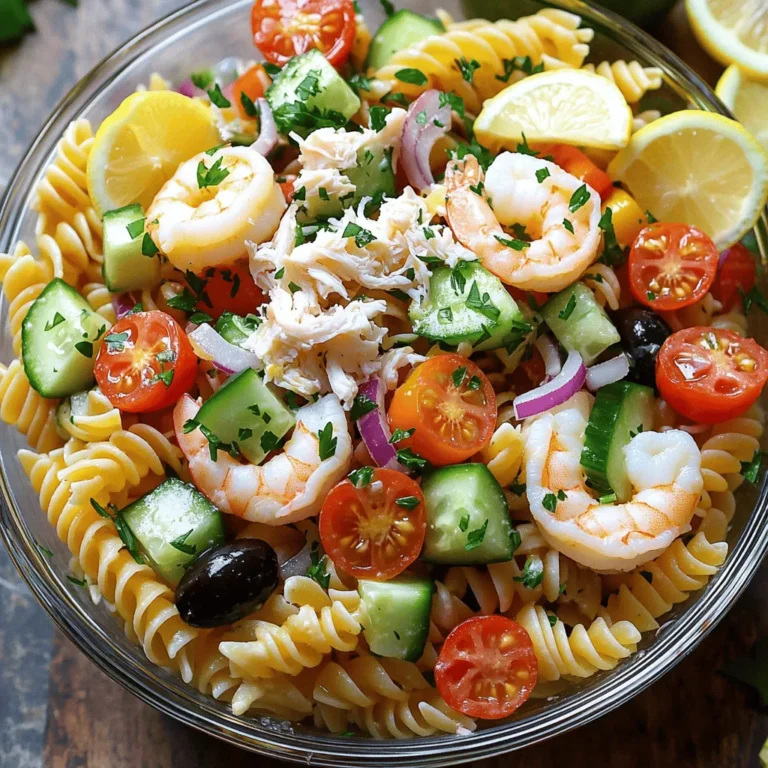
Seafood Pasta Salad with Crab and Shrimp Delight
Corned Beef Hash Flavorful and Hearty Breakfast Dish
Southern Thanksgiving Spread Flavorful and Easy Guide
Cheesesteak Tortellini Bliss Flavorful and Easy Recipe
Sweet and Savory Honey Garlic Wings Irresistible Dish
Easy Sticky Garlic Chicken Tasty and Quick Dish
Nashville Hot Beef Mozzarella Sticks Flavorful Snack
Cheesy Mozzarella Biscuit Delights Simple Recipe
20-Minute Couscous Quick and Flavorful Meal Idea
Page navigation
Previous Page
Previous
1
…
50
51
52
53
54
…
62
Next Page
Next
Home
Dinner
Appetizer
Desserts
Drinks
About
Contact
Privacy Policy
Toggle Menu Close
Search for:
Search


![- Cheese tortellini - Flank steak - Provolone cheese The main stars of Cheesesteak Tortellini Bliss are cheese tortellini, flank steak, and provolone cheese. The cheese tortellini adds a rich, creamy texture. Flank steak gives a hearty, meaty flavor. Provolone cheese melts beautifully, making everything delightfully gooey. - Green bell pepper - Onion - Garlic Next, we have the veggies. The green bell pepper adds a nice crunch and sweetness. Onions bring out a savory note when sautéed. Garlic adds a burst of flavor that elevates the dish. Together, they create a great base for our cheesesteak twist. - Beef broth - Worcestershire sauce - Olive oil Now, let’s talk about the liquids. Beef broth adds depth and richness to the sauce. Worcestershire sauce brings umami and a hint of tang. Olive oil helps to sear the steak and sauté the veggies, making everything come together nicely. For the full recipe, check the [Full Recipe]. To start, fill a large pot with water. Add a generous pinch of salt. Bring the water to a rolling boil. Once it boils, gently add the cheese tortellini. Cook according to the package instructions, usually about 3-5 minutes. You want the tortellini to be al dente, not too soft. After cooking, drain the tortellini in a colander. Keep it warm by covering it with a kitchen towel while you prepare the rest. Next, heat a large skillet over medium-high heat. Add one tablespoon of olive oil to the hot skillet. Season the thinly sliced flank steak with salt and pepper. Make sure to coat all sides. Carefully place the steak slices in the skillet. Avoid overcrowding the pan, as this will steam the meat. Sear for about 3-4 minutes on each side. You want a golden-brown crust to form. Once cooked, remove the steak from the skillet and place it on a plate. Cover it loosely with foil to keep it warm. In the same skillet, add the sliced green bell pepper and onion. Don’t clean the skillet; this adds flavor. Sauté the vegetables over medium heat for about 5 minutes. You want them to soften and start to caramelize. Stir occasionally to prevent burning. Once they are soft, add the minced garlic. Cook for another minute, just until fragrant. Be careful not to let the garlic burn, as it can turn bitter. Now, you are ready to move on to combining all the tasty elements! For the complete recipe, check out the Full Recipe. To get the best flavor from your steak, sear it well. Here are my tips: - Heat your skillet: Use a large skillet and heat it to medium-high. This helps create a great crust on the steak. - Don’t overcrowd: Place only a few slices in the pan at once. This keeps the heat high and allows each piece to sear nicely. - Check doneness: For a medium-rare steak, aim for a temperature of 130-135°F. Use a meat thermometer for accuracy. Understanding how you like your steak cooked is key. Here’s a quick guide: - Rare: 120-125°F - Medium-rare: 130-135°F - Medium: 140-145°F - Medium-well: 150-155°F - Well-done: 160°F and above Want to take your cheesesteak tortellini to the next level? Try these flavor tips: - Add spices: A pinch of smoked paprika or crushed red pepper can give it a nice kick. - Experiment with herbs: Fresh thyme or oregano adds a lovely aroma. - Pair with sides: Serve with a fresh salad or garlic bread for a complete meal. The crunch balances the creamy tortellini. Cooking can have its hiccups. Here’s how to avoid common problems: - Overcooked tortellini: Keep an eye on the cooking time. Drain them as soon as they are al dente. This usually takes about 3-5 minutes. - Clumpy cheese: If your cheese gets clumpy, add a splash of milk or broth. This helps it melt evenly. For the full recipe of Cheesesteak Tortellini Bliss, check out the details shared above! {{image_4}} You can change this recipe with different proteins. If you want a lighter option, use chicken or turkey. Ground beef also works well in this dish. For a vegetarian twist, try mushrooms or tofu. These swaps keep the flavor rich and satisfying. Cheese is another area for creativity. Provolone is classic, but you can try cheddar for a sharper taste. Gouda adds a smoky feel, while mozzarella gives a creamy texture. Mix and match to find your favorite combo. Need gluten-free options? You can find gluten-free tortellini at many stores. Just check the package to ensure it fits your needs. Use cornstarch or arrowroot instead of regular flour to thicken the sauce. Dairy-free? Swap provolone for vegan cheese. There are many tasty brands that melt well. You can also use nutritional yeast for a cheesy flavor without the dairy. Want to switch up the presentation? Turn this dish into a baked delight. Transfer everything to a baking dish. Top it with more cheese and bake until golden and bubbly. This makes for a cozy meal perfect for sharing. Looking for a lighter option? Serve the cheesesteak tortellini as a salad. Toss it with greens, tomatoes, and a light dressing. This turns your dish into a fresh and vibrant meal option, perfect for warm days. For the full recipe, check the details above. After you enjoy your cheesesteak tortellini, store leftovers right away. Let the dish cool down for about 30 minutes. Avoid leaving it out longer, as this can cause bacteria to grow. Use airtight containers to keep your meal fresh. Store it in your fridge for up to three days. To freeze the cheesesteak tortellini, first, let it cool completely. Transfer it into freezer-safe containers or bags. Make sure to remove as much air as possible to avoid freezer burn. You can keep it frozen for up to three months. When you're ready to eat, thaw it overnight in the fridge. Reheat it gently on the stove over low heat, adding a splash of beef broth to keep it moist. Stir often to ensure even heating. Enjoy your delicious meal just like the first time! For the complete cooking instructions, check the Full Recipe. To cook tortellini, first, boil a large pot of water. Add salt to the water for flavor. When the water boils, add the cheese tortellini. Cook them according to the package instructions, usually around 3-5 minutes. Make sure they are al dente, which means they should be firm but cooked through. Drain the tortellini in a colander and keep them warm. This step ensures they stay soft and tasty for your dish. You can prepare Cheesesteak Tortellini Bliss ahead of time! Cook the tortellini and steak as directed, then let them cool. Store the dish in an airtight container in the fridge. When you're ready to eat, reheat it on the stove over medium heat. Add a splash of broth to keep it moist. Stir until everything is warm, and enjoy! This makes it easy for busy days. You can easily customize the flavors in this recipe! Try adding different vegetables like mushrooms or spinach for a twist. Swap the flank steak for chicken or shrimp if you want. For a spicier kick, add red pepper flakes or diced jalapeños. You can also mix in different cheeses like cheddar or mozzarella. Get creative and make this dish your own! This blog post covered a delicious recipe combining cheese tortellini and flank steak. You learned about essential ingredients, such as provolone cheese and beef broth. I shared steps for cooking beautiful tortellini and flavor-packed steak with sautéed veggies. Tips for perfecting your dish and creative variations ensured your meal stands out. In conclusion, enjoy the flexibility of this recipe. Please feel free to customize it to fit your tastes. Happy cooking!](https://fastmealmate.com/wp-content/uploads/2025/06/d6ee9c88-ae52-41f7-bd2d-f571c0560d46-768x768.webp)


![To create a delightful 20-minute couscous, you need a few simple ingredients. Here’s what you will need: - 1 cup couscous - 1 ¼ cups vegetable broth (or water) - 1 cup cherry tomatoes, halved - 1 small cucumber, diced into small cubes - ½ red onion, finely chopped - ½ cup Kalamata olives, pitted and sliced into rings - 1 cup fresh spinach, roughly chopped - ¼ cup feta cheese, crumbled - 2 tablespoons extra virgin olive oil - 1 tablespoon fresh lemon juice - 1 teaspoon dried oregano - Salt and freshly ground black pepper to taste These ingredients bring a burst of flavor and color to your meal. Couscous cooks fast and absorbs the broth well, making it fluffy. The cherry tomatoes and cucumber add crunch, while olives give a salty kick. Fresh spinach provides nutrients, and feta cheese adds creaminess. Use good olive oil and fresh lemon juice for a bright taste. This mix of flavors makes your dish fresh and inviting. For the detailed recipe, check out the Full Recipe section. To start, bring 1 ¼ cups of vegetable broth or water to a rolling boil in a saucepan. This step is crucial for cooking the couscous properly. Once the liquid bubbles up, remove the pan from the heat. Stir in 1 cup of couscous and cover the pan with a lid. Let it sit for 5 minutes. This allows the couscous to absorb all the liquid, making it fluffy and light. While the couscous cooks, grab a large mixing bowl. Combine 1 cup of halved cherry tomatoes, 1 small diced cucumber, ½ finely chopped red onion, and ½ cup of sliced Kalamata olives. Toss in 1 cup of roughly chopped fresh spinach. Mixing these colorful veggies adds crunch and freshness to your meal. In a small bowl, whisk together 2 tablespoons of extra virgin olive oil, 1 tablespoon of fresh lemon juice, and 1 teaspoon of dried oregano. Add a pinch of salt and pepper to taste. This dressing brings all the flavors together and enhances the dish's brightness. Pour the dressing over the vegetable mix and toss gently. This helps each piece get coated well. Next, fluff the couscous with a fork, breaking apart any clumps. Add the fluffed couscous to the veggie mixture and stir until everything is mixed evenly. To finish, sprinkle ¼ cup of crumbled feta cheese on top. This adds a nice salty bite and creamy texture to the dish. Check the [Full Recipe] for all details. To make your couscous extra tasty, add fresh herbs like parsley or cilantro. You can also try spices like cumin or paprika for more depth. Feel free to swap feta cheese with goat cheese or even mozzarella if you prefer. Each cheese brings its own flavor and texture to the dish. For the best fluff, always use a fork to fluff your couscous. This helps break up any clumps. When cutting vegetables, try to make them uniform in size. This way, they cook evenly and look nice in your dish. Serve your couscous in colorful bowls to make it pop. You can also spread it on a large platter for a family-style meal. For a finishing touch, sprinkle extra crumbled feta and fresh herbs on top. This adds color and makes the dish more inviting. {{image_4}} You can change up the recipe in many ways. Use seasonal vegetables for a fresh twist. Think about adding bell peppers, zucchini, or even asparagus. These veggies add color and flavor to your dish. Protein is another way to mix things up. Chickpeas are great for a plant-based option. They add a nice texture and protein boost. Grilled chicken is another good choice if you want meat. It pairs well with the other flavors in couscous. The flavor can shift based on your ingredients. A Mediterranean style is bright and fresh. Use herbs like basil, parsley, or mint for a burst of taste. On the other hand, a Middle Eastern twist adds warmth. Spices like cumin or coriander can really change the game. Dressings also play a big role. You can use a tangy vinaigrette or a creamy yogurt dressing. Each option gives the dish a new taste profile. Experiment with what you like best. If you're looking for gluten-free options, consider quinoa or rice. Both work well in place of couscous. They provide a similar texture and are easy to cook. For vegan meals, swap out the cheese and broth. Use a plant-based broth and nuts or seeds instead of cheese. Nutritional yeast can give a cheesy flavor without dairy. These changes keep the dish tasty and suitable for all diets. To keep your leftover couscous fresh, use airtight containers. Glass containers work great, as they do not absorb smells. Plastic containers are also fine if they are good quality. Make sure to cool the couscous completely before sealing the container. This reduces moisture inside and keeps it from getting soggy. When refrigerating, store couscous within two hours of cooking. This helps prevent bacteria growth. Place it in the fridge right away. If you plan to eat it later, consider separating it from any dressing or veggies. This keeps the couscous from becoming mushy. Reheating couscous is easy. The best method is to use the microwave. Start by placing your couscous in a microwave-safe bowl. Add a few drops of water to keep it moist. Cover it with a damp paper towel and heat for 1-2 minutes. Stir halfway through for even heat. You can also reheat couscous on the stove. Add a splash of water to a pan over low heat. Stir often until warm. This method helps keep the couscous fluffy. Avoid high heat, as it may dry out the grains. When stored properly, couscous lasts about 3 to 5 days in the fridge. Check for any signs of spoilage before eating. If you see mold or a sour smell, it's best to throw it away. Fresh couscous should have a light, fluffy texture. If it feels hard or clumpy, it may have gone bad. Always trust your senses when deciding whether to eat leftovers. You can tell when couscous is done by its texture. Perfectly cooked couscous is light and fluffy. It should not be sticky or mushy. After letting it sit, fluff it with a fork. This helps break up clumps and adds air. Yes, you can meal prep couscous. Cook it in advance and store it in the fridge. It keeps well for three to five days. Just make sure to let it cool before storing. You can add your veggies and dressing just before eating. This keeps the flavors fresh. Couscous pairs well with many dishes. You can serve it with grilled chicken or fish. A fresh salad is a great side too. Roasted vegetables add nice flavor. You can also enjoy it with hummus or tzatziki for a dip. Check out the " Speedy Mediterranean Couscous Delight" for the detailed recipe and enjoy this quick meal! This blog post guides you to make a tasty Mediterranean couscous dish. We covered the key ingredients, step-by-step cooking instructions, and helpful tips to enhance flavor. Remember, you can mix in different veggies or proteins to make it your own. Storing and reheating couscous is easy, too, so enjoy your leftovers! This simple recipe is perfect for meal prep or a quick dinner. You’re now set to impress your family and friends with this delightful dish. Dive in, create, and enjoy every bite!](https://fastmealmate.com/wp-content/uploads/2025/06/3a323c96-3f14-4a25-b011-50d8f6184ffe-768x768.webp)