Skip to content
About
Contact
Cookie Policy
Copyright Policy
Disclaimer
Search
Home
Dinner
Appetizer
Desserts
Drinks
About
Contact
Privacy Policy
Toggle Menu
Home
/
NO-ING-IMG
- Page 51
NO-ING-IMG
Cheeseburger Sliders Juicy and Flavorful Delight
Southern Homemade Butter Beans Flavorful and Simple Dish
Hershey’s Chocolate Fudge Simple and Tasty Recipe
Vegetarian Dinners for Easy Cleanup Delight
Texas Sheet Cake Easy Recipe and Tips for Success
Garlic Butter Scallop and Shrimp Pasta Delight
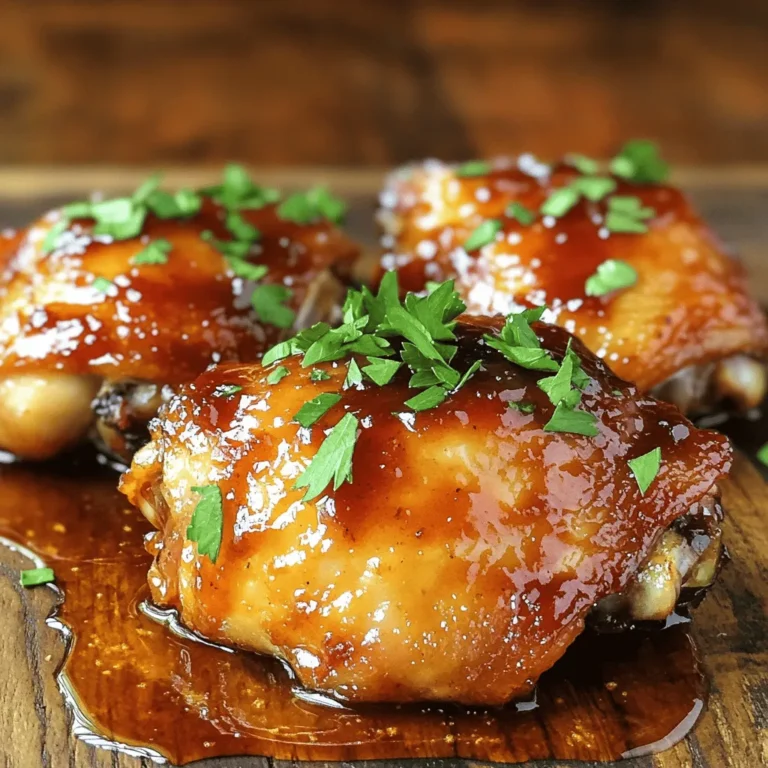
Irresistible Honey BBQ Chicken Quick and Easy Recipe
Grilled Chicken Parmesan Sliders Tasty and Simple Recipe
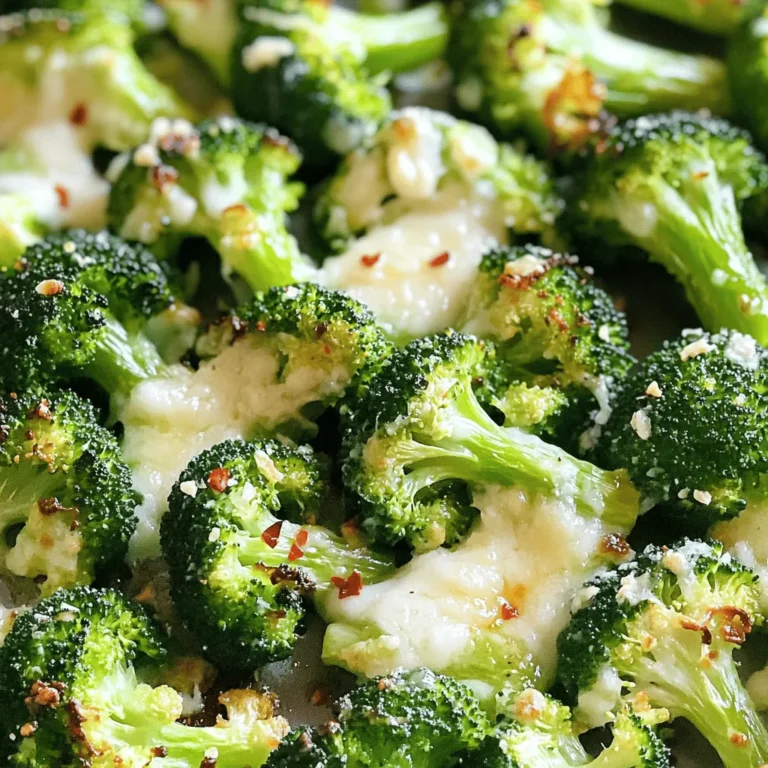
Easy Roasted Broccoli Simple and Flavorful Dish
Eggless Pancakes Fluffy and Easy to Make Recipe
Page navigation
Previous Page
Previous
1
…
49
50
51
52
53
…
62
Next Page
Next
Home
Dinner
Appetizer
Desserts
Drinks
About
Contact
Privacy Policy
Toggle Menu Close
Search for:
Search


![Here is everything you need for this tasty dish: - 8 oz spaghetti or fettuccine pasta - 1 lb fresh scallops, cleaned and patted dry - 1 lb shrimp, peeled and deveined - 6 tablespoons unsalted butter - 4 cloves garlic, finely minced - 1 teaspoon red pepper flakes (optional for heat) - 1 cup cherry tomatoes, halved - 1 medium lemon, zested and juiced - 1/4 cup fresh parsley, chopped - Salt and freshly ground black pepper to taste - Grated Parmesan cheese, for serving Fresh, quality ingredients make a big difference. The pasta forms the base and gives the dish its heart. Scallops and shrimp add a rich flavor that makes each bite special. Garlic brings out the best in seafood, while the lemon brightens everything. Don't forget the fresh parsley for a pop of color and taste. For those who like a little kick, red pepper flakes can be a nice touch. Using these ingredients, you can create a beautiful meal that impresses friends and family. Check the [Full Recipe] for detailed steps to follow. Enjoy cooking! To make perfect pasta, start with a big pot of salted water. Bring it to a rolling boil. Add 8 oz of spaghetti or fettuccine and cook it until al dente. This usually means cooking it for about 1-2 minutes less than the package says. Before you drain the pasta, save 1 cup of the starchy pasta water. This water helps the sauce stick later. After reserving the water, drain the pasta and set it aside. For great seared scallops, use a hot skillet. Melt 3 tablespoons of unsalted butter over medium-high heat. Season 1 lb of cleaned scallops with salt and pepper. When the butter is sizzling, gently add the scallops. Sear them for 2-3 minutes on each side. They should be golden brown and opaque. Once done, take them out and place them on a plate. In the same skillet, lower the heat to medium and add the rest of the butter. Wait until it melts, then add 4 cloves of finely minced garlic and 1 teaspoon of red pepper flakes if you like heat. Sauté for about 30 seconds until the garlic smells great. Now, toss in 1 lb of peeled and deveined shrimp. Cook for 2-3 minutes, stirring often, until the shrimp turn pink. Next, add 1 cup of halved cherry tomatoes to the skillet. Cook for another minute until the tomatoes soften. Return the seared scallops to the pan. Squeeze the juice from 1 medium lemon over everything, and add the lemon zest. Stir gently to mix the flavors well. Now for the fun part! Add the cooked pasta to the skillet. Toss everything together so the pasta gets coated in the garlic butter sauce. If the sauce feels too thick, add some of the reserved pasta water slowly until you like the consistency. Make sure the pasta is evenly coated. Fold in 1/4 cup of chopped fresh parsley. Taste your dish and adjust the salt and pepper if needed. Serve the pasta hot. For an elegant touch, sprinkle grated Parmesan cheese on top. You can also add a sprig of parsley and a lemon wedge for a nice look. Enjoy this meal that combines so many amazing flavors! Check out the Full Recipe for detailed steps. - Recommended cooking times: For scallops, cook 2-3 minutes per side. Shrimp need about 2-3 minutes until pink. Pasta should be al dente, usually around 8-10 minutes. - Adjusting spice levels: If you like heat, add more red pepper flakes. For milder flavor, leave them out or reduce the amount. - Best pans for searing: Use a large skillet with a heavy bottom or cast iron. These help get a good sear on scallops and shrimp. - Essential tools for pasta preparation: A large pot for boiling pasta and a colander for draining are key. Tongs work great for tossing pasta with sauce. - Suggested wines to pair: A crisp white wine, like Sauvignon Blanc, complements the seafood well. You can also try a light Pinot Grigio. - Additional herbs and spices to try: Fresh basil or thyme can add a nice twist. A touch of smoked paprika gives a unique flavor boost. For the full recipe, check out the details above. {{image_4}} You can easily swap the seafood in this dish. Try using fish like cod or halibut. These options give a nice, flaky texture. You can also use lobster or crab for a more luxurious feel. If you prefer a lighter dish, switch to shrimp and scallops only. For a vegan or vegetarian twist, use mushrooms instead of seafood. Portobello or oyster mushrooms can add a meaty texture. You can also use firm tofu. This change keeps the dish flavorful while being plant-based. Cheese can change the flavor of this pasta. Adding feta cheese gives a tangy taste. Creamy goat cheese adds richness, while a sharp blue cheese brings boldness. Each cheese will create a unique twist. Incorporating seasonal vegetables can also enhance the dish. Fresh asparagus or zucchini adds crunch and color. You can toss in spinach or arugula for a touch of green. These veggies make the pasta healthier and more vibrant. If gluten is a concern, try gluten-free pasta. Options like brown rice or quinoa pasta work well. They will absorb the garlic butter sauce nicely without losing flavor. You can also switch up the noodles. Instead of spaghetti or fettuccine, use penne or linguine. Each type of noodle will give a different eating experience. Just make sure to adjust cooking times as needed. For the full recipe, check the section above! To keep your garlic butter scallop and shrimp pasta fresh, follow these steps: - Refrigeration: Place leftovers in an airtight container. Store them in the fridge for up to 3 days. This keeps the flavors intact and prevents spoilage. - Freezing: If you want to freeze, use a freezer-safe container. This dish can stay frozen for up to 2 months. However, scallops and shrimp may lose some texture when thawed. To enjoy your pasta again, use these reheating methods: - Best Method: Heat the pasta in a skillet over low heat. Add a splash of water or broth to prevent sticking. Stir gently until warmed through. - Refreshing Flavors: To boost the taste, add a little fresh garlic or a squeeze of lemon juice while reheating. This brings back the vibrant flavors of the dish. For the full recipe and more cooking tips, refer to the Full Recipe provided above. Garlic butter scallop and shrimp pasta can last up to three days in the fridge. Store it in an airtight container to keep it fresh. Always check for any off smells or changes in texture before eating. Yes, you can make garlic butter scallop and shrimp pasta ahead of time. Cook the pasta and seafood, then store them separately. Mix them together right before serving for the best taste and texture. You can serve garlic butter scallop and shrimp pasta with: - A simple green salad - Garlic bread - Roasted vegetables - A light white wine, like Sauvignon Blanc These sides balance the rich flavors of the pasta. To reheat the pasta, use a skillet over low heat. Add a splash of water or broth to keep it moist. Stir gently until heated through. This method helps maintain the dish's creamy texture. You can enhance garlic butter scallop and shrimp pasta with these spices: - Fresh basil for a sweet touch - Thyme for earthiness - Oregano for a hint of warmth - Black pepper for a little kick - A pinch of paprika for color and depth These spices can boost flavor and create a unique twist. For the full recipe, check the section above. This dish of garlic butter scallop and shrimp pasta combines fresh seafood with rich flavors. We covered the key ingredients, tips for cooking pasta, and how to perfect your dish. Remember to adjust spice levels to suit your taste. You can try different seafood or pasta types for fun twists. This recipe is easy to follow and great for impressing guests. Enjoy every bite and share it with family and friends for a delightful meal experience. Happy cooking!](https://fastmealmate.com/wp-content/uploads/2025/06/494cb207-4638-4860-b24c-000c711884e6-768x768.webp)
. To reheat grilled chicken sliders, I suggest using an oven. Preheat your oven to 350°F. Place the sliders on a baking sheet. Cover them with foil to keep moisture in. Heat for about 10-15 minutes. This keeps the chicken juicy and the buns soft. You can also use a microwave, but they might get soggy. If you choose the microwave, cover the sliders with a damp paper towel. Heat in short bursts of 30 seconds. Check often to avoid overcooking. Yes, you can prep these sliders in advance. First, cook the chicken and let it cool. Then, store it in the fridge for up to two days. To save time, you can also bread the chicken and freeze it. When you're ready to cook, just thaw and grill. This way, you’ll have tasty sliders ready in no time. Assemble them just before serving for the best flavor and texture. Definitely! You can use eggplant or portobello mushrooms instead of chicken. Slice the eggplant or mushrooms thickly. Bread and grill them just like the chicken. Use the same marinara and cheese for that classic taste. You can also try store-bought veggie patties as a quick option. This way, everyone can enjoy delicious sliders, no matter their diet. You now know how to make delicious grilled chicken Parmesan sliders. We covered the ingredients, cooking steps, and tips to ensure success. Remember to use fresh ingredients and monitor the grill for perfect results. These sliders can impress at any meal or gathering. Feel free to experiment with variations to suit your taste. When stored properly, leftovers taste great, too. Enjoy trying this recipe and make it your own. Happy cooking!](https://fastmealmate.com/wp-content/uploads/2025/06/2b1da996-745c-44b5-a796-c9c3c581ce53-768x768.webp)
![To make my fluffy eggless pancakes, gather these key ingredients: - 1 cup all-purpose flour - 1 tablespoon granulated sugar - 1 tablespoon baking powder - 1/8 teaspoon fine sea salt - 1 cup milk (you can use plant-based milk) - 2 tablespoons vegetable oil (or melted coconut oil) - 1 teaspoon pure vanilla extract - Optional toppings: fresh seasonal fruits, maple syrup, whipped cream, or chocolate chips These ingredients work together to create a fluffy and tasty pancake that everyone will love. If you lack any of the ingredients, don't worry! Here are some easy swaps: - All-purpose flour: Use whole wheat flour for added fiber. - Granulated sugar: Try maple syrup or honey for a natural sweetener. - Milk: Almond, soy, or oat milk work just as well. - Vegetable oil: Applesauce can replace oil for a lower-fat option. These substitutes keep your pancakes delicious while catering to various diets. Toppings can take your pancakes to the next level. Here are some ideas you might enjoy: - Fresh seasonal fruits like berries or bananas - A drizzle of maple syrup for natural sweetness - A dollop of whipped cream for richness - A sprinkle of chocolate chips for a sweet twist Feel free to mix and match these toppings. They add flavor and fun to your eggless pancakes. Enjoy your creation with your favorite additions! 1. First, sift together: - 1 cup all-purpose flour - 1 tablespoon granulated sugar - 1 tablespoon baking powder - 1/8 teaspoon fine sea salt This helps mix the dry ingredients well. Sifting also adds air, making your pancakes lighter. 2. In another bowl, whisk together: - 1 cup milk (you can use plant-based milk) - 2 tablespoons vegetable oil (or melted coconut oil) - 1 teaspoon pure vanilla extract Mix until smooth. This step adds flavor and moisture to your batter. 3. Pour the wet mixture into the dry ingredients. Gently fold the batter using a spatula or whisk. 4. It’s okay if there are lumps. This keeps your pancakes fluffy! - Preheat your non-stick skillet or griddle over medium heat. - Lightly grease with a small amount of oil or cooking spray to prevent sticking. - For each pancake, pour about 1/4 cup of the batter onto the hot skillet. - Watch for bubbles on the surface. This shows they are ready to flip. It takes about 2-3 minutes. - Carefully flip each pancake using a spatula. Cook for 1-2 more minutes until golden brown. - If they cook too fast, lower the heat. You want them cooked through but fluffy! - Look for a light golden color on both sides. - The pancakes should feel soft and spring back when touched. - If they are thick and fluffy, that means you nailed it! Serve warm with your favorite toppings. Enjoy your fluffy eggless pancakes and check out the Full Recipe for more tips! To make eggless pancakes fluffy, you need the right mix. The key is using baking powder. It acts as a leavening agent, helping your pancakes rise. Mixing dry and wet ingredients separately is crucial. Always combine them gently. This keeps air bubbles intact, which makes for fluffy pancakes. Avoid over-mixing the batter; a few lumps are okay. They add to the texture. You can make your pancakes taste even better. Add vanilla extract for a sweet aroma. For a twist, try almond or coconut extract. You can also mix in spices like cinnamon or nutmeg. This gives depth to the flavor. If you want something fruity, mash in some ripe bananas or mix in blueberries. These additions elevate your pancakes from simple to special. Many people make errors when cooking pancakes. One mistake is cooking on too high heat. This can burn the outside while leaving the inside raw. Keep the heat on medium for even cooking. Another error is using old baking powder. Check the expiration date before you start. Lastly, don’t skip the resting time after mixing. Letting the batter sit for a few minutes helps improve the texture. For more details, check out the Full Recipe. {{image_4}} You can easily make your pancakes vegan. Just use plant-based milk instead of cow's milk. Almond, soy, or oat milk all work well. You can also swap vegetable oil for melted coconut oil. This adds a nice flavor. The rest of the steps stay the same. You will still get fluffy and tasty pancakes. If you need gluten-free pancakes, choose a gluten-free flour mix. Many stores sell these blends. You can also use almond flour or coconut flour. Just remember, these flours may need more liquid. Start with the same recipe, but adjust the milk as needed. Your pancakes will still be fluffy and delicious. Get creative with your pancakes! You can add different flavors to the batter. Try mixing in mashed bananas or applesauce for sweetness. You could also fold in chocolate chips or nuts for crunch. Fresh berries add a lovely pop of color and flavor. Experiment with spices like cinnamon or nutmeg for a warm twist. Each new flavor makes breakfast exciting! If you want more ideas, check the Full Recipe for inspiration. To store leftover pancakes, let them cool first. Then, stack them with parchment paper in between. This prevents sticking. Place the stack in an airtight container. They stay fresh for up to three days in the fridge. If you plan to eat them later, freezing is a great option. When reheating pancakes, use the microwave or a skillet. For the microwave, place one pancake on a plate. Heat for about 20-30 seconds. For the skillet, warm it on medium heat and add a little oil. Cook the pancake for about a minute on each side. This keeps them soft and warm. To freeze pancakes, allow them to cool completely. Then, place them in a single layer on a baking sheet. Freeze for about an hour. Once frozen, transfer them to a freezer bag. Remove as much air as possible. They can last for up to two months. When you want to eat them, just follow the reheating tips! Yes, you can use other types of flour. Whole wheat flour gives a nutty taste. Oat flour is a great gluten-free option. Just remember, different flours may change the texture. If you use whole wheat, add a bit more liquid to the batter. This helps keep your pancakes light and fluffy. To make your pancakes fluffier, you can try a few tricks. First, sift your dry ingredients before mixing. This adds air and makes them lighter. Second, don’t overmix the batter; a few lumps are okay. Lastly, let the batter rest for about 5-10 minutes. This allows the baking powder to work better, giving you fluffier pancakes. Eggless pancakes can be healthy, depending on your ingredients. Using whole grain flour adds fiber. Adding fruits like bananas or blueberries boosts vitamins. You can also reduce sugar for a healthier option. Remember, the toppings you choose can affect health too. Fresh fruit or yogurt are great choices over syrup or cream. For the full recipe, check out the [Full Recipe]. This blog post covered how to make delicious eggless pancakes. We explored the key ingredients and tasty toppings. I shared simple steps and cooking tips for fluffy results. I highlighted ways to enhance flavor and avoid common mistakes. We also discussed variations like vegan and gluten-free pancakes. Finally, I provided storage and reheating tips to enjoy leftovers. Now you can make perfect eggless pancakes that everyone will love!](https://fastmealmate.com/wp-content/uploads/2025/06/4882ee2e-6759-45a7-b0fa-121a335c7fa8-768x768.webp)