Skip to content
About
Contact
Cookie Policy
Copyright Policy
Disclaimer
Search
Home
Dinner
Appetizer
Desserts
Drinks
About
Contact
Privacy Policy
Toggle Menu
Home
/
NO-ING-IMG
- Page 15
NO-ING-IMG
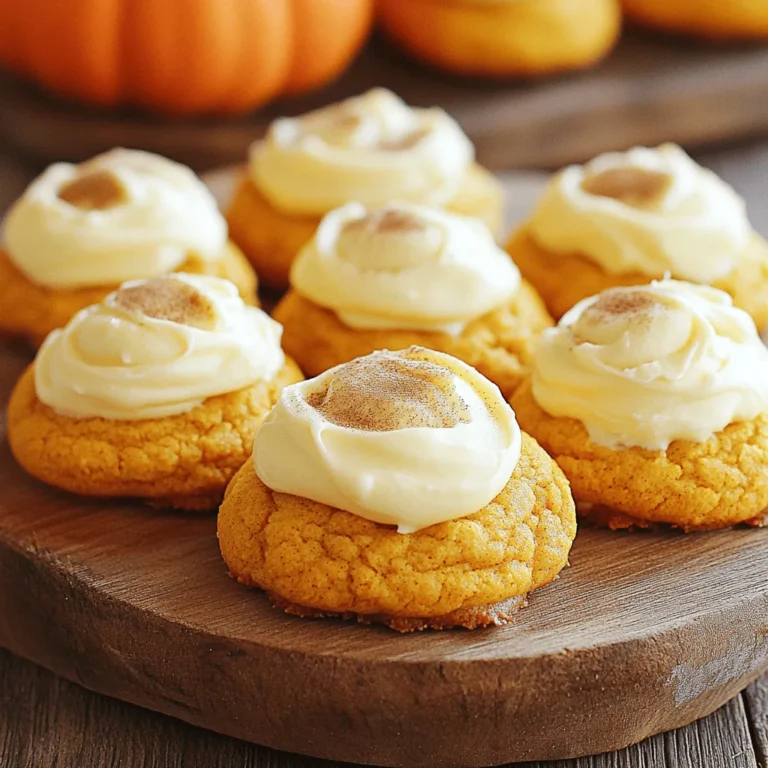
Soft Pumpkin Cookies with Cream Cheese Frosting Delight
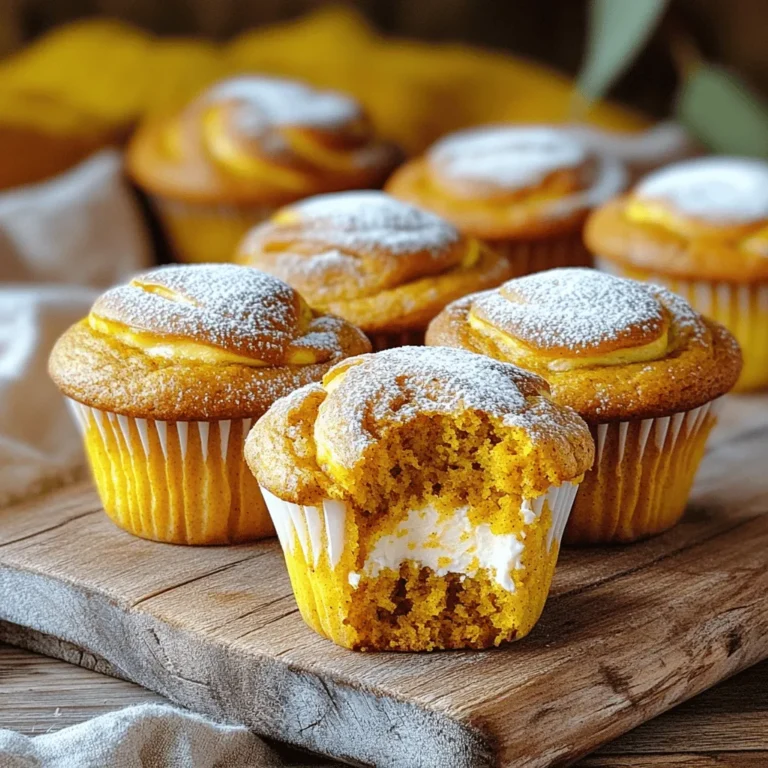
Healthy Pumpkin Cream Cheese Muffins Delightful Treat
Starbucks Copycat Pumpkin Cream Cheese Muffins Delight
Pumpkin Cream Cheese Muffins Perfect for Fall Baking
Crockpot Kielbasa Green Beans Flavorful Family Meal
Homemade Pumpkin Spice Creamer Tasty and Simple Recipe
Easy Pumpkin Spice Sauce for Lattes Recipe Delight
Pumpkin Spice Latte Sauce Rich and Flavorful Recipe
Premium Pumpkin Spice Syrup Flavorful Fall Delight
Homemade Pumpkin Spice Syrup Tasty Fall Flavor Drink
Page navigation
Previous Page
Previous
1
…
13
14
15
16
17
…
62
Next Page
Next
Home
Dinner
Appetizer
Desserts
Drinks
About
Contact
Privacy Policy
Toggle Menu Close
Search for:
Search


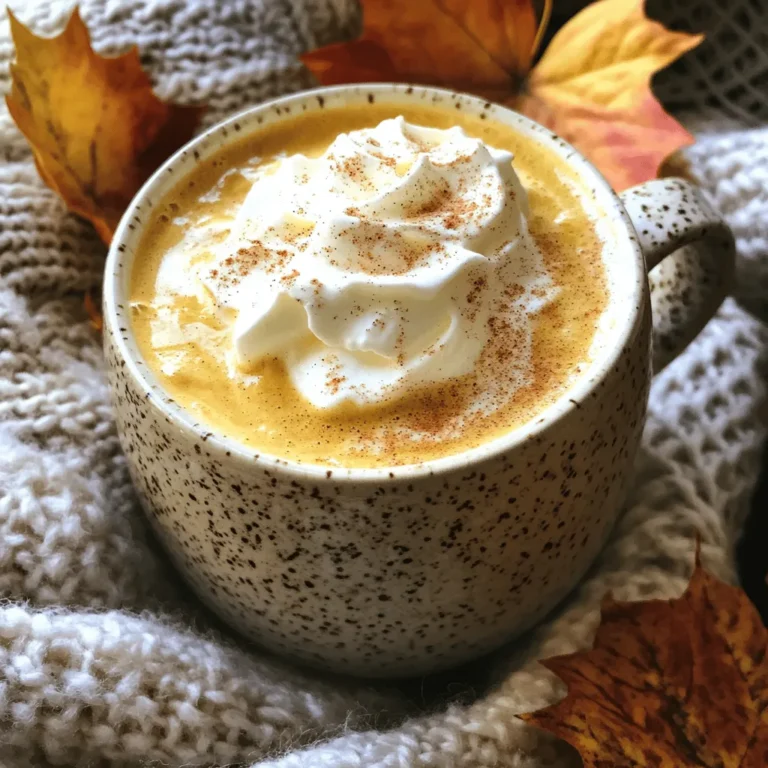
![To make homemade pumpkin spice creamer, you need a few key ingredients. Here’s the list: - 1 cup whole milk (or your favorite milk alternative) - 1 cup heavy cream - 1/2 cup pumpkin puree (canned or homemade) - 1/4 cup pure maple syrup - 1 teaspoon vanilla extract - 1 teaspoon pumpkin pie spice (or a blend of cinnamon, nutmeg, and ginger) - 1/4 teaspoon ground cinnamon - A pinch of fine sea salt Each ingredient brings its own flavor and texture. The milk and cream create a rich base. The pumpkin puree gives that warm autumn flavor. Maple syrup adds sweetness, while vanilla adds depth. The spices create that perfect pumpkin spice blend we all love. If you have dietary needs, don’t worry! You can easily swap some ingredients. For a dairy-free option, use almond milk or oat milk instead of whole milk. Coconut cream works well if you want a dairy-free alternative to heavy cream. You can also use agave syrup if you need a different sweetener. Just make sure to taste as you go! Choosing the right ingredients makes a big difference. Always pick fresh pumpkin puree. If you can, opt for pure pumpkin without extra sugar or additives. Look for real maple syrup, not the imitation kind. It tastes better and is healthier. When it comes to spices, fresher is always better. Check the expiration dates on your spices for maximum flavor. To start, gather your ingredients. You will need: - 1 cup whole milk (or your favorite milk alternative) - 1 cup heavy cream - 1/2 cup pumpkin puree - 1/4 cup pure maple syrup - 1 teaspoon vanilla extract - 1 teaspoon pumpkin pie spice - 1/4 teaspoon ground cinnamon - A pinch of fine sea salt Next, grab a medium saucepan. Pour in the whole milk and heavy cream. Add the pumpkin puree and whisk it together. Make sure the mixture is smooth and blended. Set your heat to medium. As it warms, keep whisking gently. Be careful not to let it boil. When the mixture is warm, add in the maple syrup, vanilla extract, pumpkin pie spice, ground cinnamon, and salt. Whisk it all together until it’s mixed well. This step makes your creamer rich and flavorful. Keep an eye on your heat. If it gets too hot, the creamer can curdle. You want to heat it through, not cook it. Stir often to help it heat evenly. The goal is to create a cozy, warm mix that smells like fall. Once heated, take the saucepan off the heat. Let the creamer cool for about 10 to 15 minutes. This cooling time lets the flavors come together nicely. To make sure your creamer is smooth, strain it through a fine-mesh sieve. This removes any lumps from the pumpkin puree. Pour the strained creamer into a clean jar or pitcher. After that, let the creamer cool to room temperature. Once cooled, seal it with a lid and put it in the fridge. It will thicken a bit as it cools. Before use, give it a gentle shake. Now, it’s ready to add to your favorite coffee or tea for that perfect fall touch! For the full recipe, check out the instructions above. Enjoy your homemade treat! To get the best taste, focus on high-quality ingredients. Use fresh pumpkin puree for a rich flavor. If you prefer sweet, adjust the maple syrup to your liking. Adding a bit more pumpkin pie spice can enhance the fall flavor. Always taste as you mix. This helps you find your perfect balance. One big mistake is letting the mixture boil. Boiling can change the texture and flavor. Also, don’t skip the straining step. Straining helps remove any lumps, giving you a smooth creamer. Lastly, avoid using stale spices. Fresh spices make a huge difference in taste. For a thicker creamer, use more heavy cream and less milk. You can also let the creamer cool longer before storing. This allows it to thicken. If you find it too thick later, just whisk in a bit of milk until you reach your desired consistency. {{image_4}} You can make your pumpkin spice creamer even better! Try adding a few drops of almond extract for a nutty twist. If you want a richer flavor, add a spoonful of cocoa powder. This change adds depth and a hint of chocolate. You can also adjust the sweetness. If you love it sweeter, add more maple syrup or a bit of brown sugar. You have many options for milk alternatives. Almond milk, oat milk, and coconut milk all work well. Almond milk gives a light, nutty taste. Oat milk adds creaminess, making it feel rich. Coconut milk offers a tropical vibe that pairs well with spices. Just remember to choose unsweetened versions if you want more control over the sweetness. Want to switch things up with the seasons? Use fresh pumpkin puree in the fall for a vibrant flavor. In winter, try adding a touch of peppermint extract for a festive twist. During the summer, you can swap pumpkin for ripe bananas to make a banana spice creamer. Each change brings new flavors and keeps your coffee exciting. For the complete recipe, check out the [Full Recipe]. To keep your homemade pumpkin spice creamer fresh, pour it into a clean jar. Make sure the jar has a tight lid. This helps keep out air and light, which can spoil the creamer. Always let it cool to room temperature first. Once it’s cool, seal it and place it in the fridge. Store the creamer on a middle shelf in your fridge. This spot usually stays at a safe, stable temperature. Avoid putting it in the door, where temperatures change often. Always shake the jar gently before using. This helps mix the ingredients that may settle. Homemade pumpkin spice creamer lasts about one week in the fridge. After that, it may start to spoil. Look for signs like a sour smell or changes in color. If you see any lumps or strange texture, throw it away. Always trust your senses when it comes to food safety. For the full recipe, check the provided details above. Yes, you can! Non-dairy milk works great in this recipe. Almond, oat, or coconut milk will all add unique flavors. Just keep in mind that each milk has a different texture. Some may be creamier, while others are lighter. Choose one that you enjoy! Homemade pumpkin spice creamer lasts about one week in the fridge. Store it in an airtight container to keep it fresh. Always check for any off smells or changes in texture before using it. Yes, you can freeze pumpkin spice creamer! Pour it into ice cube trays for easy use later. When you need some, just pop a cube into your coffee. It will add flavor as it melts. Maple syrup is my favorite sweetener for this creamer. It adds a nice depth of flavor. You can also use sugar, honey, or agave syrup. Start with a small amount, then taste and adjust to your liking. Enjoy experimenting with different sweeteners! In this post, we explored how to make pumpkin spice creamer. We covered key ingredients, optional substitutes, and tips for choosing quality items. You learned step-by-step instructions to prepare, cook, and store your creamer. I shared tips to perfect flavor and avoid common mistakes. You can also discover ways to vary the recipe with different flavors and milk. Proper storage ensures your creamer stays fresh. Now you’re ready to create a delicious, customized pumpkin spice creamer that fits your needs! Enjoy your coffee or dessert with this tasty treat.](https://fastmealmate.com/wp-content/uploads/2025/07/58885fb5-0183-4e31-91f9-f6f3ea6e6529-768x768.webp)
![To make a rich and flavorful pumpkin spice latte sauce, gather these ingredients: - 1 cup pumpkin puree - 1 cup coconut milk (or your preferred milk) - 1/2 cup maple syrup - 1 tablespoon vanilla extract - 1 teaspoon pumpkin pie spice - 1/2 teaspoon ground cinnamon - Pinch of salt - Optional: 1 tablespoon cornstarch (for extra thickness) These ingredients create a creamy, sweet, and spiced sauce that elevates your drinks and desserts. You can customize your sauce with a few options: - Milk: Use almond milk, oat milk, or regular dairy milk if you prefer. - Sweetener: Instead of maple syrup, try honey or agave syrup for different flavors. - Spices: Add nutmeg or ginger for a warm kick. Adjust pumpkin pie spice to your taste. - Thickener: If you want, skip the cornstarch for a thinner sauce, or use arrowroot powder. These options help you cater to your taste and dietary needs. For the best flavor, choose high-quality ingredients: - Pumpkin puree: Opt for pure pumpkin without additives. Fresh pumpkin works great too. - Milk: Select organic milk for better taste and nutrition. - Maple syrup: Real maple syrup adds depth. Avoid imitation syrups. - Spices: Fresh ground spices are more flavorful than pre-ground ones. Using quality ingredients enhances your sauce and makes it special. For the full recipe, check the section above. To make your Pumpkin Spice Latte Sauce, start by gathering your ingredients. You will need pumpkin puree, coconut milk, maple syrup, vanilla extract, pumpkin pie spice, ground cinnamon, and a pinch of salt. 1. In a medium saucepan over medium heat, add 1 cup of pumpkin puree and 1 cup of coconut milk. Whisk until smooth. 2. Next, add 1/2 cup of maple syrup, 1 tablespoon of vanilla extract, 1 teaspoon of pumpkin pie spice, 1/2 teaspoon of ground cinnamon, and a pinch of salt. Stir for about 4-5 minutes until everything blends well and heats through. 3. If you like your sauce thick, mix 1 tablespoon of cornstarch with 1 tablespoon of cold water. Stir this slurry into your sauce. Keep cooking for another 2-3 minutes. This will help your sauce reach the right thickness. 4. Taste the sauce. If you want it sweeter or spicier, add more maple syrup or spices. Adjust to your liking. 5. Once finished, remove the saucepan from the heat. Let the sauce cool a bit, then pour it into a glass jar or airtight container. To get the best texture for your sauce: - Always whisk the pumpkin puree and coconut milk well. This helps avoid lumps. - If the sauce is too thin, use the cornstarch slurry trick. It works wonders! - If it gets too thick after cooling, just reheat with a splash of milk. Here’s what you will need: - Medium saucepan - Whisk - Measuring cups and spoons - Glass jar or airtight container for storage With these instructions and tips, you can whip up a rich and flavorful Pumpkin Spice Latte Sauce that will delight your taste buds. Enjoy drizzling it over your favorite treats! To boost the flavor of your pumpkin spice latte sauce, think beyond the basics. Here are some tips to elevate your sauce: - Add a dash of nutmeg: This spice gives a warm and cozy note. Just a pinch will do! - Use fresh pumpkin puree: If you can, make your own puree. It tastes richer than canned. - Incorporate a splash of coffee extract: It adds depth and enhances the latte experience. - Experiment with different sweeteners: Try brown sugar or honey for a different sweetness profile. Making this sauce is simple, but some mistakes can affect the taste: - Skipping the whisking: Always whisk your ingredients well. This prevents lumps and ensures a smooth sauce. - Overcooking the spices: Don’t cook too long after adding spices. They can become bitter if overheated. - Ignoring the taste test: Always taste your sauce before finishing. Adjust sweetness or spice levels as needed. Your pumpkin spice latte sauce is not just for lattes. Here are some fun ways to use it: - Drizzle on hot chocolate: It adds a festive twist to your favorite drink. - Mix into chai tea: The spices blend beautifully with chai flavors. - Use in smoothies: Blend it with banana and almond milk for a fall-inspired treat. - Stir into warm milk: Create a cozy drink that’s perfect for chilly evenings. For the complete recipe, check the [Full Recipe]. {{image_4}} You can use many types of milk for this sauce. I often pick coconut milk for its creamy texture. Almond milk is another great choice. It adds a nutty flavor that pairs well with pumpkin. Oat milk also works nicely, giving a smooth finish. Each milk brings its own taste. Choose what you love most! Want to mix things up? Try adding a dash of nutmeg for warmth. A little ginger can add a spicy kick. If you like chocolate, a spoon of cocoa powder will do wonders. For a sweeter taste, consider adding caramel syrup. These small tweaks can change everything. Experiment with flavors to find your favorite. Make this sauce fit the season. In fall, add a bit of apple cider for a fruity twist. In winter, try mixing in peppermint extract for a holiday vibe. Spring is perfect for a splash of vanilla bean. Summer? Add a hint of citrus zest for a fresh taste. These seasonal ideas can keep your sauce exciting all year round. For the full recipe, check out the details above. I recommend storing your pumpkin spice latte sauce in a glass jar or an airtight container. This keeps it fresh and tasty. Make sure the sauce is cool before you seal it. Store it in the fridge for the best flavor. It will stay good and ready for your next treat. You can freeze the sauce if you want to save some for later. Use ice cube trays to make small portions. Once frozen, pop the cubes into a freezer bag. To thaw, just take out what you need and place it in the fridge overnight. You can also microwave it for a quick thaw. In the fridge, the sauce lasts about one week. Check for changes in smell or color. If it smells sour or looks off, it’s best to throw it away. If you notice any mold, do not eat it. Always trust your senses to keep your cooking safe and tasty. You can use Pumpkin Spice Latte Sauce in many drinks. It works great in coffee, lattes, and even hot chocolate. Just add a few spoonfuls to your drink. Mix it well, and enjoy the rich flavor. You can also drizzle it over whipped cream for a fancy touch. Try it in smoothies for a fall twist. Adding it to tea can create a warm, cozy drink too. Yes, you can find Pumpkin Spice Latte Sauce in stores. Many coffee shops sell their own version. However, homemade sauce tastes fresher and is easy to make. Store-bought options may contain added sugars or preservatives. Making your own gives you control over the flavor and ingredients. You can find the full recipe above to try it yourself. Using Pumpkin Spice Latte Sauce can have some health perks. Pumpkin puree is rich in vitamins A and C. It also has fiber, which is good for digestion. Coconut milk provides healthy fats, too. Maple syrup offers natural sweetness without refined sugars. Just remember to enjoy it in moderation. The spices in the sauce, like cinnamon, can also help with blood sugar control. In this post, we explored how to make pumpkin spice latte sauce at home. We discussed key ingredients, detailed cooking steps, and tips for the perfect texture. I shared ways to enhance flavors and avoid common mistakes. We also looked at variations and storage tips to keep your sauce fresh. Homemade sauce gives you control over flavors and quality. Enjoy experimenting with this easy recipe!](https://fastmealmate.com/wp-content/uploads/2025/07/6055e7be-5b1c-42f0-964b-9e7f1b73d8a4-768x768.webp)
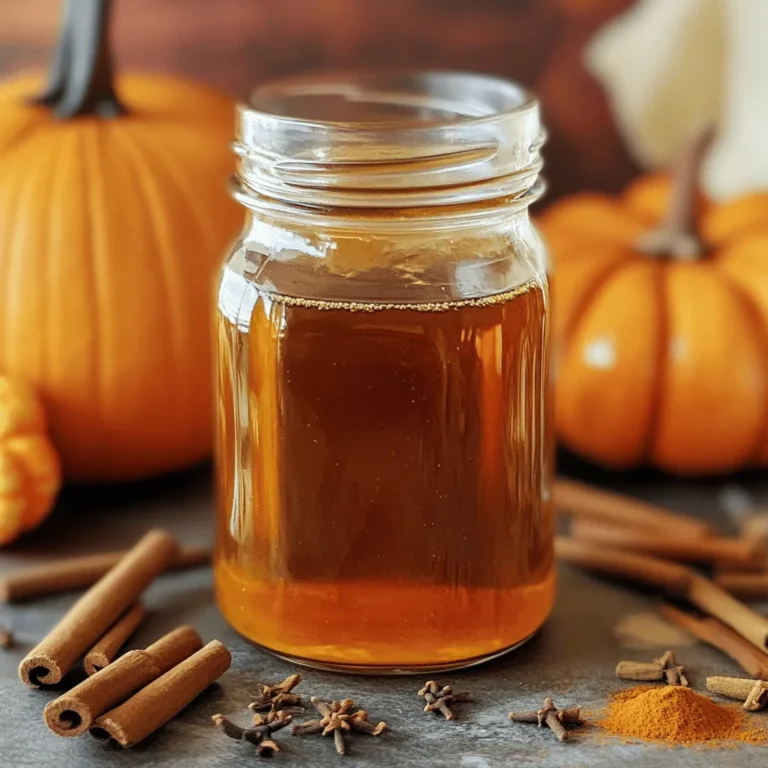
![To make a rich and tasty pumpkin spice syrup, gather these key ingredients: - 1 cup water - 1 cup granulated sugar - 1/2 cup pure pumpkin puree These ingredients form the base of your syrup. The water helps dissolve the sugar, while the pumpkin puree adds that classic pumpkin flavor. Spices are what truly make this syrup special. You’ll need: - 1 teaspoon ground cinnamon - 1/2 teaspoon ground nutmeg - 1/4 teaspoon ground ginger - 1/4 teaspoon ground cloves These spices bring warmth and depth to your syrup. Each spice adds its own unique note, creating a perfect fall blend. To round out the flavor, don't forget this important ingredient: - 1 teaspoon vanilla extract Vanilla extract adds a sweet aroma and enhances the other flavors. This small addition makes a big difference in taste. This recipe combines all these ingredients to create a syrup that brightens up any dish or drink. For the complete preparation steps, check out the Full Recipe. To start, you need to dissolve the sugar in water. Pour 1 cup of water into a medium saucepan. Add 1 cup of granulated sugar. Set the heat to medium. Stir the mixture until the sugar fully dissolves. You want the liquid to be clear and smooth. Next, add the pumpkin puree. Use 1/2 cup of pure pumpkin puree. Gently whisk it into the sugar-water mix. Make sure there are no lumps. It should blend nicely into a creamy base. Now, it’s time to add the spices. Measure out 1 teaspoon of ground cinnamon, 1/2 teaspoon of ground nutmeg, 1/4 teaspoon of ground ginger, and 1/4 teaspoon of ground cloves. Whisk these spices into the syrup base. This step gives your syrup that cozy fall flavor. Make sure to whisk thoroughly. You want all the spices to mix evenly. This will ensure every drop of syrup bursts with flavor. Next, bring your syrup to a gentle simmer. Slightly increase the heat until you see small bubbles. Once it starts simmering, reduce the heat to low. Allow the syrup to cook for 10-15 minutes. Stir occasionally to prevent sticking. This simmering step will help the flavors meld together. After the time is up, remove the saucepan from the heat. Stir in 1 teaspoon of vanilla extract for a lovely aroma. Allow the syrup to cool for a few minutes. Then strain it through a fine-mesh sieve or cheesecloth. This will remove any pumpkin pulp and keep the texture smooth. Once it cools completely, store it in a clean glass jar. Your homemade pumpkin spice syrup is ready to enjoy! For the full recipe, refer to the earlier section. To get the best texture for your syrup, start by straining it. After simmering, pour the syrup through a fine-mesh sieve or cheesecloth. This step removes any pumpkin pulp, giving you a smooth finish. If you skip this, you might end up with a chunky syrup that doesn’t mix well in drinks. You can customize your syrup to match your taste. If you love more spice, add an extra pinch of cinnamon or nutmeg. For a sweeter syrup, consider using brown sugar or honey instead of granulated sugar. Remember, the balance of flavors can make or break your syrup. Adjust it until it feels just right for you. This syrup shines in so many ways. Drizzle it over pancakes or waffles for a tasty breakfast treat. You can also add it to your coffee or hot chocolate for a cozy drink. Feeling adventurous? Mix it into cocktails for a fall twist. Your friends will love the rich flavors! You can find the full recipe here for more details. {{image_4}} You can switch up the main ingredients in your syrup. If you want to skip the pumpkin puree, you can use butternut squash puree instead. It gives a similar flavor and texture. Just make sure it is smooth for the best results. Another option is to use maple syrup instead of granulated sugar. This change adds a rich, warm flavor that pairs well with the spices. You can mix it with water to make the syrup thinner. This way, you still enjoy the sweet taste without all the white sugar. Why stick to just pumpkin spice? You can create themed syrups for other seasons too. In winter, try adding peppermint or gingerbread flavors. For spring, consider using fresh fruits like strawberries or lemons. Each season brings a chance to change the flavors. You can also infuse other flavors into your syrup. Adding vanilla gives it a creamy taste. If you love chocolate, mix in some cocoa powder. This creates a unique twist that makes your drinks even more special. If you follow a vegan diet, it’s easy to adapt this recipe. Just use maple syrup or agave nectar instead of sugar. This choice keeps it sweet and plant-based. For low-sugar options, you can use stevia or monk fruit sweetener. These alternatives provide sweetness without the extra calories. Adjust the amount based on your taste. If you need a gluten-free syrup, you’re in luck! All the ingredients are naturally gluten-free. So, enjoy this syrup in your favorite recipes without worry. For a complete guide on making this syrup, check out the Full Recipe. Store your homemade pumpkin spice syrup in a glass jar. Glass helps keep the syrup fresh longer. Make sure to seal the jar tightly after each use. Refrigerate the syrup to maintain its flavor and quality. Cold storage slows down spoilage. Your syrup will stay fresh for about two weeks in the fridge. Check it for any off-smells or mold. If the syrup looks cloudy or has an unusual texture, toss it out. Always trust your senses when it comes to freshness. Once you finish the syrup, don’t throw away the jar! You can use it for other sauces or spices. Clean the jar with hot soapy water. To sterilize it, you can boil the jar in water for a few minutes. This way, you keep your kitchen eco-friendly and tidy. For the full recipe and tips on making your own delicious pumpkin spice syrup, check out the [Full Recipe]. Homemade pumpkin spice syrup lasts about two weeks in the fridge. You want to store it in a clean glass jar. Always check for any off smells or mold before using. If it looks or smells strange, it’s best to toss it out. Yes, you can use this syrup in both hot and cold drinks. It adds a cozy flavor to your morning coffee or lattes. You can also mix it into iced tea or smoothies for a fall twist. The syrup blends well in any drink you choose. The best way to use pumpkin spice syrup is in your favorite beverages. You can drizzle it over pancakes or waffles for a sweet touch. It also tastes great in yogurt or oatmeal. Try mixing it into cocktails for a festive flavor. For the full recipe, check out the entire guide! In this blog post, we explored how to make homemade pumpkin spice syrup. We covered key ingredients like pumpkin puree, sugar, and essential spices. I shared step-by-step instructions to help you create this tasty syrup. Remember, you can adjust flavors and even try different ingredients for fun twists. Store your syrup properly for long-lasting freshness. Enjoy adding this syrup to drinks or breakfast dishes. Making your own syrup is easy and delicious—give it a try!](https://fastmealmate.com/wp-content/uploads/2025/07/fc2a1fa2-a46c-4404-8cf7-6e2e63d61871-768x768.webp)