Strawberry Mochi Delightful Treat You Can Make Today

Do you crave something sweet and fun to make? Strawberry mochi is a delightful treat you can whip up today! This soft and chewy Japanese dessert fuses sweet rice flour, fresh strawberries, and a bit of love. It’s easy to make and ideal for sharing. Join me as we explore the simple steps, tasty variations, and tips to create your own perfect strawberry mochi at home. Let’s dive in!
Ingredients
List of Required Ingredients
– 1 cup sweet rice flour (mochiko)
– 1/4 cup granulated sugar
– 1/2 cup water
– 1/2 cup fresh strawberries, finely chopped
– 1 tablespoon cornstarch (for dusting)
– 1 teaspoon vanilla extract
– 1/4 teaspoon salt
Optional Ingredients
– Food coloring for visual appeal
– Additional fillings (like red bean paste or whipped cream)
Nutritional Information
Each serving of strawberry mochi has around 100 calories. Key nutrients include vitamin C from strawberries and carbohydrates from the sweet rice flour. This treat offers a fun way to enjoy fresh fruit while indulging in a unique texture.
When you gather these ingredients, ensure you have fresh strawberries. Their sweet and tart flavor makes all the difference. Using mochiko is key, as it gives the mochi its chewy texture. If you want to make it more colorful, add a drop of food coloring.
Step-by-Step Instructions
Preparation Steps
1. Start by taking a large bowl.
2. Add 1 cup sweet rice flour, 1/4 cup sugar, and 1/4 teaspoon salt.
3. Mix these dry ingredients well with a whisk.
4. Pour in 1/2 cup water and 1 teaspoon vanilla extract.
5. Stir until the batter is smooth and free of lumps.
Cooking the Mochi
1. Transfer your batter to a microwave-safe dish.
2. Cover it loosely with plastic wrap. Leave a small gap for steam.
3. Microwave on high for 1 minute.
4. Take it out and stir well. Repeat this for 3 minutes total.
5. The mochi should be sticky and a bit translucent when done.
Forming the Mochi
1. Let the mochi cool slightly. Dust your counter with cornstarch.
2. Turn the mochi onto the cornstarch.
3. Flatten it into a rectangle about 1/4 inch thick.
4. Cut it into squares or circles, about 3 inches wide.
5. Place a spoonful of chopped strawberries in the center.
6. Fold the edges over the filling and pinch to seal.
7. Roll in your hands to shape into a smooth ball.
8. Dust with more cornstarch to prevent sticking.
9. Place your mochi on a serving plate.Enjoy your delicious Strawberry Mochi!
Tips & Tricks
Achieving the Perfect Texture
Cooling time is key for great mochi. After cooking, let it cool for at least 10 minutes. This helps the mochi firm up just right. If your mochi feels too sticky, it may need more cornstarch. Dust your hands and work area well before shaping. For dry mochi, you may have microwaved it too long. Keep an eye on it during cooking for the best results.
Serving Suggestions
You can elevate your mochi with fun sauces or toppings. Try drizzling chocolate or matcha sauce on top. Fresh fruits like mango or kiwi pair nicely as well. Serve your mochi with a cup of green tea for a warm touch. This combo creates a lovely balance of flavors.
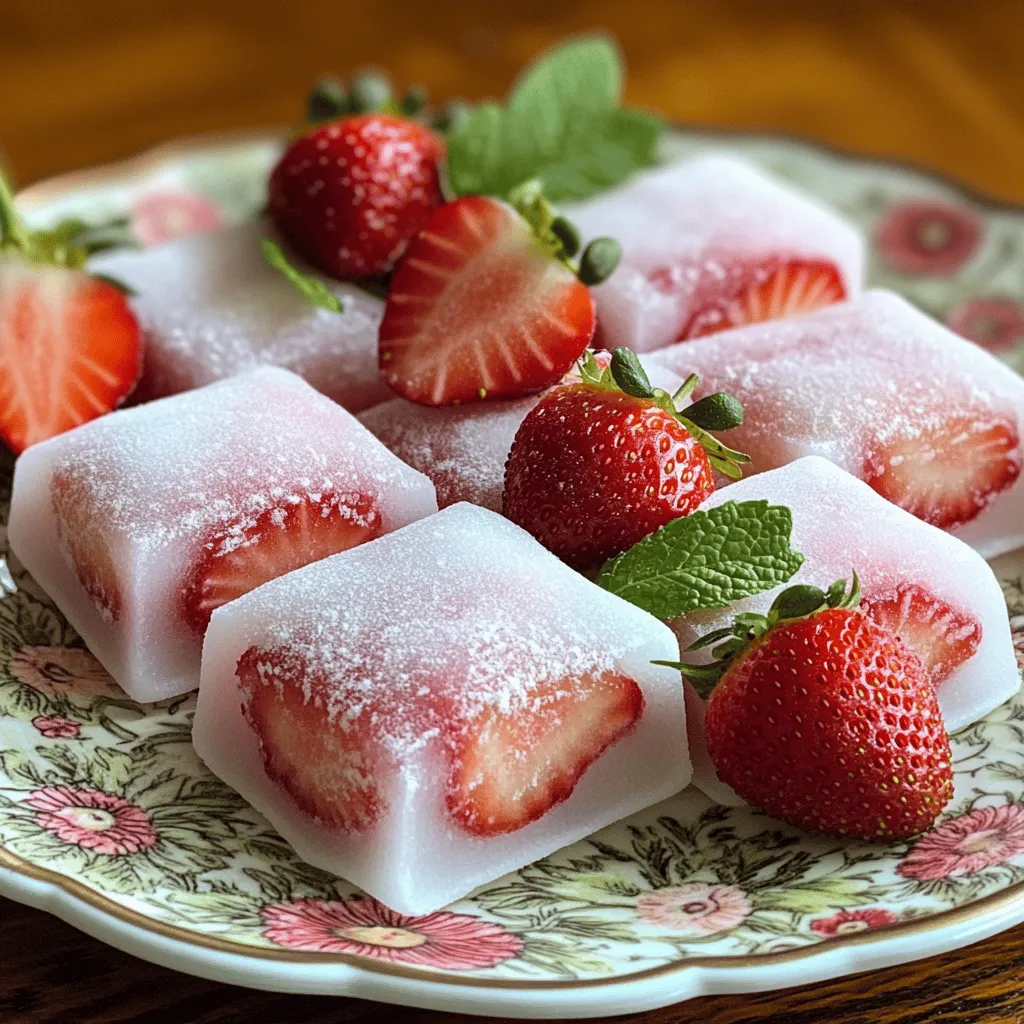
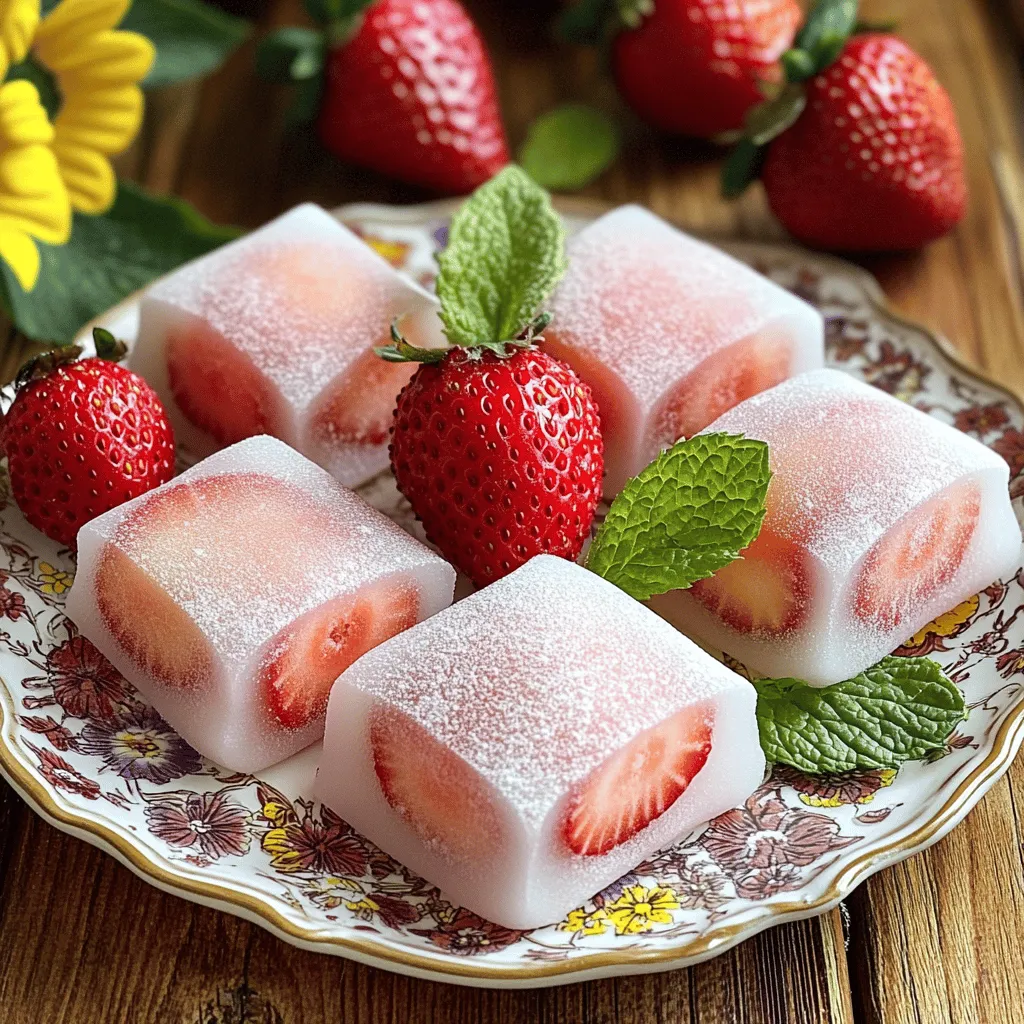
Visual Presentation Ideas
Presentation matters! Arrange your mochi on a pretty plate. A light dusting of cornstarch makes it look clean. Add whole strawberries or mint leaves for color. This makes your dish pop and feel festive. A good look makes the treat even more inviting!

Variations
Flavor Variants
You can change the flavor of mochi by using different fruits. Mango is a sweet choice. It adds a tropical twist. Matcha gives a rich, earthy taste. You can also add flavored fillings. Try coconut for a creamy texture. Chocolate is a great option for a sweet surprise. These variations keep your mochi exciting and fun.
Dietary Modifications
If you need gluten-free options, use sweet rice flour. It is naturally gluten-free. You can also make vegan mochi. Replace regular sugar with coconut sugar. This change keeps the taste good while making it plant-based. Always check labels to ensure all ingredients fit your needs.
Cultural Variations
Mochi has different styles based on where you are in Japan. Kanto-style mochi is often softer and more gooey. Kansai-style is chewier and denser. Each version has its own charm. In Japanese culture, mochi is served in unique ways. Sometimes it’s dusted with soy flour. Other times, you see it served with sweet syrup. These cultural touches add to the fun of eating mochi.
Storage Info
Best Practices for Storage
To keep your mochi fresh, store it in an airtight container. This helps prevent it from drying out. You can use a plastic or glass container with a tight lid. If you stack them, add a layer of parchment paper between each piece. This will stop them from sticking together.
Freezing Mochi
To freeze mochi, first let it cool completely. Then, wrap each piece in plastic wrap. Place the wrapped mochi in a freezer-safe bag. When you want to eat it, take it out and let it thaw in the fridge overnight. This keeps the texture nice and soft.
Shelf Life Insights
Mochi lasts about 1-2 days at room temperature. Make sure it stays in a cool, dry place. If you see any mold or an off smell, throw it away. Fresh mochi should feel soft and slightly sticky. If it becomes hard or dry, it’s best to discard it.
FAQs
What is Strawberry Mochi?
Strawberry mochi is a sweet treat made from rice flour. It has a chewy texture and is filled with fresh strawberries. This dessert is popular in Japan and represents a blend of tradition and innovation. Mochi has a deep cultural meaning in Japanese cuisine, often enjoyed during festivals and special occasions.
Can I make Strawberry Mochi without sweet rice flour?
Yes, you can use other flours, but the texture may change. Regular rice flour will not give the same chewiness. Try using glutinous rice flour as a substitute. However, the taste and feel of mochi may differ from the original recipe.
How do I know when my mochi is done cooking?
Your mochi is done when it turns slightly translucent. It should feel soft and pliable. Avoid overcooking, as this can make it tough. Stir it well between cooking cycles to ensure even cooking.
Where can I buy Strawberry Mochi?
You can find strawberry mochi in local Asian markets. Check the frozen section for packaged options. Many online stores also sell mochi, making it easy to order from home.
Can Strawberry Mochi be made in advance?
Yes, you can prepare mochi ahead of time. Store it in an airtight container to keep it fresh. Enjoy it within a few days for the best taste and texture.
In this post, I explored how to make strawberry mochi from start to finish. You learned about the key ingredients, preparation steps, and even some helpful tips. Variations and storage methods also featured prominently. Making mochi can be fun and tasty, offering a delightful snack or dessert. Remember, practice makes perfect. Don’t hesitate to experiment with flavors and presentation. Enjoy the process of creating this unique treat!


![To make honey garlic chicken breasts, gather these items: - 4 boneless, skinless chicken breasts - 1/3 cup honey - 1/4 cup low-sodium soy sauce - 4 cloves garlic, finely minced - 1 tablespoon fresh ginger, grated - 1 tablespoon olive oil (for cooking) - 1 teaspoon sesame oil - 1 teaspoon apple cider vinegar - Salt and freshly cracked black pepper, to taste - Chopped green onions (for garnish) - Sesame seeds (for garnish) If you want to switch things up, you can make some simple changes: - Use chicken thighs instead of breasts for more flavor and tenderness. - Swap honey for maple syrup for a different sweet taste. - Choose coconut aminos instead of soy sauce for a gluten-free option. - Replace fresh ginger with powdered ginger in a pinch. - Use canola oil instead of olive oil for frying. Measuring helps your dish taste just right. Here are some tips: - Use a liquid measuring cup for honey and soy sauce. Pour slowly for accuracy. - Use a dry measuring cup for solid ingredients like ginger and garlic. - Level off dry ingredients with a straight edge for a perfect measure. - For sticky ingredients like honey, spray the measuring cup with cooking oil first. This makes it easier to pour out. Get ready for a flavorful dinner delight with these simple ingredients! For the full recipe, check the details above. To start, gather all your ingredients. You need four boneless, skinless chicken breasts, honey, soy sauce, garlic, ginger, olive oil, sesame oil, apple cider vinegar, salt, and pepper. Chop the garlic and grate the ginger. In a medium bowl, mix the honey, soy sauce, garlic, ginger, olive oil, sesame oil, and apple cider vinegar. Whisk the mixture until it is smooth and well combined. Pat the chicken dry with paper towels. Season both sides with salt and freshly cracked black pepper. This step adds flavor to the chicken. Heat a drizzle of olive oil in a large skillet over medium-high heat. Once the oil is hot and shimmering, place the seasoned chicken breasts in the skillet. Cook each side for about 5-7 minutes. You want a rich, golden-brown crust. Use a meat thermometer to check if the chicken has reached 165°F (75°C). When the chicken is golden, pour the honey garlic sauce over the top. Reduce the heat to medium-low and cover the skillet. Let it simmer for 10-15 minutes. This allows the sauce to thicken and flavor the chicken. To check if your chicken is done, use a meat thermometer. Insert it into the thickest part of the chicken. It should read 165°F (75°C). If you don’t have a thermometer, you can cut into the chicken. The juices should run clear, not pink. Make sure to check all pieces, as they can cook unevenly. After cooking, let the chicken rest for a few minutes before serving. This helps keep it juicy. For a great presentation, drizzle extra sauce on top and garnish with green onions and sesame seeds. Enjoy this flavorful dinner delight from the Full Recipe! To make your honey garlic chicken truly shine, use fresh ingredients. Fresh garlic and ginger pack a punch and enhance the dish's flavor. If you want more depth, let the chicken marinate. A 30-minute soak in the sauce will increase flavor. You can also add a splash of lime juice to brighten the taste. Remember, balance is key! Use salt to enhance sweetness and acidity to cut through richness. Cooking chicken breasts can be tricky. To keep them juicy, avoid overcooking. Use a meat thermometer to check for an internal temperature of 165°F (75°C). Start on high heat to get a nice crust, then lower the heat. This helps the inside cook without drying out. Covering the skillet while simmering allows the chicken to absorb sauce flavors. Here are some tools that can help you cook like a pro: - Large skillet - Meat thermometer - Whisk for mixing - Cutting board - Sharp knife for slicing These tools make cooking smoother and more enjoyable. Having the right equipment allows you to focus on creating a delicious meal. For the full recipe, check out the details above! {{image_4}} You can add more colors and flavors to your honey garlic chicken. Try mixing in vegetables like bell peppers, broccoli, or snap peas. Cut them into bite-sized pieces. Add them to the skillet after the chicken has cooked for about 5 minutes. This way, the veggies soak up the sauce and stay crisp. It makes the dish healthy and fun. If you like heat, spice up your honey garlic chicken. Add red pepper flakes or chili paste to the sauce. Start with half a teaspoon and adjust to your taste. This spicy kick pairs well with the sweetness of honey. It gives you a nice balance of flavors. You can also use sriracha for a different heat profile. You don’t have to cook the chicken on the stove. Grilling gives it a smoky flavor. Marinate the chicken in the honey garlic sauce for at least one hour. Then, grill it on medium heat for about 6-8 minutes per side. If you prefer baking, preheat your oven to 400°F (200°C). Place the chicken in a baking dish, pour the sauce over it, and bake for 20-25 minutes. This keeps the chicken juicy and full of flavor. For the full recipe, check the [Full Recipe]. After your meal, let the chicken cool down. Place leftovers in an airtight container. This keeps them fresh and tasty. Store the container in the fridge. Honey garlic chicken can last for up to four days. If you plan to eat it later, consider freezing it. To reheat, you have a few options. The best way is to use the oven. Preheat it to 350°F (175°C). Place the chicken in a baking dish and cover it. Heat for about 15-20 minutes. Check that the chicken is hot all the way through. You can also use a microwave. Heat in short bursts, checking often. This keeps the chicken juicy. If you want to freeze the chicken, it’s simple. Wrap each piece tightly in plastic wrap. Then, place them in a freezer bag. Squeeze out as much air as possible. This helps prevent freezer burn. You can freeze the chicken for up to three months. When you’re ready to eat, thaw it overnight in the fridge. Then, reheat using the oven or microwave. This way, you enjoy a delicious meal later. You can serve many sides with honey garlic chicken breasts. Here are some great options: - Steamed rice: This absorbs the sauce well and adds a nice balance. - Sautéed vegetables: Try broccoli, bell peppers, or carrots for color and crunch. - Mashed potatoes: Creamy potatoes enhance the meal and add comfort. - Quinoa: A healthy grain that pairs perfectly with the sauce. - Salad: A fresh green salad can lighten up the meal. These sides complement the flavors of the chicken and make a complete meal. Yes! You can prepare honey garlic chicken breasts ahead of time. Here’s how: - Marinate: You can marinate the chicken in the sauce for up to 24 hours. This adds flavor and tenderizes the meat. - Cook and store: After cooking, let the chicken cool. Store it in an airtight container in the fridge for up to 3 days. - Reheat: When you’re ready to eat, simply reheat in a skillet or microwave. Add a splash of water if the sauce thickens too much. This method saves time and keeps dinner stress-free. You can easily change the sweetness of the honey garlic sauce. Here are some tips: - Add more honey: For a sweeter sauce, increase the honey a bit. - Use less honey: If you prefer less sweetness, reduce the honey. - Try other sweeteners: Maple syrup or agave can be good substitutes. They offer a different flavor while keeping it sweet. - Balance with acid: If it gets too sweet, add a splash of apple cider vinegar for a tangy touch. Adjusting the sweetness helps you tailor the dish to your taste. You learned about the ingredients, steps, and tips for cooking honey garlic chicken. We covered ingredient substitutions, measuring tips, and how to check doneness. I shared best practices for enhancing flavor and cooking juicy chicken. You also saw variations and how to store leftovers properly. Cooking can be simple and fun. Use these tips to make your meals taste great. Enjoy your cooking experience!](https://fastmealmate.com/wp-content/uploads/2025/06/7fed451b-ca95-459f-be21-3e50f3436304-768x768.webp)
![For a great crispy tofu panini, you need: - 1 block firm tofu, well-pressed and sliced into 1/2 inch slabs - 1 tablespoon soy sauce - 1 tablespoon sesame oil - 1 tablespoon cornstarch - 1 large round ciabatta or focaccia bread, sliced in half horizontally - 1/2 cup fresh spinach leaves, washed and dried - 1/2 red bell pepper, roasted, peeled, and sliced thin - 1 small ripe avocado, sliced - 2 tablespoons hummus or vegan mayonnaise - Salt and freshly ground black pepper to taste - Olive oil, for grilling These ingredients work together to create a crispy, tasty panini that is both filling and healthy. You can add some extra flavor with these ingredients: - Sliced tomatoes for freshness - Red onion for a bit of bite - Fresh herbs like basil or cilantro - A dash of hot sauce for heat If you want to mix things up, these optional ingredients can make your panini even better. To make your meal complete, consider these sides: - A light salad with lemon vinaigrette - Sweet potato fries for crunch - A bowl of soup, like tomato or lentil These sides balance the flavors and add variety to your meal. Plus, they are easy to prepare! For the full recipe, check out the detailed steps to bring your crispy tofu panini to life. To start, we need to prepare the tofu. First, press the block of firm tofu. Use a clean kitchen towel or tofu press. This step removes excess moisture. Removing moisture is key for achieving crispiness later. Once pressed, slice the tofu into even slabs, each about 1/2 inch thick. This ensures even cooking and crispiness. Next, we will marinate the tofu. In a mixing bowl, whisk together soy sauce, sesame oil, and a pinch of salt and pepper. Then, add your tofu slices to this mixture. Make sure each piece gets coated well. Let the tofu soak in the marinade for about 15 minutes. This allows the tofu to absorb all those tasty flavors. Now, it’s time to cook the tofu. After marinating, take the slices out and sprinkle cornstarch on both sides. This coating is crucial for that nice, crispy texture. Heat a non-stick skillet over medium heat. Add a drizzle of olive oil to the pan. When the oil shimmers, carefully lay the coated tofu slices in the skillet. Cook each slice for about 4-5 minutes on each side. Look for a golden brown color and a crispy texture. Once done, transfer the tofu to a plate and set it aside. Let’s move on to assembling the panini. Take your ciabatta or focaccia bread and cut it in half horizontally. Spread hummus or vegan mayo on the inside of both halves. This adds moisture and flavor to the sandwich. On the bottom half, layer fresh spinach leaves first. Then add the crispy tofu slices, followed by roasted red bell pepper slices. Finally, place avocado slices on top. Now, close the sandwich with the top half of the bread. Press it down gently to hold everything in place. Next, we grill the panini. Preheat your panini press or another skillet over medium heat. Brush the outside of the sandwich with olive oil. This helps to create a crunchy crust while grilling. If using a skillet, place a heavy pan on top of the sandwich. This presses it down as it cooks. Grill for about 3-4 minutes on each side. Look for a beautiful golden brown color and a crispy texture. Once grilled to perfection, remove the panini from the heat. Slice it in half with a sharp knife and serve warm for the best taste. Enjoy your crispy tofu panini, a flavorful and satisfying delight! For the full recipe, check out the earlier sections. To make your tofu crispy, follow these tips: - Press the tofu well: Remove as much water as possible. This helps the tofu absorb flavors better. - Use cornstarch: Coat both sides of the tofu slices with cornstarch. This creates a crunchy crust. - Heat your skillet properly: Use medium heat and wait for the oil to shimmer before adding the tofu. - Do not overcrowd the pan: Cook in batches if needed. This allows each piece to get crisp. Here are some mistakes to watch out for: - Skipping the marination: Marinating adds flavor. Don’t rush this step. - Using too little oil: A light drizzle helps achieve that golden color and crisp texture. - Not slicing evenly: Make sure your tofu slabs are even. This ensures consistent cooking. - Opening the panini too soon: Let it grill fully to get the best texture. Having the right tools makes a big difference. Here are my top picks: - Panini press: This tool cooks evenly and gives perfect grill marks. - Non-stick skillet: If you don’t have a press, a good skillet works too. - Heavy pan: Use it to press down the sandwich while it cooks in a skillet. - Sharp knife: A sharp knife helps slice your panini without squishing it. Using these tips and tools, you can create a delicious crispy tofu panini. For the full recipe, check out the earlier sections. {{image_4}} When making a crispy tofu panini, you can switch up the ingredients to match your taste. This adds fun and keeps things interesting. You can use different sauces or spreads. Try using pesto or spicy mustard instead of hummus. Swap spinach for kale or arugula for a bolder flavor. For added crunch, add sliced cucumbers or pickles. You can also replace the red bell pepper with grilled zucchini or eggplant. Each swap brings a new twist to your panini. To keep this dish vegan, stick with plant-based ingredients. Use gluten-free bread to make it gluten-free. Many brands offer delicious options that taste great. Check labels to ensure they have no animal products. This allows everyone to enjoy the crispy tofu panini without worry. Fresh produce can change with the seasons. In spring, try adding fresh asparagus or sprouts. In summer, include ripe tomatoes or zucchini. In fall, swap in roasted butternut squash for a sweet flavor. Winter might call for roasted root vegetables like carrots or sweet potatoes. These seasonal swaps help you enjoy fresh tastes all year long. This recipe offers endless possibilities for creativity. Use the [Full Recipe] as your base, and let your imagination run wild with variations! To keep your crispy tofu panini fresh, wrap it tightly. Use plastic wrap or foil for best results. Store it in the fridge for up to three days. Avoid leaving it out at room temperature. This helps prevent sogginess and keeps the flavors intact. To reheat, use a skillet over medium heat. Place the panini in the skillet and cover it. Heat for about 4-5 minutes on each side. This method helps restore the crispiness. You can also use a toaster oven for a similar effect. Avoid the microwave, as it can make the bread soft. If you want to freeze your panini, wrap it well in plastic wrap and foil. It can last for up to a month in the freezer. When you’re ready to eat, thaw it in the fridge overnight. Reheat it in a skillet for the best texture. This way, you can enjoy a quick meal without losing flavor. To make tofu extra crispy, start with firm tofu. Press it well to remove water. Slice it into even slabs. Marinate the slices in soy sauce and sesame oil. Let them soak for at least 15 minutes. After marinating, coat each slice with cornstarch. This coating helps create that crunchy texture you want. Cook the tofu in a hot skillet with olive oil. Flip it until golden brown on both sides. Yes, you can use many types of bread. Ciabatta and focaccia work great, but others can too. Try sourdough or whole grain for a different taste. Each bread type adds its own flavor and texture. Choose one that you love, and enjoy your panini in a new way. Dipping sauces can enhance your panini experience. Hummus is a classic choice. It adds creaminess and flavor. Vegan mayo also works well for a smooth dip. You can try spicy salsa for a kick. Another option is a tangy vinaigrette. Each sauce complements the crispy tofu and adds fun flavors. For more ideas, check out the Full Recipe for inspiration. In summary, we explored how to make a crispy tofu panini. We covered the main and optional ingredients, step-by-step cooking tips, and even some fun variations. Remember to store leftovers well and reheat them correctly for the best taste. Experiment with flavors and enjoy this dish as part of your meals. With a few simple steps, you can have a delicious, crispy tofu panini that satisfies your cravings. Enjoy your cooking journey!](https://fastmealmate.com/wp-content/uploads/2025/06/c0074219-6fc3-4ba3-a1d2-dcd469194d4e-768x768.webp)
. - Set temperature to 325°F (160°C) - Prepare a 9-inch springform pan Start by preheating your oven to 325°F (160°C). This will ensure that your carrot cake cheesecake bakes evenly. Next, grab a 9-inch springform pan. Grease it well and line the bottom with parchment paper. This will help the cheesecake come out easily after baking. - Mix dry ingredients and combine with wet ingredients - Fold in grated carrots, walnuts, and crushed pineapple In a medium bowl, mix the dry ingredients. You need flour, baking powder, baking soda, cinnamon, nutmeg, and salt. In a large bowl, whisk together the sugars, vegetable oil, eggs, and vanilla extract. Once it is smooth, slowly add the dry mix to the wet mix. Stir gently until just combined. Now, fold in the grated carrots, walnuts, and crushed pineapple. This gives your cake great texture and flavor. - Pour batter into the springform pan - Bake for 25-30 minutes until a toothpick comes out clean Pour the carrot cake batter into the prepared springform pan. Bake for 25-30 minutes. To check if it's done, insert a toothpick into the center. If it comes out clean, it's ready. Let the carrot layer cool in the pan on a wire rack. - Beat the cream cheese until smooth - Gradually add sugar and eggs while mixing In a large bowl, beat the softened cream cheese with an electric mixer on medium speed. Keep mixing until it's smooth. Gradually add in the sugar. Then, add the eggs one at a time, mixing on low speed after each one. Finally, mix in the vanilla extract, lemon juice, and sour cream. Your cheesecake batter should be creamy and well blended. - Pour cheesecake batter over the cooled carrot layer - Smooth the surface with a spatula Once the carrot layer is cool, pour the cheesecake batter over it. Use a spatula to spread it out evenly. This will create a nice, smooth top for your cake. - Bake for 45-50 minutes or until center slightly jiggles - Cool gradually in the oven Put the cake back in the oven. Bake for 45-50 minutes. The center should jiggle slightly when done. After baking, turn off the oven and crack the door open. This helps the cheesecake cool slowly, reducing the chance of cracks. - Chill in the refrigerator for at least 4 hours - Top with walnuts and shredded coconut before serving After an hour, take the cheesecake out and place it in the fridge. Chill for at least 4 hours, or overnight for the best taste. Before serving, sprinkle the top with walnuts and shredded coconut for extra flavor and crunch. Enjoy your delicious creation! For the full recipe, check the details above. - Use room temperature ingredients for better mixing. This helps all the flavors blend well. - Avoid overmixing the cheesecake batter to prevent cracks. Mix until just smooth for a perfect texture. - Serve with whipped cream or a scoop of vanilla ice cream. This adds a creamy touch to each bite. - Garnish with fresh carrots or edible flowers for decoration. This makes the dish look extra special and fun. - A springform pan is great for easy removal. It helps keep your cheesecake intact when serving. - An electric mixer ensures a smooth cheesecake batter. This saves time and effort, making mixing a breeze. {{image_4}} You can change the flavor of your carrot cake cheesecake. Try adding raisins or shredded coconut to the carrot layer. Both add sweetness and texture. You can also mix in spices like cardamom for a warm, spicy kick. This makes each bite more exciting. If you want a lighter version, use whole wheat flour instead of all-purpose flour. This swap adds fiber and nutrients. You can also replace sour cream with Greek yogurt. It gives creaminess with less fat. For a gluten-free option, use a gluten-free flour blend. This way, everyone can enjoy your cheesecake. If you need a vegan version, use dairy-free cream cheese. It works just as well in the cheesecake layer. These variations allow you to make this dessert fit your taste and dietary needs. Feel free to explore and enjoy the process! For the complete recipe, check the Full Recipe section. Store your carrot cake cheesecake in the refrigerator for up to 5 days. To keep it fresh, cover it tightly with plastic wrap or foil. This will help prevent it from drying out and absorbing other fridge odors. You can freeze carrot cake cheesecake for up to 2 months. Be sure to wrap it well in plastic wrap and then place it in an airtight container. When you're ready to enjoy it, thaw it in the refrigerator overnight before serving. This cheesecake is best enjoyed chilled. However, if you like it warm, you can briefly heat it in the oven. Just a few minutes at a low temperature will do. This method can enhance its creamy texture, making it even more delightful. The center should slightly jiggle and not look wet when finished. This means it has set properly. You can also check with a toothpick. Insert it into the center; it should come out mostly clean. Yes, it can be prepared a day in advance for optimal flavor. Making it ahead allows the flavors to blend better. Just remember to chill it in the fridge until you’re ready to serve. Slice with a sharp knife and serve chilled, topped as desired. You can add whipped cream or extra nuts for fun. A nice touch is a sprinkle of cinnamon on top. Absolutely! Pecans or almonds can be great substitutes for walnuts. They will add different flavors and textures. You can also skip the nuts if you prefer a nut-free version. This post covered everything you need to make a delicious Carrot Cake Cheesecake. We discussed the ingredients for both layers, how to bake, and tips for the best results. Remember, use room-temperature items and avoid overmixing the cheesecake. Feel free to try variations to fit your taste and dietary needs. This cake is perfect for any occasion and is easy to store. Now, grab your ingredients and impress your family or friends with this treat!](https://fastmealmate.com/wp-content/uploads/2025/06/33af2c91-c02f-4d6c-a85e-840ab017cd6c-768x768.webp)

