Stained Glass Sugar Cookies Delightful Holiday Treat

- 2 3/4 cups all-purpose flour - 1 teaspoon baking powder - 1/2 teaspoon salt - 1 cup unsalted butter, softened - 1 1/2 cups granulated sugar - 1 large egg - 1 teaspoon vanilla extract - 1/2 teaspoon almond extract - 1 cup crushed hard candies (various colors) - Optional: edible glitter for decoration Using unsalted butter is key for flavor control. It allows you to manage the salt in your recipe. Salted butter can make your cookies too salty. Always choose unsalted butter for baking. Hard candies bring the stained glass look to life. When they melt, they fill the cookie's center with vibrant color. Choose a mix of colors for a fun effect. You can use any hard candy you like. Just crush them into small pieces. The smaller the pieces, the better they melt. This will give you a stunning stained glass effect in your cookies. These ingredients set the stage for your delightful stained glass sugar cookies. For the full recipe, refer to the provided details. 1. Preheat your oven to 350°F (175°C). This step is key to baking cookies evenly. 2. Line two baking sheets with parchment paper. This makes cleanup a breeze later. 3. In a medium bowl, mix together 2 3/4 cups of flour, 1 teaspoon of baking powder, and 1/2 teaspoon of salt. Use a whisk to combine them well. Set this bowl aside. 4. In a large bowl, beat 1 cup of softened unsalted butter with 1 1/2 cups of granulated sugar. Mix until it is light and fluffy. This should take about 3 to 4 minutes. 5. Add in 1 large egg, 1 teaspoon of vanilla extract, and 1/2 teaspoon of almond extract. Mix again until everything is well blended. 6. Gradually add the dry ingredients to the wet mixture. Stir gently until just combined. Remember, do not overmix! 7. Divide the dough in half. Wrap each half in plastic wrap and chill them in the refrigerator for at least 1 hour. Chilling helps the cookies hold their shape. 1. After chilling, take one half of the dough from the fridge. Roll it out on a lightly floured surface to about 1/4 inch thick. 2. Use cookie cutters to cut out shapes from the dough. Make sure to cut a hole in the center of each cookie. This hole will hold the candy filling. 3. Place the cut-out cookies onto the prepared baking sheets. Leave a little space between them for baking. 1. Fill the holes in the cookies with crushed hard candies. Use different colors for a fun stained glass look. 2. Bake the cookies in the preheated oven for about 8 to 10 minutes. The edges should be firm, but the centers can stay soft. 3. Let the cookies cool on the baking sheet for 5 minutes. Then, transfer them to a wire rack to cool completely. This helps them become crisp and tasty. To get the best stained glass look, choose the right candies. I love using hard candies like Jolly Ranchers or Life Savers. Crush them into small pieces, but not too fine. If they are too small, they will melt away. Fill the cookie holes with the candy pieces, but don’t overfill them. This helps keep the candy from spilling over. To prevent cookies from spreading, chill the dough well. After mixing, wrap the dough and refrigerate for at least one hour. This helps the cookies hold their shape while baking. Also, use parchment paper on your baking sheets. It keeps the cookies from sticking and helps them bake evenly. Garnishing your stained glass cookies with edible glitter adds a fun touch. Just sprinkle some on after baking, while the cookies are still warm. The heat helps the glitter stick. You can also use colored sugar for a sparkly effect. For serving, display the cookies on a decorative plate. You can add colorful ribbons around the plate for a festive look. Arrange the cookies in groups by color for a stunning effect. This makes them eye-catching and fun to enjoy. {{image_4}} You can change the flavor of your stained glass sugar cookies easily. Swap the vanilla extract for peppermint extract for a fresh twist. Orange extract adds a bright, citrus flavor, great for a sunny day. You can even mix a few drops of almond extract for extra depth. When it comes to candy, the options are endless! Hard candies like Jolly Ranchers or Lifesavers work best. Try using different colors to make your cookies pop. You can even mix flavors, like cherry and lemon, for a fun surprise inside. Each cookie can tell a different sweet story! If you need a gluten-free option, use a gluten-free flour blend. Many blends work well in cookies. Just choose one that has a good taste and texture. You can also add a bit of xanthan gum to help with the structure. For a vegan version, replace the butter with coconut oil or a vegan butter. Use flaxseed meal mixed with water instead of an egg. This mix creates a good binding agent. Your cookies will still be tasty and fun to eat! Explore these variations and make your stained glass sugar cookies unique! For the full recipe, check the link above. To keep your stained glass sugar cookies fresh, store them in an airtight container. This helps retain their flavor and moisture. If you use wax paper between layers, it prevents sticking. For long-term storage, you can freeze these cookies. Wrap them tightly in plastic wrap and place them in a freezer-safe bag. This method keeps them fresh for up to three months. These cookies taste best within one week. After that, they may start to lose their soft texture. You’ll know they are stale if they feel hard or dry. If you notice any off smells or colors, it's best to discard them. Enjoying these cookies fresh ensures you get the full stained glass effect! How do I prevent my cookies from spreading? To stop cookies from spreading, chill your dough. A cool dough firms up. This helps keep the cookie shape. Also, use parchment paper. It prevents sticking and gives a better bake. Make sure you measure flour correctly. Too little can cause spreading. Can I use different types of candies for the stained glass effect? Yes, you can use many kinds of candies! Hard candies work best. Try different colors for fun designs. You could use Jolly Ranchers, Life Savers, or any hard candy you like. Just crush them well before using. The more colorful, the better! What to do if the cookies are too soft? If your cookies are too soft, chill the dough longer. A firmer dough bakes better. If they bake and still seem soft, check your oven temp. An oven thermometer helps ensure it's accurate. You can also bake them a minute or two longer. Why did my candies not melt properly? Candies may not melt if they are too thick. Make sure to crush them finely. Uneven pieces will melt differently. Also, check your baking time. If they are not melted after baking, put them back in for a minute. Keep a close eye on them! Best occasions to serve stained glass sugar cookies These cookies shine during holidays! Use them for Christmas, birthdays, or any festive gathering. They also make great gifts. Their bright colors and fun shapes please everyone. Kids love making and eating them too! Pairing ideas with beverages or other desserts Serve these cookies with warm milk or hot cocoa. They also taste great with tea or coffee. For dessert, pair them with vanilla ice cream. The cold ice cream and sweet cookie complement each other well. For the full recipe, check out the earlier section! You've learned how to make stained glass sugar cookies with detailed steps and tips. Starting with key ingredients like unsalted butter and hard candies ensures great results. By following the preparation and baking techniques, you can achieve the perfect texture. Don't forget to explore flavor variations and dietary options. Proper storage helps maintain freshness, while our FAQs address common concerns. Enjoy baking and sharing these beautiful cookies at your next gathering!

WANT TO SAVE THIS RECIPE?

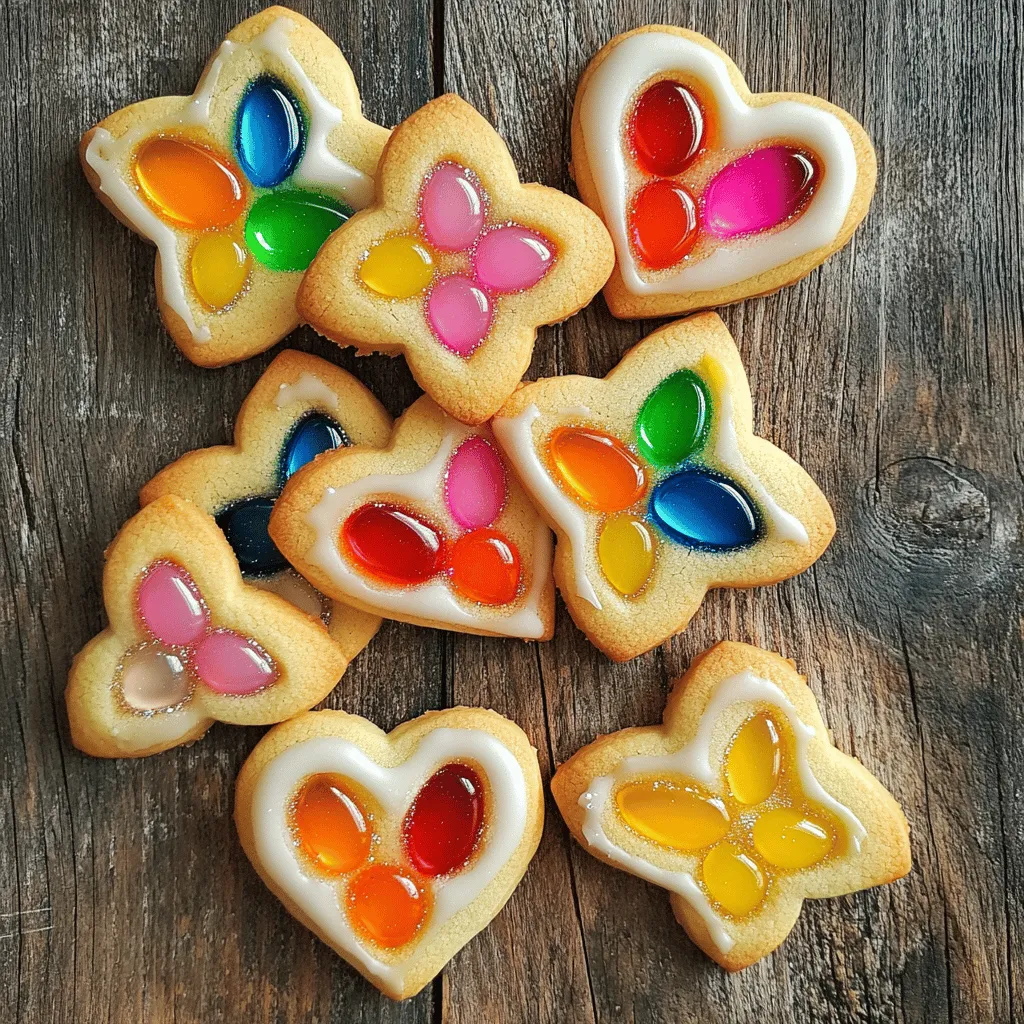
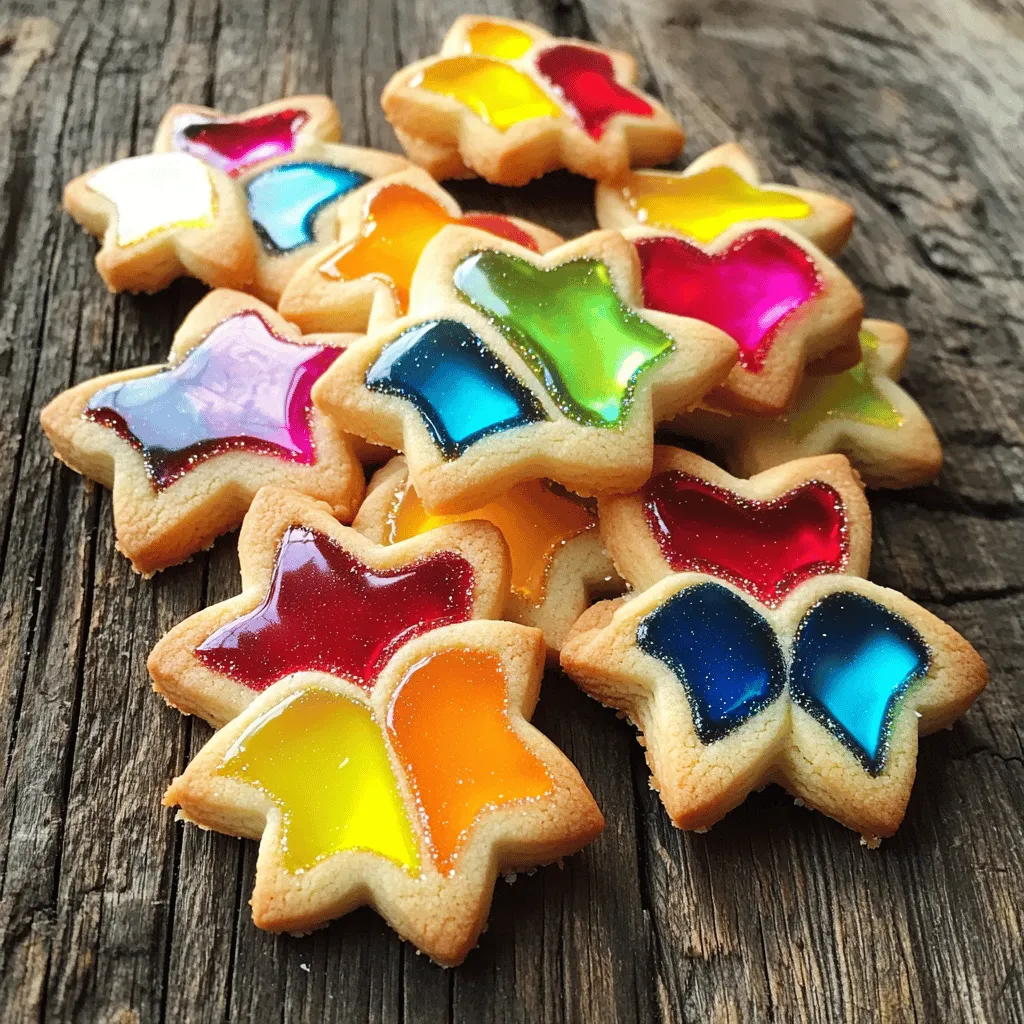
Get ready to make the holidays even sweeter with my Stained Glass Sugar Cookies! These delightful treats aren’t just fun to bake; they’re a feast for the eyes and the taste buds. In this post, I’ll guide you through each step, from mixing the perfect dough to achieving that stunning stained glass effect with hard candies. Plus, I’ll share tips for getting it just right! Let’s get started on this festive treat!

Ingredients

List of Ingredients

– 2 3/4 cups all-purpose flour

– 1 teaspoon baking powder

– 1/2 teaspoon salt

– 1 cup unsalted butter, softened

– 1 1/2 cups granulated sugar

– 1 large egg

– 1 teaspoon vanilla extract

– 1/2 teaspoon almond extract

– 1 cup crushed hard candies (various colors)

– Optional: edible glitter for decoration

Description of Key Ingredients

Using unsalted butter is key for flavor control. It allows you to manage the salt in your recipe. Salted butter can make your cookies too salty. Always choose unsalted butter for baking.

Hard candies bring the stained glass look to life. When they melt, they fill the cookie’s center with vibrant color. Choose a mix of colors for a fun effect. You can use any hard candy you like. Just crush them into small pieces. The smaller the pieces, the better they melt. This will give you a stunning stained glass effect in your cookies.

These ingredients set the stage for your delightful stained glass sugar cookies. For the full recipe, refer to the provided details.

Step-by-Step Instructions

Preparation Steps

1. Preheat your oven to 350°F (175°C). This step is key to baking cookies evenly.

2. Line two baking sheets with parchment paper. This makes cleanup a breeze later.

3. In a medium bowl, mix together 2 3/4 cups of flour, 1 teaspoon of baking powder, and 1/2 teaspoon of salt. Use a whisk to combine them well. Set this bowl aside.

4. In a large bowl, beat 1 cup of softened unsalted butter with 1 1/2 cups of granulated sugar. Mix until it is light and fluffy. This should take about 3 to 4 minutes.

5. Add in 1 large egg, 1 teaspoon of vanilla extract, and 1/2 teaspoon of almond extract. Mix again until everything is well blended.

6. Gradually add the dry ingredients to the wet mixture. Stir gently until just combined. Remember, do not overmix!

7. Divide the dough in half. Wrap each half in plastic wrap and chill them in the refrigerator for at least 1 hour. Chilling helps the cookies hold their shape.

Shaping the Cookies

1. After chilling, take one half of the dough from the fridge. Roll it out on a lightly floured surface to about 1/4 inch thick.

2. Use cookie cutters to cut out shapes from the dough. Make sure to cut a hole in the center of each cookie. This hole will hold the candy filling.

3. Place the cut-out cookies onto the prepared baking sheets. Leave a little space between them for baking.

Baking and Cooling

1. Fill the holes in the cookies with crushed hard candies. Use different colors for a fun stained glass look.

2. Bake the cookies in the preheated oven for about 8 to 10 minutes. The edges should be firm, but the centers can stay soft.

3. Let the cookies cool on the baking sheet for 5 minutes. Then, transfer them to a wire rack to cool completely. This helps them become crisp and tasty.

Tips & Tricks

Achieving the Best Stained Glass Effect

To get the best stained glass look, choose the right candies. I love using hard candies like Jolly Ranchers or Life Savers. Crush them into small pieces, but not too fine. If they are too small, they will melt away. Fill the cookie holes with the candy pieces, but don’t overfill them. This helps keep the candy from spilling over.

To prevent cookies from spreading, chill the dough well. After mixing, wrap the dough and refrigerate for at least one hour. This helps the cookies hold their shape while baking. Also, use parchment paper on your baking sheets. It keeps the cookies from sticking and helps them bake evenly.

Decorating Suggestions

Garnishing your stained glass cookies with edible glitter adds a fun touch. Just sprinkle some on after baking, while the cookies are still warm. The heat helps the glitter stick. You can also use colored sugar for a sparkly effect.

For serving, display the cookies on a decorative plate. You can add colorful ribbons around the plate for a festive look. Arrange the cookies in groups by color for a stunning effect. This makes them eye-catching and fun to enjoy.

Variations

Flavor Variations

You can change the flavor of your stained glass sugar cookies easily. Swap the vanilla extract for peppermint extract for a fresh twist. Orange extract adds a bright, citrus flavor, great for a sunny day. You can even mix a few drops of almond extract for extra depth.

When it comes to candy, the options are endless! Hard candies like Jolly Ranchers or Lifesavers work best. Try using different colors to make your cookies pop. You can even mix flavors, like cherry and lemon, for a fun surprise inside. Each cookie can tell a different sweet story!

Dietary Modifications

If you need a gluten-free option, use a gluten-free flour blend. Many blends work well in cookies. Just choose one that has a good taste and texture. You can also add a bit of xanthan gum to help with the structure.

For a vegan version, replace the butter with coconut oil or a vegan butter. Use flaxseed meal mixed with water instead of an egg. This mix creates a good binding agent. Your cookies will still be tasty and fun to eat!

Explore these variations and make your stained glass sugar cookies unique! For the full recipe, check the link above.

Storage Info

How to Store

To keep your stained glass sugar cookies fresh, store them in an airtight container. This helps retain their flavor and moisture. If you use wax paper between layers, it prevents sticking. For long-term storage, you can freeze these cookies. Wrap them tightly in plastic wrap and place them in a freezer-safe bag. This method keeps them fresh for up to three months.

Shelf Life

These cookies taste best within one week. After that, they may start to lose their soft texture. You’ll know they are stale if they feel hard or dry. If you notice any off smells or colors, it’s best to discard them. Enjoying these cookies fresh ensures you get the full stained glass effect!

FAQs

Common Questions

How do I prevent my cookies from spreading?

To stop cookies from spreading, chill your dough. A cool dough firms up. This helps keep the cookie shape. Also, use parchment paper. It prevents sticking and gives a better bake. Make sure you measure flour correctly. Too little can cause spreading.

Can I use different types of candies for the stained glass effect?

Yes, you can use many kinds of candies! Hard candies work best. Try different colors for fun designs. You could use Jolly Ranchers, Life Savers, or any hard candy you like. Just crush them well before using. The more colorful, the better!

Troubleshooting Tips

What to do if the cookies are too soft?

If your cookies are too soft, chill the dough longer. A firmer dough bakes better. If they bake and still seem soft, check your oven temp. An oven thermometer helps ensure it’s accurate. You can also bake them a minute or two longer.

Why did my candies not melt properly?

Candies may not melt if they are too thick. Make sure to crush them finely. Uneven pieces will melt differently. Also, check your baking time. If they are not melted after baking, put them back in for a minute. Keep a close eye on them!

Serving Suggestions

Best occasions to serve stained glass sugar cookies

These cookies shine during holidays! Use them for Christmas, birthdays, or any festive gathering. They also make great gifts. Their bright colors and fun shapes please everyone. Kids love making and eating them too!

Pairing ideas with beverages or other desserts

Serve these cookies with warm milk or hot cocoa. They also taste great with tea or coffee. For dessert, pair them with vanilla ice cream. The cold ice cream and sweet cookie complement each other well. For the full recipe, check out the earlier section!

You’ve learned how to make stained glass sugar cookies with detailed steps and tips. Starting with key ingredients like unsalted butter and hard candies ensures great results. By following the preparation and baking techniques, you can achieve the perfect texture. Don’t forget to explore flavor variations and dietary options. Proper storage helps maintain freshness, while our FAQs address common concerns. Enjoy baking and sharing these beautiful cookies at your next gathering!

- 2 3/4 cups all-purpose flour - 1 teaspoon baking powder - 1/2 teaspoon salt - 1 cup unsalted butter, softened - 1 1/2 cups granulated sugar - 1 large egg - 1 teaspoon vanilla extract - 1/2 teaspoon almond extract - 1 cup crushed hard candies (various colors) - Optional: edible glitter for decoration Using unsalted butter is key for flavor control. It allows you to manage the salt in your recipe. Salted butter can make your cookies too salty. Always choose unsalted butter for baking. Hard candies bring the stained glass look to life. When they melt, they fill the cookie's center with vibrant color. Choose a mix of colors for a fun effect. You can use any hard candy you like. Just crush them into small pieces. The smaller the pieces, the better they melt. This will give you a stunning stained glass effect in your cookies. These ingredients set the stage for your delightful stained glass sugar cookies. For the full recipe, refer to the provided details. 1. Preheat your oven to 350°F (175°C). This step is key to baking cookies evenly. 2. Line two baking sheets with parchment paper. This makes cleanup a breeze later. 3. In a medium bowl, mix together 2 3/4 cups of flour, 1 teaspoon of baking powder, and 1/2 teaspoon of salt. Use a whisk to combine them well. Set this bowl aside. 4. In a large bowl, beat 1 cup of softened unsalted butter with 1 1/2 cups of granulated sugar. Mix until it is light and fluffy. This should take about 3 to 4 minutes. 5. Add in 1 large egg, 1 teaspoon of vanilla extract, and 1/2 teaspoon of almond extract. Mix again until everything is well blended. 6. Gradually add the dry ingredients to the wet mixture. Stir gently until just combined. Remember, do not overmix! 7. Divide the dough in half. Wrap each half in plastic wrap and chill them in the refrigerator for at least 1 hour. Chilling helps the cookies hold their shape. 1. After chilling, take one half of the dough from the fridge. Roll it out on a lightly floured surface to about 1/4 inch thick. 2. Use cookie cutters to cut out shapes from the dough. Make sure to cut a hole in the center of each cookie. This hole will hold the candy filling. 3. Place the cut-out cookies onto the prepared baking sheets. Leave a little space between them for baking. 1. Fill the holes in the cookies with crushed hard candies. Use different colors for a fun stained glass look. 2. Bake the cookies in the preheated oven for about 8 to 10 minutes. The edges should be firm, but the centers can stay soft. 3. Let the cookies cool on the baking sheet for 5 minutes. Then, transfer them to a wire rack to cool completely. This helps them become crisp and tasty. To get the best stained glass look, choose the right candies. I love using hard candies like Jolly Ranchers or Life Savers. Crush them into small pieces, but not too fine. If they are too small, they will melt away. Fill the cookie holes with the candy pieces, but don’t overfill them. This helps keep the candy from spilling over. To prevent cookies from spreading, chill the dough well. After mixing, wrap the dough and refrigerate for at least one hour. This helps the cookies hold their shape while baking. Also, use parchment paper on your baking sheets. It keeps the cookies from sticking and helps them bake evenly. Garnishing your stained glass cookies with edible glitter adds a fun touch. Just sprinkle some on after baking, while the cookies are still warm. The heat helps the glitter stick. You can also use colored sugar for a sparkly effect. For serving, display the cookies on a decorative plate. You can add colorful ribbons around the plate for a festive look. Arrange the cookies in groups by color for a stunning effect. This makes them eye-catching and fun to enjoy. {{image_4}} You can change the flavor of your stained glass sugar cookies easily. Swap the vanilla extract for peppermint extract for a fresh twist. Orange extract adds a bright, citrus flavor, great for a sunny day. You can even mix a few drops of almond extract for extra depth. When it comes to candy, the options are endless! Hard candies like Jolly Ranchers or Lifesavers work best. Try using different colors to make your cookies pop. You can even mix flavors, like cherry and lemon, for a fun surprise inside. Each cookie can tell a different sweet story! If you need a gluten-free option, use a gluten-free flour blend. Many blends work well in cookies. Just choose one that has a good taste and texture. You can also add a bit of xanthan gum to help with the structure. For a vegan version, replace the butter with coconut oil or a vegan butter. Use flaxseed meal mixed with water instead of an egg. This mix creates a good binding agent. Your cookies will still be tasty and fun to eat! Explore these variations and make your stained glass sugar cookies unique! For the full recipe, check the link above. To keep your stained glass sugar cookies fresh, store them in an airtight container. This helps retain their flavor and moisture. If you use wax paper between layers, it prevents sticking. For long-term storage, you can freeze these cookies. Wrap them tightly in plastic wrap and place them in a freezer-safe bag. This method keeps them fresh for up to three months. These cookies taste best within one week. After that, they may start to lose their soft texture. You’ll know they are stale if they feel hard or dry. If you notice any off smells or colors, it's best to discard them. Enjoying these cookies fresh ensures you get the full stained glass effect! How do I prevent my cookies from spreading? To stop cookies from spreading, chill your dough. A cool dough firms up. This helps keep the cookie shape. Also, use parchment paper. It prevents sticking and gives a better bake. Make sure you measure flour correctly. Too little can cause spreading. Can I use different types of candies for the stained glass effect? Yes, you can use many kinds of candies! Hard candies work best. Try different colors for fun designs. You could use Jolly Ranchers, Life Savers, or any hard candy you like. Just crush them well before using. The more colorful, the better! What to do if the cookies are too soft? If your cookies are too soft, chill the dough longer. A firmer dough bakes better. If they bake and still seem soft, check your oven temp. An oven thermometer helps ensure it's accurate. You can also bake them a minute or two longer. Why did my candies not melt properly? Candies may not melt if they are too thick. Make sure to crush them finely. Uneven pieces will melt differently. Also, check your baking time. If they are not melted after baking, put them back in for a minute. Keep a close eye on them! Best occasions to serve stained glass sugar cookies These cookies shine during holidays! Use them for Christmas, birthdays, or any festive gathering. They also make great gifts. Their bright colors and fun shapes please everyone. Kids love making and eating them too! Pairing ideas with beverages or other desserts Serve these cookies with warm milk or hot cocoa. They also taste great with tea or coffee. For dessert, pair them with vanilla ice cream. The cold ice cream and sweet cookie complement each other well. For the full recipe, check out the earlier section! You've learned how to make stained glass sugar cookies with detailed steps and tips. Starting with key ingredients like unsalted butter and hard candies ensures great results. By following the preparation and baking techniques, you can achieve the perfect texture. Don't forget to explore flavor variations and dietary options. Proper storage helps maintain freshness, while our FAQs address common concerns. Enjoy baking and sharing these beautiful cookies at your next gathering!

Stained Glass Sugar Cookies

Make your celebrations shine with these stunning Stained Glass Sugar Cookies! This delightful recipe guides you through creating beautiful, colorful cookies filled with hard candy for a mesmerizing glass effect. Plus, you’ll learn tips for preparation, baking, and decorating to impress your guests. Don’t miss out on the fun—click through to explore the full recipe and start baking these eye-catching treats today!

Ingredients
  

2 3/4 Tassen Weizenmehl

1 Teelöffel Backpulver

1/2 Teelöffel Salz

1 Tasse ungesalzene Butter, weichgestellt

1 1/2 Tassen Kristallzucker

1 großes Ei

1 Teelöffel Vanilleextrakt

1/2 Teelöffel Mandelaroma

1 Tasse zerdrückte Hartbonbons (verschiedene Farben)

Optional: essbarer Glitzer zum Garnieren

Instructions
 

Backofen vorheizen: Heize deinen Backofen auf 350°F (175°C) vor. Lege zwei Backbleche mit Backpapier aus, um die Reinigung zu erleichtern.

    Trockene Zutaten mischen: In einer mittelgroßen Schüssel vermische das Mehl, das Backpulver und das Salz gründlich mit einem Schneebesen. Beiseite stellen.

      Butter und Zucker cremig schlagen: In einer großen Schüssel die weiche Butter und den Kristallzucker mit einem elektrischen Mixer auf mittlerer Geschwindigkeit schlagen, bis die Mischung hell und luftig ist, etwa 3-4 Minuten.

        Ei und Aromen hinzufügen: Das Ei, den Vanilleextrakt und das Mandelaroma zur Butter-Zucker-Mischung geben. Weiter schlagen, bis alles gut vermischt ist.

          Mischungen kombinieren: Die trockenen Zutaten portionsweise zu den nassen Zutaten hinzufügen und vorsichtig rühren, bis alles gerade so kombiniert ist. Übermische den Teig nicht.

            Teig kühlen: Den Teig in zwei Hälften teilen, jede Hälfte in Frischhaltefolie wickeln und mindestens 1 Stunde lang im Kühlschrank kühlen.

              Teig ausrollen: Nach dem Kühlen eine Teighälfte aus dem Kühlschrank nehmen. Auf einer leicht bemehlten Arbeitsfläche den Teig auf eine Dicke von 1/4 Zoll ausrollen.

                Formen ausstechen: Mit Ausstechformen verschiedene Formen aus dem Teig ausstechen. Achte darauf, auch in der Mitte jedes Kekses ein Loch für den Glaseffekt auszustechen.

                  Bonbons hinzufügen: Die ausgestochenen Kekse vorsichtig auf die vorbereiteten Backbleche legen. Fülle die Löcher in der Mitte mit den zerdrückten Hartbonbons deiner Wahl.

                    Backen: Im vorgeheizten Ofen etwa 8-10 Minuten backen, bis die Ränder fest sind und die Mitte noch leicht weich bleibt. Die Bonbons sollten in den Keksformauschnitten schmelzen.

                      Kekse abkühlen: Lass die Kekse 5 Minuten auf dem Backblech abkühlen, bevor du sie zum vollständigen Abkühlen auf ein Kuchengitter legst.

                        Optionale Garnitur: Nach Belieben kannst du die abgekühlten Kekse mit essbarem Glitzer bestreuen, um ihnen einen zusätzlichen funkelnden Effekt zu verleihen.

                          Vorbereitungszeit: 20 Minuten | Gesamtzeit: 2 Stunden | Portionen: 24 Kekse

                            - Präsentationstipps: Anrichten auf einer dekorativen Platte und eventuell mit bunten Schleifen umwickeln, um die festliche Note zu betonen.

                              WANT TO SAVE THIS RECIPE?

                              Related Posts