Spicy Shrimp Tacos with Mango Salsa Delightful Dish

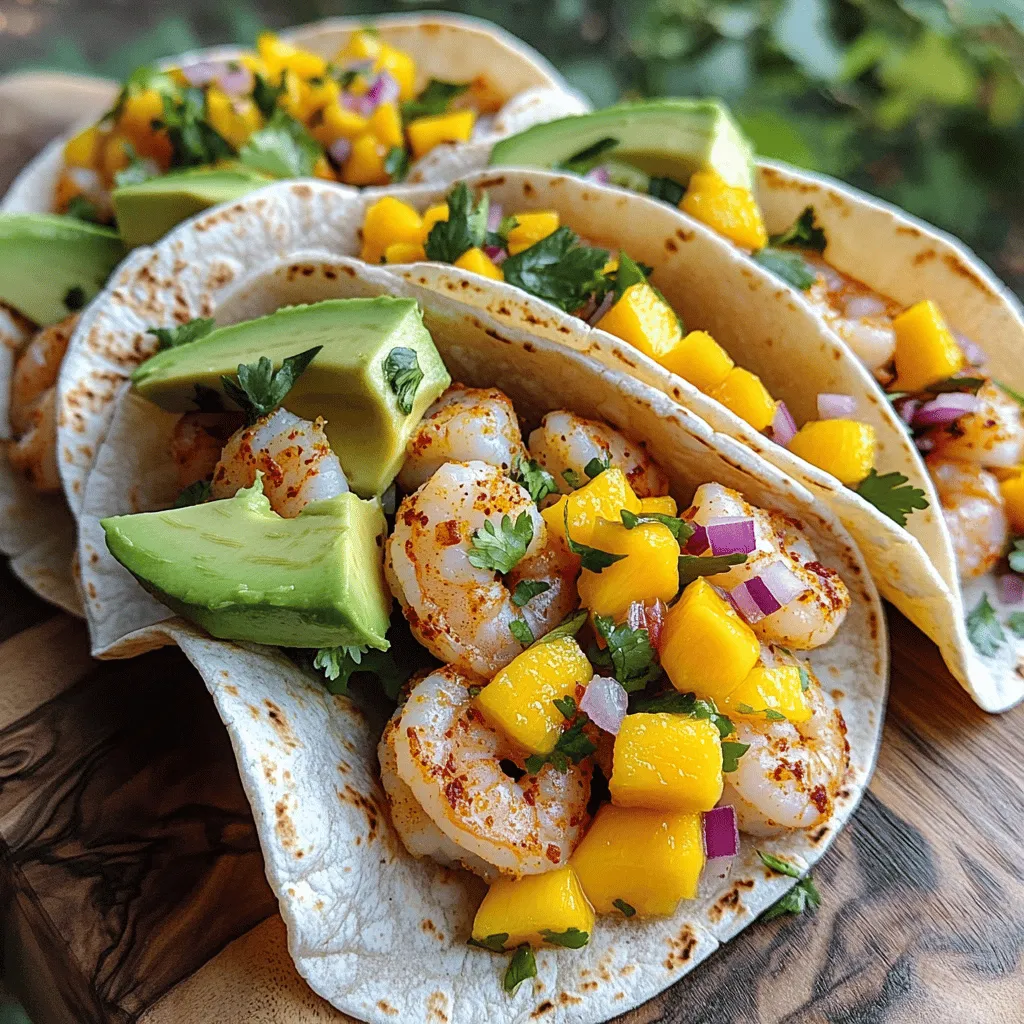
Get ready to spice up your dinner with these Spicy Shrimp Tacos and Mango Salsa! This dish combines juicy shrimp, zesty spices, and fresh mango for a flavor explosion. Whether you’re a taco lover or trying something new, these tacos will not disappoint. I’ll guide you step by step, so you can impress your family and friends with a delightful meal they won’t forget. Let’s dive into this tasty adventure!
Ingredients
Essential Ingredients for Spicy Shrimp Tacos
For the spicy shrimp tacos, you need a few key items:
– 1 pound shrimp, peeled and deveined
– 2 tablespoons olive oil
– 1 teaspoon smoked paprika
– 1 teaspoon chili powder
– 1/2 teaspoon ground cumin
– 1/4 teaspoon cayenne pepper
– Salt and black pepper, to taste
– 8 small corn tortillas
The shrimp gives a rich flavor. The spices create a perfect kick. The corn tortillas hold everything together nicely.
Mango Salsa Components
The salsa adds a fresh touch to the tacos. You will need:
– 1 ripe mango, diced into small cubes
– 1/2 red onion, finely chopped
– 1 jalapeño pepper, deseeded and minced
– 1/4 cup fresh cilantro leaves, chopped
– Juice of 1 lime
The mango brings sweetness. The onion and jalapeño add crunch and heat. Cilantro and lime juice make it vibrant.
Optional Garnishes
Garnishes can enhance your tacos. Consider these options:
– Slices of avocado for garnish
– Extra lime wedges
Avocado adds creaminess. Extra lime gives a zesty boost. These toppings make your tacos even more enjoyable.
Step-by-Step Instructions
Preparing the Shrimp
Marinating the Shrimp with Spices
Start by taking 1 pound of shrimp. Peel and devein them first. In a medium mixing bowl, add the shrimp along with 2 tablespoons of olive oil. Then, sprinkle in 1 teaspoon of smoked paprika, 1 teaspoon of chili powder, 1/2 teaspoon of ground cumin, 1/4 teaspoon of cayenne pepper, and salt and black pepper to taste. Mix everything well. This will coat the shrimp in a spicy, flavorful blend.
Cooking the Shrimp in a Skillet
Next, heat a large skillet over medium-high heat. When it’s hot, add the marinated shrimp. Cook for 2-3 minutes on each side. You want the shrimp to turn pink and opaque. This means they are fully cooked. Once done, take them off the heat and set aside.
Making the Mango Salsa
Combining Ingredients for the Salsa
While the shrimp cooks, let’s make the mango salsa. In a separate medium bowl, combine 1 ripe mango diced into small cubes, 1/2 red onion finely chopped, and 1 jalapeño pepper, deseeded and minced. Add 1/4 cup of fresh cilantro leaves chopped and the juice of 1 lime. Mix everything together well. This salsa will add a sweet and spicy kick.
Allowing Flavors to Meld
Once mixed, let the salsa sit for a few minutes. This allows the flavors to meld together. The sweet mango and spicy jalapeño will create a delightful mix.
Assembling the Tacos
Warming Corn Tortillas
To warm the corn tortillas, place them in a dry skillet over low heat. You can also microwave them for a few seconds. This makes them soft and easy to fold.
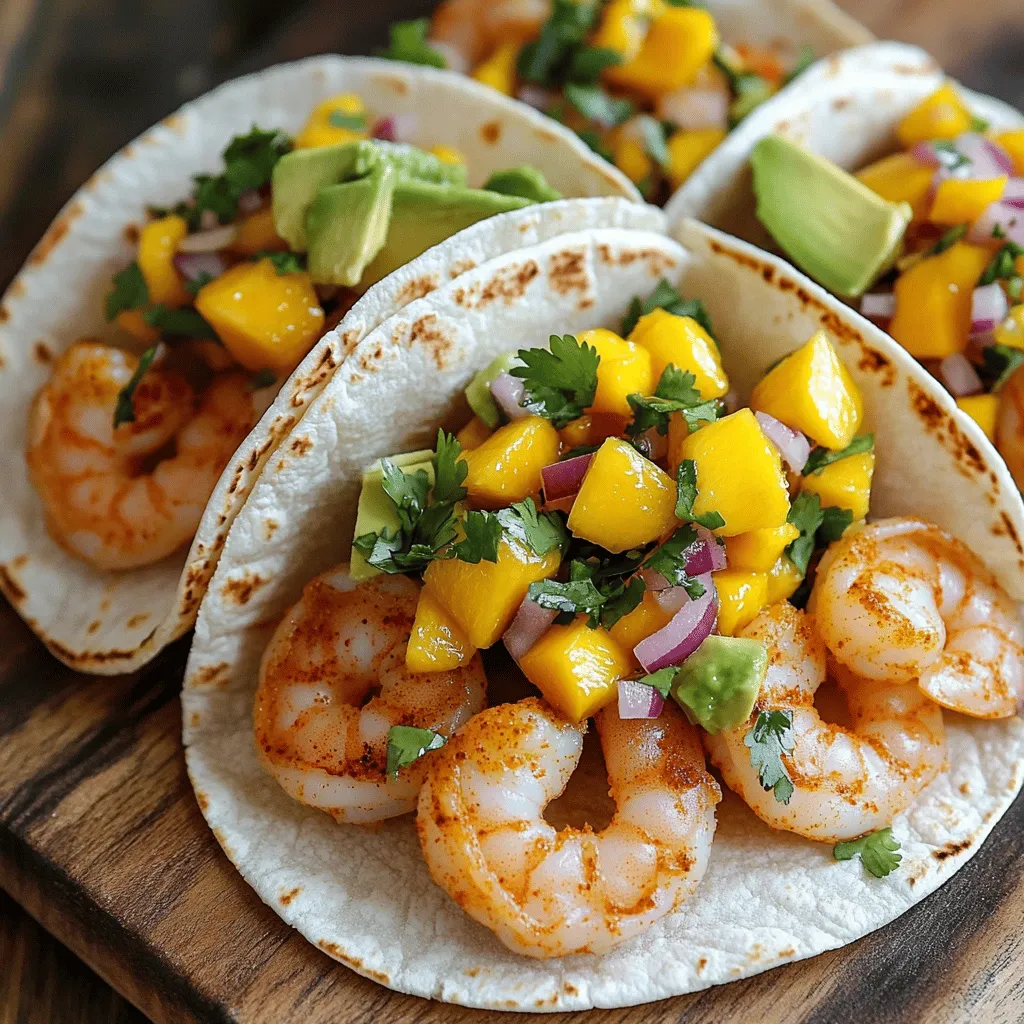
Layering Shrimp and Salsa
Now, it’s time to assemble the tacos. Take a warmed tortilla and lay a few pieces of spicy shrimp on it. Top it generously with the fresh mango salsa. If you want, add slices of avocado for extra creaminess. Fold the tacos gently and serve them right away. Enjoy the burst of flavors from the shrimp and salsa.
Tips & Tricks
Perfecting the Spicy Shrimp
Avoiding Overcooking the Shrimp
Overcooking shrimp can ruin their texture. Cook shrimp just until pink and opaque. This takes about 2-3 minutes per side in a hot skillet. Remove them as soon as they are done. They will continue to cook slightly from the heat.
Adjusting Spice Levels
If you prefer milder tacos, reduce the cayenne pepper. You can also skip the jalapeño in the salsa. For more heat, add a pinch of chili flakes or more cayenne. Always taste as you go to find your perfect level.
Enhancing the Mango Salsa
Choosing the Right Mango
Pick a ripe mango that gives slightly when pressed. The flavor must be sweet and juicy. Avoid mangoes that are hard or overly soft, as they won’t taste as good in the salsa.
Adding More Heat
Want to kick up the heat? Add more minced jalapeño or a dash of hot sauce. You can also mix in some finely chopped serrano peppers. Just remember to taste and adjust to your liking.
Presentation Tips
Serving Suggestions
Serve the tacos on a bright platter. A few lime wedges and cilantro sprigs add color. This makes your meal look inviting and fun to eat.
Complementary Side Dishes
Pair these tacos with a fresh salad or corn on the cob. These sides balance the spicy shrimp and sweet salsa. Enjoying a cold drink like lemonade can also help cool down the heat.

Variations
Alternative Proteins
You can use chicken instead of shrimp. Just cut it into small pieces. Marinate it the same way. Cook until it is done. Fish is another great choice. Use firm white fish like cod or tilapia. Season and cook just like shrimp.
Vegetarians can enjoy these tacos too. Tofu makes a great swap. Use firm tofu, press it, and cut it into cubes. Marinate it with the same spices. Cook until golden and crispy for a tasty texture.
Different Salsas
Want to switch up the salsa? Try pineapple salsa for a sweet twist. Just swap the mango for fresh pineapple. Add the same onion, jalapeño, and lime juice. This change adds a fun, tropical flavor.
If you prefer a classic taste, use tomato salsa. Chop fresh tomatoes, onion, and jalapeño. Mix with lime juice and cilantro. This salsa offers a fresh and tangy option for your tacos.
Topping Variations
You can add cheese for a creamy touch. Crumbled feta or shredded cheddar works well. Just sprinkle it on top of the tacos.
Pickled onions are a great addition too. They add a tangy crunch. Slice red onions and soak them in vinegar for a bit. Top your tacos with these for extra flavor.Enjoy your cooking adventure!
Storage Info
Storing Leftover Tacos
– To keep tacos fresh, wrap them tightly in foil or plastic wrap.
– Store shrimp and salsa in separate airtight containers to maintain their quality.
Reheating Tips
– For shrimp, heat them in a skillet over low heat until warmed through.
– Warm tortillas in a dry skillet over low heat or microwave for just a few seconds.
Freezing Options
– You can freeze cooked shrimp for up to three months. Just place them in a freezer-safe bag.
– Store salsa in a container with a tight lid. It lasts well in the freezer for about a month.
FAQs
Can I use frozen shrimp for this recipe?
Yes, you can use frozen shrimp. Thaw the shrimp in the fridge overnight. For faster thawing, place them in a bowl of cold water for 15-20 minutes. Make sure to drain and pat them dry before cooking.
How do I make the tacos spicier?
To add more heat, mix in extra spices. You can add more cayenne pepper or chili powder. You might also try adding hot sauce to the shrimp or salsa. Taste your mix as you go to find your perfect heat level.
What can I serve with these tacos?
These tacos pair well with several side dishes. Consider serving them with:
– Mexican rice
– Black beans
– Grilled corn on the cob
– A fresh green salad
How long does it take to make Spicy Shrimp Tacos with Mango Salsa?
Making these tacos is quick! Prep time is about 15 minutes, while cooking takes another 10 minutes. You can enjoy your meal in around 25 minutes total.
Can I prepare the mango salsa ahead of time?
Yes, you can make the mango salsa ahead of time. Store it in an airtight container. Keep it in the fridge for up to two days for the best freshness. Just give it a stir before serving to mix the flavors again.
You learned how to make spicy shrimp tacos with fresh mango salsa. Remember, fresh ingredients make the difference. Perfectly cooked shrimp, zesty salsa, and warm tortillas create a delicious meal. Don’t hesitate to try different proteins or salsas for variety. Store leftovers properly to enjoy later. With these tips and simple steps, you can impress your family and friends at any meal. Enjoy the tasty adventure of cooking!


![- 8 oz spaghetti or fettuccine - 3 large egg yolks - 1 whole egg - 1/2 cup finely grated Parmesan cheese - 1 tablespoon gochujang - 2 cloves garlic, minced - 1 tablespoon olive oil - 4 oz pancetta or diced turkey bacon (optional) - Salt and freshly cracked black pepper - Chopped green onions (for garnish) - Sesame seeds (for garnish) Gather these ingredients before you start cooking. This will make your process smooth and fun. The star of this dish is gochujang. It adds a deep heat and unique flavor. The creamy sauce comes from the eggs and cheese. The garlic and olive oil offer a nice aroma. If you want a meat option, use pancetta or turkey bacon. - Large pot - Medium mixing bowl - Large skillet - Tongs You need a large pot to boil the pasta. A medium mixing bowl helps mix the egg and cheese. The large skillet cooks the garlic and meat. Tongs are key to tossing your pasta with the sauce. Having the right tools makes cooking easier and more enjoyable. - Calories per serving: about 500 - Protein: 20g - Fat: 25g - Carbohydrates: 50g This dish is rich and filling. The calories come from the pasta, eggs, and cheese. It packs a good protein punch from the eggs and cheese. Enjoy it as a main meal or share it with a friend. For more details, check the Full Recipe for serving sizes and more tips. - Bring a large pot of salted water to a boil. - Cook spaghetti or fettuccine until al dente, about 8-10 minutes. First, salt the water. This helps the pasta taste great. When it boils, add the pasta. Stir it often. Before draining, save one cup of pasta water. This water helps make the sauce creamy later. - Whisk together egg yolks, whole egg, Parmesan, gochujang, and seasonings. - Heat olive oil and sauté garlic. In a medium bowl, mix the egg yolks, whole egg, and finely grated Parmesan cheese. Add gochujang and a pinch of salt and pepper. Whisk until it looks smooth. Heat olive oil in a skillet over medium heat. Add minced garlic. Sauté it for about 30 seconds. Watch for it to smell great and turn golden. - Cook pancetta or turkey bacon if using. - Toss drained pasta with garlic oil. - Mix in egg and gochujang mixture off the heat. If you want meat, add pancetta or turkey bacon now. Cook it until it is crispy, about 3-4 minutes. Then, toss the drained pasta into the skillet. Mix it well with the garlic oil. Off the heat, pour the egg and gochujang mixture over the hot pasta. Use tongs to toss it. The heat will cook the eggs gently, making a creamy sauce. Slowly add the reserved pasta water until the sauce is creamy and smooth. Taste and add more salt or pepper if you need to. Plate your Gochujang Carbonara right away. Enjoy the spicy twist! For the full recipe, check out the detailed steps and tips. To achieve a creamy sauce, start with room temperature eggs. Cold eggs can make the sauce clumpy. Whisk the yolks and the whole egg together well. This creates a smooth base. When you combine the egg mixture with the pasta, do it off the heat. The pasta should be hot enough to cook the eggs gently. Toss quickly with tongs. This helps make a rich sauce. If your sauce feels too thick, use reserved pasta water. Add it a little at a time. This water adds starch and helps to loosen the sauce. Keep tossing until you reach your desired creaminess. To boost the flavor, try adding spices. A pinch of red pepper flakes can add heat. Fresh herbs like parsley or basil can bring brightness. These small changes can really lift your dish. You can also experiment with different cheese. Pecorino Romano adds a sharp flavor. A mix of Parmesan and Pecorino can give you a nice depth. Use what you like best for a personal touch. One big mistake is overcooking the pasta. Al dente is best, as it will cook a bit more in the sauce. Always check the package time and taste a strand. Another mistake is scrambling the eggs. Keep the heat low when mixing the egg and pasta. If the skillet is too hot, the eggs will cook too fast. You want a creamy sauce, not scrambled eggs. {{image_4}} You can make a great vegetarian version of gochujang carbonara. Start by replacing the pancetta. Use mushrooms instead. They add a nice umami flavor. You can use shiitake or cremini mushrooms for this. Just sauté them in olive oil until they are golden and tender. Next, add seasonal vegetables. Think spinach, zucchini, or asparagus. They brighten up the dish and add color. Just toss them in the skillet with the garlic. This adds flavor and nutrition. Want more heat? You can increase the gochujang. Adding a little more will make it extra spicy. Just be careful! Start small and taste as you go. If you want to add other spices, try crushed red pepper flakes. They bring another layer of heat and flavor. Do you need a gluten-free option? You can easily swap out regular pasta for gluten-free pasta. There are many good brands available now. They work well in this recipe. You can also explore other noodle types. Try rice noodles or soba noodles. Each option gives a unique twist to the dish. They can bring different textures and flavors, making it fun to try new things. To keep your Gochujang Carbonara fresh, store it in an airtight container. Place the container in the fridge. Make sure to cool the pasta to room temperature before sealing. This helps prevent moisture buildup. Leftovers last about 3 days in the fridge. The best way to reheat carbonara is on the stove. Add a splash of water or broth to a skillet. Heat it over low to medium heat. Stir gently until warm. This keeps the sauce creamy and smooth. Avoid using the microwave, as it can dry out the pasta. You can freeze carbonara, but it may change texture. To freeze, place cooled portions in freezer-safe bags. Remove as much air as possible before sealing. For best taste, eat it within 1 month. When ready to eat, thaw it in the fridge overnight. Reheat gently on the stove with added liquid. This helps restore some of the creaminess. For the full recipe, check out the details above. Gochujang is a Korean chili paste. It has a deep red color. This paste is made from fermented soybeans, glutinous rice, and chili powder. Its flavor is sweet, spicy, and umami-rich. Gochujang adds a unique kick to many dishes. You can find it in Asian markets and some grocery stores. Yes, you can prep this dish ahead of time. Cook the pasta and store it in the fridge. Keep the sauce separate, so it stays creamy. When you are ready to eat, heat the pasta and mix in the sauce. This way, you enjoy fresh, tasty carbonara. If you lack pancetta, try turkey bacon or diced ham. For a vegetarian option, use mushrooms. Sauté them until golden and add them to the dish. You can also use smoked tofu for a plant-based protein. To make it milder, use less gochujang. You can start with half a tablespoon and taste it. If you want more heat, add a little more gochujang or some red pepper flakes. Adjust slowly until it meets your preference. For the complete steps and extra tips for making Gochujang Carbonara, click here: [Full Recipe]. This blog post covered how to make Gochujang Carbonara, from ingredients to storage tips. You learned about choosing the right pasta, creating a creamy sauce, and avoiding common cooking mistakes. No matter your taste, you can try variations like vegetarian options. Always store leftovers correctly to enjoy them later. Remember, cooking is fun, so feel free to experiment with flavors! Enjoy your delicious meal and impress others with your skills!](https://fastmealmate.com/wp-content/uploads/2025/06/8ba01260-66cf-4de4-8766-bae4801448e1-768x768.webp)


![- 1 ½ cups graham cracker crumbs - ½ cup unsalted butter, melted - 2 tablespoons granulated sugar - 8 oz cream cheese, softened - ½ cup powdered sugar - ½ cup heavy whipping cream - Zest and juice of 1 lemon - 1 teaspoon pure vanilla extract - Assorted fresh berries (for topping) - Fresh mint leaves (for garnish) Gathering the right ingredients is key. The graham cracker crumbs form a sweet and crunchy crust. Unsalted butter adds richness, while granulated sugar gives a touch of sweetness. Cream cheese provides that classic cheesecake texture. Powdered sugar balances the filling's flavor. Next, I add heavy whipping cream for lightness. The zest and juice from the lemon bring bright flavor. Pure vanilla extract adds depth. For garnishing, I use fresh berries on top for color and mint leaves for a fresh touch. These ingredients come together to create a treat that is light, creamy, and bursting with flavor. You can find the detailed steps in the Full Recipe. - Combine 1 ½ cups of graham cracker crumbs, ½ cup melted unsalted butter, and 2 tablespoons granulated sugar in a bowl. - Press this mixture firmly into mini tart molds. Ensure it is even and tight. - Chill the crusts in the refrigerator for 10-15 minutes to help them set. - In a large bowl, beat 8 oz of softened cream cheese until it is smooth. - Mix in ½ cup powdered sugar, zest and juice of 1 lemon, and 1 teaspoon vanilla extract. Blend until there are no lumps. - In a separate bowl, whip ½ cup heavy cream with an electric mixer until stiff peaks form. - Gently fold the whipped cream into the cream cheese mixture using a spatula. Be careful not to deflate the whipped cream. - Take the chilled crusts out of the refrigerator. - Fill each crust with the lemon cheesecake filling, smoothing the tops evenly. - Place the filled tarts back in the refrigerator. Chill for at least 2 hours to let the filling set. - Gently remove the tarts from their pans. - Top each tart with fresh berries and a mint leaf for a lovely touch. For the full recipe, please refer to the earlier section. Enjoy making these delightful mini no-bake lemon cheesecake tarts! To make the crust strong, pack the mixture tightly. This helps keep the shape. You can also try different cookies. For example, use chocolate cookies or gingersnaps. Each cookie gives a unique flavor. For a smooth filling, use cream cheese at room temperature. Cold cream cheese can make lumps. You can adjust the lemon juice to find your perfect tartness. If you love tart, add more lemon. For a milder taste, use less juice. To fill the tarts neatly, use a piping bag. This gives a professional look. You can also sprinkle extra lemon zest on the plate. It adds color and makes your dessert pop. For a fun touch, place fresh mint leaves around the tarts. It looks great and adds freshness! You can find the Full Recipe for these delightful tarts to explore more tips. {{image_4}} You can change up the taste of these mini tarts easily. Swap lemon for lime for a zesty twist. The tartness from lime adds a fresh kick. If you want something rich, use chocolate or fruit purees for a unique filling. Chocolate brings sweet indulgence, while fruit purees add a fruity burst. Not everyone can eat the same way. You can make a gluten-free crust with gluten-free crumbs. This way, everyone can enjoy these tarts. For those avoiding dairy, substitute with vegan cream cheese and coconut cream. These options keep the creamy texture while being dairy-free. Garnishing can elevate your dessert. Top your tarts with seasonal fruits like strawberries or raspberries. The colors and flavors will pop! You can also use edible flowers for an elegant presentation. They add a touch of beauty and whimsy to your tarts. For the full recipe, check out the [Full Recipe]. You can store the mini no-bake lemon cheesecake tarts in the refrigerator. They will last for up to three days if covered. To keep them fresh, make sure to cover them well. It’s best to keep the tarts separate from any garnishes until you are ready to serve them. This way, they stay fresh and look great. If you want to save some for later, you can freeze the unfilled crusts. This is a great option if you plan to make them ahead of time. The filled tarts can also be frozen for up to a month. Just remember to thaw them before serving. This will help keep their creamy texture. To prevent the tarts from drying out, use airtight containers. This keeps them fresh and tasty. It’s also smart to label your containers with dates. This way, you can easily track how long they have been stored. Yes, you can prepare these tarts a day in advance and chill them. This makes them great for parties or busy days. Just keep them in the fridge until you are ready to serve. Lightly grease the tart pans before filling them. You can also use silicone molds. Both methods help the tarts pop out without breaking. You can use bottled lemon juice in a pinch. However, fresh lemons give the best flavor. The zest adds a bright taste that makes these tarts stand out. Yes, Greek yogurt or vegan cream cheese works well as substitutes. These options can change the flavor slightly, but they still taste great. This recipe yields 12 mini tarts. Perfect for sharing or enjoying over a few days! Pair your mini tarts with coffee or tea. This makes for a delightful dessert experience that everyone will love. For the full recipe, check out the details above! This blog post covers how to make delicious mini lemon cheesecake tarts. We discussed each ingredient, from the crust to the creamy filling, and shared tips for a perfect dessert. You can customize flavors and garnishes to suit your taste. Remember, storage is key for keeping them fresh. Enjoy making these tarts for any occasion. Your friends and family will love them!](https://fastmealmate.com/wp-content/uploads/2025/06/a8bd9651-0c39-4151-9790-24600a8eb0ea-768x768.webp)

