Spiced Zucchini Carrot Bread Easy and Flavorful Recipe

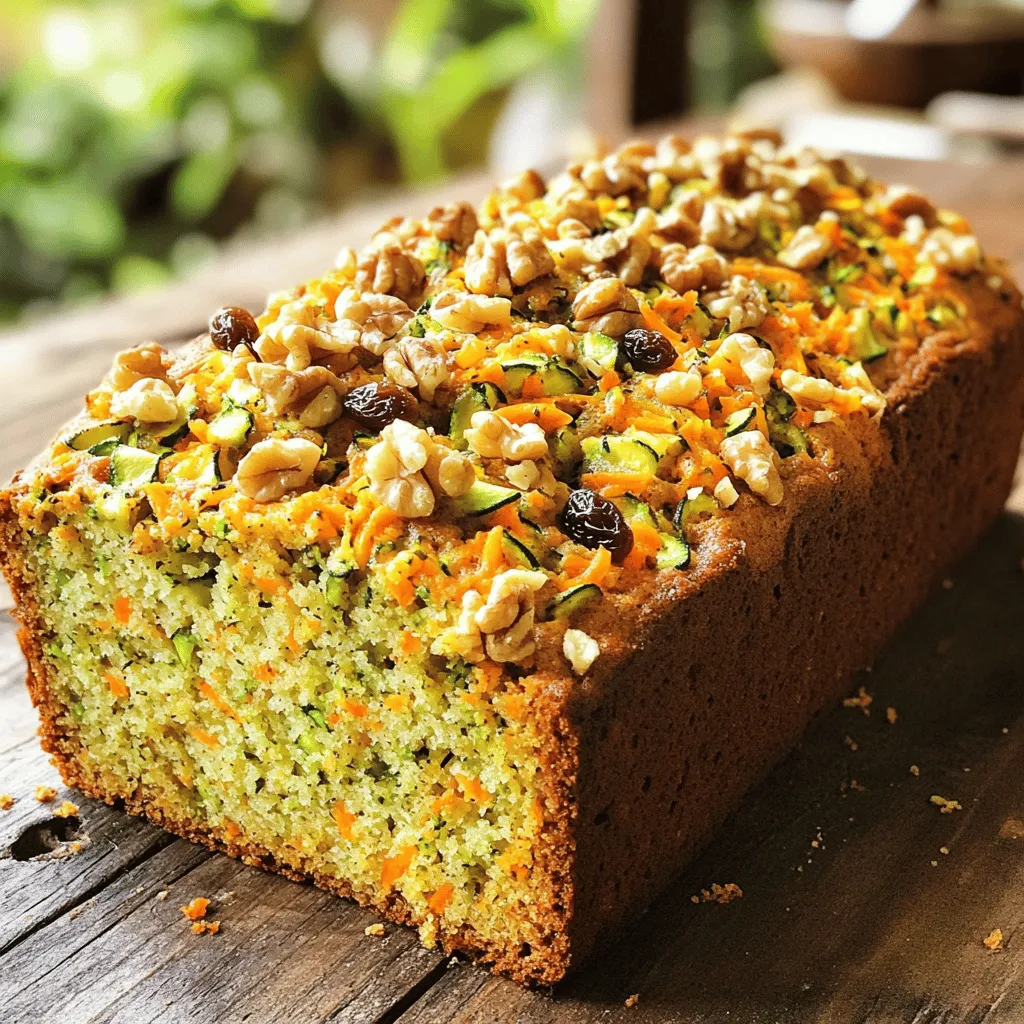
Are you ready to bake something easy and delicious? This Spiced Zucchini Carrot Bread is packed with flavor and moisture. With simple ingredients like zucchini, carrots, and warm spices, you’ll impress family and friends in no time. Whether you want a sweet snack or a cozy breakfast, this recipe checks all the boxes. Join me in the kitchen and let’s create this delightful bread together!
Ingredients
To make spiced zucchini carrot bread, gather these simple ingredients:
– 1 medium zucchini, finely grated
– 1 cup carrots, finely grated
– 1 cup all-purpose flour
– ¾ cup packed brown sugar
– ½ cup granulated sugar
– ½ cup vegetable oil
– 3 large eggs
– 1 teaspoon pure vanilla extract
– 1 teaspoon baking soda
– ½ teaspoon baking powder
– 1 teaspoon ground cinnamon
– ½ teaspoon ground nutmeg
– ½ teaspoon salt
– ½ cup chopped walnuts (optional)
– ½ cup raisins (optional)
These ingredients create a moist and flavorful bread. The zucchini and carrots add natural sweetness and moisture. The spices bring warmth and depth. If you like, add walnuts or raisins for extra texture. Using fresh ingredients will make your bread even better.
Step-by-Step Instructions
Preparation Steps
1. Preheating the Oven and Preparing the Pan
First, I set my oven to 350°F (175°C). I grab a 9×5-inch loaf pan and grease it well with cooking spray. This makes sure the bread comes out easily.
2. Mixing the Wet Ingredients
In a large bowl, I whisk together the brown sugar, granulated sugar, and vegetable oil. I mix until it’s smooth. Then, I crack in three large eggs, one at a time. After each egg, I stir well. Finally, I add the pure vanilla extract and mix until everything is blended.
3. Combining the Dry Ingredients
In another bowl, I sift together the all-purpose flour, baking soda, baking powder, ground cinnamon, ground nutmeg, and salt. I make sure these dry ingredients are mixed well. This helps the bread rise evenly and taste great.
Final Mixing
1. Adding Zucchini and Carrots to the Batter
I slowly add the dry mix to the wet mix. I stir gently until it’s just combined. I fold in the grated zucchini and carrots now. If I want, I can also mix in walnuts and raisins for extra flavor.
2. Pouring Batter into the Loaf Pan
Next, I pour the batter into the prepared loaf pan. I smooth the top with a spatula to make it even.
3. Baking and Cooling
I bake the bread for about 55-60 minutes. I check if it’s done by inserting a toothpick into the center. If it comes out clean or with a few crumbs, it’s ready. After baking, I let it cool in the pan for 10 minutes. Then, I transfer it to a wire rack to cool completely before slicing.
Tips & Tricks
Enhancing Flavor and Moisture
Grating the vegetables finely is key. It helps the bread stay moist and adds flavor. Larger pieces may not mix well and can create a dense texture. Aim for a fine grate for both zucchini and carrots. This makes sure they blend into the batter.
Avoid overmixing your batter. Once you add the dry ingredients, mix just until combined. Overmixing can make the bread tough. You want a light and fluffy texture, so be gentle.
Using fresh spices makes a big difference. Ground spices lose flavor over time. Always check your spice jars. Fresh cinnamon and nutmeg will boost the taste of your bread.
Baking Tips
Check doneness with a toothpick. Insert it into the center of the bread. If it comes out clean or with a few moist crumbs, the bread is ready. This simple test ensures your bread is baked perfectly.
For ideal slicing, cooling is important. Let the bread cool in the pan for 10 minutes. Then, move it to a wire rack. This helps the bread set and makes slicing easier. If you slice too soon, it may crumble. Enjoy your delicious Spiced Zucchini Carrot Bread!

Variations
Ingredient Swaps
You can change up the sugars in this recipe. Try using honey or maple syrup instead of sugar. Both options add a nice flavor and keep the bread moist. You can also use different nuts or seeds. Walnuts are great, but you can swap them for pecans or sunflower seeds. This adds some crunch and healthy fats to your bread.
Flavor Additions
Adding chocolate chips or dried fruit can take this bread to the next level. Chocolate chips make it sweet and fun for kids. Dried fruit like cranberries or apricots gives a chewy texture. You can also play with spices. Using different spices like allspice or cloves can add depth. Allspice has a warm flavor that pairs well with the bread. Cloves add a nice kick. Feel free to mix and match these ideas to find your favorite taste!
Storage Info
Storing the Bread
You can store your Spiced Zucchini Carrot Bread at room temperature. Wrap it tightly in plastic wrap or aluminum foil. This way, it stays fresh for up to four days. If you live in a humid area, refrigeration can help prevent spoilage. Just remember, cold storage may change the texture a bit.
For long-term storage, freezing is a great option. Slice the bread first, then wrap each slice in plastic. Place the wrapped slices in a freezer-safe bag. You can store it this way for up to three months. When you’re ready, simply take out a slice or two.
Best Ways to Reheat
To reheat your bread, you have two main options: the oven or the microwave. If you use the oven, preheat it to 350°F (175°C). Place the bread on a baking sheet and heat for about 10 minutes. This method keeps the crust nice and crisp.
If you’re in a hurry, the microwave works well, too. Heat a slice for about 15 to 20 seconds. To keep it moist, place a damp paper towel over the bread. This will help prevent it from drying out. Enjoy your warm and delicious bread anytime!
FAQs
Common Questions
How do I know when the bread is done?
You can check the bread’s doneness using a toothpick. Insert it into the center of the bread. If it comes out clean or with a few moist crumbs, your bread is ready. It’s important to not rely solely on time, as oven temperatures can vary.
Can I make this bread gluten-free?
Yes, you can make this bread gluten-free! Simply replace all-purpose flour with a gluten-free blend. Ensure the blend contains a binding agent, like xanthan gum, to keep the bread from crumbling.
How long does Spiced Zucchini Carrot Bread last?
This bread can last about 3-5 days at room temperature. To keep it fresh longer, store it in an airtight container. You can refrigerate it for up to a week or freeze it for up to three months.
Additional User Queries
Can I substitute the eggs?
Yes, you can substitute the eggs. Use unsweetened applesauce, mashed banana, or flaxseed meal mixed with water. Each of these options works well and keeps the bread moist.
What can I serve with this bread?
This bread is delicious on its own, but you can serve it with cream cheese, butter, or a light glaze. It pairs well with a cup of tea or coffee for a cozy treat.
Can I double the recipe for a larger batch?
Absolutely! You can double the recipe easily. Just make sure you have a larger loaf pan or multiple pans. Adjust the baking time if necessary, as larger batches may need a bit longer to bake through.This spiced zucchini carrot bread is a joy to make. You can prepare it in under an hour. You will love how simple it is to mix the ingredients.
When I make this bread, I start by grating the zucchini and carrots. This step is key. Finely grated veggies blend well into the batter, keeping the bread moist.
Next, I combine the wet ingredients. I whisk together brown sugar, granulated sugar, and vegetable oil. I add eggs one by one. This keeps the mixture smooth and creamy. Then, I mix in pure vanilla extract for that lovely aroma.
In another bowl, I sift the dry ingredients. This includes flour, baking soda, baking powder, and spices. Sifting helps to avoid clumps. I love using fresh ground cinnamon and nutmeg for a warm flavor.
I combine the wet and dry mixtures gently. It’s important not to overmix. This keeps the bread light and fluffy. After that, I fold in the grated veggies. If I want extra crunch, I add walnuts or raisins.
When the batter is ready, I pour it into a greased loaf pan. Smoothing the top with a spatula gives it a nice finish. I bake it in a preheated oven for about 55-60 minutes. The smell fills my kitchen, making it hard to wait!
After baking, I let the bread cool for 10 minutes in the pan. Then, I transfer it to a wire rack. This cooling step is crucial for perfect slicing later.
This blog post shared a great recipe for Spiced Zucchini Carrot Bread. You learned about key ingredients and step-by-step instructions for making it. Tips on flavor, texture, and variations add value to the recipe. Remember to store it properly for freshness and feel free to experiment with flavors. Baking brings joy, and this bread is an easy way to enjoy that. Dive in and share this treat with family and friends. Your baking adventure awaits!


![- 2 boneless, skinless chicken breasts - 4 cups frozen sweet corn - 1 medium onion, finely diced - 2 cloves garlic, minced - 2 medium-sized potatoes, peeled and diced - 3 cups chicken broth (low-sodium if preferred) - 1 teaspoon dried thyme - 1 teaspoon smoked paprika - 1 teaspoon salt (adjust to taste) - 1/2 teaspoon black pepper - 1 cup heavy cream - 1 tablespoon fresh parsley, finely chopped (for garnish) - Chicken Breasts: These give the chowder its protein and heartiness. Boneless and skinless cuts work best for easy shredding. - Frozen Sweet Corn: This adds natural sweetness and a nice texture. Frozen corn saves time and adds flavor. - Onion and Garlic: These aromatics enhance the overall taste. They create a flavorful base for your chowder. - Potatoes: Diced potatoes add creaminess and body. They also soak up all the lovely flavors. - Chicken Broth: This liquid forms the chowder's base. Low-sodium broth lets you control the salt. - Heavy Cream: This ingredient adds richness and smoothness. It makes the chowder feel indulgent. - Dried Thyme and Smoked Paprika: These spices give depth and warmth. They create a lovely, savory taste. - Chicken: You can use turkey or tofu for a different protein. - Corn: Fresh corn works instead of frozen if you have it. - Cream: Swap heavy cream for coconut milk for a dairy-free option. - Potatoes: Cauliflower can replace potatoes for a lower-carb choice. - Broth: Use vegetable broth for a vegetarian version. - Herbs and Spices: Feel free to mix in your favorite seasonings or herbs. This recipe is flexible, allowing you to create a chowder that fits your taste and needs. Check out the Full Recipe for cooking instructions and enjoy making this hearty meal! To start, gather all your ingredients. You’ll need chicken, corn, onion, garlic, potatoes, and broth. Place the chicken breasts at the bottom of the crockpot. Next, add the corn, onion, garlic, and potatoes on top of the chicken. This order helps the chicken cook well. Pour the broth over everything, covering the ingredients completely. Sprinkle in the thyme, paprika, salt, and pepper. Use a spoon to mix them gently. Set your crockpot to cook on low for 6-8 hours or high for 4 hours. The low setting gives the best taste and texture. The chicken will be very tender when done. You can check for doneness by cutting into the chicken; it should be white and juicy. About 30 minutes before serving, take the chicken out of the pot. Use two forks to shred it into small pieces. This will help it absorb more flavors. After shredding, return the chicken to the chowder. Mix it well. This step adds heartiness to your meal. Enjoy the rich, creamy goodness of this chowder! For the complete recipe, refer to the [Full Recipe]. To boost the flavor of your chowder, try using fresh herbs. Fresh thyme or basil can add a bright touch. You can also add a squeeze of lemon juice before serving. This gives a fresh and zesty kick. For a smoky flavor, increase the smoked paprika. If you like heat, add a pinch of cayenne pepper. This will make your chowder more exciting without overpowering it. One common mistake is not seasoning enough. Always taste your chowder before serving. Adjust the salt and pepper to your liking. Another mistake is overcooking the chicken. If you leave it in too long, it can become dry. Remember to shred the chicken about 30 minutes before serving. This keeps it juicy and flavorful. Lastly, don’t skip the cream. It adds richness and a nice texture to your chowder. Garnishing can make your chowder look appealing. I love using fresh parsley for color and freshness. Chopped green onions also add a nice crunch. A dollop of sour cream can enhance creaminess and flavor. For a fun twist, sprinkle some crispy bacon bits on top. This adds a salty crunch that contrasts well with the smooth chowder. Serve with warm bread for a complete meal. {{image_4}} You can boost the health of your chowder by adding more veggies. Carrots, bell peppers, or zucchini work great. Chop them into small pieces so they cook well. You can add them when you put in the corn and potatoes. This way, they cook together and soak up all the yummy flavors. If you need a gluten-free dish, this chowder is already a great choice. Just make sure the chicken broth you use is gluten-free. Most store-bought broths are, but it's always good to check the label. This chowder is warm and filling without any gluten. Want to add some heat? You can make your chowder spicy! Add diced jalapeños or a pinch of cayenne pepper. Start with a little and taste it. You can always add more if you like it hot. This twist will give your chowder a fun kick and make it even more exciting. For more ideas and a complete guide, check out the Full Recipe. After you finish your meal, let the chowder cool. Store it in an airtight container. It will stay fresh in the fridge for about 3 to 4 days. If you want to keep it longer, consider freezing. To freeze your chowder, first cool it completely. Then, pour it into freezer-safe bags or containers. Make sure to leave some space for expansion. You can freeze it for up to 3 months. When ready to eat, just thaw it overnight in the fridge. When it’s time to enjoy your chowder again, reheat it gently. You can use the stove or microwave. If using the stove, heat it on low and stir often. If it seems too thick, add a splash of chicken broth or water. This will help bring back the creamy texture. Enjoy your warm and hearty meal! You can store leftover chowder in the fridge for up to four days. Keep it in an airtight container. If you want to keep it longer, freeze it. It can last up to three months in the freezer. Just make sure to thaw it overnight in the fridge before reheating. Yes, you can use fresh corn! Just cut the kernels off the cob. You will need about four ears of corn to replace the frozen version. Fresh corn adds a lovely crunch and sweetness. Just add it to the crockpot at the same time as the other ingredients. Crockpot Chicken Corn Chowder goes well with many sides. Here are some great options: - Crispy bread - Buttered rolls - Green salad - Garlic bread - Cornbread These sides add texture and complement the chowder's flavors. To make this chowder vegetarian, replace chicken with firm tofu or chickpeas. Use vegetable broth instead of chicken broth. You can also add more veggies, like bell peppers or zucchini. This way, you keep the chowder hearty and tasty without meat. This chowder is rich and filling. A serving has about: - 350 calories - 15 grams of fat - 30 grams of carbs - 20 grams of protein These values can change based on the ingredients you use. Check the labels for exact numbers if you substitute items. For the full recipe, refer to the earlier section. This blog post covered all you need to make tasty Crockpot Chicken Corn Chowder. We explored key ingredients, helpful cooking steps, and tips to enhance flavor. I shared variations to fit your diet and storage info to keep leftovers fresh. Remember, making chowder can be fun and easy. Experiment with flavors and enjoy your meal. Happy cooking!](https://fastmealmate.com/wp-content/uploads/2025/07/7342804b-764e-40da-bca1-0102f439c2b1-768x768.webp)
![For the Chicken Caesar Pasta Salad, you will need these main ingredients: - 8 oz fusilli pasta - 1 cup cooked chicken breast, diced (or rotisserie chicken) - 1 cup romaine lettuce, chopped into bite-sized pieces - 1/2 cup cherry tomatoes, halved - 1/4 cup freshly grated Parmesan cheese - 1/4 cup Caesar dressing - 2 tablespoons freshly squeezed lemon juice - 1 teaspoon garlic powder - Salt and black pepper, to taste - 1/4 cup crunchy croutons (for garnish) - Fresh parsley, finely chopped (for garnish) These ingredients come together to create a vibrant and tasty dish. Feel free to customize your salad with these optional ingredients: - Avocado slices for creaminess - Grilled zucchini or bell peppers for extra veggies - Bacon bits for a smoky flavor - Extra herbs like basil or dill for freshness Adding these extras can make your salad unique and tailored to your taste. This salad not only tastes great but also packs some nutritional value. Here is a rough estimate of what you get per serving: - Calories: About 400 - Protein: 30g - Carbohydrates: 35g - Fat: 20g - Fiber: 3g This Chicken Caesar Pasta Salad is a balanced meal, making it perfect for lunch or dinner. You can find the full recipe at [Full Recipe]. First, grab a large pot and fill it with water. Bring the water to a rolling boil. Add a pinch of salt to the water. Now, add 8 oz of fusilli pasta. Cook it for 8-10 minutes until it's al dente. When the pasta is done, drain it well. Rinse it under cold water to stop cooking. This helps keep the pasta firm and cool. Set the pasta aside in a large bowl. Next, let’s focus on the chicken. If you have leftover cooked chicken, chop it into small pieces. If you’re using fresh chicken, season it with salt, black pepper, and 1 teaspoon of garlic powder. Cook it in a skillet over medium heat for 6-8 minutes. Make sure it’s cooked through and no longer pink. Let the chicken rest for a few minutes, then chop it into bite-sized pieces. Now, it’s time to bring it all together. In the large bowl with the pasta, add the diced chicken. Then, toss in 1 cup of chopped romaine lettuce and 1/2 cup of halved cherry tomatoes. Gently mix everything to keep the lettuce fresh. In a small bowl, whisk together 1/4 cup of Caesar dressing and 2 tablespoons of fresh lemon juice. Pour the dressing over the salad and toss it all together. Sprinkle 1/4 cup of grated Parmesan cheese and 1/4 cup of crunchy croutons on top. For a fresh touch, add some chopped parsley. Enjoy your Chicken Caesar Pasta Salad right away for the best taste! To make the best Caesar dressing, use fresh ingredients. Start with a good Caesar dressing base. Add freshly squeezed lemon juice for a bright taste. This gives your salad a fresh kick. If you like garlic, mix in some minced garlic. This adds depth to the flavor. Taste your dressing before pouring it over the salad. Adjust salt and pepper to your liking. For a creamier texture, whisk in some Greek yogurt or sour cream. This can make the salad richer and more satisfying. Serve this salad in a big bowl to show off its colors. Layer it with extra romaine for a nice crunch. Add more cherry tomatoes for a sweet touch. For a fun twist, sprinkle some bacon bits or chopped olives on top. This adds extra flavor and texture. You can also serve it as a side dish for grilled meats. Pair it with garlic bread for a full meal. For a picnic, pack the salad in a jar. Just layer the ingredients and keep the dressing separate until serving. To save time, use rotisserie chicken. It’s already cooked and ready to go. You can also cook the pasta in advance. Just store it in the fridge until you’re ready to mix the salad. Pre-chop your veggies and store them in airtight containers. This makes assembly quick and easy. If you have leftovers, make sure to keep the dressing separate. This keeps the salad fresh and crunchy. You can enjoy it for lunch the next day, too! Check out the full recipe for more details. {{image_4}} You can add many proteins to your Chicken Caesar Pasta Salad. Grilled shrimp gives a sweet and savory taste. You can use steak for a heartier meal. If you like fish, try adding tuna for a fresh twist. Each protein adds a unique flavor and texture. For a vegetarian version, skip the chicken and use chickpeas. They add protein and a nice bite. To make it vegan, swap the Caesar dressing for a plant-based version. You can also use nutritional yeast instead of Parmesan cheese for a cheesy flavor without dairy. If you have dietary needs, you can make simple swaps. Use gluten-free pasta if you need to avoid gluten. For a lower carb option, try zucchini noodles. If you're watching calories, cut down on the dressing or use a lighter version. Always feel free to adjust this recipe to fit your diet. To store your Chicken Caesar Pasta Salad, place it in an airtight container. This keeps the flavors fresh and prevents it from drying out. Make sure it cools down first before sealing. You can store it in the fridge for up to three days. For meal prep, divide the salad into single-serving containers. This makes it easy to grab and go. Keep the croutons and dressing separate until you're ready to eat. This way, the salad stays crisp, and the flavors blend perfectly when you mix it. The salad tastes best cold. If you want to reheat it, warm the chicken separately, then mix it back in. However, I recommend enjoying it cold for the best flavor. The salad keeps well for about three days, but the croutons may lose their crunch after a day. For the freshest taste, eat it sooner rather than later. For more details, check out the Full Recipe. To make Chicken Caesar Pasta Salad less calorie-dense, you can swap some ingredients. Use whole wheat pasta instead of regular. This change adds fiber and nutrients. You can also replace Caesar dressing with a lighter version or make your own with yogurt. This option cuts down on fat. Reducing the amount of cheese and croutons helps too. You get the flavor without the extra calories. Focus on using more veggies, like cucumbers or bell peppers. They add crunch and volume without many calories. Yes, you can use different types of pasta for this salad. Fusilli is great, but penne, rotini, or even whole wheat pasta works well too. Gluten-free pasta is an option if you need it. Each type brings its unique shape and texture. Just make sure to cook it al dente as per package directions. This ensures it holds up well with the dressing and other ingredients. When looking for the best store-bought Caesar dressings, I recommend a few brands. Look for ones with natural ingredients and low sugar. Some great options include Annie's Organic Caesar, Ken's Steakhouse, and Cardini's. These dressings have a good balance of flavor and creaminess. Always check the label. You want a dressing that fits your taste and dietary needs. If possible, try a few to find your favorite! This post detailed how to make Chicken Caesar Pasta Salad. You learned about main ingredients, tips for making the best dressing, and how to customize your meal. We covered storage, time-saving tricks, and tasty variations. In summary, this salad is easy to make. You can enjoy it fresh or save it for later. Use these tips to make your dish unique. Enjoy your cooking journey!](https://fastmealmate.com/wp-content/uploads/2025/06/c8df564d-281f-4520-b900-ec1f4444fefb-768x768.webp)


![- Ground beef - Flour tortillas - Cheeses: cheddar and mozzarella - Pickles, ketchup, and mustard The heart of my Cheeseburger Quesadilla Smash Sliders lies in the essential ingredients. I always choose high-quality ground beef for flavor. The flour tortillas serve as the base, holding everything together. I love using both cheddar and mozzarella cheese. They melt perfectly and add a creamy texture. Pickles, ketchup, and mustard bring that classic cheeseburger taste. - Garlic powder - Onion powder - Salt and pepper Seasonings are key to great flavor. I add garlic powder and onion powder to the beef. They enhance the taste without being overpowering. Salt and pepper are a must for balance. Adjust them to your liking for the best results. - Fresh lettuce leaves - Sliced tomatoes and onions For extra crunch and freshness, I recommend optional toppings. Fresh lettuce leaves add a nice texture. Sliced tomatoes and onions give a burst of flavor. Feel free to mix and match these toppings to suit your taste. They make the sliders even better! For the full recipe, check out the [Full Recipe]. - Start by mixing the ground beef with garlic powder, onion powder, salt, and pepper. - Use your hands or a spoon to blend the mixture well. - Divide the mixture into 8 equal parts. Shape each part into small patties. - Preheat a large skillet over medium-high heat. - Place the patties in the skillet, making sure not to crowd them. - Cook each patty for 2-3 minutes. Look for a nice golden brown crust before flipping. - Once cooked through, remove the patties and set them aside on a plate. - Lay one flour tortilla flat in the skillet. - Sprinkle half of the shredded cheddar and mozzarella cheese on the tortilla. - Place 2 cooked beef patties on top of the cheese. - Add chopped pickles and drizzle ketchup and mustard over the patties for extra flavor. - Top with the remaining cheese, then place a second tortilla over it. - Cook for about 2-3 minutes until the bottom is golden brown. Flip it carefully to cook the other side until crispy. - Once cooked, let it rest for a minute on a cutting board. Slice into wedges and enjoy. For the full recipe, check the [Full Recipe]. To ensure even cooking of patties, make them all the same size. I like to shape them about the size of a golf ball. This way, they cook evenly in the skillet. Preheat your skillet well before adding the patties. This helps develop a nice crust. For a crispy quesadilla, use medium-high heat while cooking. This allows the tortillas to become golden and crispy. Flip them carefully to keep the fillings intact. You want that delightful crunch with every bite! Adding spices can make a big difference. Try a pinch of smoked paprika or chili powder for a kick. Fresh herbs, like cilantro or parsley, can brighten the flavors too. These small changes can take your sliders to the next level. When it comes to sauces, think beyond ketchup and mustard. Barbecue sauce or spicy mayo can add a new twist. You can even mix them for extra flavor. Don’t be afraid to experiment! For the best sides, consider crispy fries or a fresh salad. Both pair nicely with these sliders. You can also serve them with a side of salsa for a fun dip! Presentation is key. Try stacking the quesadilla slices in a tower. Add fresh lettuce or tomatoes on the side for color. It makes the dish look great and appetizing. For a fun touch, use small skewers to hold the sliders together! You can find the full recipe for these delicious Cheeseburger Quesadilla Smash Sliders to explore more ways to enjoy this amazing dish! {{image_4}} You can change the protein in these sliders. Instead of ground beef, try ground chicken or turkey. Both offer great taste and a leaner option. If you want a plant-based choice, use vegan ground meat. Vegan cheese options are also available. Brands like Daiya or Violife melt well and taste good. Want some spice? Add jalapeños to your sliders for a kick. You can also mix in spices like cumin or chili powder for extra flavor. For a Southwestern twist, top your quesadilla with avocado or pico de gallo. These toppings add freshness and texture, making every bite exciting. You can cook your sliders in different ways. Grilling gives a smoky flavor. If you prefer stovetop cooking, use a skillet for a crispy finish. An air fryer is perfect for a lighter option. Set it to 375°F and cook for about 8-10 minutes. This method makes your quesadilla super crispy without excess oil. For the complete recipe, check out the Full Recipe. To keep your quesadilla sliders fresh, store them in an airtight container. Place parchment paper between layers to avoid sticking. They can last up to three days in the fridge. Make sure to cool them down before sealing. This helps keep them safe and tasty. When reheating, use a skillet over medium heat. This method warms them evenly and keeps them crispy. Add a drop of oil for extra crispness. Avoid the microwave, as it can make them soggy. Heat each slider for about 3-4 minutes per side. You can freeze either assembled or cooked sliders. Wrap each slider tightly in plastic wrap and then in foil. This helps prevent freezer burn. They can last up to two months in the freezer. To enjoy them, thaw in the fridge overnight. Reheat in the skillet as mentioned above for the best results. For the full recipe, check out the earlier sections. To make these sliders, start by mixing ground beef with garlic powder, onion powder, salt, and pepper. Shape the mix into small patties. Next, cook the patties in a skillet until they are brown. Then, place one tortilla in the skillet, add cheese, cooked patties, pickles, ketchup, and mustard. Top with another tortilla. Cook until both tortillas are crispy and the cheese melts. Cut the quesadilla into wedges, and enjoy! I recommend using a blend of cheddar and mozzarella. Cheddar gives a rich flavor, while mozzarella melts beautifully. You can also try pepper jack for a spicy kick or gouda for a smoky taste. Mixing these cheeses will create a creamy, tasty filling that pulls apart nicely. Yes, you can prepare the beef patties and chop the toppings ahead of time. Store them in the fridge for up to a day. When ready to cook, just assemble the quesadillas and grill them. This will save you time and let you enjoy your meal stress-free. For the full recipe, check out the details above. You learned how to make delicious cheeseburger quesadilla smash sliders. We covered essential ingredients, like ground beef and cheeses, and how to cook them perfectly. I shared key tips for flavor and cooking techniques. You also discovered variations and storage tips for these tasty sliders. By trying these recipes, you can impress your family or friends at your next gathering. Happy cooking!](https://fastmealmate.com/wp-content/uploads/2025/07/75d3e756-492b-48dc-99fb-d4828a25c64e-768x768.webp)