Get ready to indulge in a sweet treat like no other! S’mores Brownies are the perfect twist on the classic campfire dessert. With gooey chocolate, crispy graham crumbs, and fluffy marshmallows, they’ll impress everyone. In this easy recipe, I’ll guide you step-by-step, ensuring you get the best texture and taste. Let’s dive into the delightful world of S’mores Brownies, where every bite is a warm hug!
Ingredients
Exact Ingredients Needed
To make S’mores Brownies, gather these ingredients:
– 1 cup unsalted butter (2 sticks)
– 2 cups granulated sugar
– 4 large eggs
– 1 teaspoon pure vanilla extract
– 1 cup all-purpose flour
– 1 cup unsweetened cocoa powder
– 1/2 teaspoon baking powder
– 1/4 teaspoon fine sea salt
– 1 cup semi-sweet chocolate chips
– 1 cup mini marshmallows (plus extra for topping)
– 1 cup crushed graham crackers (divided)
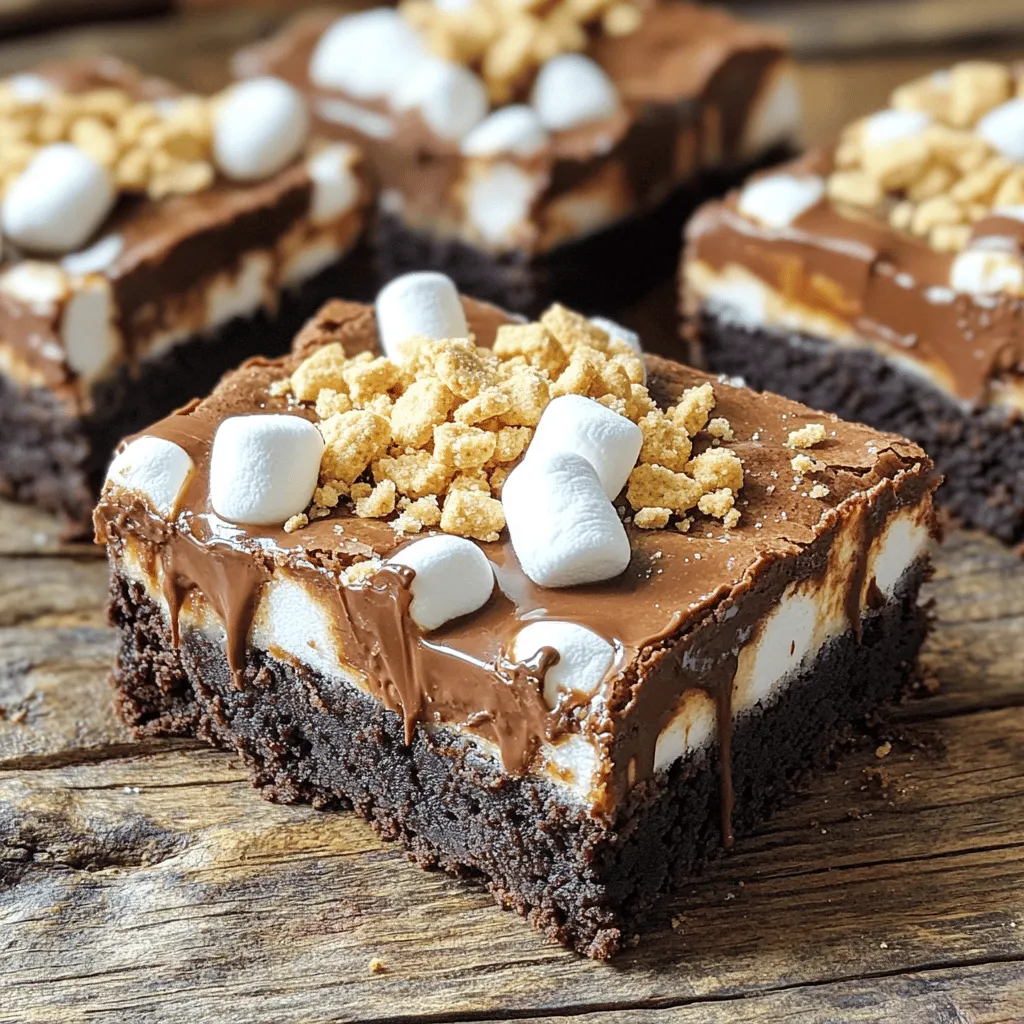
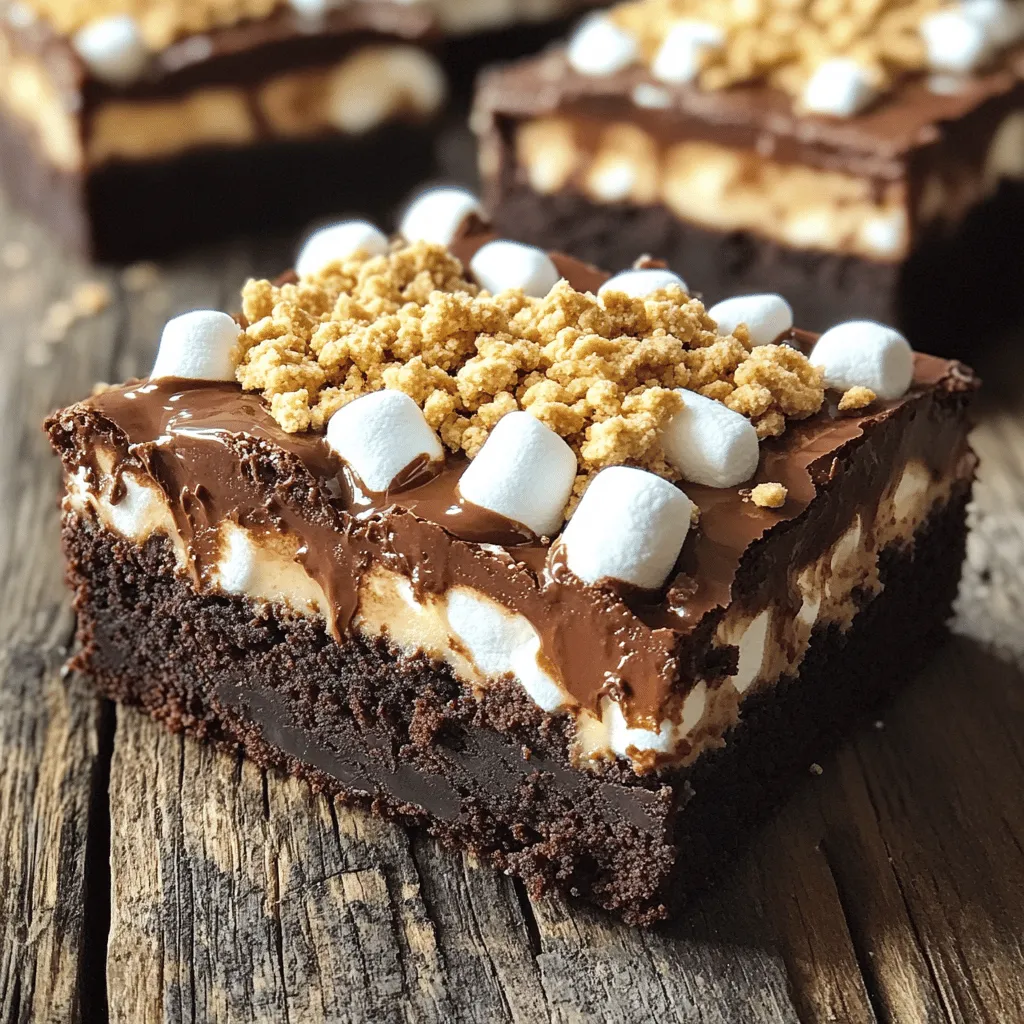
These ingredients create a rich brownie base, layered with chocolate, marshmallows, and graham crackers.
Optional Toppings and Enhancements
You can add fun toppings to your S’mores Brownies:
– Extra mini marshmallows for a toasted finish
– A drizzle of chocolate sauce for richness
– A dusting of powdered sugar for a sweet touch
– A scoop of vanilla ice cream for creaminess
These enhancements bring an extra layer of joy to each bite.
Substitutions for Dietary Preferences
If you have dietary needs, here are some easy swaps:
– Use coconut oil instead of butter for a dairy-free option.
– Substitute flax eggs for regular eggs for a vegan version.
– Use gluten-free flour to make these brownies gluten-free.
These substitutions keep the flavor and joy intact while catering to your needs.
Step-by-Step Instructions
Preheating and Preparing the Pan
First, preheat your oven to 350°F (175°C). This heat gets the brownies baking just right. Next, grab a 9×13 inch baking pan. You can grease it lightly or line it with parchment paper. Lining helps with easy removal later.
Combining Ingredients
Start by melting 1 cup of unsalted butter in a medium saucepan over low heat. Once it’s melted, take it off the heat. Stir in 2 cups of granulated sugar until it looks shiny and well mixed. Let this cool a bit. Now, add 4 large eggs one at a time. Whisk each egg in fully before adding the next one. Don’t forget the 1 teaspoon of pure vanilla extract. Mix until smooth.
In another bowl, whisk together 1 cup of all-purpose flour, 1 cup of unsweetened cocoa powder, 1/2 teaspoon of baking powder, and 1/4 teaspoon of fine sea salt. This step is key for the best brownie texture. After that, gently fold the dry mix into the wet mix. Stir just until combined; it’s okay if some lumps stay. Finally, fold in 1 cup of semi-sweet chocolate chips.
Layering and Baking Process
Pour half of the brownie batter into your prepared pan, spreading it evenly. Next, sprinkle half of the crushed graham crackers over this layer. Then, add half of the mini marshmallows. This creates a lovely s’mores layer. After that, pour the rest of the brownie batter on top and smooth it out.
Finish by sprinkling the remaining graham crackers and mini marshmallows on top. This will make a delicious topping that toasts in the oven. Place the pan in your preheated oven and bake for 30-35 minutes. To check if they are done, insert a toothpick. It should come out with a few moist crumbs but no wet batter.
Let the brownies cool in the pan for about 20 minutes before cutting them into squares.
Tips & Tricks
How to Achieve the Perfect Brownie Texture
To get that perfect brownie texture, focus on mixing. Combine the wet and dry ingredients just until you see no dry flour. Overmixing leads to tough brownies. Remember, a few lumps are okay! Also, using fresh ingredients helps a lot. Fresh eggs and cocoa make your brownies rich and tasty.
Best Practices for Layering S’mores Elements
Layering is key to a great s’mores brownie. Start with half of the brownie batter in the pan. Then, add half of the crushed graham crackers, followed by half of the mini marshmallows. Repeat this process. This way, every bite is a surprise of gooey marshmallow and crunchy graham cracker. Make sure to spread the final layer of batter gently over the top.
Cooling and Cutting for Best Presentation
Cooling the brownies is very important. Let them sit in the pan for about 20 minutes. This makes them easier to cut. Use a sharp knife for clean edges. For a fun finish, top each piece with extra mini marshmallows and drizzle some chocolate sauce. You can also dust them with powdered sugar for a sweet touch.
Variations
Different Types of Chocolate to Use
You can change the type of chocolate in these brownies. Instead of semi-sweet chocolate chips, try dark or milk chocolate. Dark chocolate gives a rich flavor. Milk chocolate adds sweetness and creaminess. You can even mix different types for a fun twist.
Adding Nuts or Other Mix-Ins
Nuts can add crunch to your brownies. Chopped walnuts, pecans, or almonds work well. You can also try adding coconut flakes or toffee bits. Mix these in when you add the chocolate chips. This way, you get a tasty surprise in every bite!
Alternative Flavor Profiles (Mint, Peanut Butter, etc.)
Want to switch up the flavors? Add a few drops of mint extract for a fresh twist. For a nutty taste, mix in some peanut butter. You can swirl peanut butter into the batter before baking. This makes your brownies even more special. Feel free to experiment. The ideas are endless!
Storage Info
How to Store Leftover Brownies
To keep your S’mores brownies fresh, place them in an airtight container. This helps maintain their moistness. If you cut the brownies into squares, layer parchment paper between the pieces. This keeps them from sticking together. Store the container in a cool, dry place, like a kitchen cabinet. The brownies will stay tasty for up to a week. If you want them to last longer, freezing is a great option.
Freezing Tips for S’mores Brownies
Freezing S’mores brownies is easy. First, let them cool completely. Then, wrap each brownie square in plastic wrap. For extra protection, place the wrapped brownies in a freezer bag or airtight container. This prevents freezer burn. You can freeze the brownies for up to three months. When you’re ready to enjoy them, simply take them out and let them thaw at room temperature.
Reheating Instructions for Best Results
To enjoy your brownies warm, preheat the oven to 350°F (175°C). Place the brownies on a baking sheet and heat for about 10 minutes. This warms them without drying them out. You can also use the microwave. Heat each brownie for 10-15 seconds, but keep an eye on them. You want them warm, not hot. Serve them with a scoop of vanilla ice cream for a real treat!
FAQs
Can I make S’mores Brownies ahead of time?
Yes, you can make S’mores Brownies ahead of time. I often bake them a day before a party. Just let them cool completely, then cover them tightly. This way, they stay fresh and tasty. When it’s time to serve, warm them slightly in the oven. This makes the chocolate and marshmallows gooey once again!
What if I don’t have graham crackers?
If you don’t have graham crackers, don’t worry! You can use crushed cookies instead. Oreos or digestive biscuits work well as a substitute. Just crush them into small pieces, and use them in the same way. The flavor will change a bit, but they will still taste great!
How do I know when the brownies are done baking?
To check if the brownies are done, insert a toothpick into the center. If it comes out with a few moist crumbs, they are perfect. If the toothpick has wet batter on it, they need more time. Bake them for 30-35 minutes, but keep an eye on them near the end. You want that perfect, fudgy texture!
This blog post covered how to make delicious s’mores brownies. We discussed the exact ingredients and optional toppings for your recipe. I shared step-by-step instructions that make it easy to follow. You learned tips for perfect texture and cutting brownies nicely. We also explored fun variations and storage tricks.
These brownies are tasty and fun to make. Now, grab your ingredients and start baking. Your sweet treat awaits!


