Savory Potato Spinach Frittata Healthy and Flavorful Dish

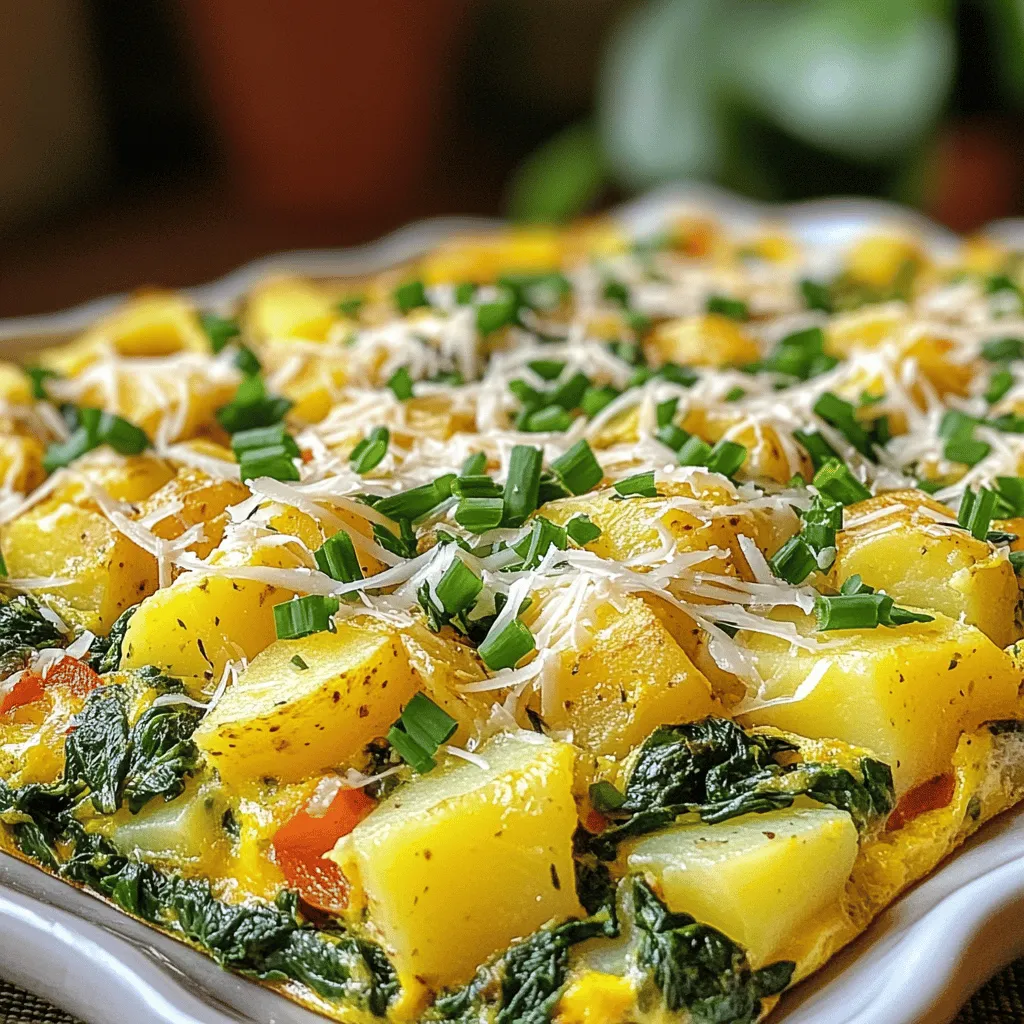
Craving a dish that’s both healthy and packed with flavor? Look no further! This Savory Potato Spinach Frittata combines tender potatoes and fresh spinach for a satisfying meal. Perfect for breakfast, lunch, or dinner, it’s quick to make and offers endless variations. Join me to explore simple ingredients, easy steps, and tips to elevate your frittata game. Let’s dive into this delicious, nutritious recipe that will impress your taste buds!
Ingredients
Grocery List for Savory Potato Spinach Frittata
To make a savory potato spinach frittata, gather these ingredients:
– 4 large eggs
– 1 cup fresh spinach, chopped
– 2 medium potatoes, peeled and diced
– 1/2 cup onion, finely chopped
– 1/2 cup bell pepper, diced (red or yellow for sweetness)
– 1/2 cup shredded cheese (cheddar for a sharp flavor or mozzarella for creaminess)
– 2 tablespoons olive oil
– Salt and freshly cracked black pepper to taste
– Fresh herbs (like chives or parsley), finely chopped, for garnish
Substitute Options for Key Ingredients
You can swap some ingredients if needed:
– Eggs: Try using egg whites or a plant-based egg substitute.
– Potatoes: Sweet potatoes work well and add a new flavor.
– Spinach: Use kale or Swiss chard for a different green.
– Cheese: Feta or goat cheese can add a tangy twist.
– Olive oil: You can use butter or avocado oil instead.
Ingredient Tips for the Best Flavor
To boost the taste of your frittata, consider these tips:
– Use fresh herbs: Fresh herbs add brightness and depth. Always choose high-quality, fresh produce.
– Salt wisely: Add salt at different stages to enhance flavors.
– Cook potatoes well: Ensure they are golden brown and tender for a great base.
– Don’t rush cooking: Let the frittata set slowly in the oven for a tender texture.Enjoy cooking!
Step-by-Step Instructions
Preheating and Preparing the Oven
First, you need to preheat your oven to 375°F (190°C). This step is crucial. A hot oven helps the frittata cook evenly. While the oven heats up, grab your oven-safe skillet. I prefer using cast iron for its heat retention. This skillet will hold all those tasty veggies and eggs.
Cooking the Potatoes and Aromatics
Next, add two tablespoons of olive oil into your skillet. Turn on the heat to medium. Once the oil is hot, toss in the diced potatoes. Cook these for about 10 minutes. Stir them often. You want them golden brown and soft.
After the potatoes are ready, add in 1/2 cup of finely chopped onion and 1/2 cup of diced bell pepper. Cook these for another 5 minutes. The onion should become translucent, and the peppers should soften. This mix brings a sweet and savory flavor to your dish.
Now it’s time to add the spinach. Fold in 1 cup of chopped spinach and let it cook for 1-2 minutes. You want it to wilt down. Don’t forget to sprinkle salt and freshly cracked black pepper to taste. This will enhance all the flavors in your frittata.
Combining Eggs and Vegetables
In a separate bowl, crack 4 large eggs and whisk them well. Be sure to beat them until they’re smooth. Then, add in your shredded cheese of choice—1/2 cup works great. Cheddar gives a sharp taste, while mozzarella adds creaminess.
Pour this egg and cheese mixture over your cooked veggies in the skillet. Let it cook on the stovetop for 3-4 minutes. Watch closely as the edges set while the center stays a bit runny.
Finally, transfer the skillet to your preheated oven. Bake it for 10-12 minutes. Look for a golden top and a firm center. When it’s done, take it out and let it cool a bit. This will help with slicing.
For a finishing touch, sprinkle fresh herbs on top. This adds a nice pop of color. Enjoy your savory potato spinach frittata!
Tips & Tricks
Ensuring a Fluffy Frittata
To make your frittata fluffy, focus on the eggs. Whisk them well until they are light and frothy. This adds air, which helps with fluffiness. Use fresh eggs since they whip better than older ones. When mixing in the cheese, avoid over-stirring. This keeps the texture light. Aim for a balance of cooked vegetables and egg. If the veggies are too wet, they can weigh down the frittata.
Common Mistakes to Avoid
One common mistake is cooking on high heat. This can lead to a burnt bottom and a raw center. Instead, cook your frittata on medium heat. Another mistake is not letting it cool before slicing. If you cut it right away, it may fall apart. Lastly, don’t skip the seasoning. Salt and pepper bring out the flavors in all the ingredients.
Alternative Cooking Methods
You can cook your frittata in different ways. The oven method is great for even cooking. It gives a nice golden top. You can also cook it entirely on the stovetop. Just cover the skillet with a lid once the edges set. This method takes a bit more attention, but it works well. If you want a quick option, try a microwave. It won’t brown as much, but it’s fast and easy.

Variations
Adding Different Vegetables (e.g., mushrooms, zucchini)
You can make your frittata even more tasty by adding other veggies. Mushrooms add a rich flavor. Sauté them before mixing into the eggs. Zucchini brings a nice crunch and moisture. Just slice and cook with the potatoes. You can also try broccoli, asparagus, or tomatoes. Each adds its own twist.
Cheese Options: Choosing the Best Type
Cheese can change the whole taste of your frittata. Cheddar gives a sharp bite. Mozzarella offers a creamy texture. Feta adds a salty zing. You can mix different cheeses for more flavor. Just make sure to use about half a cup. This keeps the frittata light and fluffy.
Spicing It Up: Herbs and Seasonings to Experiment With
Fresh herbs can elevate your frittata. Try adding basil for a sweet touch or dill for a fresh taste. You can also use dried herbs like oregano or thyme. A sprinkle of red pepper flakes adds heat. Experiment with different spices to find what you love. Use what you have on hand to create unique flavors.
This frittata is simple but full of options. You can always find new ways to make it your own.
Storage Info
Proper Storage Techniques for Leftovers
After enjoying your savory potato spinach frittata, store leftovers properly. Let the frittata cool at room temperature first. Then, slice it into individual portions. Use an airtight container to keep it fresh. This will help prevent it from drying out. Store it in the fridge for up to 3 days.
How to Reheat Frittata Without Drying It Out
To reheat your frittata, use an oven or a microwave. For the oven, preheat it to 350°F (175°C). Place the frittata on a baking sheet. Cover it with foil to keep moisture in. Heat for about 10-15 minutes. If using a microwave, place a slice on a microwave-safe plate. Cover it with a damp paper towel. Heat on medium power for about 1 minute. Check if it’s warm enough.
Freezing Tips for Long-term Storage
If you want to save your frittata for later, freezing is a great option. Wrap each slice tightly in plastic wrap. Then, place them in a freezer bag. Be sure to remove as much air as possible. Label the bag with the date. Your frittata can last in the freezer for up to 2 months. When ready to eat, thaw it in the fridge overnight. Then, reheat as mentioned above.
FAQs
Can I make frittata without eggs?
Yes, you can make a frittata without eggs. Use silken tofu as a base. Blend it until smooth. You can add spices like turmeric for color and flavor. Mix in your favorite veggies, like spinach and potatoes. Bake it just like a regular frittata. This option is great for vegans or those allergic to eggs.
How do I know when the frittata is fully cooked?
You can tell the frittata is cooked when it has no jiggle in the center. A knife inserted should come out clean. The edges will be slightly puffed and golden. If the top looks dry and firm, it’s ready. Trust your eyes and the knife test to guide you.
What are some creative toppings for frittata?
Get creative with toppings to enhance your frittata. Here are some tasty ideas:
– Sliced avocado for creaminess.
– Fresh salsa for a kick.
– A dollop of sour cream for richness.
– Extra herbs like basil or cilantro for freshness.
– Crumbled feta or goat cheese for a tangy twist.
Try these toppings to add your personal touch to the dish.
This blog post covered how to make a savory potato spinach frittata. You learned about key ingredients, steps for cooking, and tips for the best results. I shared ideas for variations, storage, and answers to common questions.
Making a frittata is simple and fun. You can customize it to suit your taste. With these tips, you’ll enjoy perfect frittatas every time. Happy cooking!


![Fresh peaches are the star of this pie. Choose ripe, sweet peaches for the best flavor. Use about 1 ½ cups of peaches, peeled and sliced. The slices should be thick enough to hold their shape. This will give your pie a lovely texture and taste. You have a few choices for the pie crust. A store-bought 9-inch pie crust is quick and easy. If you want to make it from scratch, use flour, butter, and a pinch of salt. Either way, the crust should be crisp and flaky. This creates a nice contrast with the smooth custard. Here’s a quick look at the other ingredients you’ll need: - ¾ cup granulated sugar - 3 tablespoons cornstarch - 2 large eggs - 1 cup heavy cream - 1 teaspoon pure vanilla extract - ½ teaspoon ground cinnamon - Pinch of salt These ingredients work together to form the rich custard. The sugar adds sweetness, while cornstarch helps it set. Eggs provide structure, and heavy cream gives a creamy texture. Vanilla and cinnamon add depth to the flavor. For the full recipe, check out the details above. To start, preheat your oven to 375°F (190°C). Take your store-bought pie crust and fit it snugly into a 9-inch pie plate. Use a fork to prick the bottom. This helps prevent bubbling. Place the crust in the oven for about 10 minutes. You want it set but not browned. Once done, take it out and let it cool on a wire rack. Next, grab a large mixing bowl. In it, combine the granulated sugar, cornstarch, ground cinnamon, and a pinch of salt. Mix these dry ingredients well to avoid any lumps. In a separate bowl, crack two large eggs and whisk them until well beaten. Add the heavy cream and vanilla extract, whisking until everything blends into a smooth mixture. Gradually pour this egg mixture into the dry ingredients. Stir continuously to create a smooth custard. Now, let's assemble the pie. Start by evenly distributing your sliced fresh peaches over the base of the pre-baked pie crust. Carefully pour the custard mixture over the peaches. Make sure they are all covered. Place the pie in the oven and bake for 30-35 minutes. The custard should be firm and slightly golden. To check if it's set, gently shake the pie. The center should jiggle just a bit. Once baked, let the pie cool on a wire rack for about an hour. This helps the custard firm up nicely. For the best results, refrigerate the pie for at least 2 hours before slicing. This step makes the custard even better. You can find the full recipe here: [Full Recipe]. To get a creamy custard, mix the sugar and cornstarch well. This step avoids lumps. When you add the eggs and cream, whisk until smooth. This ensures a rich texture. Bake until the center slightly jiggles. This tells you the custard is set but still soft. It will firm up as it cools. A soggy crust ruins your pie. To prevent this, bake the crust first. Prick the bottom with a fork to let steam escape. Bake it for about ten minutes until it’s just set. Once out of the oven, let it cool before adding the custard. This keeps the crust crisp and flaky. For a lovely presentation, slice the pie neatly. Serve each piece with whipped cream on top. A sprinkle of ground cinnamon adds warmth and charm. Add a slice of fresh peach on the side. This highlights the fresh flavors in the pie. Enjoy your beautiful creation! For more detailed steps, check the Full Recipe. {{image_4}} You can swap fresh peaches for other fruits. Try ripe nectarines for a similar taste. Plums add a tart kick and are juicy, too. Blueberries give a pop of color and sweetness. Apples offer a crunchy bite, especially if you bake them a bit first. Each fruit brings its own charm to the pie. If you need a gluten-free crust, several options exist. Almond flour is a great choice for a nutty flavor. You can also use a gluten-free pie crust mix from the store. Just follow the package instructions for best results. Make sure to check that all ingredients are gluten-free. This way, everyone can enjoy this tasty treat. To make your pie stand out, try some flavor boosts. A dash of lemon juice brightens the peach flavor. You can mix in some nutmeg for warmth, too. Adding a splash of bourbon or rum gives a nice depth. Experimenting with spices lets you create a unique pie that reflects your taste. Get creative and have fun with it! For the complete recipe, check out the [Full Recipe]. To store leftover pie, let it cool completely. Cover it with plastic wrap or foil. You can also use an airtight container. Keep it in the fridge for up to three days. The pie stays fresh this way. Avoid stacking anything on top to prevent crushing. If you want to freeze the pie, make sure it’s fully cooled. Wrap it tightly in plastic wrap, then in aluminum foil. This helps prevent freezer burn. You can freeze it for up to three months. To enjoy later, just thaw it in the fridge overnight before serving. To reheat the pie, preheat your oven to 350°F (175°C). Place the pie in an oven-safe dish. Cover it with foil to keep it from browning too much. Heat for about 15-20 minutes, or until warm. If you like, you can microwave individual slices for a quick snack. Just heat for 30 seconds, checking often. Enjoy your pie as if it were fresh! Yes, you can use canned peaches. However, fresh peaches taste better. Canned peaches are softer and sweeter. If you choose them, drain the syrup well. Pat them dry with a paper towel. This helps reduce excess moisture. Use the same amount as fresh peaches. But keep in mind that the texture will change. You can use half-and-half or whole milk as a lighter option. For a dairy-free choice, use coconut cream or almond milk. These will alter the flavor slightly. If you want to keep the richness, try a mix of milk and butter. Use 1 cup of milk and 2 tablespoons of melted butter. This gives a similar creamy texture. The custard is set when it has a smooth, firm texture. Give the pie a gentle shake. If the center jiggles slightly, it is ready. You can also insert a knife into the center. If it comes out clean, the custard is done. Let it cool for a bit to firm up further. For the best texture, refrigerate it for at least two hours. Enjoy this pie chilled for the best flavor! You learned how to make a delicious peach pie from scratch. We covered fresh peaches, pie crust options, and key ingredients. I detailed steps for prepping the crust, making the custard, and baking. Plus, I shared tips for a perfect texture and stunning presentation. You can even explore variations with different fruits and gluten-free options. Finally, we talked about storage and reheating to keep the pie tasty. Now, you have all you need to create this delightful treat! Enjoy every bite of your homemade peach pie.](https://fastmealmate.com/wp-content/uploads/2025/06/869ea291-58a7-44e1-8c29-8ce1fa52617f-768x768.webp)

![To make a hearty Instant Pot beef stew, you need fresh and tasty ingredients. Here’s what you will need: - 2 pounds beef chuck, cut into 1-inch cubes - 1 tablespoon olive oil - 1 large onion, finely chopped - 2 cloves garlic, minced - 4 medium carrots, sliced into rounds - 3 medium potatoes, peeled and diced into 1-inch cubes - 2 cups beef broth - 1 tablespoon tomato paste - 1 teaspoon dried thyme - 1 teaspoon dried rosemary - 1 bay leaf - Salt and freshly ground black pepper to taste - 2 tablespoons cornstarch (optional, for thickening) - Fresh parsley, chopped (for garnish) These ingredients bring great flavor and comfort to your dish. Each one plays a key role. For example, beef chuck gives the stew a rich taste. Onions and garlic add depth. Carrots and potatoes give it heartiness. Don’t skip the herbs; they add wonderful notes to every bite. You will find that using quality ingredients makes a big difference. Fresh veggies and good beef will elevate your stew. Remember, you can always adjust the seasonings to fit your taste. If you want to explore more, check out the Full Recipe for step-by-step instructions. - Prep time: 15 minutes - Cook time: 35 minutes - Total time: 1 hour - Servings: 6 With just an hour, you can create a warm and filling meal for your family or friends. Enjoy the process! Set your Instant Pot to “Sauté” and pour in the olive oil. Let it heat until it shimmers. Add the beef cubes in a single layer. Sear them until browned, about 5-7 minutes. This step seals in flavor. Once browned, remove the beef and set it aside on a plate. In the same pot, add the finely chopped onion and minced garlic. Cook them for 2-3 minutes until the onion is soft. You will smell a rich aroma that adds depth to your stew. Pour a splash of beef broth into the pot. Use a wooden spoon to scrape up the browned bits stuck to the bottom. This step is key for enhancing the stew’s flavor. Now, return the seared beef to the pot. Add the sliced carrots, diced potatoes, the remaining beef broth, tomato paste, dried thyme, dried rosemary, and the bay leaf. Don’t forget to add a pinch of salt and pepper. Stir everything until well mixed. Close the lid tightly on the Instant Pot. Make sure the steam release valve is set to “Sealing.” Select the “Manual” function. Adjust the cooking time to 35 minutes at high pressure. When the cooking time is up, let the Instant Pot naturally release pressure for 10 minutes. This helps make the beef tender. After that, carefully quick-release any remaining pressure by turning the valve to “Venting.” If you want a thicker stew, mix 2 tablespoons of cornstarch with cold water to make a slurry. Stir this into the warm stew. Set the Instant Pot back to “Sauté” for 5 minutes. Stir often until the stew thickens to your liking. Before serving, remember to remove the bay leaf. Garnish the stew with freshly chopped parsley for color. Ladle it into bowls while hot. Enjoy this hearty meal! Check the [Full Recipe] for more details. Browning meat is key. It builds flavor and color. When you sear beef, you create a nice crust. This adds a rich taste to your stew. Make sure to do this step well. For seasoning, use salt and pepper early. This helps to boost the flavor. Add herbs like thyme and rosemary for aroma. If you love a kick, throw in some paprika. Pair your beef stew with sides that shine. Mashed potatoes work great. They soak up all the stew's goodness. You can also serve it with green beans or a fresh salad. Bread is a must! Choose crusty bread for dipping. Sourdough or baguette are fantastic options. They bring texture and enhance the meal. Want to deepen the taste? Try adding red wine. A splash of wine gives a rich layer to your stew. If you prefer, soy sauce works too. It adds umami that makes flavors pop. Don’t forget about extra veggies! Mushrooms, peas, or bell peppers can brighten your stew. They add nutrition and color. Chop them up and toss them in before cooking. For the full recipe, check out the details above. Happy cooking! {{image_4}} You can use chicken or pork in your stew. For chicken, use boneless thighs or breasts. Cut them into bite-sized pieces. Sear them just like you do with beef. Chicken cooks faster, so reduce the cooking time to 25 minutes. For pork, use shoulder or loin. Cut into 1-inch cubes and follow the same steps as beef. Both meats will soak up the rich flavors of your stew. To make a vegetarian stew, skip the meat entirely. Use hearty vegetables like mushrooms, butternut squash, or lentils. Replace beef broth with vegetable broth for a lighter taste. You can add beans for protein and texture. Cook it just like the beef stew. This version is still rich and filling, perfect for anyone. You can change the taste by using different herbs and spices. Instead of thyme and rosemary, try basil and oregano for an Italian twist. Or, add cumin and coriander for a warm, earthy flavor. For a touch of heat, add red pepper flakes or a splash of hot sauce. Each change gives you a new dish to enjoy. To refrigerate beef stew, let it cool first. Pour the stew into a container. Seal it tightly with a lid. Store it in the fridge for up to three days. If you want to enjoy it later, use the freezer. To freeze beef stew, follow these steps. Cool the stew completely first. Then, transfer it to freezer-safe bags or containers. Remove as much air as possible to avoid freezer burn. Label the bags with the date. You can freeze it for up to three months. To reheat, let it thaw in the fridge overnight. Heat it in the microwave or on the stove until hot. In the fridge, beef stew lasts about three days. If you freeze it, it can last for three months. After that, the quality may decline. Be sure to check for any off smells or changes in texture before eating. When stored correctly, the stew stays flavorful and comforting. Yes, you can skip browning the meat. However, your stew may lack flavor. Browning adds depth and richness. It creates a lovely crust and enhances the dish. If you skip this step, consider adding more spices. If your stew is too thick, add more beef broth. Start with half a cup and stir well. You can also use water if needed. Another option is to add more veggies. They will release moisture as they cook. You can use frozen beef, but adjust the cooking time. Increase the time to 45 minutes for frozen chunks. This allows the meat to cook through properly. Make sure to add a few extra minutes if pieces are large. The beef is tender when it falls apart easily. You can check by using a fork. If it shreds easily, it's done. Aim for a melt-in-your-mouth texture for the best stew. Yes, this recipe is great for meal prep. You can make it ahead and store leftovers. It keeps well in the fridge for about three days. You can also freeze it for up to three months. Just reheat before serving. Check out the Full Recipe for more details. This blog post covered delicious Instant Pot beef stew. You learned the key ingredients, simple steps, and expert tips. I emphasized the importance of browning the beef for flavor. You can customize the recipe with different proteins or vegetables too. Stored correctly, it lasts well and is perfect for meals later. Enjoying this hearty dish brings warmth and satisfaction. I hope you try this recipe and share it with friends. Your kitchen adventures await!](https://fastmealmate.com/wp-content/uploads/2025/07/4eb70415-c4b6-43db-bf2d-31d3ec08fe2e-768x768.webp)