Raspberry Meringue Bars Delightful and Easy Recipe

If you’re craving a sweet treat that balances tart and sweet, look no further! My Raspberry Meringue Bars are not only delicious but also easy to make. With a buttery crust, a luscious raspberry filling, and a fluffy meringue topping, these bars will impress anyone. Join me as we dive into this simple and delightful recipe that will have you baking with confidence in no time!
Ingredients
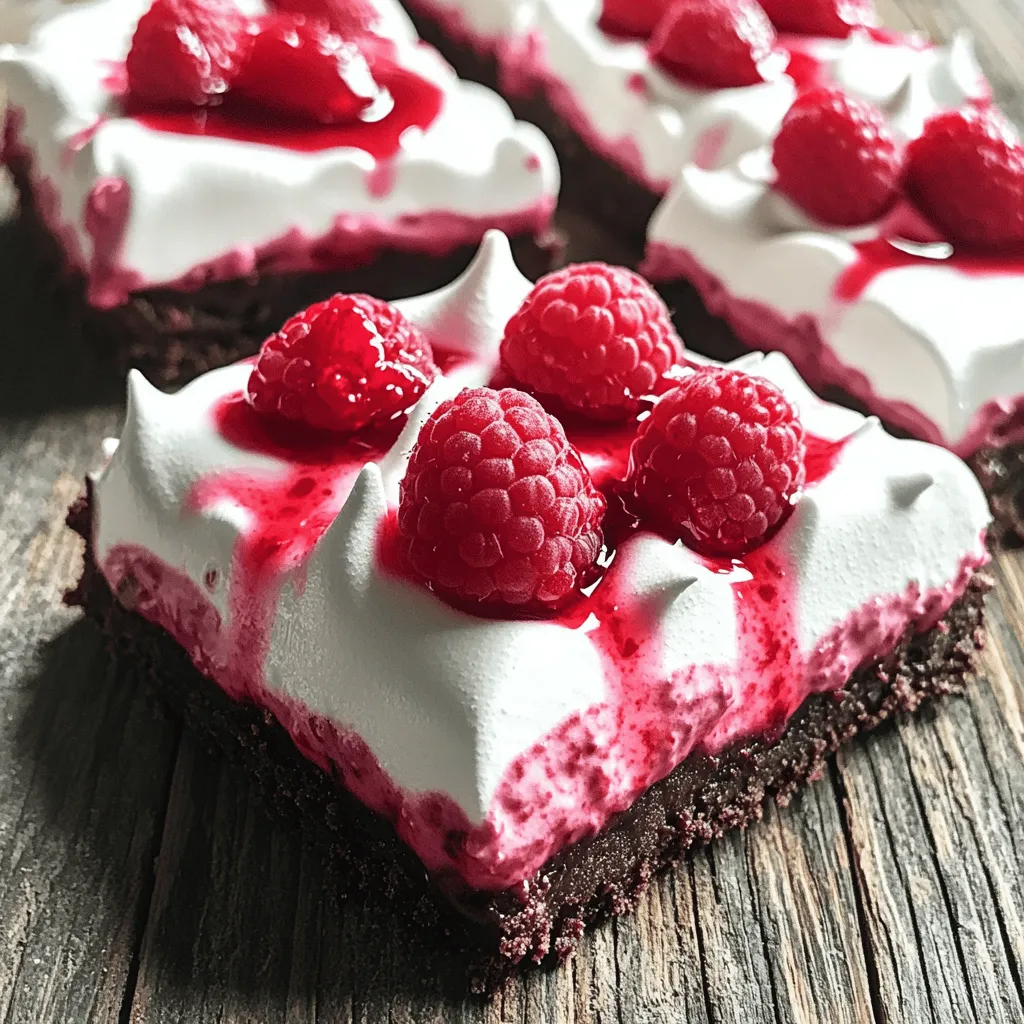
List of Ingredients for Raspberry Meringue Bars
To make delicious raspberry meringue bars, gather these simple ingredients:
– 1 cup all-purpose flour
– 1/2 cup unsweetened cocoa powder
– 1/2 cup powdered sugar
– 1/2 teaspoon salt
– 1/2 cup cold unsalted butter, cubed
– 1/4 cup granulated sugar (for raspberry filling)
– 2 cups fresh raspberries
– 4 large egg whites
– 1/4 teaspoon cream of tartar
– 1/2 teaspoon vanilla extract
– 1/4 cup granulated sugar (for meringue)
For the crust, you need all-purpose flour, cocoa powder, powdered sugar, and salt. Mix these dry items well. Then, you will add cold, cubed butter to this mix. This makes a crumbly texture that forms the base of your dessert.
Next, focus on the filling. Use fresh raspberries for the best flavor. You will need about 2 cups. Sweeten them with 1/4 cup of granulated sugar. This mixture will create a tasty, syrupy layer that pairs perfectly with the crust.
Now, let’s talk meringue. You will need 4 large egg whites and 1/4 teaspoon of cream of tartar. The cream of tartar helps stabilize the egg whites. Beat them until soft peaks form. Gradually, add another 1/4 cup of granulated sugar to create a smooth, glossy meringue.
This combination of ingredients creates a delightful treat.
Step-by-Step Instructions
Preheat the Oven and Prepare the Pan
Start by preheating your oven to 350°F (175°C). This step ensures even baking. Next, take an 8×8 inch baking pan. Line it with parchment paper. Make sure the paper hangs over the edges. This helps to remove the bars easily later.
Make the Crust
In a large bowl, mix together the dry ingredients. Whisk the all-purpose flour, cocoa powder, powdered sugar, and salt until blended. Then add the cold, cubed butter. Use your fingers or a pastry cutter to blend the mix. You want it to look like coarse crumbs. Once ready, press this mixture firmly into the bottom of the prepared pan.
Prepare Raspberry Filling
In a medium saucepan, cook the fresh raspberries with 1/4 cup of granulated sugar. Stir gently over medium heat. After about 5 minutes, the raspberries will break down and form a syrupy mix. Remove from heat and let it cool slightly. Spread this raspberry filling over the cooled crust.
Make the Meringue
In a clean bowl, beat the egg whites and cream of tartar together. Start at medium speed until soft peaks form. Gradually add the remaining 1/4 cup of granulated sugar. Increase the speed to high. Beat until you see stiff peaks and a glossy finish. Finally, mix in the vanilla extract for flavor.
Assemble and Bake
Evenly pour the raspberry filling over the crust. Then dollop the meringue on top. Use a spatula to spread it smoothly. Create peaks and swirls for a nice look. Bake in the oven for 15 to 20 minutes. The meringue should turn light golden when done.
Cool, Slice, and Serve
Cool the raspberry meringue bars in the pan. Use the parchment overhang to lift them out. Once cooled, slice into squares or bars. For serving, garnish with fresh raspberries on top for a lovely touch.
Tips & Tricks
Achieving the Perfect Meringue
To make the best meringue, start with clean bowls. Any grease can ruin the texture. Use fresh egg whites for the best volume. Room temperature egg whites whip up better than cold ones. Beat them until soft peaks form. Then, slowly add sugar while mixing. This helps make a glossy meringue.
To prevent weeping, add cream of tartar. This stabilizes the meringue and helps it hold its shape. Avoid mixing too long, as overbeating can lead to dryness. Bake the meringue just until lightly golden. This keeps it soft inside.
Choosing Raspberries
When picking raspberries, look for bright color and firmness. Avoid any that are mushy or have spots. Fresh raspberries are best, but frozen ones work too. If you use frozen, thaw them first and drain excess juice. You can also try other berries like blackberries or strawberries if raspberries are not available.
Serving Suggestions
Serve the raspberry meringue bars chilled for a refreshing treat. They pair well with a scoop of vanilla ice cream. For a fun twist, try them with a dollop of whipped cream. To make your bars look fancy, top with fresh raspberries and mint leaves. Arrange the bars on a colorful plate for a pop of color. You could even dust them lightly with powdered sugar for extra flair.

Variations
Flavor Variations
You can change the flavor of your meringue easily. Adding different extracts can give your bars a new twist. For example, almond or lemon extract can brighten the taste. You can even mix in a little coconut or mint for a fun surprise.
Also, you don’t have to stick to raspberries. Try using strawberries, blueberries, or blackberries in your filling. Each berry brings its own unique flavor and color. This way, you can enjoy a tasty treat all year long.
Dietary Modifications
Want to make gluten-free Raspberry Meringue Bars? Use almond or coconut flour instead of all-purpose flour. These flours work well and keep the taste great. If you need a low-sugar option, use a sugar substitute like stevia or erythritol. Just make sure to check the conversion ratios on the package.
For those who need vegan options, you can make meringue without eggs. Use aquafaba, the liquid from canned chickpeas, instead of egg whites. It whips up nicely and creates a fluffy topping. Just remember to add a bit of cream of tartar to help stabilize it.
Serving Style Options
You can turn these bars into mini delights. Simply cut them into smaller squares or make tartlets using a muffin tin. These mini treats are perfect for parties or gatherings.
For individual servings, think about using dessert cups. Layer the raspberry filling and meringue in clear cups. This way, everyone can see the pretty layers. Plus, it makes serving easy and fun!
Storage Info
Best Storage Practices
To keep your raspberry meringue bars fresh, store them in the fridge. Place them in an airtight container to prevent drying out. They will stay fresh for about three days. If you want to keep them longer, freeze them. Wrap each bar in plastic wrap, then place them in a freezer bag. In the freezer, they can last up to three months.
Reheating Instructions
When you’re ready to enjoy your bars again, take them out of the fridge. If frozen, let them thaw in the fridge overnight. To warm them, place a bar in the microwave for about 10 seconds. This will keep the meringue soft and the filling delicious. Avoid heating for too long, or the texture may change.
Signs of Spoilage
Check your raspberry meringue bars for any signs of spoilage. If you see mold or notice an off smell, it’s best to discard them. The meringue may also lose its texture if it becomes too soft or sticky. To avoid waste, only make what you can eat within a few days. Enjoy your baking and savor each bite!
FAQs
How long do Raspberry Meringue Bars last?
Raspberry meringue bars last about three days at room temperature. Keep them in an airtight container to maintain freshness. If you store them in the fridge, they can last up to a week. However, the texture may change slightly. For the best taste, eat them fresh.
Can I make Raspberry Meringue Bars ahead of time?
Yes, you can make these bars ahead of time. Prepare the crust and raspberry filling one day before serving. Store them separately in the fridge. Make the meringue just before baking for the best results. This keeps the meringue light and fluffy.
What can I substitute for egg whites in the meringue?
If you need a substitute for egg whites, use aquafaba. Aquafaba is the liquid from canned chickpeas. Use three tablespoons of aquafaba for each egg white. This works well for a vegan meringue. Whip it just like you would egg whites for great results!
Can I freeze Raspberry Meringue Bars?
Yes, you can freeze these bars. Cut them into squares before freezing for easy serving later. Wrap each piece tightly in plastic wrap, then place them in a freezer-safe container. They can be frozen for up to three months. Thaw them in the fridge before serving.
Why is my meringue weeping?
Meringue can weep due to too much moisture in the air. It can also happen if the meringue is not cooked long enough. To prevent weeping, ensure your mixing bowl is completely dry before whipping the egg whites. Bake the meringue until it’s firm and lightly golden for the best texture.
Raspberry Meringue Bars are a delightful treat made with simple ingredients. You learned how to create a tasty crust, a sweet raspberry filling, and a fluffy meringue. Tips helped you achieve the perfect texture and flavor. Consider variations like different fruits or dietary swaps. Store them properly to keep them fresh longer.
These bars are fun to make and share. Now, gather your ingredients and enjoy baking!


![- 2 ripe mangoes - 1 large cucumber - 1 red bell pepper - 1/4 red onion - 1/4 cup fresh cilantro - 1 jalapeño - Honey or agave syrup - Fresh lime juice - Salt and pepper to taste When I make this salad, I start by gathering all the main ingredients. Ripe mangoes add sweetness and color. The cucumber gives a nice crunch. A red bell pepper brings brightness. I chop the red onion finely for a hint of sharpness. Fresh cilantro adds a burst of flavor. If you like heat, you can add a jalapeño. Just remember to remove the seeds. For sweetness, honey or agave syrup works well too. For the dressing, I use fresh lime juice. It brightens the salad and adds tang. I season it with salt and pepper. This combination makes the salad taste fresh and lively. The full recipe is easy to follow and takes just 15 minutes to prep. Enjoy making this delightful dish! First, you'll need to prep your fruits and veggies. Start with these steps: - Dice 2 ripe mangoes into bite-sized pieces. Make sure they are sweet and juicy. - Chop 1 large cucumber into small cubes. This adds a nice crunch. - Cut 1 red bell pepper into small pieces for color and taste. - Finely chop 1/4 red onion for a hint of sharpness. - If you like some heat, mince 1 jalapeño and set it aside. - Finally, chop 1/4 cup fresh cilantro for a burst of freshness. Now, it's time to combine everything. Follow these steps: - In a large mixing bowl, add the diced mangoes, cucumber, red bell pepper, and red onion. Give them a gentle stir to mix. - Next, fold in the chopped cilantro and minced jalapeño. Adjust the jalapeño based on how spicy you want your salad. - In a separate bowl, whisk together 2 tablespoons fresh lime juice and 1 tablespoon honey (or agave syrup) until smooth. - Drizzle the dressing over the salad mix in the large bowl. - Using a spatula or wooden spoon, toss everything together gently. You want all the ingredients to be coated in the dressing. To finish your salad, season it just right: - Sprinkle salt and pepper to taste over the salad. - Toss it again very gently to distribute the seasoning. - Let the salad rest for about 10 minutes before serving. This helps the flavors blend nicely. By following these steps, you create a Mango Cucumber Summer Salad that is not only refreshing but also full of vibrant flavors. For the complete details, refer to the Full Recipe. To make the best Mango Cucumber Summer Salad, choose ripe mangoes and fresh cucumbers. Look for mangoes that feel slightly soft when you gently press them. Their skin should have a rich color. A ripe cucumber should be firm and dark green, with no soft spots. For cilantro, pick bunches with bright green leaves. Avoid any that look wilted or yellowed. Fresh cilantro adds a burst of flavor to your salad. To boost the taste, let your salad marinate. Mix the diced fruits and veggies and let them sit for about 10 minutes. This helps the flavors blend well. Before serving, chill the salad in the fridge for about an hour. This makes it extra refreshing on warm days. How you serve your salad matters. Use a large, colorful bowl to show off those vibrant ingredients. For a fun touch, garnish with lime wedges and more cilantro on top. This adds color and makes your dish even more inviting. Enjoy your beautiful salad! For the complete recipe, check out the [Full Recipe]. {{image_4}} To make your Mango Cucumber Summer Salad even more fun, try these variations. You can add grilled chicken or shrimp for a protein boost. These options taste great with the fresh flavors. If you want a vegetarian choice, substitute tofu. Tofu soaks up the dressing well and adds a nice texture. Adding grains can change the salad's texture. Consider mixing in quinoa or couscous. Both grains work well and make the salad heartier. You can also explore using brown rice as a base. It adds a nutty flavor that pairs nicely with mango. Mix in other seasonal fruits or vegetables for variety. Try diced avocado or cherry tomatoes for added color. Experimenting with different herbs can also bring new flavors. Fresh mint or basil can add a refreshing twist. Nuts like almonds or walnuts add a nice crunch too. For a complete experience, check out the [Full Recipe]. To keep your Mango Cucumber Summer Salad fresh, store leftovers in airtight containers. This will lock in flavor and keep the salad crisp. Use the salad within three days for the best taste. If you wait too long, the ingredients may become soggy. You can prepare the ingredients ahead of time. Chop the mangoes, cucumber, red bell pepper, and red onion. Keep each ingredient separate in the fridge. When it's time to eat, simply mix them together. Assemble the salad just before serving for the freshest taste. This salad does not freeze well. Freezing can change the texture of the mango and cucumber. If you want to preserve the ingredients, consider freezing them separately. Use them in smoothies or soups instead. Always make sure to pack produce in freezer-safe bags or containers. You can use several fruits instead of mango. Pineapple adds a sweet, tangy flavor. Peaches bring a juicy touch. Papaya offers a mild sweetness. When you pick a fruit, think about how it will blend with cucumber and lime. You want a balance of sweetness and freshness. Typically, this salad lasts about two days. After that, the vegetables may get soggy. Look for signs of spoilage like a change in color or smell. If it smells off, it’s best to toss it out. Yes! To make it vegan, swap honey for agave syrup. You can also add more veggies like avocado or even black beans for extra nutrition. This way, you keep the flavor while making it plant-based. This mango salad blends fresh ingredients with simple steps. You start by preparing ripe fruits and vegetables. Mixing them with fresh lime juice brings out their flavor. Optional proteins and grains add variety. Store leftovers properly to enjoy later. Try different herbs or spices for unique tastes. This recipe is versatile and easy to adapt. Enjoy your colorful, healthy dish!](https://fastmealmate.com/wp-content/uploads/2025/07/d214d25a-b677-4b49-bd4c-02fe8092c0e1-768x768.webp)


![- 1 pound ground beef (80/20 blend) - ½ teaspoon salt - ½ teaspoon black pepper - ½ cup cheddar cheese, shredded - ½ cup mozzarella cheese, shredded - 4 large flour tortillas - 4 tablespoons cream cheese, softened - ¼ cup dill pickles, diced - ¼ cup diced tomatoes - ¼ cup onion, minced - 2 tablespoons ketchup - 2 tablespoons mustard - Olive oil, for cooking Creating Cheeseburger Quesadilla Smash Sliders is a fun way to enjoy flavors. With the right ingredients, your sliders burst with taste. First, let’s start with the beef. I like using an 80/20 blend. This mix gives a juicy bite. Next, season it well with salt and pepper. Don't skip this step; flavor is key. For the cheese, I use both cheddar and mozzarella. The cheddar brings a sharp taste, while mozzarella melts beautifully. You can feel the cheese stretch in every bite. The flour tortillas are the base for these sliders. They hold everything together and crisp up nicely when cooked. I recommend using large tortillas for easier assembly. Cream cheese adds richness. Spread it on the tortillas for a creamy layer. Then, top it off with diced dill pickles, tomatoes, and onions. These toppings add crunch and freshness. Finally, drizzle some ketchup and mustard for that classic burger taste. Use olive oil to cook the quesadillas. It helps create a golden brown crust while keeping everything moist inside. For the full recipe, check the details above. This will guide you step by step to create your own Cheeseburger Quesadilla Smash Sliders. Enjoy the flavor explosion! To start, grab a medium mixing bowl. Add 1 pound of ground beef, ½ teaspoon of salt, ½ teaspoon of black pepper, and 1 teaspoon of garlic powder. Use your hands to mix everything gently. Once mixed, divide the beef into small patties, each about 2-3 ounces. Next, heat a skillet on medium heat. Add a drizzle of olive oil. When the pan is hot, place the patties in the skillet. Cook for 3-4 minutes until they turn brown. Flip them over and cook for another 3-4 minutes. Once done, remove the patties and set them aside on a plate. Now it's time to build your quesadilla! Lower the skillet heat to medium-low. Take 4 large flour tortillas and spread 1 tablespoon of softened cream cheese on one side of each tortilla. Place one tortilla in the skillet with the cream cheese-side facing up. Add a generous amount of cheddar cheese, then stack half of the cooked burger patties on top. Next, sprinkle on the diced pickles, diced tomatoes, and minced onions. Drizzle a bit of ketchup and mustard over this. Finish by adding a layer of shredded mozzarella cheese. Carefully place another tortilla on top, cream cheese-side down. Press it gently with a spatula to hold everything together. Cook the quesadilla for about 2-3 minutes. Look for a golden-brown color on the bottom tortilla and melted cheese. Now, flip the quesadilla gently and cook the other side for another 2-3 minutes. When both sides are browned, take the quesadilla off the heat. Let it cool for a minute, then slice it into quarters or sliders. Repeat this for the rest of your tortillas and filling ingredients. Serve the warm cheeseburger quesadilla sliders on a platter. I like to add extra diced pickles and some ketchup and mustard for dipping on the side. Enjoy this flavor explosion! For the full recipe, check out the [Full Recipe]. To make the best burger texture, use ground beef that is 80/20. This mix provides the right fat content for juicy patties. When you form the patties, handle the meat gently. Overworking it can make the burgers tough. Aim for small patties, about 2-3 ounces, for sliders. For seasoning, keep it simple. A mix of salt, black pepper, and garlic powder works great. These flavors enhance the beef without overpowering it. Be sure to season both sides of each patty before cooking. This will help lock in the taste. To get that perfect cheese melt, use a mix of cheeses. Cheddar and mozzarella are my go-tos. Cheddar adds sharpness, while mozzarella brings stretchiness. Spread cheese evenly, so it melts all the way through. For a fun twist, try pepper jack cheese for a spicy kick. You can also experiment with gouda or fontina. These will add richness and depth. Just remember to slice the cheese thinly for quicker melting. Cooking your quesadillas to a perfect golden brown is key. Use medium-low heat for even cooking. This prevents burning while letting the cheese melt fully. When flipping quesadillas, use a large spatula. Slide it under the quesadilla gently to avoid spills. If you're nervous about flipping, consider using a plate. Simply slide one side onto the plate, then flip it back into the pan. This method keeps your fillings intact. {{image_4}} You can switch up the meat in this dish. Ground turkey or chicken works well. Both have a lighter flavor but still taste great. For a plant-based option, try lentils or black beans. These give you a nice texture and flavor. Using these options can help you cater to different diets. To boost taste, add spices like paprika or cumin. These spices add warmth and depth. You can also mix in sauces, like barbecue or sriracha, for a kick. Experimenting with different cheeses can change the flavor too. Pepper jack adds heat, while gouda brings a smoky taste. Topping with fresh herbs, like cilantro or chives, can brighten each bite. You can serve these quesadilla sliders in many ways. They work as a classic quesadilla or as fun sliders. For parties, cut them into smaller pieces. Arrange them on a colorful platter to impress your guests. You might also serve them with dips, like guacamole or salsa, for extra flavor. Each style can make your meal exciting and unique. To keep your cheeseburger quesadilla sliders fresh, place them in an airtight container. This helps lock in flavor and moisture. Store them in the fridge for up to three days. After that, the taste may decline, and the texture could change. If you want to save them longer, freezing is a good option. Wrap each quesadilla slider tightly in plastic wrap. Then, place them in a freezer-safe bag or container. This keeps them safe from freezer burn. You can freeze them for up to three months. When you're ready to eat, let them thaw overnight in the fridge before reheating. For the best taste, reheat using the oven. Preheat it to 350°F (175°C). Place the quesadilla sliders on a baking sheet. Heat for about 10-15 minutes, until warm and crispy. If you use a microwave, put them on a plate. Heat for 30-60 seconds. This method is faster but may not keep the crunch. To restore crunchiness, consider finishing in a hot pan for a minute. Yes, you can prepare these sliders ahead. Make the patties and cook them. Let them cool. Then, store them in the fridge. When ready to serve, assemble the quesadillas. You can use either fresh tortillas or pre-made ones. If you use pre-made tortillas, spread cream cheese and layer the fillings. Cook them quickly in a hot skillet. This way, they stay crispy and warm. You can serve many tasty sides with these sliders. Consider some crispy fries or sweet potato fries. They pair well with the cheesy sliders. A fresh salad can balance the richness. You might also try dipping sauces like ranch or spicy mayo. These add extra flavor and fun. You could even serve a zesty salsa for a fresh kick. To make these sliders vegetarian, swap out the beef for a meat alternative. You could use black beans or lentils as a base. Another option is to use plant-based burger patties. Just season them like the beef. Add your favorite toppings, like cheese and veggies. You can still enjoy the same great flavors without meat. Just make sure all the other ingredients are vegetarian-friendly. You can make tasty Cheeseburger Quesadilla Smash Sliders easily. Start with classic ingredients and follow straightforward steps for delicious results. Don’t forget to try different proteins and toppings to suit your taste. Storing any leftovers is simple, and reheating them will keep them just as good. With these tips, you can impress guests or enjoy a fun meal at home. Making this dish lets you explore flavors while fitting right into your busy day. Enjoy your cooking adventure!](https://fastmealmate.com/wp-content/uploads/2025/07/3ea5f9d6-0f24-4765-99ee-1beab0673b04-768x768.webp)
