Pickle Juice Hot Honey Wings Savory and Flavorful Dish

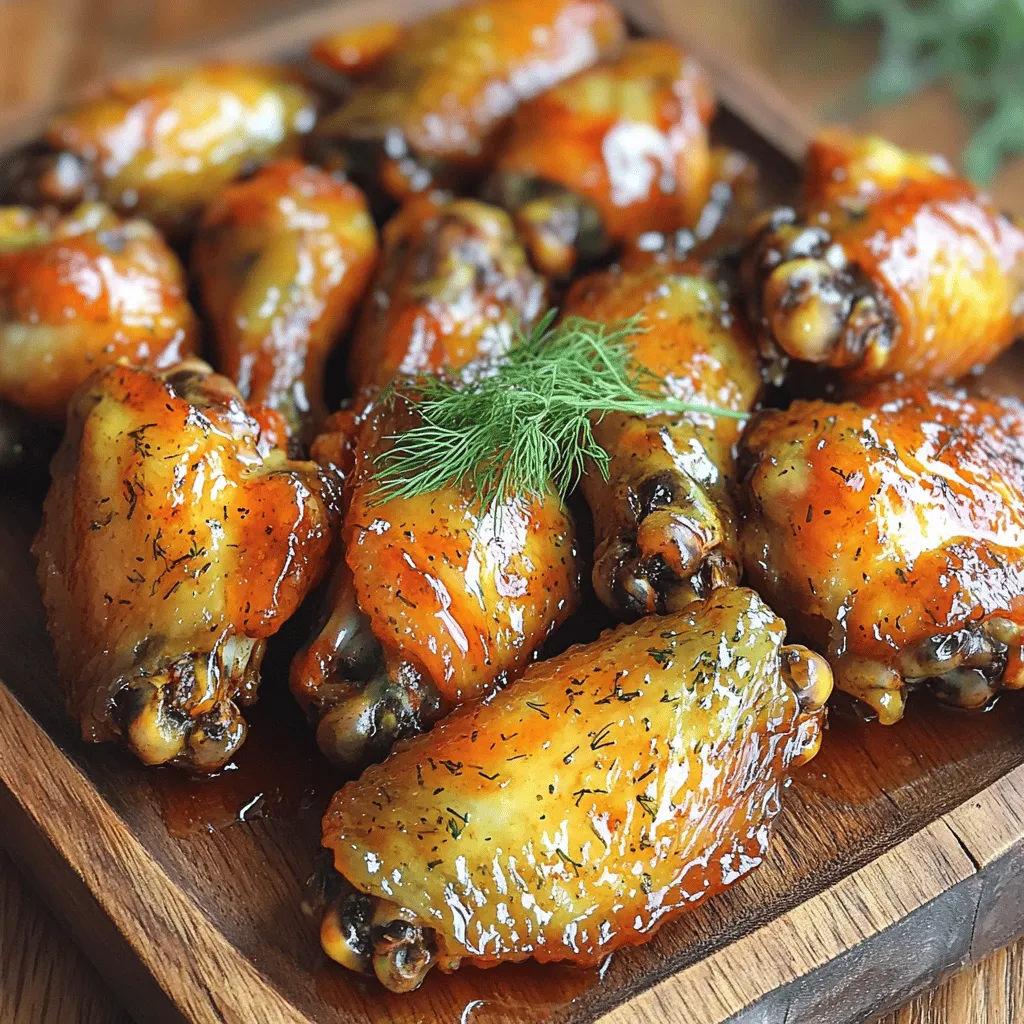
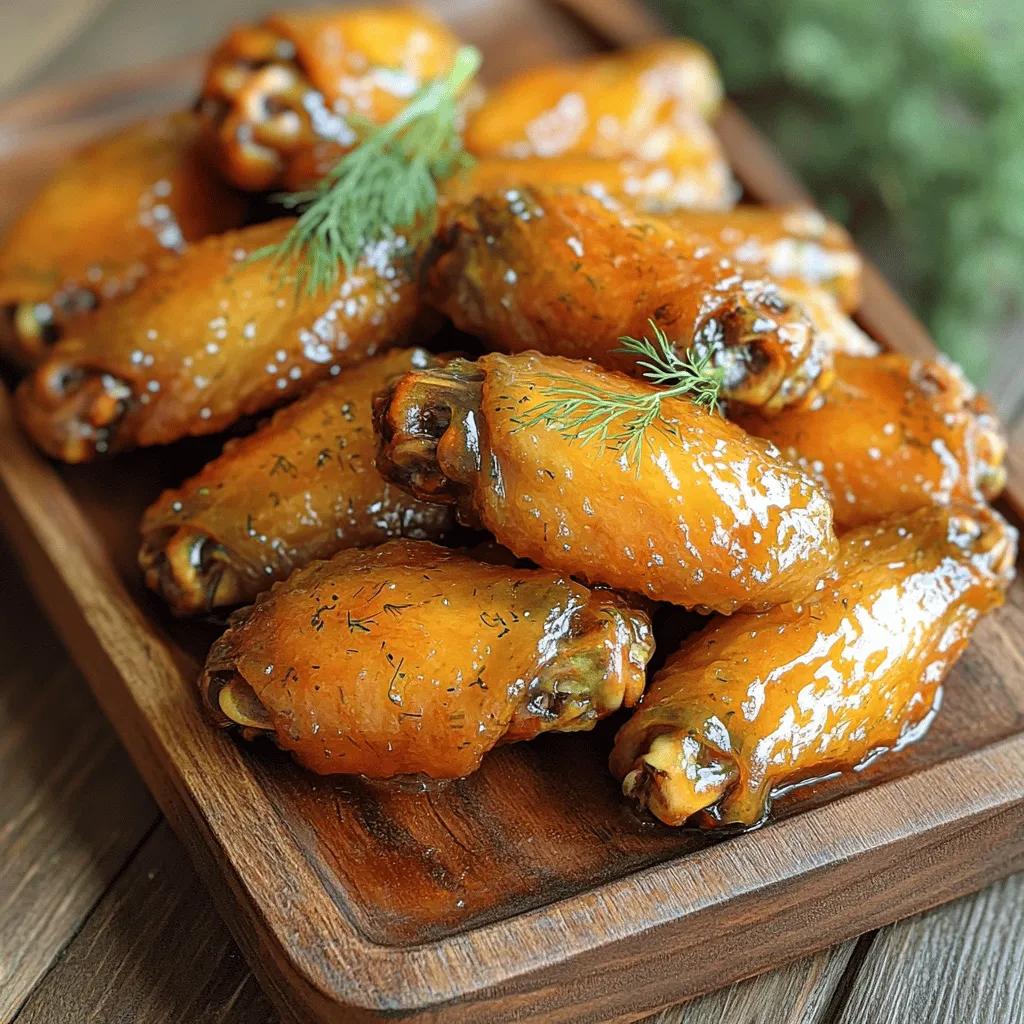
If you love bold flavors, you’ll want to dive into my Pickle Juice Hot Honey Wings recipe. This mouthwatering dish combines tangy pickle juice, sweet honey, and spicy heat, creating a taste explosion! Perfect for game days, family dinners, or any snack attack, these wings are easy to make and packed with flavor. Let’s get cooking and transform simple chicken wings into a savory sensation you’ll crave again and again!
Ingredients
List of Ingredients
– Chicken wings
– Pickle juice
– Honey
– Hot sauce
– Seasonings
– Olive oil
Best Quality Ingredients
Choosing the right wings is key. I suggest using fresh, high-quality chicken wings. Look for wings that are plump and have a nice skin. They should feel firm and not slimy.
For hot sauce, you can try different brands. A classic cayenne sauce adds heat without overpowering. If you prefer a smoky flavor, opt for a chipotle sauce.
Using fresh dill is a must for garnish. It gives a bright taste that complements the wings well. Dried dill lacks the same punch, so stick with fresh whenever you can.
Step-by-Step Instructions
Preparing the Wings
Marinating the chicken wings
Start by marinating your chicken wings. In a large bowl, add 2 pounds of wings and pour in 1 cup of pickle juice. Stir well to coat each wing. Cover the bowl with plastic wrap and refrigerate. Leave them for at least 1 hour, but overnight gives the best flavor.
Preheating the oven
While the wings marinate, preheat your oven to 400°F (200°C). This temperature helps create that crispy skin we all love.
Making the honey-hot sauce
Now it’s time to make the sauce. In a small saucepan, mix 1/2 cup of honey, 1/4 cup of your favorite hot sauce, 1 tablespoon of garlic powder, 1 teaspoon of onion powder, and 1 teaspoon of smoked paprika. Add a pinch of salt and pepper. Heat this mix over medium-low heat and stir until smooth. Once combined, take it off the heat and set it aside.
Cooking the Wings
Preparing the wings for baking
After marinating, take the wings out and gently pat them dry with paper towels. This step is key for crispy wings. Then, put them in a large bowl, drizzle with 1 tablespoon of olive oil, and toss to coat.
Baking instructions and tips
Arrange the wings in a single layer on a baking sheet lined with parchment paper. Bake them for 40-45 minutes. Make sure to turn them halfway through. This ensures they cook evenly and get a nice golden color.
Tossing the wings with the sauce
Once baked, move the wings to a large bowl. Pour the honey-hot sauce over them while they are hot. Toss gently until every wing is covered in that yummy sauce.
These steps make your Pickle Juice Hot Honey Wings a tasty and flavorful dish that you’ll love to serve!
Tips & Tricks
Achieving Perfectly Crispy Wings
To get the best crispy wings, start by drying them well. After marinating, take the wings out of the pickle juice. Use paper towels to pat them dry. This step is key for crispiness.
Next, set your oven to 400°F (200°C). This temperature helps to cook the wings evenly. Bake them for about 40 to 45 minutes. Make sure to turn them halfway through. This ensures both sides get golden and crunchy.
Sauce Variations for Extra Flavor
You can spice up the sauce in many ways. For instance, add cayenne pepper or smoked paprika to give it a kick. You can also mix in garlic or onion powder for added depth.
If you want to change the sweetness, try different sweeteners. Maple syrup or agave nectar can be great substitutes for honey. Each sweetener alters the flavor, offering a unique twist.
I love experimenting with these variations. They keep the wings exciting and fresh every time I make them.

Variations
Different Cooking Methods
You can cook Pickle Juice Hot Honey Wings in several ways. Each method gives a unique taste and texture.
Air Fryer Instructions:
1.
2. Set Up the Air Fryer: Preheat your air fryer to 380°F (193°C).
3. Cook the Wings: Place the wings in a single layer in the basket. Cook for about 25-30 minutes. Flip them halfway for even cooking.
4. Add Sauce: After cooking, toss the wings in the honey-hot sauce until coated.
Grilling Options:
1. Prepare the Grill: Preheat your grill to medium heat.
2.
3. Grill the Wings: Place wings on the grill. Cook for about 20-25 minutes, turning them often. Look for a nice char.
4. Sauce Them Up: Brush the honey-hot sauce on the wings during the last few minutes of grilling.
Recipe Adaptations
You can adapt the recipe for more fun flavors and textures.
Serving Suggestions:
– Pair the wings with celery sticks and carrot sticks for crunch.
– Serve with blue cheese or ranch dressing for dipping.
– Add a side of cornbread for a Southern twist.
Adjusting Spiciness Levels:
– Want it hotter? Use more hot sauce or add chili flakes to the mix.
– Prefer it milder? Reduce the amount of hot sauce or use a milder one.
– You can also mix in honey to balance out the heat if it gets too spicy.
Storage Info
Storing Leftover Wings
To keep your pickle juice hot honey wings fresh, store them properly. First, allow the wings to cool to room temperature. Next, place them in an airtight container. This helps to keep out air and moisture.
– Use a glass or plastic container with a tight lid.
– Line the container with paper towels to absorb extra moisture.
– Label the container with the date for easy tracking.
Refrigerate your wings within two hours of cooking. They will stay fresh for up to three days.
Reheating Instructions
When it’s time to enjoy your wings again, you can choose between the oven or microwave. Each method has its perks.
– Oven: Preheat your oven to 350°F (175°C). Place the wings on a baking sheet. Bake for about 15-20 minutes. This method keeps them crispy and tasty.
– Microwave: While quicker, the microwave can make wings soggy. Place the wings on a microwave-safe plate. Heat in short bursts of 30 seconds, checking often.
To maintain crispiness, try placing a paper towel under the wings in the microwave. This absorbs moisture and helps keep your wings delicious.
FAQs
Common Questions
How long do I need to marinate the wings?
You should marinate the wings for at least 1 hour. For the best taste, try to marinate them overnight. The pickle juice adds flavor and helps tenderize the meat.
Can I use frozen wings?
Yes, you can use frozen wings. Just make sure to thaw them before marinating. Thaw them in the fridge overnight for best results.
Are these wings suitable for meal prep?
Absolutely! These wings work great for meal prep. You can cook a large batch and store them in the fridge. They taste just as good reheated.
Finding Pre-Made Options
Restaurants offering Pickle Juice Hot Honey Wings
Many local restaurants and wings joints serve Pickle Juice Hot Honey Wings. Check online reviews or local menus to find a place near you.
Where to buy ready-to-cook wings
You can find ready-to-cook wings at grocery stores. Look for fresh or frozen options in the meat section. Some stores also carry pre-marinated wings for convenience.
In this blog post, I covered how to make delicious pickle juice hot honey wings. I detailed key ingredients, highlighted quality choices, and shared easy steps to prepare and cook your wings. I included essential tips for achieving the perfect crispiness and offered variations for cooking methods.
Now you have everything you need to enjoy these wings at home. Use these insights and impress your friends with your tasty creations. You can confidently make adjustments to fit your taste. Happy cooking!


![- 1 pound boneless, skinless chicken thighs, cut into 1-inch cubes - 1/4 cup soy sauce - 1/4 cup honey - 2 tablespoons rice vinegar - 1 tablespoon sesame oil - 2 cloves garlic, finely minced - 1 teaspoon fresh ginger, grated - 1 red bell pepper, cut into 1-inch squares - 1 yellow bell pepper, cut into 1-inch squares - 1 zucchini, sliced into thick rounds The main ingredients are key to a great teriyaki dish. Chicken thighs are juicy and flavorful. The soy sauce and honey create a sweet and salty marinade. Rice vinegar adds a slight tang. Garlic and ginger bring warmth and depth to the flavor. The colorful veggies add crunch and a fresh touch. - 1 teaspoon cornstarch mixed with 1 tablespoon cold water (optional, for thickening the sauce) - Sesame seeds, for garnish - Fresh cilantro, for garnish Cornstarch helps thicken the teriyaki sauce. This makes it stick better to the chicken. Sesame seeds and cilantro are perfect for garnishing. They add a nice look and extra flavor. - Bamboo skewers (soaked in water for at least 30 minutes) - Grill or grill pan You need skewers to hold the chicken and veggies. Soaking them in water prevents burning. A grill or grill pan cooks the skewers evenly. It gives the chicken those beautiful grill marks. For the full recipe and more tips, check out the Full Recipe section. To start, we need to mix the marinade. In a medium bowl, combine the soy sauce, honey, rice vinegar, sesame oil, minced garlic, and grated ginger. Whisk these ingredients together until they blend well. This mixture is key to our teriyaki chicken skewers. Marinating is very important. It lets the chicken soak up all the nice flavors. Aim for at least 30 minutes. For the best taste, try to marinate for 1 to 2 hours. This makes a big difference in flavor. Now, it’s time to thread the chicken and veggies onto the skewers. First, take your soaked bamboo skewers and start with a piece of chicken. Then, add a square of red bell pepper, followed by a piece of yellow pepper. Next, add a thick slice of zucchini. Repeat this pattern. This colorful arrangement is not just tasty; it looks great too! Make sure the pieces fit snugly but not so tightly that they can't cook well. A nice visual appeal will impress everyone at the table. When it’s time to cook, we can grill the skewers. Preheat your grill or grill pan to medium-high heat. Place the skewers on the grill and cook them for about 10 to 12 minutes. Turn them occasionally for even cooking. If you prefer, you can also bake or broil the skewers. Just adjust the cooking time. Cook until the chicken is fully done and has lovely grill marks. For added flavor, brush the skewers with the thickened teriyaki sauce while they cook. Check the Full Recipe for more details on each step! To make a great teriyaki marinade, you need balance. Start with soy sauce for saltiness. Add honey for sweetness. Rice vinegar brings in acidity, which brightens the flavors. Garlic and ginger give depth. Ensure you mix these well. A good marinade coats the chicken evenly. For extra flavor, let the chicken sit in the marinade for longer. Aim for 1 to 2 hours for the best taste. If you want more richness, try adding a splash of orange juice. This will enhance the flavor profile. Grilling your skewers right is key. First, preheat your grill to medium-high heat. This helps get those beautiful grill marks. Place the skewers on the grill and leave them alone for a few minutes. Avoid moving them too much; let them sear. Flip them only once or twice. If you brush them with the thickened sauce, it adds a nice glaze. Keep an eye on the time; cook them for about 10-12 minutes. Common mistakes include overcrowding the grill. Give each skewer space so they cook evenly. Also, don’t skip the resting time after grilling; it helps the juices redistribute. When serving, presentation matters. Lay the skewers on a big platter. Drizzle with any leftover teriyaki sauce for extra flavor. Sprinkle sesame seeds and chopped cilantro on top. It adds color and looks inviting. For side dishes, think simple. Steamed rice or a fresh salad pairs well. You could also serve grilled veggies for a complete meal. These combinations elevate your dish and make for a delicious feast. Remember, the Full Recipe will guide you through the process! {{image_4}} You can swap chicken for other proteins like beef or tofu. Beef gives a rich, hearty taste. Tofu offers a plant-based option that absorbs flavors well. Adjust cooking times depending on what you use. Beef may need longer than chicken, while tofu cooks quicker. Always check for doneness to keep your meal safe. Feel free to include seasonal vegetables. Bell peppers, zucchini, and onions add color and crunch. Try mushrooms or cherry tomatoes for even more variety. These colorful additions not only taste great but also make your dish visually appealing. Mixing different veggies can create a vibrant plate that excites the eyes. You can use store-bought teriyaki sauce for speed. Homemade sauce allows you to control flavors better. If you want a kick, try adding chili flakes for spice. For a sweeter twist, mix in some pineapple juice. These variations help you customize the sauce to fit your taste. Check the [Full Recipe] for details on how to make your own sauce! After enjoying your teriyaki chicken skewers, you may have some leftovers. It’s best to store them right away. Place the skewers in an airtight container. This keeps them fresh and prevents odors. You can refrigerate them for up to four days. For longer storage, wrap them tightly in plastic wrap and place them in a freezer bag. You can freeze them for up to three months. Just remember to label the bag with the date. When it’s time to enjoy leftovers, reheating correctly matters. You want to keep the chicken moist. The oven works best for this. Preheat it to 350°F (175°C). Place the skewers on a baking sheet and cover them with foil. Heat for about 10-15 minutes until warm. The microwave is quicker but can dry out the chicken. If you use it, heat in short bursts of 30 seconds. Check often to avoid overcooking. Leftover teriyaki chicken skewers can last up to four days in the fridge. If frozen, they remain safe for three months. Always check for signs of spoilage before eating. If the chicken smells bad or looks off, don’t eat it. Look for a change in color or texture too. When in doubt, throw it out. Enjoying your teriyaki chicken skewers fresh is the best way to experience their flavor. For the full recipe, refer to the earlier sections. The best chicken for skewers is thighs. They stay juicy and tender when cooked. Breasts can dry out quickly. They have less fat, which makes them less forgiving. Thighs are more flavorful and can handle marinating well. Yes, you can make teriyaki chicken skewers in advance. Marinate the chicken for at least 30 minutes. For the best taste, marinate for 1 to 2 hours. You can even marinate them overnight. Cook them right before serving for the best results. You can serve teriyaki chicken skewers with many tasty sides. Rice, like jasmine or brown rice, pairs well. You can also offer stir-fried veggies for crunch. A fresh salad with sesame dressing adds a nice touch. Consider serving with grilled pineapple for a sweet twist. Explore these options to find what you love! This article covered making delicious teriyaki chicken skewers. We explored key ingredients like chicken, marinade, and vegetables. You learned how to prepare the marinade, assemble skewers, and cook on the grill. We also shared tips for flavor, grilling techniques, and serving ideas. You can mix in different proteins or vegetables and make it your own. Remember to store any leftovers properly to enjoy later. Now, get ready to impress with your new skewering skills!](https://fastmealmate.com/wp-content/uploads/2025/06/9b1dc869-68dc-4727-be9c-b0e6615ca1ac-768x768.webp)
![To make a hearty Instant Pot beef stew, you need fresh and tasty ingredients. Here’s what you will need: - 2 pounds beef chuck, cut into 1-inch cubes - 1 tablespoon olive oil - 1 large onion, finely chopped - 2 cloves garlic, minced - 4 medium carrots, sliced into rounds - 3 medium potatoes, peeled and diced into 1-inch cubes - 2 cups beef broth - 1 tablespoon tomato paste - 1 teaspoon dried thyme - 1 teaspoon dried rosemary - 1 bay leaf - Salt and freshly ground black pepper to taste - 2 tablespoons cornstarch (optional, for thickening) - Fresh parsley, chopped (for garnish) These ingredients bring great flavor and comfort to your dish. Each one plays a key role. For example, beef chuck gives the stew a rich taste. Onions and garlic add depth. Carrots and potatoes give it heartiness. Don’t skip the herbs; they add wonderful notes to every bite. You will find that using quality ingredients makes a big difference. Fresh veggies and good beef will elevate your stew. Remember, you can always adjust the seasonings to fit your taste. If you want to explore more, check out the Full Recipe for step-by-step instructions. - Prep time: 15 minutes - Cook time: 35 minutes - Total time: 1 hour - Servings: 6 With just an hour, you can create a warm and filling meal for your family or friends. Enjoy the process! Set your Instant Pot to “Sauté” and pour in the olive oil. Let it heat until it shimmers. Add the beef cubes in a single layer. Sear them until browned, about 5-7 minutes. This step seals in flavor. Once browned, remove the beef and set it aside on a plate. In the same pot, add the finely chopped onion and minced garlic. Cook them for 2-3 minutes until the onion is soft. You will smell a rich aroma that adds depth to your stew. Pour a splash of beef broth into the pot. Use a wooden spoon to scrape up the browned bits stuck to the bottom. This step is key for enhancing the stew’s flavor. Now, return the seared beef to the pot. Add the sliced carrots, diced potatoes, the remaining beef broth, tomato paste, dried thyme, dried rosemary, and the bay leaf. Don’t forget to add a pinch of salt and pepper. Stir everything until well mixed. Close the lid tightly on the Instant Pot. Make sure the steam release valve is set to “Sealing.” Select the “Manual” function. Adjust the cooking time to 35 minutes at high pressure. When the cooking time is up, let the Instant Pot naturally release pressure for 10 minutes. This helps make the beef tender. After that, carefully quick-release any remaining pressure by turning the valve to “Venting.” If you want a thicker stew, mix 2 tablespoons of cornstarch with cold water to make a slurry. Stir this into the warm stew. Set the Instant Pot back to “Sauté” for 5 minutes. Stir often until the stew thickens to your liking. Before serving, remember to remove the bay leaf. Garnish the stew with freshly chopped parsley for color. Ladle it into bowls while hot. Enjoy this hearty meal! Check the [Full Recipe] for more details. Browning meat is key. It builds flavor and color. When you sear beef, you create a nice crust. This adds a rich taste to your stew. Make sure to do this step well. For seasoning, use salt and pepper early. This helps to boost the flavor. Add herbs like thyme and rosemary for aroma. If you love a kick, throw in some paprika. Pair your beef stew with sides that shine. Mashed potatoes work great. They soak up all the stew's goodness. You can also serve it with green beans or a fresh salad. Bread is a must! Choose crusty bread for dipping. Sourdough or baguette are fantastic options. They bring texture and enhance the meal. Want to deepen the taste? Try adding red wine. A splash of wine gives a rich layer to your stew. If you prefer, soy sauce works too. It adds umami that makes flavors pop. Don’t forget about extra veggies! Mushrooms, peas, or bell peppers can brighten your stew. They add nutrition and color. Chop them up and toss them in before cooking. For the full recipe, check out the details above. Happy cooking! {{image_4}} You can use chicken or pork in your stew. For chicken, use boneless thighs or breasts. Cut them into bite-sized pieces. Sear them just like you do with beef. Chicken cooks faster, so reduce the cooking time to 25 minutes. For pork, use shoulder or loin. Cut into 1-inch cubes and follow the same steps as beef. Both meats will soak up the rich flavors of your stew. To make a vegetarian stew, skip the meat entirely. Use hearty vegetables like mushrooms, butternut squash, or lentils. Replace beef broth with vegetable broth for a lighter taste. You can add beans for protein and texture. Cook it just like the beef stew. This version is still rich and filling, perfect for anyone. You can change the taste by using different herbs and spices. Instead of thyme and rosemary, try basil and oregano for an Italian twist. Or, add cumin and coriander for a warm, earthy flavor. For a touch of heat, add red pepper flakes or a splash of hot sauce. Each change gives you a new dish to enjoy. To refrigerate beef stew, let it cool first. Pour the stew into a container. Seal it tightly with a lid. Store it in the fridge for up to three days. If you want to enjoy it later, use the freezer. To freeze beef stew, follow these steps. Cool the stew completely first. Then, transfer it to freezer-safe bags or containers. Remove as much air as possible to avoid freezer burn. Label the bags with the date. You can freeze it for up to three months. To reheat, let it thaw in the fridge overnight. Heat it in the microwave or on the stove until hot. In the fridge, beef stew lasts about three days. If you freeze it, it can last for three months. After that, the quality may decline. Be sure to check for any off smells or changes in texture before eating. When stored correctly, the stew stays flavorful and comforting. Yes, you can skip browning the meat. However, your stew may lack flavor. Browning adds depth and richness. It creates a lovely crust and enhances the dish. If you skip this step, consider adding more spices. If your stew is too thick, add more beef broth. Start with half a cup and stir well. You can also use water if needed. Another option is to add more veggies. They will release moisture as they cook. You can use frozen beef, but adjust the cooking time. Increase the time to 45 minutes for frozen chunks. This allows the meat to cook through properly. Make sure to add a few extra minutes if pieces are large. The beef is tender when it falls apart easily. You can check by using a fork. If it shreds easily, it's done. Aim for a melt-in-your-mouth texture for the best stew. Yes, this recipe is great for meal prep. You can make it ahead and store leftovers. It keeps well in the fridge for about three days. You can also freeze it for up to three months. Just reheat before serving. Check out the Full Recipe for more details. This blog post covered delicious Instant Pot beef stew. You learned the key ingredients, simple steps, and expert tips. I emphasized the importance of browning the beef for flavor. You can customize the recipe with different proteins or vegetables too. Stored correctly, it lasts well and is perfect for meals later. Enjoying this hearty dish brings warmth and satisfaction. I hope you try this recipe and share it with friends. Your kitchen adventures await!](https://fastmealmate.com/wp-content/uploads/2025/07/4eb70415-c4b6-43db-bf2d-31d3ec08fe2e-768x768.webp)


