Instant Pot Beef Stew Hearty and Comforting Dish
![To make a hearty Instant Pot beef stew, you need fresh and tasty ingredients. Here’s what you will need: - 2 pounds beef chuck, cut into 1-inch cubes - 1 tablespoon olive oil - 1 large onion, finely chopped - 2 cloves garlic, minced - 4 medium carrots, sliced into rounds - 3 medium potatoes, peeled and diced into 1-inch cubes - 2 cups beef broth - 1 tablespoon tomato paste - 1 teaspoon dried thyme - 1 teaspoon dried rosemary - 1 bay leaf - Salt and freshly ground black pepper to taste - 2 tablespoons cornstarch (optional, for thickening) - Fresh parsley, chopped (for garnish) These ingredients bring great flavor and comfort to your dish. Each one plays a key role. For example, beef chuck gives the stew a rich taste. Onions and garlic add depth. Carrots and potatoes give it heartiness. Don’t skip the herbs; they add wonderful notes to every bite. You will find that using quality ingredients makes a big difference. Fresh veggies and good beef will elevate your stew. Remember, you can always adjust the seasonings to fit your taste. If you want to explore more, check out the Full Recipe for step-by-step instructions. - Prep time: 15 minutes - Cook time: 35 minutes - Total time: 1 hour - Servings: 6 With just an hour, you can create a warm and filling meal for your family or friends. Enjoy the process! Set your Instant Pot to “Sauté” and pour in the olive oil. Let it heat until it shimmers. Add the beef cubes in a single layer. Sear them until browned, about 5-7 minutes. This step seals in flavor. Once browned, remove the beef and set it aside on a plate. In the same pot, add the finely chopped onion and minced garlic. Cook them for 2-3 minutes until the onion is soft. You will smell a rich aroma that adds depth to your stew. Pour a splash of beef broth into the pot. Use a wooden spoon to scrape up the browned bits stuck to the bottom. This step is key for enhancing the stew’s flavor. Now, return the seared beef to the pot. Add the sliced carrots, diced potatoes, the remaining beef broth, tomato paste, dried thyme, dried rosemary, and the bay leaf. Don’t forget to add a pinch of salt and pepper. Stir everything until well mixed. Close the lid tightly on the Instant Pot. Make sure the steam release valve is set to “Sealing.” Select the “Manual” function. Adjust the cooking time to 35 minutes at high pressure. When the cooking time is up, let the Instant Pot naturally release pressure for 10 minutes. This helps make the beef tender. After that, carefully quick-release any remaining pressure by turning the valve to “Venting.” If you want a thicker stew, mix 2 tablespoons of cornstarch with cold water to make a slurry. Stir this into the warm stew. Set the Instant Pot back to “Sauté” for 5 minutes. Stir often until the stew thickens to your liking. Before serving, remember to remove the bay leaf. Garnish the stew with freshly chopped parsley for color. Ladle it into bowls while hot. Enjoy this hearty meal! Check the [Full Recipe] for more details. Browning meat is key. It builds flavor and color. When you sear beef, you create a nice crust. This adds a rich taste to your stew. Make sure to do this step well. For seasoning, use salt and pepper early. This helps to boost the flavor. Add herbs like thyme and rosemary for aroma. If you love a kick, throw in some paprika. Pair your beef stew with sides that shine. Mashed potatoes work great. They soak up all the stew's goodness. You can also serve it with green beans or a fresh salad. Bread is a must! Choose crusty bread for dipping. Sourdough or baguette are fantastic options. They bring texture and enhance the meal. Want to deepen the taste? Try adding red wine. A splash of wine gives a rich layer to your stew. If you prefer, soy sauce works too. It adds umami that makes flavors pop. Don’t forget about extra veggies! Mushrooms, peas, or bell peppers can brighten your stew. They add nutrition and color. Chop them up and toss them in before cooking. For the full recipe, check out the details above. Happy cooking! {{image_4}} You can use chicken or pork in your stew. For chicken, use boneless thighs or breasts. Cut them into bite-sized pieces. Sear them just like you do with beef. Chicken cooks faster, so reduce the cooking time to 25 minutes. For pork, use shoulder or loin. Cut into 1-inch cubes and follow the same steps as beef. Both meats will soak up the rich flavors of your stew. To make a vegetarian stew, skip the meat entirely. Use hearty vegetables like mushrooms, butternut squash, or lentils. Replace beef broth with vegetable broth for a lighter taste. You can add beans for protein and texture. Cook it just like the beef stew. This version is still rich and filling, perfect for anyone. You can change the taste by using different herbs and spices. Instead of thyme and rosemary, try basil and oregano for an Italian twist. Or, add cumin and coriander for a warm, earthy flavor. For a touch of heat, add red pepper flakes or a splash of hot sauce. Each change gives you a new dish to enjoy. To refrigerate beef stew, let it cool first. Pour the stew into a container. Seal it tightly with a lid. Store it in the fridge for up to three days. If you want to enjoy it later, use the freezer. To freeze beef stew, follow these steps. Cool the stew completely first. Then, transfer it to freezer-safe bags or containers. Remove as much air as possible to avoid freezer burn. Label the bags with the date. You can freeze it for up to three months. To reheat, let it thaw in the fridge overnight. Heat it in the microwave or on the stove until hot. In the fridge, beef stew lasts about three days. If you freeze it, it can last for three months. After that, the quality may decline. Be sure to check for any off smells or changes in texture before eating. When stored correctly, the stew stays flavorful and comforting. Yes, you can skip browning the meat. However, your stew may lack flavor. Browning adds depth and richness. It creates a lovely crust and enhances the dish. If you skip this step, consider adding more spices. If your stew is too thick, add more beef broth. Start with half a cup and stir well. You can also use water if needed. Another option is to add more veggies. They will release moisture as they cook. You can use frozen beef, but adjust the cooking time. Increase the time to 45 minutes for frozen chunks. This allows the meat to cook through properly. Make sure to add a few extra minutes if pieces are large. The beef is tender when it falls apart easily. You can check by using a fork. If it shreds easily, it's done. Aim for a melt-in-your-mouth texture for the best stew. Yes, this recipe is great for meal prep. You can make it ahead and store leftovers. It keeps well in the fridge for about three days. You can also freeze it for up to three months. Just reheat before serving. Check out the Full Recipe for more details. This blog post covered delicious Instant Pot beef stew. You learned the key ingredients, simple steps, and expert tips. I emphasized the importance of browning the beef for flavor. You can customize the recipe with different proteins or vegetables too. Stored correctly, it lasts well and is perfect for meals later. Enjoying this hearty dish brings warmth and satisfaction. I hope you try this recipe and share it with friends. Your kitchen adventures await!](https://fastmealmate.com/wp-content/uploads/2025/07/4eb70415-c4b6-43db-bf2d-31d3ec08fe2e.webp)
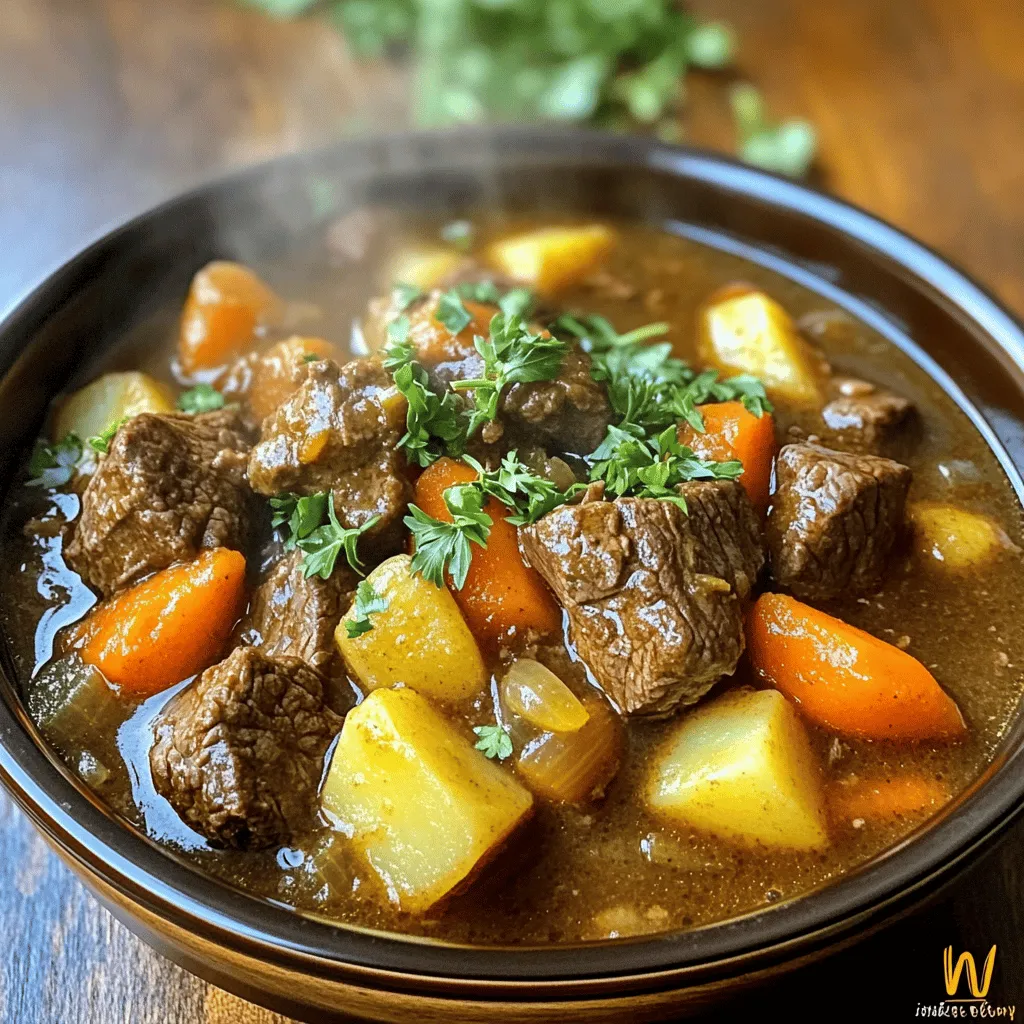
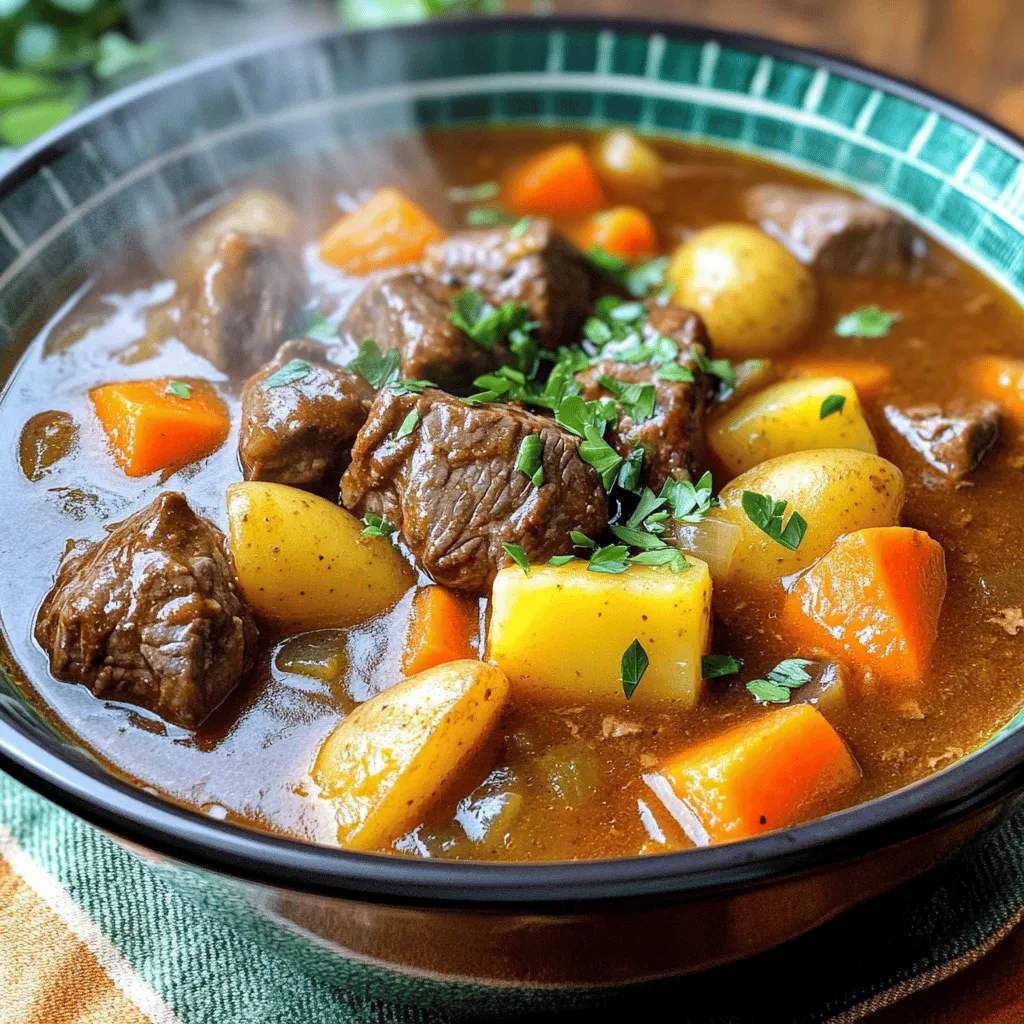
Are you ready to make a meal that warms your soul? My Instant Pot Beef Stew is not just any dish; it’s a hearty comfort classic. With tender beef, fresh veggies, and rich broth, it’s the ultimate cozy dinner. In just one hour, you’ll create a dish that feeds the whole family. Let’s dive into the simple steps and ingredients to turn your kitchen into a haven of warmth!
Ingredients
To make a hearty Instant Pot beef stew, you need fresh and tasty ingredients. Here’s what you will need:
– 2 pounds beef chuck, cut into 1-inch cubes
– 1 tablespoon olive oil
– 1 large onion, finely chopped
– 2 cloves garlic, minced
– 4 medium carrots, sliced into rounds
– 3 medium potatoes, peeled and diced into 1-inch cubes
– 2 cups beef broth
– 1 tablespoon tomato paste
– 1 teaspoon dried thyme
– 1 teaspoon dried rosemary
– 1 bay leaf
– Salt and freshly ground black pepper to taste
– 2 tablespoons cornstarch (optional, for thickening)
– Fresh parsley, chopped (for garnish)
These ingredients bring great flavor and comfort to your dish. Each one plays a key role. For example, beef chuck gives the stew a rich taste. Onions and garlic add depth. Carrots and potatoes give it heartiness. Don’t skip the herbs; they add wonderful notes to every bite.
You will find that using quality ingredients makes a big difference. Fresh veggies and good beef will elevate your stew. Remember, you can always adjust the seasonings to fit your taste.
Preparation and Cooking Times
– Prep time: 15 minutes
– Cook time: 35 minutes
– Total time: 1 hour
– Servings: 6
With just an hour, you can create a warm and filling meal for your family or friends. Enjoy the process!
Step-by-Step Instructions
Sauté the Beef
Set your Instant Pot to “Sauté” and pour in the olive oil. Let it heat until it shimmers. Add the beef cubes in a single layer. Sear them until browned, about 5-7 minutes. This step seals in flavor. Once browned, remove the beef and set it aside on a plate.
Sauté Aromatics
In the same pot, add the finely chopped onion and minced garlic. Cook them for 2-3 minutes until the onion is soft. You will smell a rich aroma that adds depth to your stew.
Deglaze the Pot
Pour a splash of beef broth into the pot. Use a wooden spoon to scrape up the browned bits stuck to the bottom. This step is key for enhancing the stew’s flavor.
Combine Ingredients
Now, return the seared beef to the pot. Add the sliced carrots, diced potatoes, the remaining beef broth, tomato paste, dried thyme, dried rosemary, and the bay leaf. Don’t forget to add a pinch of salt and pepper. Stir everything until well mixed.
Pressure Cook
Close the lid tightly on the Instant Pot. Make sure the steam release valve is set to “Sealing.” Select the “Manual” function. Adjust the cooking time to 35 minutes at high pressure.
Natural Pressure Release
When the cooking time is up, let the Instant Pot naturally release pressure for 10 minutes. This helps make the beef tender. After that, carefully quick-release any remaining pressure by turning the valve to “Venting.”
Thicken Stew (Optional)
If you want a thicker stew, mix 2 tablespoons of cornstarch with cold water to make a slurry. Stir this into the warm stew. Set the Instant Pot back to “Sauté” for 5 minutes. Stir often until the stew thickens to your liking.
Serve
Before serving, remember to remove the bay leaf. Garnish the stew with freshly chopped parsley for color. Ladle it into bowls while hot. Enjoy this hearty meal!
Tips & Tricks
Perfecting Your Instant Pot Beef Stew
Browning meat is key. It builds flavor and color. When you sear beef, you create a nice crust. This adds a rich taste to your stew. Make sure to do this step well.
For seasoning, use salt and pepper early. This helps to boost the flavor. Add herbs like thyme and rosemary for aroma. If you love a kick, throw in some paprika.
Serving Suggestions
Pair your beef stew with sides that shine. Mashed potatoes work great. They soak up all the stew’s goodness. You can also serve it with green beans or a fresh salad.
Bread is a must! Choose crusty bread for dipping. Sourdough or baguette are fantastic options. They bring texture and enhance the meal.
How to Enhance Flavor
Want to deepen the taste? Try adding red wine. A splash of wine gives a rich layer to your stew. If you prefer, soy sauce works too. It adds umami that makes flavors pop.
Don’t forget about extra veggies! Mushrooms, peas, or bell peppers can brighten your stew. They add nutrition and color. Chop them up and toss them in before cooking.Happy cooking!

Variations
Alternate Proteins
You can use chicken or pork in your stew. For chicken, use boneless thighs or breasts. Cut them into bite-sized pieces. Sear them just like you do with beef. Chicken cooks faster, so reduce the cooking time to 25 minutes. For pork, use shoulder or loin. Cut into 1-inch cubes and follow the same steps as beef. Both meats will soak up the rich flavors of your stew.
Vegetarian Option
To make a vegetarian stew, skip the meat entirely. Use hearty vegetables like mushrooms, butternut squash, or lentils. Replace beef broth with vegetable broth for a lighter taste. You can add beans for protein and texture. Cook it just like the beef stew. This version is still rich and filling, perfect for anyone.
Different Flavor Profiles
You can change the taste by using different herbs and spices. Instead of thyme and rosemary, try basil and oregano for an Italian twist. Or, add cumin and coriander for a warm, earthy flavor. For a touch of heat, add red pepper flakes or a splash of hot sauce. Each change gives you a new dish to enjoy.
Storage Info
How to Store Leftovers
To refrigerate beef stew, let it cool first. Pour the stew into a container. Seal it tightly with a lid. Store it in the fridge for up to three days. If you want to enjoy it later, use the freezer.
Freezing Instant Pot Beef Stew
To freeze beef stew, follow these steps. Cool the stew completely first. Then, transfer it to freezer-safe bags or containers. Remove as much air as possible to avoid freezer burn. Label the bags with the date. You can freeze it for up to three months. To reheat, let it thaw in the fridge overnight. Heat it in the microwave or on the stove until hot.
Shelf Life
In the fridge, beef stew lasts about three days. If you freeze it, it can last for three months. After that, the quality may decline. Be sure to check for any off smells or changes in texture before eating. When stored correctly, the stew stays flavorful and comforting.
FAQs
Can I make Instant Pot Beef Stew without browning the meat?
Yes, you can skip browning the meat. However, your stew may lack flavor. Browning adds depth and richness. It creates a lovely crust and enhances the dish. If you skip this step, consider adding more spices.
What should I do if my stew is too thick?
If your stew is too thick, add more beef broth. Start with half a cup and stir well. You can also use water if needed. Another option is to add more veggies. They will release moisture as they cook.
Can I use frozen beef for this recipe?
You can use frozen beef, but adjust the cooking time. Increase the time to 45 minutes for frozen chunks. This allows the meat to cook through properly. Make sure to add a few extra minutes if pieces are large.
How do I know when the beef is tender?
The beef is tender when it falls apart easily. You can check by using a fork. If it shreds easily, it’s done. Aim for a melt-in-your-mouth texture for the best stew.
Is this recipe suitable for meal prep?
Yes, this recipe is great for meal prep. You can make it ahead and store leftovers. It keeps well in the fridge for about three days. You can also freeze it for up to three months. Just reheat before serving.
This blog post covered delicious Instant Pot beef stew. You learned the key ingredients, simple steps, and expert tips. I emphasized the importance of browning the beef for flavor. You can customize the recipe with different proteins or vegetables too. Stored correctly, it lasts well and is perfect for meals later. Enjoying this hearty dish brings warmth and satisfaction. I hope you try this recipe and share it with friends. Your kitchen adventures await!
![To make a hearty Instant Pot beef stew, you need fresh and tasty ingredients. Here’s what you will need: - 2 pounds beef chuck, cut into 1-inch cubes - 1 tablespoon olive oil - 1 large onion, finely chopped - 2 cloves garlic, minced - 4 medium carrots, sliced into rounds - 3 medium potatoes, peeled and diced into 1-inch cubes - 2 cups beef broth - 1 tablespoon tomato paste - 1 teaspoon dried thyme - 1 teaspoon dried rosemary - 1 bay leaf - Salt and freshly ground black pepper to taste - 2 tablespoons cornstarch (optional, for thickening) - Fresh parsley, chopped (for garnish) These ingredients bring great flavor and comfort to your dish. Each one plays a key role. For example, beef chuck gives the stew a rich taste. Onions and garlic add depth. Carrots and potatoes give it heartiness. Don’t skip the herbs; they add wonderful notes to every bite. You will find that using quality ingredients makes a big difference. Fresh veggies and good beef will elevate your stew. Remember, you can always adjust the seasonings to fit your taste. If you want to explore more, check out the Full Recipe for step-by-step instructions. - Prep time: 15 minutes - Cook time: 35 minutes - Total time: 1 hour - Servings: 6 With just an hour, you can create a warm and filling meal for your family or friends. Enjoy the process! Set your Instant Pot to “Sauté” and pour in the olive oil. Let it heat until it shimmers. Add the beef cubes in a single layer. Sear them until browned, about 5-7 minutes. This step seals in flavor. Once browned, remove the beef and set it aside on a plate. In the same pot, add the finely chopped onion and minced garlic. Cook them for 2-3 minutes until the onion is soft. You will smell a rich aroma that adds depth to your stew. Pour a splash of beef broth into the pot. Use a wooden spoon to scrape up the browned bits stuck to the bottom. This step is key for enhancing the stew’s flavor. Now, return the seared beef to the pot. Add the sliced carrots, diced potatoes, the remaining beef broth, tomato paste, dried thyme, dried rosemary, and the bay leaf. Don’t forget to add a pinch of salt and pepper. Stir everything until well mixed. Close the lid tightly on the Instant Pot. Make sure the steam release valve is set to “Sealing.” Select the “Manual” function. Adjust the cooking time to 35 minutes at high pressure. When the cooking time is up, let the Instant Pot naturally release pressure for 10 minutes. This helps make the beef tender. After that, carefully quick-release any remaining pressure by turning the valve to “Venting.” If you want a thicker stew, mix 2 tablespoons of cornstarch with cold water to make a slurry. Stir this into the warm stew. Set the Instant Pot back to “Sauté” for 5 minutes. Stir often until the stew thickens to your liking. Before serving, remember to remove the bay leaf. Garnish the stew with freshly chopped parsley for color. Ladle it into bowls while hot. Enjoy this hearty meal! Check the [Full Recipe] for more details. Browning meat is key. It builds flavor and color. When you sear beef, you create a nice crust. This adds a rich taste to your stew. Make sure to do this step well. For seasoning, use salt and pepper early. This helps to boost the flavor. Add herbs like thyme and rosemary for aroma. If you love a kick, throw in some paprika. Pair your beef stew with sides that shine. Mashed potatoes work great. They soak up all the stew's goodness. You can also serve it with green beans or a fresh salad. Bread is a must! Choose crusty bread for dipping. Sourdough or baguette are fantastic options. They bring texture and enhance the meal. Want to deepen the taste? Try adding red wine. A splash of wine gives a rich layer to your stew. If you prefer, soy sauce works too. It adds umami that makes flavors pop. Don’t forget about extra veggies! Mushrooms, peas, or bell peppers can brighten your stew. They add nutrition and color. Chop them up and toss them in before cooking. For the full recipe, check out the details above. Happy cooking! {{image_4}} You can use chicken or pork in your stew. For chicken, use boneless thighs or breasts. Cut them into bite-sized pieces. Sear them just like you do with beef. Chicken cooks faster, so reduce the cooking time to 25 minutes. For pork, use shoulder or loin. Cut into 1-inch cubes and follow the same steps as beef. Both meats will soak up the rich flavors of your stew. To make a vegetarian stew, skip the meat entirely. Use hearty vegetables like mushrooms, butternut squash, or lentils. Replace beef broth with vegetable broth for a lighter taste. You can add beans for protein and texture. Cook it just like the beef stew. This version is still rich and filling, perfect for anyone. You can change the taste by using different herbs and spices. Instead of thyme and rosemary, try basil and oregano for an Italian twist. Or, add cumin and coriander for a warm, earthy flavor. For a touch of heat, add red pepper flakes or a splash of hot sauce. Each change gives you a new dish to enjoy. To refrigerate beef stew, let it cool first. Pour the stew into a container. Seal it tightly with a lid. Store it in the fridge for up to three days. If you want to enjoy it later, use the freezer. To freeze beef stew, follow these steps. Cool the stew completely first. Then, transfer it to freezer-safe bags or containers. Remove as much air as possible to avoid freezer burn. Label the bags with the date. You can freeze it for up to three months. To reheat, let it thaw in the fridge overnight. Heat it in the microwave or on the stove until hot. In the fridge, beef stew lasts about three days. If you freeze it, it can last for three months. After that, the quality may decline. Be sure to check for any off smells or changes in texture before eating. When stored correctly, the stew stays flavorful and comforting. Yes, you can skip browning the meat. However, your stew may lack flavor. Browning adds depth and richness. It creates a lovely crust and enhances the dish. If you skip this step, consider adding more spices. If your stew is too thick, add more beef broth. Start with half a cup and stir well. You can also use water if needed. Another option is to add more veggies. They will release moisture as they cook. You can use frozen beef, but adjust the cooking time. Increase the time to 45 minutes for frozen chunks. This allows the meat to cook through properly. Make sure to add a few extra minutes if pieces are large. The beef is tender when it falls apart easily. You can check by using a fork. If it shreds easily, it's done. Aim for a melt-in-your-mouth texture for the best stew. Yes, this recipe is great for meal prep. You can make it ahead and store leftovers. It keeps well in the fridge for about three days. You can also freeze it for up to three months. Just reheat before serving. Check out the Full Recipe for more details. This blog post covered delicious Instant Pot beef stew. You learned the key ingredients, simple steps, and expert tips. I emphasized the importance of browning the beef for flavor. You can customize the recipe with different proteins or vegetables too. Stored correctly, it lasts well and is perfect for meals later. Enjoying this hearty dish brings warmth and satisfaction. I hope you try this recipe and share it with friends. Your kitchen adventures await!](https://fastmealmate.com/wp-content/uploads/2025/07/4eb70415-c4b6-43db-bf2d-31d3ec08fe2e-300x300.webp)


![To make Greek Chickpea Cucumber Feta Salad, you will need: - 1 can (15 oz) chickpeas, thoroughly drained and rinsed - 1 medium cucumber, diced into bite-sized pieces - 1 cup cherry tomatoes, halved - 1/2 medium red onion, finely chopped - 1 cup feta cheese, crumbled - 1/4 cup Kalamata olives, pitted and halved - 1/4 cup fresh parsley, finely chopped - 3 tablespoons extra virgin olive oil - 2 tablespoons red wine vinegar (or substitute with apple cider vinegar) - 1 teaspoon dried oregano - Salt and freshly ground black pepper to taste You can swap out some ingredients based on what you have. No feta cheese? Use goat cheese or a dairy-free option. If you don’t like Kalamata olives, green olives work well too. For a crunchier salad, add bell peppers or radishes. You can also mix in some avocados for a creamy twist. Don't have red wine vinegar? Use lemon juice or apple cider vinegar instead. Fresh ingredients make this salad shine. When you use ripe tomatoes and crisp cucumbers, you enhance the flavor and texture. Fresh herbs like parsley brighten the dish. They add a pop of color and a burst of flavor. The quality of your olive oil matters too. A good extra virgin olive oil brings depth to the dressing. Using fresh produce not only boosts taste but also adds vital nutrients. Enjoying this salad means savoring the vibrant flavors of the Mediterranean. Start by gathering all your ingredients. You will need: - 1 can (15 oz) chickpeas, thoroughly drained and rinsed - 1 medium cucumber, diced into bite-sized pieces - 1 cup cherry tomatoes, halved - 1/2 medium red onion, finely chopped - 1 cup feta cheese, crumbled - 1/4 cup Kalamata olives, pitted and halved - 1/4 cup fresh parsley, finely chopped In a large mixing bowl, add the chickpeas, cucumber, cherry tomatoes, and red onion. Stir gently to mix everything well. Next, it’s time to add flavor and texture. Carefully fold in the crumbled feta cheese, Kalamata olives, and fresh parsley. Use a gentle hand to keep the feta intact. This adds creaminess to the salad. Now, let’s whip up the dressing. In a small bowl, combine: - 3 tablespoons extra virgin olive oil - 2 tablespoons red wine vinegar (or apple cider vinegar) - 1 teaspoon dried oregano - Salt and freshly ground black pepper to taste Whisk these ingredients together until the mixture is smooth and well blended. The dressing will enhance the salad's taste. Drizzle the dressing over the salad mixture in the large bowl. Using a gentle folding motion, toss everything together. You want all the ingredients to be nicely coated. Let the salad sit at room temperature for 10-15 minutes. This resting time allows the flavors to meld beautifully. For the full recipe, check the Mediterranean Chickpea Cucumber Feta Delight. To keep your Greek Chickpea Cucumber Feta Salad fresh, choose the best ingredients. Use ripe cherry tomatoes and crisp cucumbers. Look for bright green, firm cucumbers. Always rinse canned chickpeas well to remove any canning liquid. This step helps reduce sodium and enhances flavor. Store leftover salad in an airtight container in the fridge. This will help maintain its freshness for up to 2 days. Serve your salad at room temperature for the best taste. This allows the flavors to shine. If you store it in the fridge, take it out about 20 minutes before serving. Letting it warm slightly helps enhance the taste and makes for a more enjoyable meal. To boost the flavor of your salad, try adding fresh herbs. Basil or mint can add a nice twist. A squeeze of fresh lemon juice can brighten the dish even more. For a spicy kick, add a pinch of red pepper flakes. Mixing in different olives can also create a unique taste. If you want to change the dressing, add a touch of honey or Dijon mustard for extra depth. These small changes can make your salad even more exciting. For the full recipe, check out the Mediterranean Chickpea Cucumber Feta Delight. {{image_4}} You can easily boost the protein in your Greek chickpea cucumber feta salad. Grilled chicken, shrimp, or even tofu work well. Just cut them into bite-sized pieces. Mix them in with the chickpeas. This adds flavor and makes the salad more filling. If you want a vegan version, swap the feta cheese for avocado or a plant-based cheese. Avocado gives a creamy texture and healthy fats. You can also add hemp seeds for more protein. This keeps the salad fresh and tasty without any animal products. Feel free to change up the ingredients based on the season. In spring, add fresh radishes for a crunchy bite. In summer, diced bell peppers add sweetness. In fall, try roasted butternut squash for warmth. Each swap keeps your salad exciting and full of flavor. Explore the [Full Recipe] for more ideas on how to make this dish your own! To keep your Greek chickpea cucumber feta salad fresh, store it in an airtight container. This will help keep the flavors strong and the ingredients crisp. If you have leftovers, it’s best to separate the dressing from the salad. This way, the salad won’t get soggy. Just toss the dressing in when you’re ready to enjoy it again. When stored properly, the salad lasts about 3 to 5 days in the fridge. The chickpeas and feta cheese hold up well. However, the cucumber and tomatoes start to lose their crunch after a couple of days. Make sure to check for any signs of spoilage, like a funky smell or slimy texture. I do not recommend freezing this salad. The textures change, and the fresh ingredients do not thaw well. If you want to prep ahead, consider freezing the chickpeas separately. They can last up to 3 months in the freezer. Just thaw them in the fridge overnight before mixing them back into your salad. For the best taste, always enjoy your salad fresh! For the full recipe, refer back to the Mediterranean Chickpea Cucumber Feta Delight. Yes, you can make this salad the night before. Just keep it in the fridge. The flavors will blend well overnight. However, the salad may lose some crunch. To keep it fresh, add the cucumber and feta just before serving. If you don’t have feta, try using goat cheese or ricotta. Both options bring a creamy taste. You can also use a dairy-free cheese for a vegan twist. Just choose a cheese that crumbles well to mimic feta. To spice up your salad, add chopped jalapeños or red pepper flakes. You can also mix in a spicy dressing. Try adding a dash of hot sauce to the olive oil and vinegar mix. This will give your salad a nice kick. Yes, this salad is gluten-free! All the ingredients are naturally free of gluten. Chickpeas, cucumber, tomatoes, and feta are all safe for a gluten-free diet. It's a great choice for those with gluten sensitivity. Enjoy this fresh and tasty salad without worry. In this blog post, I covered the core ingredients and their importance. We explored how to prepare, mix, and dress the salad. I also shared tips for freshness and serving. You learned about different variations to suit your taste and how to store your salad properly. Eating fresh, tasty food is fun and easy. Enjoy your Greek Chickpea Cucumber Feta Salad, and don’t be afraid to experiment with new flavors!](https://fastmealmate.com/wp-content/uploads/2025/07/24431354-d8c0-436c-9845-ce85b88e9160-768x768.webp)


