Craving a seafood feast? Look no further! My homemade baked crab legs recipe is both tasty and simple. With just a few ingredients, you can whip up a delicious dish that impresses any dinner guest. Whether you’re a seasoned cook or a beginner, this guide will help you create a flavorful experience right at home. Ready to dive into the world of mouthwatering crab legs? Let’s get started!
Ingredients
List of Ingredients
– 2 pounds frozen Alaskan crab legs
– 4 tablespoons unsalted butter, melted
– 2 cloves garlic, finely minced
– 1 tablespoon freshly squeezed lemon juice
– 1 teaspoon smoked paprika
– 1 teaspoon Old Bay seasoning
– Sea salt and freshly cracked black pepper, to taste
– Fresh parsley, finely chopped (for garnish)
– Lemon wedges, for serving
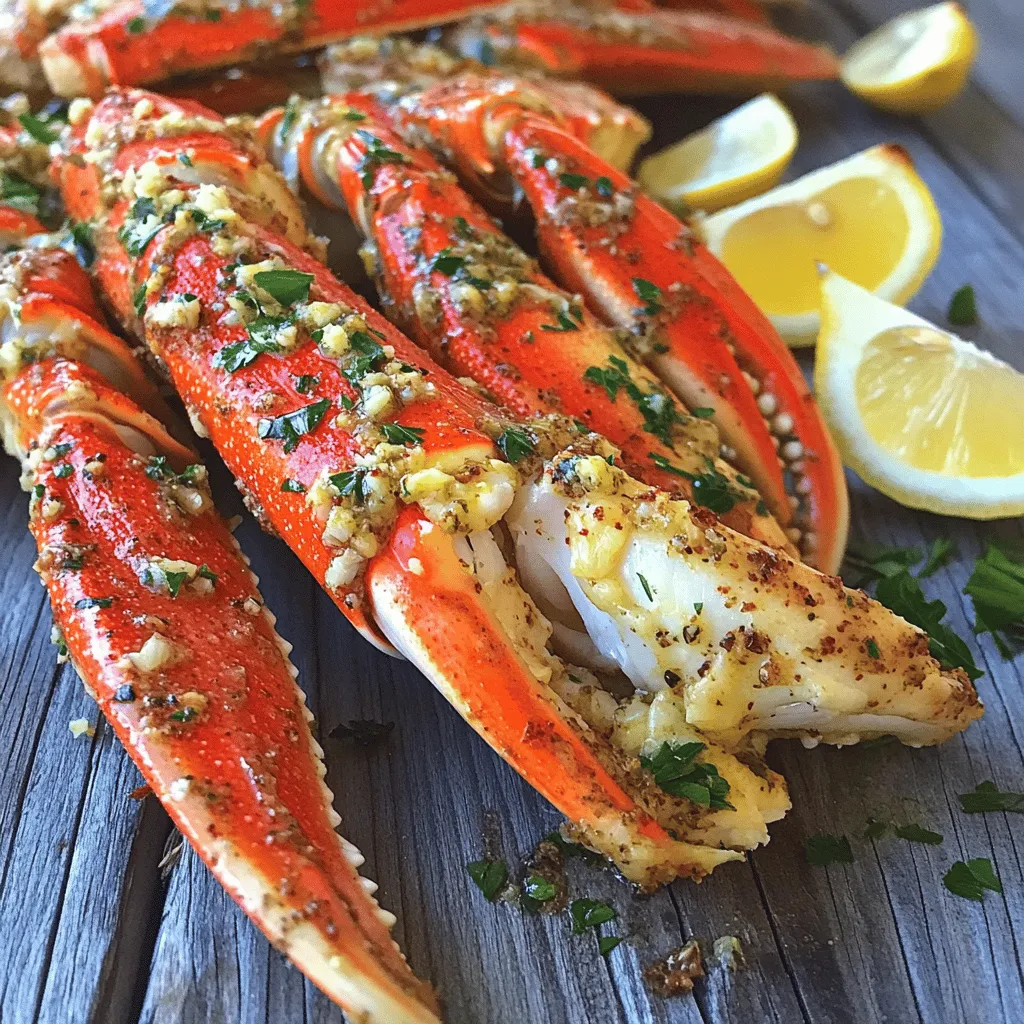
To make homemade baked crab legs, you need simple, fresh items. I love using frozen Alaskan crab legs for this recipe. They are tender and full of flavor. You can find them in most grocery stores.
Next, I use unsalted butter. The butter adds richness to the dish. You will also need garlic, which gives a lovely aroma and taste. Fresh lemon juice adds brightness and balances the flavors.
Smoked paprika and Old Bay seasoning give the crab legs a unique taste. Sea salt and black pepper are key for seasoning the dish. For garnish, fresh parsley adds color and a fresh note.
Lastly, lemon wedges serve as a perfect side. They add a zesty touch when squeezed over the crab legs. Gather these ingredients before starting your cooking adventure.
Equipment Needed
– Baking dish
– Aluminum foil
– Mixing bowl
– Whisk
– Basting brush
You will need a few tools to make this recipe easy. A baking dish helps hold the crab legs while they bake. Aluminum foil is essential to keep the moisture in while cooking.
A mixing bowl is perfect for combining the garlic butter mix. I recommend a whisk to blend the ingredients well. Finally, a basting brush is great for applying the garlic butter to each crab leg.
With these ingredients and tools, you are ready to create a delicious dish.
Step-by-Step Instructions
Preheat the Oven
Set your oven to 375°F (190°C). This heat helps cook the crab legs evenly.
Prepare the Crab Legs
Rinse frozen crab legs under cold water to slightly thaw. This makes them easier to handle later.
Mix the Garlic Butter
In a bowl, combine melted butter, minced garlic, lemon juice, smoked paprika, Old Bay seasoning, salt, and pepper. Whisk until smooth. This garlic butter adds great flavor.
Arrange and Brush
Place crab legs in a baking dish. Brush each leg with the garlic butter mix. Make sure to coat every part for the best taste.
Cover and Bake
Cover the dish tightly with foil. Bake for 20-25 minutes. If your legs are larger, add another 5-10 minutes. This step cooks the crab meat fully.
Broil for Finish
After baking, carefully remove the foil. Set your oven to broil. Broil the crab legs for 2-3 minutes for a toasted finish. This gives them a delicious crispiness.
Enjoy your homemade baked crab legs!
Tips & Tricks
Choosing the Best Crab Legs
When picking crab legs, you have two main choices: frozen or fresh. Frozen crab legs are often more convenient and can be just as tasty as fresh ones. They are usually caught and cooked right away, then frozen. This keeps them fresh until you are ready to cook. If you can find fresh crab legs, they can be a treat if you cook them the same day. Alaskan and Dungeness crab legs are my favorites. Alaskan crab legs are thick and sweet, while Dungeness legs are tender with a lovely, mild flavor.
Flavor Enhancements
To make your crab legs even tastier, think about adding herbs or spices. Fresh herbs like parsley or dill add brightness. You can also try spices like chili powder or lemon zest for a kick. Butter is a classic choice for dipping. You can play with different flavors too. Try garlic or herb-infused butter to add depth. Mixing in a splash of hot sauce can give your dish a fun twist. Let your taste buds guide you!
Cooking Time Adjustments
Cooking time can change based on the size of your crab legs. For smaller legs, 20 minutes in the oven is perfect. Larger legs may need 25 to 30 minutes. Always check if they are hot all the way through. To cook evenly, spread the legs out in a single layer in the baking dish. Covering them with foil helps keep moisture in, making them juicy and tender. If you want a crispy finish, broil them for a few minutes at the end. This adds a delightful crunch!

Variations
Spicy Baked Crab Legs
To make spicy baked crab legs, I add chili flakes or hot sauce to the butter. This gives the dish a nice kick. Simply mix your preferred amount of chili flakes into the garlic butter.If you love heat, start with one teaspoon and adjust to taste. You can also serve with extra hot sauce on the side. This variation is perfect for those who crave a little heat in their seafood.
Citrus Baked Crab Legs
For a fresh twist, I use citrus like lime or orange juice in the recipe. This brightens the dish and adds a zesty flavor that pairs well with crab. Just squeeze some fresh juice into the garlic butter mix. You can use one tablespoon of lime juice or orange juice. Brush this mixture over the crab legs before baking. The citrus will enhance the natural sweetness of the crab and give it a unique flavor profile.
Herb-Crusted Crab Legs
If you love herbs, try mixing fresh or dried herbs into the garlic butter. I recommend using parsley, thyme, or dill. These herbs add great taste and aroma to the dish. Just chop the fresh herbs finely or measure out dried ones. Mix them into the butter mixture before brushing it onto the crab legs. This variation gives the crab a lovely herbaceous note, making it even more delightful.
Storage Info
Refrigeration Guidelines
After a delicious meal, you might have leftover crab legs. To keep them fresh, first let them cool to room temperature. Then, place them in an airtight container. Store the container in the fridge. They can stay good for about three days. When you want to eat them, check for any off smells or changes in color.
Reheating Instructions
Reheating crab legs can be tricky. The best way is to use the oven. Preheat it to 350°F (175°C). Place the crab legs on a baking tray. Cover them with foil to keep them moist. Heat for about 10-15 minutes. You can also use the microwave. Place the legs in a microwave-safe dish with a bit of water. Cover it and heat in short bursts. Check often to avoid overcooking.
Freezing Options
If you want to store crab legs longer, freezing is a great choice. Wrap each leg tightly in plastic wrap. Then, place them in a freezer bag. Squeeze out the air before sealing. They can stay fresh for up to six months. When ready to eat, thaw them overnight in the fridge. Always remember to cook them after thawing for the best taste.
FAQs
How do I know when crab legs are done?
To check if your crab legs are done, look for a few signs. First, the color should change to a bright orange. This means they are heated through. Next, check the internal temperature. It should reach at least 145°F (63°C). If you see and feel these signs, your crab legs are good to go!
Can I use different seafood for this recipe?
Yes, you can easily switch out crab legs for other seafood. Shrimp or lobster tails work great! They have similar cooking times and flavors. You could even try scallops for a different taste. Just adjust the baking time as needed.
What sauces pair well with baked crab legs?
There are many tasty sauces you can use. A classic choice is melted garlic butter. It adds a rich flavor. You can also try a spicy cocktail sauce for a kick. Lemon butter sauce is fresh and zesty. For something unique, mix mayo with sriracha for a creamy dip. Enjoy experimenting with your favorite flavors!
The steps for baking crab legs blend flavor and fun. You pick the best ingredients, like crab and seasonings, then follow simple steps. From preparing the crab legs to adding tasty garlic butter, every part matters. Experiment with new flavors and keep leftovers right for later. Remember, cooking can be easy and enjoyable! Now it’s time for you to try this delicious dish and impress your family and friends. Enjoy the feast ahead!


