Ground Beef Penne Pasta Bake Quick and Tasty Meal

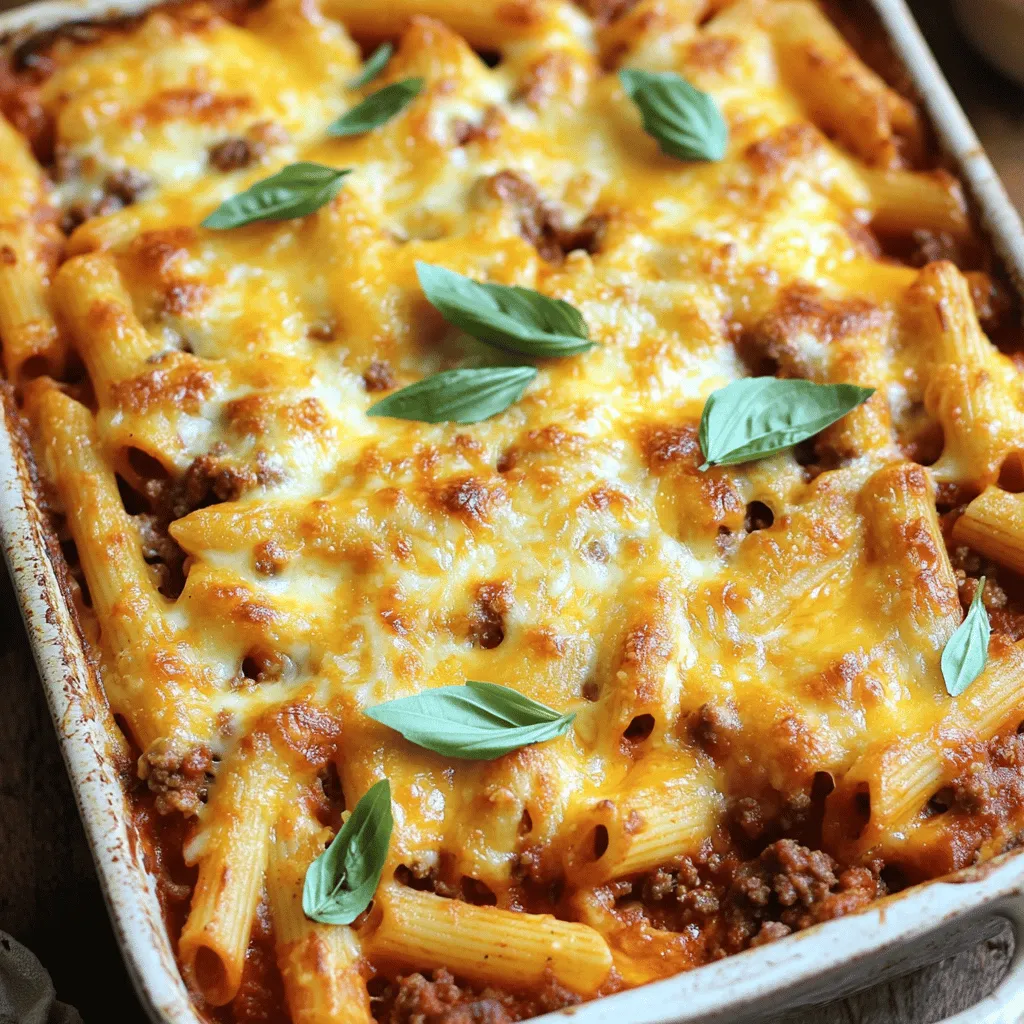
Are you looking for a quick and tasty meal that pleases everyone? This Ground Beef Penne Pasta Bake is your answer. It combines hearty ground beef, creamy cheese, and flavorful spices, all in one dish. Perfect for busy weeknights, this recipe is simple, satisfying, and delicious. Let’s dive in and learn how to whip up this crowd-pleaser in no time!
Ingredients
Main Ingredients
– Ground beef
– Penne pasta
– Crushed tomatoes
The main ingredients are simple but key. Ground beef gives a hearty base. I use penne pasta for its perfect shape. Crushed tomatoes add rich flavor and moisture.
Seasoning and Spices
– Italian seasoning
– Granulated sugar
– Salt and pepper
Seasoning is vital for taste. Italian seasoning brings out the flavors. A touch of granulated sugar balances the acidity. Don’t forget salt and pepper to enhance the dish.
Cheese and Garnishes
– Mozzarella cheese
– Parmesan cheese
– Fresh basil leaves
Cheese makes this bake special. Mozzarella melts beautifully, creating a creamy texture. Parmesan adds a salty kick. Fresh basil leaves give a pop of color and flavor.
Step-by-Step Instructions
Preparation Steps
1. Preheating the oven: Start by preheating your oven to 350°F (175°C). This step is key for a great bake.
2. Cooking the penne pasta: Boil a large pot of salted water. Add 8 oz of penne pasta and cook until al dente. This usually takes about 8-10 minutes. After cooking, drain the pasta and set it aside.
3. Preparing the meat sauce: In a big skillet, heat 2 tablespoons of olive oil over medium heat. Add 1 small diced onion and cook for 3-4 minutes until soft. Then, add 2 minced garlic cloves and sauté for about 30 seconds. Next, add 1 lb of ground beef. Cook until it is browned, which should take around 5-7 minutes. Drain any extra fat. Stir in 1 can of crushed tomatoes, 1 can of tomato paste, 1 teaspoon of Italian seasoning, 1 teaspoon of sugar, 1/2 teaspoon of salt, and 1/4 teaspoon of black pepper. Let this simmer for 5 minutes.
Assembling the Dish
1. Mixing pasta with the sauce: Combine the cooked penne with the meat sauce in the skillet. Add 1 1/2 cups of shredded mozzarella cheese. Mix well until the cheese melts into the sauce.
2. Greasing the baking dish: Take a 9×13 inch baking dish and grease it with cooking spray or a little olive oil. This will help prevent sticking.
3. Adding cheese toppings: Spread the pasta mixture evenly in the dish. Top it with the remaining mozzarella cheese and 1/2 cup of grated Parmesan cheese. This will create a delicious cheesy crust.
Baking
1. Setting the baking time: Place the baking dish in your preheated oven. Bake for 25-30 minutes until the cheese is golden brown and bubbly.
2. Checking for doneness: Look for a nice golden crust on top. The cheese should be melted and gooey.
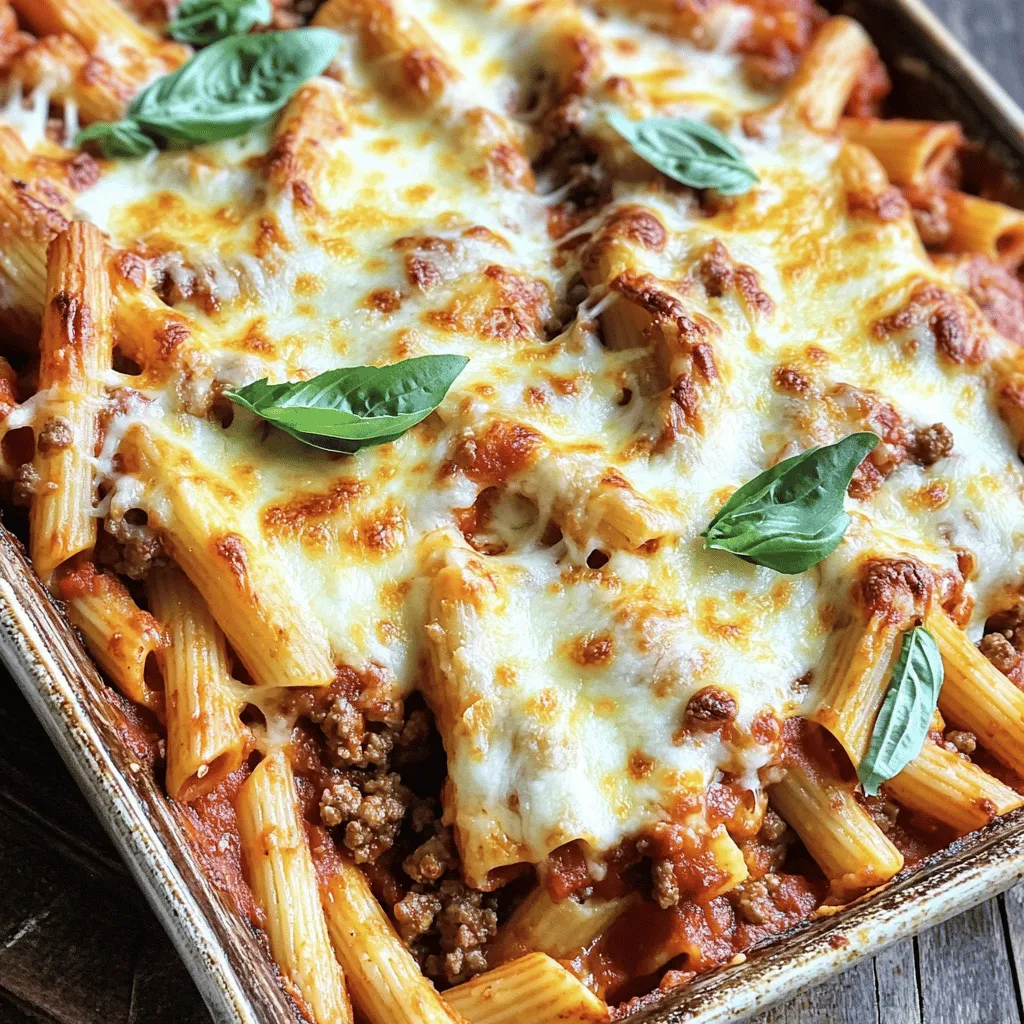
3. Cooling and garnishing: When done, remove the dish from the oven. Let it cool for a few minutes. For a fresh touch, garnish with fresh basil leaves before serving. Enjoy your Ground Beef Penne Pasta Bake!
Tips & Tricks
Perfecting the Bake
– Avoiding overcooking pasta: Cook the penne just until al dente. This means it should be firm and a bit chewy. The pasta will continue to cook in the oven, so undercooking it slightly helps maintain its texture.
– Achieving the best cheese crust: Use a mix of mozzarella and Parmesan for a rich, golden crust. Make sure to cover the dish evenly with cheese. For extra crispiness, broil the bake for a few minutes at the end.
– Ensuring balanced flavors: Taste your meat sauce before mixing it with the pasta. Adjust the seasoning as needed. Add a pinch of sugar to balance the acidity of the tomatoes.
Cooking Techniques
– Browning ground beef correctly: Break up the meat with a spatula and cook it over medium heat. This allows it to brown evenly. Avoid overcrowding the pan, as this can lead to steaming instead of browning.
– Tips for sautéing onions and garlic: Sauté onions first until they are soft. Then, add garlic for the last 30 seconds. This will prevent the garlic from burning, which can make the dish taste bitter.
– Timing for ingredient additions: Add the crushed tomatoes and seasonings after the beef is browned. This allows the flavors to meld nicely.
Presentation Suggestions
– Serving in individual portions: For a fun twist, serve the bake in small, oven-safe bowls. Each guest can have their own serving, making it feel special.
– Garnishing ideas: Fresh basil leaves add color and a hint of flavor. You can also sprinkle some extra cheese on top or drizzle with olive oil before serving.
– Complementing sides: A simple green salad or garlic bread pairs well with this dish. The freshness of the salad balances the richness of the bake.

Variations
Ingredient Swaps
You can switch ground beef with ground turkey or chicken. This makes the dish lighter. For gluten-free options, use gluten-free penne pasta. You can also add fresh veggies like spinach or bell peppers. These changes add color and nutrients to your meal.
Flavor Enhancements
Want to change the taste? Try using different cheeses. Cheddar or provolone can add a unique twist. If you like heat, add some hot sauce. A few dashes can spice things up. Fresh herbs like basil or parsley can brighten the flavor too. Just chop them finely and mix them in before baking.
Dietary Considerations
For those on a keto diet, swap pasta for cauliflower. This keeps the meal low-carb. If you want a vegetarian dish, replace the beef with lentils or mushrooms. To make it dairy-free, use dairy-free cheese options. These swaps let everyone enjoy a tasty meal.
Storage Info
Refrigeration
When you have leftover Ground Beef Penne Pasta Bake, cool it quickly. Place it in airtight containers. This keeps the dish fresh and tasty. In the fridge, it lasts up to 3-4 days. Always check for any signs of spoilage before eating.
Freezing
To freeze, let the dish cool completely first. Then, divide it into portions. Use freezer-safe containers or bags. Squeeze out all the air to avoid freezer burn. The pasta bake can stay fresh in the freezer for about 2-3 months. To reheat, thaw in the fridge overnight. You can then bake it at 350°F (175°C) until hot.
Serving Leftovers
Leftovers can be great for lunch or dinner. Try making a pasta salad with the bake. Mix in some fresh veggies and a bit of dressing. For a quick meal, reheat in the microwave. Use a low power setting to warm it evenly. This dish stays flavorful and satisfying even after a few days!
FAQs
How do I know when the pasta bake is done?
Look for a golden brown top. The cheese should bubble nicely. A fork can help check the center. If it feels hot and firm, it is ready.
Can I make this recipe ahead of time?
Yes, you can. Prepare the dish up to the baking step. Cover it with foil and store in the fridge. To reheat, bake at 350°F for about 30-40 minutes.
What other side dishes pair well with Ground Beef Penne Pasta Bake?
A fresh salad works great with this dish. Try a simple green salad with vinaigrette. Garlic bread is also a perfect match. It adds a nice crunch and flavor.
This blog post covered how to make a tasty Ground Beef Penne Pasta Bake. I shared the key ingredients, preparation steps, and baking tips. Cooking involves using the right seasonings and cheese toppings. You can also try fun variations based on your diet or ingredients on hand. Lastly, I provided storage tips for leftovers and answered common questions. Enjoy making and sharing this hearty dish with friends and family! Simple steps can lead to a delicious meal everyone will love.


![- Smooth natural peanut butter - Pure maple syrup or honey - Coconut oil (melted) - Rolled oats - Dark or semi-sweet chocolate chips - Unsweetened cocoa powder - Pure vanilla extract - Fine sea salt To make delicious chocolate peanut butter bars, you need these key ingredients. First, smooth natural peanut butter gives a creamy base. I love using peanut butter that has no added sugar or oils. It keeps the bars rich and healthy. Next, pure maple syrup or honey sweetens the bars. Both options work well, but maple syrup has a unique flavor. Coconut oil adds a silky texture. Make sure it’s melted for easy mixing. Rolled oats provide fiber and a chewy texture. They help hold everything together. Choose certified gluten-free oats if needed. Dark or semi-sweet chocolate chips add a sweet touch. They melt beautifully into the mixture. Unsweetened cocoa powder brings a rich chocolate flavor. I recommend high-quality cocoa for the best taste. Pure vanilla extract enhances the overall flavor, while fine sea salt balances the sweetness. When making these bars, accurate measurements are key. If you measure wrong, the texture may change. I suggest using a kitchen scale for best results. A scale gives exact amounts, which is very helpful. Use measuring cups for dry ingredients and liquid measuring cups for liquids. Make sure to level off dry ingredients for accuracy. This helps achieve the perfect consistency in your bars. You can customize these bars easily. For sweeteners, try agave syrup or brown rice syrup. Both options work well if you want to change things up. If you prefer a different nut butter, almond or cashew butter are great choices. Just remember that these may alter the taste a bit. For gluten-free options, use certified gluten-free oats. This way, everyone can enjoy these tasty treats without worry. You can find many useful substitutions to fit your needs. Check out the Full Recipe for detailed steps to create your own chocolate peanut butter bars! Start by lining an 8x8 inch baking dish with parchment paper. This helps with easy removal later. Leave some paper overhang on two sides. It makes lifting the bars out simple. Next, grab a large mixing bowl. Combine 1 cup of smooth peanut butter, 1/2 cup of pure maple syrup, and 1/4 cup of melted coconut oil. Use a whisk or spatula to mix until you see a smooth blend. Now it's time to add the dry ingredients. Toss in 1 cup of rolled oats, 1/2 cup of unsweetened cocoa powder, 1 teaspoon of pure vanilla extract, and 1/4 teaspoon of fine sea salt. Mix everything well until you get a thick batter. Now, gently fold in 1/2 cup of dark or semi-sweet chocolate chips. Make sure they spread evenly through the mix. Transfer this mixture into your lined baking dish. Use a spatula or your hands to press it down firmly. You want a compact, even layer. Once done, place the dish in the fridge. Chill it for at least 1 to 2 hours until the mixture feels firm. For the complete recipe, check the Full Recipe section. To make the best chocolate peanut butter bars, focus on texture. You want a smooth, firm bar that holds together well. Use natural peanut butter for creaminess. If your bars turn out dry or crumbly, it often means too many dry ingredients. Stick to the recipe and measure carefully. Mixing well helps combine all the ingredients and avoids clumps. You can boost flavor with simple add-ins. A splash of pure vanilla extract adds depth. A sprinkle of fine sea salt can enhance sweetness too. Consider adding a bit of cinnamon for warmth or even a few tablespoons of crushed nuts for crunch. Each small change can make your bars even better. Presentation matters when serving these bars. Cut them into neat squares or rectangles. Arrange them on a colorful plate for a pop. Drizzling melted chocolate over the top makes them look fancy. You can also sprinkle some crushed peanuts or a pinch of sea salt on top for a rustic touch. These small efforts make your treat feel special. For the full recipe, check out the [Full Recipe]. {{image_4}} If you want to make these bars healthier, you have options. You can use less sweetener. Try using only 1/4 cup of pure maple syrup. You can also replace coconut oil with unsweetened applesauce. This swap cuts calories and adds moisture. Another great idea is to use a sugar substitute. Look for options like stevia or monk fruit. These can help you cut sugar without losing sweetness. Want to switch up the flavor? Add fruits like mashed bananas or shredded coconut. Bananas give a creamy texture, while coconut adds a tropical twist. You can even mix in some almond extract for a nutty flavor boost. Experiment with different nut butters too! Almond butter or cashew butter can change the taste. Each nut butter brings a unique flavor. It’s fun to find your favorite blend. Toppings can make your bars even better. Try sprinkling crushed nuts on top. Walnuts or pecans add a nice crunch. You can also use coconut flakes for a chewy texture. For a sweet finish, drizzle melted chocolate over the top. You can use dark, milk, or even white chocolate. This extra layer makes the bars look fancy and taste amazing. For the full recipe, check out the detailed instructions above. To keep your chocolate peanut butter bars fresh, use an airtight container. This helps prevent moisture and keeps them from drying out. You can store them in the refrigerator or freezer, depending on how long you want to keep them. If you plan to eat them within a week, the fridge is perfect. For longer storage, the freezer is your best option. In the fridge, these bars can last about one week. If you notice any changes in color or smell, it's best to throw them away. Signs of spoilage include a dry texture or a strange odor. Always inspect your bars before enjoying them. You can freeze the bars either one by one or as a whole batch. If you freeze them individually, wrap each bar in plastic wrap or foil. This way, you can grab one whenever you want a treat. If you prefer to freeze the whole batch, just place the container in the freezer. When you're ready to eat, let them thaw in the fridge for a few hours. For the full recipe, check the earlier section. Yes, you can use crunchy peanut butter! It adds a fun texture. The bars will have a nice bite from the peanut pieces. Keep in mind, the flavor may be more intense with crunchy peanut butter. If you enjoy that nutty crunch, go for it! To check if the bars are set, gently press the top with your finger. If it feels firm and springs back, they are ready. You can also look for a slight sheen on the surface. If it’s still soft, give it more time in the fridge. Patience makes perfect bars! For clean cuts, use a sharp knife. Run the knife under hot water, then dry it off. This helps the knife glide through the bars easily. Cut them into squares or rectangles, depending on your preference. If they crumble, try chilling them longer before cutting. Absolutely! To make these bars vegan, use maple syrup instead of honey. Ensure your chocolate chips are dairy-free. Check that your peanut butter has no added ingredients. With these swaps, you can enjoy a tasty vegan treat! In summary, this guide covered how to make delicious no-bake bars. You learned about the key ingredients, measurement tips, and how to mix everything smoothly. We shared storage techniques to keep your bars fresh and variations to suit your taste. Remember, small changes can lead to big flavor. Experiment with different add-ins and toppings to make these bars your own. By following these tips, you’ll enjoy tasty treats that fit your needs. Enjoy making your no-bake bars!](https://fastmealmate.com/wp-content/uploads/2025/06/11f9b23d-ca49-49dd-b442-fa08a6216cde-768x768.webp)
![To make a tasty Instant Pot beef stew, you need a few key ingredients. Here’s what you’ll need: - 2 lbs beef chuck, cut into 1-inch cubes - 4 medium carrots, sliced into rounds - 3 medium potatoes, diced into bite-sized pieces - 1 onion, finely chopped - 3 cloves garlic, minced - 4 cups beef broth - 2 tablespoons tomato paste - 1 teaspoon dried thyme - 1 teaspoon dried rosemary - 1 bay leaf - Salt and freshly ground black pepper to taste - 2 tablespoons extra virgin olive oil - 1 tablespoon Worcestershire sauce - 1 cup frozen peas Each ingredient plays a vital role in building the flavor. The beef chuck gives the stew its rich taste and tender texture. Carrots and potatoes add sweetness and heartiness. Onions and garlic bring depth, while broth keeps everything moist and flavorful. Tomato paste adds a nice tang, and the herbs like thyme and rosemary provide warmth. The bay leaf adds a subtle earthiness. The olive oil helps to sauté the beef and veggies, while Worcestershire sauce gives a savory kick. Finally, frozen peas add a pop of color and sweetness at the end. For the full recipe, check out the complete instructions. Happy cooking! Start by getting your Instant Pot ready. Set it to the 'Sauté' function. Add 2 tablespoons of extra virgin olive oil. Once the oil is hot, add 2 lbs of beef chuck, cut into 1-inch cubes. Season the beef with salt and freshly ground black pepper. Brown the beef for about 5-7 minutes. You want it to have a nice color on all sides. When done, take the beef out and place it on a plate. Next, we’ll sauté the onions and garlic. In the same pot, add 1 finely chopped onion and 3 minced garlic cloves. Stir them for 2-3 minutes until the onion turns soft and clear. This step adds a great flavor base for your stew. Now it’s time to deglaze the pot. Add 2 tablespoons of tomato paste and 1 tablespoon of Worcestershire sauce. Use a wooden spoon to scrape the bottom of the pot. This helps to lift all those tasty bits stuck at the bottom. After deglazing, return the browned beef to the pot. Then, add 4 medium sliced carrots and 3 medium diced potatoes. Don’t forget to include 1 teaspoon each of dried thyme and dried rosemary, plus 1 bay leaf. Finally, pour in 4 cups of beef broth. Give everything a good stir to mix all the flavors together. Secure the lid on your Instant Pot, making sure the vent is sealed. Set it to 'Manual' or 'Pressure Cook' and choose high pressure for 35 minutes. Once it finishes, let the pressure release naturally for 10 minutes. After that, carefully turn the vent to let out any extra pressure before opening the lid. Finally, gently stir in 1 cup of frozen peas. Let the stew sit for 5 minutes to warm the peas. Taste your stew and adjust the seasoning with more salt or pepper if needed. For the full recipe, check [Full Recipe]. Enjoy your hearty and flavorful meal! To make tender beef and a flavorful broth, start with quality beef chuck. It has good marbling, which helps keep the meat juicy. Cut the beef into 1-inch cubes. This size cooks evenly and absorbs flavor well. Searing the beef is key. Use the sauté function on your Instant Pot. Browning adds depth to the stew. After browning, don’t skip deglazing. Scrape the pot to lift all those tasty bits. They add richness to your broth. Avoid common mistakes, like overcrowding the pot. It can lead to uneven cooking. If your beef isn’t browning well, cook in smaller batches. Also, don’t rush the natural pressure release. This step helps keep the meat tender. For an appealing dish, serve your beef stew in deep bowls. Top with freshly chopped parsley. This adds color and freshness. Pair it with warm, crusty bread. It’s perfect for dipping into the savory broth. Consider side dishes that complement the stew. Creamy mashed potatoes or buttery corn enhance the meal. A simple green salad adds a nice crunch. These sides balance the richness of the stew. For the full recipe, check out the details above. Enjoy your hearty meal! {{image_4}} You can change the beef in this stew to other proteins. Lamb works well, giving a rich taste. Chicken is another option; it cooks faster and is lighter. You can also use turkey for a healthy twist. Switching vegetables can change the flavor too. Try adding parsnips or sweet potatoes for a sweet touch. Green beans or corn add a nice crunch. Fresh herbs like parsley or thyme can brighten up the dish. Want a richer taste? Add a splash of red wine or beer. It adds depth and a warm flavor. Just remember to let the alcohol cook off a bit. For a spicy kick, chop some peppers or sprinkle in chili flakes. You can adjust the heat to your liking. Adding a touch of smoked paprika can also bring a warm, smoky flavor. These variations keep the stew fresh and exciting. Check the full recipe for more tips! To keep your beef stew fresh, start by cooling it. After it cools, place it in an airtight container. You can store it in the fridge for up to three days. For longer storage, freeze the stew in a freezer-safe container. Leave some space at the top for the stew to expand as it freezes. When you are ready to eat, you can reheat it on the stove or in the microwave. If reheating on the stove, do it on low heat. Stir often to keep it from sticking. In the fridge, beef stew lasts about three days. In the freezer, it can stay good for about three months. Always look for signs of spoilage. If the stew smells off or has a strange color, it’s best to throw it away. Checking for these signs helps you enjoy your meal safely. You can skip browning the meat, but it affects the flavor. Browning adds rich taste and deep color. It seals in juices, keeping the beef tender. Without this step, your stew may taste flat, lacking depth. I recommend you take the time to brown the meat. It makes a big difference in the final dish. To thicken your beef stew, you have a few options. You can mash some of the potatoes in the stew for a natural thickener. Another way is to mix a tablespoon of cornstarch with water, then stir it in. If you want a rich texture, simmer the stew longer with the lid off. This helps to reduce the liquid, giving you a thicker consistency. Yes, you can make a hearty vegetarian stew. Use mushrooms instead of beef for a meaty texture. You can also add lentils or chickpeas for protein. Swap beef broth for vegetable broth to keep it flavorful. Add plenty of root vegetables like carrots, potatoes, and parsnips for body and taste. This way, you still get a warm, filling dish without the meat. For stew, beef chuck is the best choice. It has a good amount of fat, making it tender when cooked. You can also use brisket or round for a leaner option. These cuts break down during cooking, adding flavor to your stew. Always opt for well-marbled meat, as this will keep your stew juicy and delicious. For the full recipe, check out the Hearty Instant Pot Beef Stew section. In this post, we covered how to make a tasty Instant Pot beef stew. We discussed essential ingredients, preparation steps, and cooking tips. You learned how to perfect your stew and explore fun variations. Plus, we shared storage tips to keep your leftovers fresh. With these steps, you can make a hearty meal easily. Enjoy pushing the limits of flavors and try new ingredients!](https://fastmealmate.com/wp-content/uploads/2025/06/1aa76e63-909b-4af2-b8b1-6d18f846e702-768x768.webp)


![To make Greek Chickpea Cucumber Feta Salad, you will need: - 1 can (15 oz) chickpeas, thoroughly drained and rinsed - 1 medium cucumber, diced into bite-sized pieces - 1 cup cherry tomatoes, halved - 1/2 medium red onion, finely chopped - 1 cup feta cheese, crumbled - 1/4 cup Kalamata olives, pitted and halved - 1/4 cup fresh parsley, finely chopped - 3 tablespoons extra virgin olive oil - 2 tablespoons red wine vinegar (or substitute with apple cider vinegar) - 1 teaspoon dried oregano - Salt and freshly ground black pepper to taste You can swap out some ingredients based on what you have. No feta cheese? Use goat cheese or a dairy-free option. If you don’t like Kalamata olives, green olives work well too. For a crunchier salad, add bell peppers or radishes. You can also mix in some avocados for a creamy twist. Don't have red wine vinegar? Use lemon juice or apple cider vinegar instead. Fresh ingredients make this salad shine. When you use ripe tomatoes and crisp cucumbers, you enhance the flavor and texture. Fresh herbs like parsley brighten the dish. They add a pop of color and a burst of flavor. The quality of your olive oil matters too. A good extra virgin olive oil brings depth to the dressing. Using fresh produce not only boosts taste but also adds vital nutrients. Enjoying this salad means savoring the vibrant flavors of the Mediterranean. Start by gathering all your ingredients. You will need: - 1 can (15 oz) chickpeas, thoroughly drained and rinsed - 1 medium cucumber, diced into bite-sized pieces - 1 cup cherry tomatoes, halved - 1/2 medium red onion, finely chopped - 1 cup feta cheese, crumbled - 1/4 cup Kalamata olives, pitted and halved - 1/4 cup fresh parsley, finely chopped In a large mixing bowl, add the chickpeas, cucumber, cherry tomatoes, and red onion. Stir gently to mix everything well. Next, it’s time to add flavor and texture. Carefully fold in the crumbled feta cheese, Kalamata olives, and fresh parsley. Use a gentle hand to keep the feta intact. This adds creaminess to the salad. Now, let’s whip up the dressing. In a small bowl, combine: - 3 tablespoons extra virgin olive oil - 2 tablespoons red wine vinegar (or apple cider vinegar) - 1 teaspoon dried oregano - Salt and freshly ground black pepper to taste Whisk these ingredients together until the mixture is smooth and well blended. The dressing will enhance the salad's taste. Drizzle the dressing over the salad mixture in the large bowl. Using a gentle folding motion, toss everything together. You want all the ingredients to be nicely coated. Let the salad sit at room temperature for 10-15 minutes. This resting time allows the flavors to meld beautifully. For the full recipe, check the Mediterranean Chickpea Cucumber Feta Delight. To keep your Greek Chickpea Cucumber Feta Salad fresh, choose the best ingredients. Use ripe cherry tomatoes and crisp cucumbers. Look for bright green, firm cucumbers. Always rinse canned chickpeas well to remove any canning liquid. This step helps reduce sodium and enhances flavor. Store leftover salad in an airtight container in the fridge. This will help maintain its freshness for up to 2 days. Serve your salad at room temperature for the best taste. This allows the flavors to shine. If you store it in the fridge, take it out about 20 minutes before serving. Letting it warm slightly helps enhance the taste and makes for a more enjoyable meal. To boost the flavor of your salad, try adding fresh herbs. Basil or mint can add a nice twist. A squeeze of fresh lemon juice can brighten the dish even more. For a spicy kick, add a pinch of red pepper flakes. Mixing in different olives can also create a unique taste. If you want to change the dressing, add a touch of honey or Dijon mustard for extra depth. These small changes can make your salad even more exciting. For the full recipe, check out the Mediterranean Chickpea Cucumber Feta Delight. {{image_4}} You can easily boost the protein in your Greek chickpea cucumber feta salad. Grilled chicken, shrimp, or even tofu work well. Just cut them into bite-sized pieces. Mix them in with the chickpeas. This adds flavor and makes the salad more filling. If you want a vegan version, swap the feta cheese for avocado or a plant-based cheese. Avocado gives a creamy texture and healthy fats. You can also add hemp seeds for more protein. This keeps the salad fresh and tasty without any animal products. Feel free to change up the ingredients based on the season. In spring, add fresh radishes for a crunchy bite. In summer, diced bell peppers add sweetness. In fall, try roasted butternut squash for warmth. Each swap keeps your salad exciting and full of flavor. Explore the [Full Recipe] for more ideas on how to make this dish your own! To keep your Greek chickpea cucumber feta salad fresh, store it in an airtight container. This will help keep the flavors strong and the ingredients crisp. If you have leftovers, it’s best to separate the dressing from the salad. This way, the salad won’t get soggy. Just toss the dressing in when you’re ready to enjoy it again. When stored properly, the salad lasts about 3 to 5 days in the fridge. The chickpeas and feta cheese hold up well. However, the cucumber and tomatoes start to lose their crunch after a couple of days. Make sure to check for any signs of spoilage, like a funky smell or slimy texture. I do not recommend freezing this salad. The textures change, and the fresh ingredients do not thaw well. If you want to prep ahead, consider freezing the chickpeas separately. They can last up to 3 months in the freezer. Just thaw them in the fridge overnight before mixing them back into your salad. For the best taste, always enjoy your salad fresh! For the full recipe, refer back to the Mediterranean Chickpea Cucumber Feta Delight. Yes, you can make this salad the night before. Just keep it in the fridge. The flavors will blend well overnight. However, the salad may lose some crunch. To keep it fresh, add the cucumber and feta just before serving. If you don’t have feta, try using goat cheese or ricotta. Both options bring a creamy taste. You can also use a dairy-free cheese for a vegan twist. Just choose a cheese that crumbles well to mimic feta. To spice up your salad, add chopped jalapeños or red pepper flakes. You can also mix in a spicy dressing. Try adding a dash of hot sauce to the olive oil and vinegar mix. This will give your salad a nice kick. Yes, this salad is gluten-free! All the ingredients are naturally free of gluten. Chickpeas, cucumber, tomatoes, and feta are all safe for a gluten-free diet. It's a great choice for those with gluten sensitivity. Enjoy this fresh and tasty salad without worry. In this blog post, I covered the core ingredients and their importance. We explored how to prepare, mix, and dress the salad. I also shared tips for freshness and serving. You learned about different variations to suit your taste and how to store your salad properly. Eating fresh, tasty food is fun and easy. Enjoy your Greek Chickpea Cucumber Feta Salad, and don’t be afraid to experiment with new flavors!](https://fastmealmate.com/wp-content/uploads/2025/07/24431354-d8c0-436c-9845-ce85b88e9160-768x768.webp)