Grape Mojito Refreshing Cocktail Recipe to Enjoy

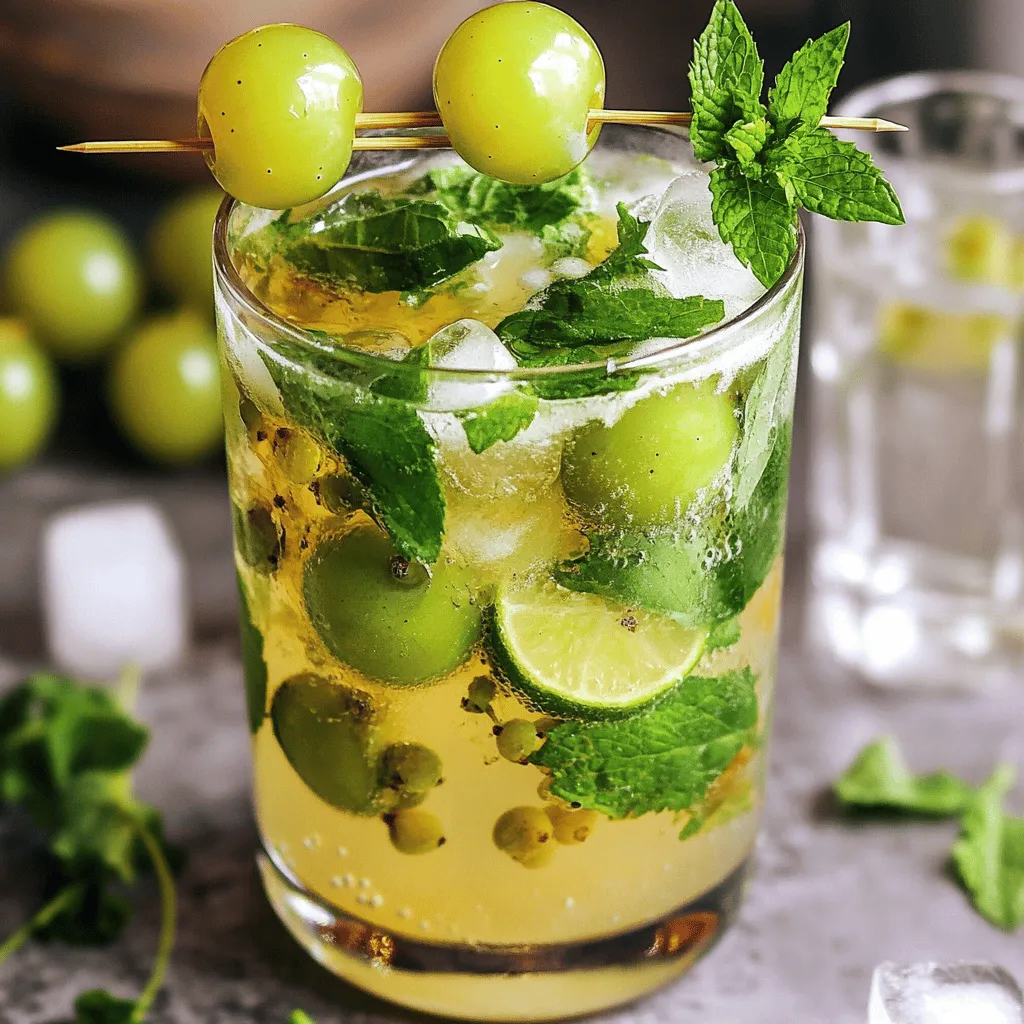
Are you ready to sip on something refreshing and fun? The Grape Mojito combines juicy grapes, mint, and zesty lime for a drink that stands out. Whether it’s a hot day or a special occasion, this cocktail is a tasty choice you won’t want to miss. Follow my easy steps and tips to make the perfect blend. Let’s dive into this delicious recipe and transform your next gathering!
Ingredients
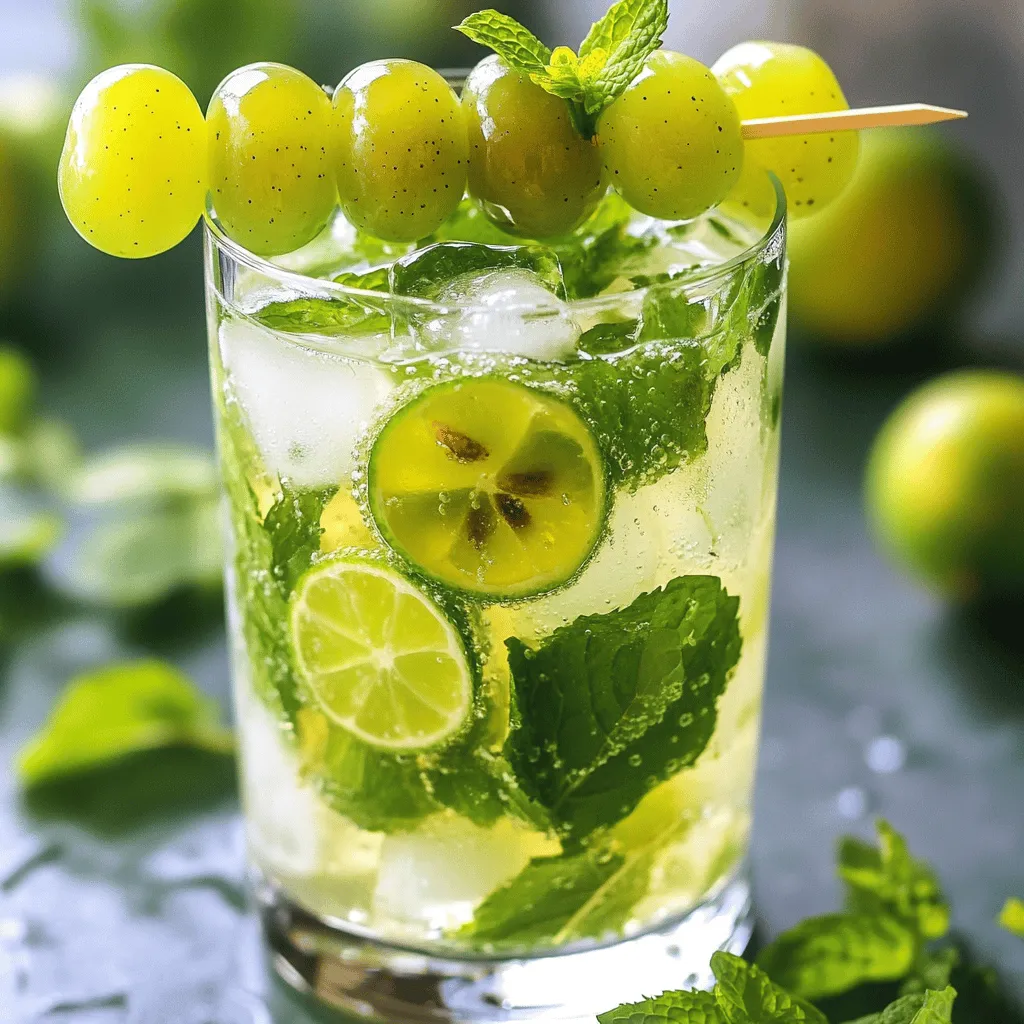
Fresh Ingredients for Grape Mojito
– 1 cup green seedless grapes
– 10 fresh mint leaves
– 1 lime
– Sugar
Additional Ingredients
– Sparkling water
– Ice cubes
– Whole grapes for garnish
To make a Grape Mojito, you need fresh and vibrant ingredients. Start with a cup of green seedless grapes. These grapes add a sweet and juicy base to your drink. Next, grab ten fresh mint leaves. The mint gives a refreshing touch, making each sip pleasant. You will also need one lime. Its juice adds a zesty flavor that balances sweetness. Finally, keep some sugar handy. Adjust the amount based on your taste.
In addition to the main ingredients, you will need sparkling water. This bubbly drink makes your mojito fizzy and fun. Ice cubes are a must to keep your cocktail chilled. Lastly, consider whole grapes for garnish. They add a nice look and extra flavor to your drink.
Step-by-Step Instructions
Muddling the Base Ingredients
– In a sturdy glass or cocktail shaker, combine:
– 1 cup green seedless grapes, halved
– 10 fresh mint leaves
– 1 tablespoon sugar
– 1 lime, juiced (about 2 tablespoons)
First, use a muddler or the back of a spoon. Gently press and twist the mix. This step releases the grape juices and mint flavor. You want a fragrant blend that smells amazing.
Assembling the Cocktail
– Fill the glass or shaker with ice cubes.
– Pour in 1 cup of sparkling water.
Carefully mix it with a bar spoon. Stir gently to keep those bubbles. You want a nice balance of fruity and minty flavors.
Final Touches
– Taste your Grape Mojito. If you want it sweeter, add more sugar. Stir gently to dissolve.
– Pour the mojito into two glasses, filling them halfway. Add more ice if you wish.
– For a pretty finish, garnish with a sprig of mint and whole grapes on a skewer.
Now you have a refreshing drink ready to enjoy.
Tips & Tricks
Perfecting the Sweetness
You can adjust the sugar in your Grape Mojito to fit your taste. Some like it sweeter, while others prefer it less sweet. Start with one tablespoon, then add more if needed. If you want alternatives to sugar, try honey or agave syrup. Both add sweetness and a unique flavor.
Enhancing Flavor
For the best taste, always use fresh mint. It gives your drink a bright and lively aroma. Also, think about trying different lime varieties. Key limes are small and tart, while Persian limes are larger and sweeter. Each type can change the drink’s flavor profile.
Presentation Tips
Tall glasses are perfect for serving your Grape Mojito. They show off the vibrant colors and layers. For garnishing, consider using whole grapes on a skewer. This adds a fun and tasty touch that looks great. You can also place a mint sprig on top for extra flair.

Variations
Creating a Grape Mojito is fun, and you can easily change it up. Here are some tasty variations you might enjoy.
Fruity Twists
– Berry Mojito: Add fresh berries like strawberries or blueberries. They add a sweet burst of flavor and color.
– Citrus Mojito: Squeeze in some orange or grapefruit juice. This adds a zesty note that brightens the drink.
Alcohol-Adjusted Versions
– Non-alcoholic grape mojito: Skip the rum for a refreshing mocktail. Just stick to the grapes, mint, lime juice, and sparkling water for a delicious drink.
– Using different rums for unique flavors: Try light, dark, or spiced rum. Each type gives the mojito a different taste and aroma.
Seasonal Variations
– Summer-inspired versions: Freeze grapes or fruit juice into ice cubes. They keep your drink cold and add extra flavor as they melt.
– Winter warming additions: Use spiced rum for a cozy twist. This adds warmth and depth, perfect for chilly nights.
These variations allow you to enjoy the Grape Mojito in many different ways.
Storage Info
Storing Leftover Ingredients
Store grapes and mint in the fridge. Keep grapes in a sealed bag to avoid drying out. For mint, wrap it in a damp paper towel. Place it in a bag or container. This helps keep the mint fresh and fragrant. Lime juice lasts longer in an airtight container. Use it within a few days for the best flavor.
Prepared Cocktail Storage
If you have leftover Grape Mojito, store it in the fridge. Use a sealed container to keep it fresh. The bubbles will fade, but the taste stays good. For best results, make your mojito just before serving. If you want to prepare in advance, muddle the grapes and mint first. Add lime juice and sparkling water right before serving.
Shelf Life Insights
Fresh grapes can last about a week in the fridge. Mint lasts around five days if stored right. Lime juice keeps for about a week, too. Signs of spoilage include brown spots on grapes or wilting mint. If the juice smells sour, it’s time to toss it. Always check before using any ingredient.
FAQs
Can I use frozen grapes for a Grape Mojito?
Yes, you can use frozen grapes. They work well in this drink. Frozen grapes chill the mojito nicely. They also add a sweet flavor. Just remember to muddle them gently. This way, you can still release their juices.
What type of rum is best for Grape Mojito?
For a Grape Mojito, light rum is the best choice. It has a smooth flavor that blends well. Brands like Bacardi or Captain Morgan are great options. You can also try flavored rums, like coconut or mango. They add a twist to the drink.
How can I make a non-alcoholic version?
To make a mocktail version, simply skip the rum. Use the same ingredients, but add more sparkling water. This keeps the drink light and refreshing. You can also add extra lime juice for zing. Garnish with mint and grapes for a pretty look.
What is the history of the Mojito cocktail?
The Mojito has roots in Cuba. It dates back to the 1500s. Sailors mixed it to fight illness. They used local ingredients like mint, lime, and sugar. Over time, it grew popular in bars and homes. Now, it’s a classic cocktail worldwide.
Can I add other herbal elements?
Yes, you can add other herbs like basil or rosemary. They give a unique twist to your mojito. Just muddle them with the mint for best flavor. Basil adds a sweet note, while rosemary gives an earthy taste. Experiment and find your favorite blend!
The Grape Mojito offers a refreshing twist with simple, fresh ingredients and easy steps. You learned how to muddle grapes and mint, mix in sparkling water, and adjust sweetness for your taste. You can even try fun variations for any season. Remember to store your ingredients correctly and enjoy your delicious drink. You now have all the tools to make this great cocktail your own. Enjoy experimenting, and cheers to your new favorite drink!


![To make this Southern fried okra, start with 1 pound of fresh okra. Look for bright green pods that feel firm. Avoid any that show signs of browning or softness. Slice the okra into 1/2 inch rounds. This size helps them cook evenly and keeps their crunch. Next, prepare the coating. You will need: - 1 cup buttermilk - 1 cup cornmeal - 1/2 cup all-purpose flour - 1 teaspoon garlic powder - 1 teaspoon onion powder - 1 teaspoon smoked paprika - 1/2 teaspoon cayenne pepper (you can adjust this for spice) - Salt and pepper to taste Mix the cornmeal, flour, and spices in a bowl. This blend adds flavor and crunch. The buttermilk will help the coating stick well to the okra. For frying, use vegetable or canola oil. You need enough to fill your skillet by about 1 inch. This depth helps fry the okra evenly. Heat the oil to 350°F (175°C). A thermometer is handy for this step. Getting the oil hot enough is key for that crispy texture. Check the Full Recipe for detailed steps on cooking. Enjoy making this tasty dish! To start, you need fresh okra. Rinse it well under cold water. This cleans any dirt off the pods. Next, slice the okra into 1/2 inch rounds. Make sure each piece is uniform in size. This helps them cook evenly. Once sliced, set the okra aside on a clean plate. Now, grab a mixing bowl and pour in 1 cup of buttermilk. Add the sliced okra to the bowl. Make sure each piece is well-coated with buttermilk. Soak the okra for about 15 minutes. This step adds moisture and flavor. In another bowl, mix the dry ingredients. Combine 1 cup of cornmeal and 1/2 cup of all-purpose flour. Add 1 teaspoon each of garlic powder, onion powder, and smoked paprika. For extra heat, mix in 1/2 teaspoon of cayenne pepper. Lastly, add salt and pepper to taste. Whisk everything together well. This will create a tasty coating for the okra. For the complete recipe, check out the [Full Recipe]. Start by heating the oil in a skillet. Pour about an inch of vegetable or canola oil into a large skillet. Set the heat to medium-high. You want the oil to reach 350°F (175°C). Use a cooking thermometer for accuracy. This temperature is key for a crispy texture. After soaking the okra in buttermilk, lift it out carefully. Allow the excess buttermilk to drip off. Now, place each piece in the cornmeal mixture. Coat them well, but shake off any extra coating. This step helps avoid clumps. Once the oil is hot, add the coated okra in small batches. Avoid overcrowding the pan to keep the oil hot. Fry the okra for 3-4 minutes. Turn them occasionally to get an even golden color. When they look crispy and brown, use a slotted spoon to transfer them to a plate lined with paper towels. This removes any excess oil for a light bite. For the full experience, serve your Southern Fried Okra warm with your favorite dipping sauce. Enjoy the crunch and flavor that comes from this classic dish! {{image_4}} To make your Southern Fried Okra crispy, follow these steps: - Use fresh okra. Freshness matters for flavor and crunch. - Soak in buttermilk. This adds moisture and helps the coating stick well. - Mix dry ingredients well. A good mix of cornmeal and flour creates a great crust. - Heat oil properly. The oil should be around 350°F (175°C). Use a thermometer for accuracy. - Don't overcrowd the pan. Fry in small batches to keep the oil hot. Dipping sauces can enhance your okra’s flavor. Here are my favorites: - Creamy ranch dressing. This classic pairs well with the crunch. - Spicy remoulade. For a kick, this sauce adds a nice zest. - Honey mustard sauce. A sweet twist that complements the savory fried okra. Avoid these errors for the best okra: - Skipping the buttermilk soak. This step is key for flavor and texture. - Using cold oil. Cold oil makes the okra soggy, not crispy. - Not draining excess oil. Place fried okra on paper towels to remove oil. - Frying too many pieces at once. This lowers the oil temperature and makes the coating soggy. With these tips, your Southern Fried Okra will shine! For the full recipe, check the Southern Fried Okra Delight section above. To add some heat, use cayenne pepper. You can adjust the amount to your taste. For more spice, mix in some finely chopped jalapeños. Add them to the buttermilk soak for a spicy kick. You can also sprinkle hot sauce in the buttermilk. This brings out the zest in the dish. Spicy Southern fried okra pairs well with creamy dips. Want a lighter option? Try baking instead of frying. Coat the okra in the same buttermilk and cornmeal mix. Then, place them on a baking sheet lined with parchment. Spray a little oil on top for crispiness. Bake at 425°F (220°C) for about 20-25 minutes. Turn them halfway through to ensure even cooking. You’ll still enjoy the great flavor with less oil. Get creative with your okra! Try adding cheese to the coating. Grated Parmesan or cheddar blends well with cornmeal. You can also add herbs like thyme or dill for a fresh taste. For a sweet twist, sprinkle some brown sugar in the coating mix. This gives a nice contrast to the okra's natural flavor. Each version brings new excitement to your meal. Don’t forget to try these variations when following the Full Recipe! To keep your fried okra fresh, let it cool first. Place it in an airtight container. You can store it in the fridge for up to three days. For longer storage, freeze it in a freezer-safe bag. Just remember to remove as much air as you can. This way, your okra stays tasty and avoids freezer burn. When you are ready to enjoy your leftovers, you can reheat them easily. The best method is to use an oven. Preheat your oven to 350°F (175°C). Spread the fried okra on a baking sheet. Bake for about 10-15 minutes until hot and crispy again. You can also use an air fryer for a quick reheating. Set it to 350°F (175°C) for about 5-7 minutes. Serve your Southern Fried Okra warm for the best taste. It pairs well with several dips. Try ranch dressing for a creamy option or a spicy remoulade for some heat. You can also serve it as a side dish with fried chicken or barbecue. For a fun twist, add it to salads or tacos for extra crunch. Enjoy your crispy and flavorful delight! Yes, you can use frozen okra. Just thaw it first. Pat it dry with a kitchen towel. This helps remove excess moisture. Too much water can make the coating soggy. For the best flavor, fresh okra is still the top choice. Frozen okra works in a pinch, though! To keep your okra crispy, follow these tips: - Soak the okra in buttermilk. This adds moisture and flavor. - Make sure to coat each piece well in the cornmeal mixture. - Do not overcrowd the pan when frying. This keeps the oil hot. - Drain the fried okra on paper towels. This removes excess oil. These steps help you get that crunchy texture every time! Southern Fried Okra has roots in the American South. It came from African culinary traditions. Okra traveled with enslaved people to the U.S. They used it in many dishes. Over time, it became a staple in Southern cooking. Today, it is loved for its unique flavor and crispy texture. Enjoying Southern Fried Okra connects us to this rich history. We explored how to make Southern Fried Okra from fresh ingredients. We covered the best ways to prepare okra, soak it properly, and fry it for crispiness. You learned tips for tasty dipping sauces and ways to avoid common mistakes. Variations let you spice things up or make a healthier version. Lastly, we discussed how to store leftovers and serve them well. Enjoy this fun treat as a snack or side dish! Your fried okra will impress everyone!](https://fastmealmate.com/wp-content/uploads/2025/06/ecd84e34-27de-41dd-a177-4579a9f233b7-768x768.webp)
![To make garlic butter shrimp, gather these simple ingredients: - 1 lb large shrimp, deveined and peeled - 6 tablespoons unsalted butter - 5 cloves garlic, finely minced - 1 teaspoon red pepper flakes - 1 lemon, zested and juiced - 2 tablespoons fresh parsley, finely chopped - Salt and freshly ground black pepper, to taste - Optional: 1 tablespoon extra virgin olive oil These ingredients create a dish full of flavor. The shrimp give a sweet and briny taste. The garlic brings a warm, earthy aroma. Butter adds richness and a smooth texture. Lemon juice brightens the dish and balances the flavors. Fresh parsley gives a pop of color and freshness. Feel free to adjust the red pepper flakes. If you like heat, add more! If you prefer a milder flavor, use less. The optional olive oil helps prevent butter from burning. It adds depth to the dish. Once you gather these ingredients, you're ready to dive into the world of garlic butter shrimp. For a full recipe, check out the section above. To start, heat a large skillet over medium heat. Add 3 tablespoons of unsalted butter and, if you like, 1 tablespoon of extra virgin olive oil. This oil helps keep the butter from burning and adds flavor. Once the butter melts, add 5 cloves of minced garlic along with 1 teaspoon of red pepper flakes. Sauté for about 1-2 minutes. Stir often until the garlic smells great and turns light golden brown. Watch closely, so the garlic doesn’t burn. Now, it’s time for the shrimp. Carefully add 1 pound of peeled and deveined shrimp to the skillet. Spread them out in a single layer. Season with salt and freshly ground black pepper. Let the shrimp cook for about 2-3 minutes without stirring. You will see them change color to pink and opaque. When they look good, gently flip the shrimp over. Add the zest and juice from 1 lemon along with the remaining 3 tablespoons of butter. Cook for another 2-3 minutes until the shrimp are fully cooked and coated in the buttery sauce. When the shrimp are done, take the skillet off the heat. Stir in 2 tablespoons of finely chopped parsley. Taste the dish and adjust seasoning by adding more salt or pepper if needed. Serve the garlic butter shrimp hot to enjoy the best flavor. For more details, check the Full Recipe. To make your garlic butter shrimp shine, focus on two key areas: garlic and seasoning. - Avoid burning garlic: Garlic burns fast. Keep your heat at medium. Stir it often. You want it golden, not dark. Burnt garlic tastes bad. - Adjust seasoning to preference: Taste is personal. Start with salt and pepper. Add more to match your liking. You can also play with red pepper flakes for heat. Now, let’s talk about how to serve your dish. Presentation matters, and there are tasty ways to enjoy it. - Pairing with rice or bread: Serve your shrimp over fluffy rice. Jasmine or basmati works great. If you prefer, slice some warm bread. It soaks up the sauce well. - Garnishing ideas: Fresh parsley adds color. A few lemon wedges brighten your plate. A sprinkle of extra red pepper flakes adds a kick. Need more help? Here are some useful tools. - Suggested video tutorial or high-quality images: Look for a video that shows the steps in action. It helps to see the cooking process. - Nutritional information: Check out the calories and nutrients in this dish. It’s good to know what you're eating. For the full recipe, click [Full Recipe]. Enjoy cooking! {{image_4}} You can play with the flavors in garlic butter shrimp. For a kick, try Spicy Garlic Butter Shrimp. Just add more red pepper flakes. Adjust the heat to your taste. This gives the dish a nice kick that many love. Another great option is Lemon Herb Garlic Shrimp. Add fresh herbs like thyme or basil for a fresh twist. You can also squeeze extra lemon juice for more brightness. This variation makes the dish feel light and refreshing. You can swap some ingredients for different flavors. Instead of butter, try using olive oil. This gives a different taste and is a healthier choice. You can also use ghee for a rich flavor. Adding vegetables can change the dish too. Toss in asparagus or cherry tomatoes. These add color and nutrients. They cook quickly and soak up the garlic butter sauce. If you need gluten-free options, this recipe is easy. Just make sure your red pepper flakes and any other spices are gluten-free. For a dairy-free option, use olive oil instead of butter. You can also try vegan butter. This keeps the flavor while making it suitable for those avoiding dairy. By making these small adjustments, you can enjoy garlic butter shrimp in many ways. For the full recipe, check out the details above. To store leftovers, place the garlic butter shrimp in an airtight container. Ensure the shrimp cool down first. This keeps them fresh and tasty. You should eat the leftovers within 2 days. The flavors stay best within this time. For reheating, I suggest using a skillet. Heat it on low and add a little butter. This method keeps the shrimp moist. Stir gently to avoid overcooked shrimp. If you use the microwave, heat in short bursts. Check every 30 seconds until warm. You can freeze cooked shrimp for later use. Place them in a freezer-safe bag and remove as much air as possible. They can last up to 3 months in the freezer. To defrost, place the shrimp in the fridge overnight. For a faster method, submerge the bag in cold water. This way, you can enjoy your garlic butter shrimp whenever you want. For the full recipe, check out the [Full Recipe]. Cook shrimp for about 2-3 minutes on each side. They turn pink and opaque. This short time keeps them tender and juicy. Overcooking makes them tough. Always check their texture before serving. Yes, you can use frozen shrimp. Thaw them first in cold water. It takes about 15-20 minutes. Pat them dry before cooking. This helps them sear nicely in the pan. Cooking frozen shrimp directly may not give the best results. You can pair garlic butter shrimp with many sides. Rice is a great choice, like jasmine or basmati. You can also serve it with crusty bread. A fresh salad or steamed veggies work well too. They balance the rich flavors of the shrimp. This recipe is very flexible. You can adjust the spice level by adding more or less red pepper flakes. Want a different flavor? Try adding fresh herbs like basil or cilantro. You can even add veggies like asparagus or bell peppers. The choice is yours! For the full recipe, check the earlier section. This blog post covered a simple garlic butter shrimp recipe with step-by-step instructions. You learned about key ingredients, cooking tips, and variations for flavor. Storing and reheating shrimp was also discussed. This dish is not only easy to make, but it’s also delicious too. Experiment with the ingredients or try new sides to make it your own. Enjoy your cooking, and have fun exploring different flavors and options!](https://fastmealmate.com/wp-content/uploads/2025/05/4326bcb2-842f-4d6f-96a8-35ed43fbf561-768x768.webp)


![- Watermelon: 4 cups of seedless watermelon, cut into bite-sized cubes - Feta Cheese: 1 cup of creamy feta cheese, crumbled into small pieces - Fresh Herbs: 1/2 cup of fresh mint leaves, roughly chopped - Balsamic Glaze: 1/4 cup for drizzle - Olive Oil: 1 tablespoon of extra-virgin olive oil - Lime Juice: Juice of 1 fresh lime - Salt and Pepper: To taste I love using fresh watermelon in this salad. The juicy sweetness of watermelon pairs perfectly with the salty feta cheese. When you bite into the watermelon, it feels like summer. The mint leaves add a nice touch of freshness. For the dressing, balsamic glaze brings a rich flavor. A little olive oil adds smoothness, while lime juice gives it a bright kick. Don’t forget to add salt and pepper to bring out all the flavors. This salad is quick to make and very tasty. You can find the Full Recipe to help you create this fresh and flavorful delight. - Combine Watermelon and Feta In a large mixing bowl, add 4 cups of watermelon cubes and 1 cup of crumbled feta cheese. Mix them gently to keep the texture nice. - Add Mint Leaves and Toss Next, add 1/2 cup of chopped mint leaves. Toss everything lightly. This lets the flavors mix well without breaking the cheese or watermelon. - Whisk Together Balsamic Glaze, Olive Oil, Lime Juice, Salt, and Pepper In a small bowl, whisk together 1/4 cup of balsamic glaze, 1 tablespoon of olive oil, and the juice of 1 lime. Add a pinch of salt and some freshly ground pepper. Mix until it’s smooth and well combined. - Drizzle Dressing Over Salad Pour the dressing over the watermelon and feta mixture. Use a gentle motion to coat everything evenly. - Adjust Seasoning to Taste Taste your salad now. If it needs more flavor, add a bit more salt or pepper. - Transfer to Serving Platter Finally, move the salad to a nice serving platter. Arrange it to make it look pretty. Enjoy the fresh and vibrant colors! For the complete recipe, check out the [Full Recipe]. - Use a shallow bowl for serving. It makes the salad look lovely and inviting. - Garnish with whole mint leaves on top. This adds a nice pop of color. - Consider adding cucumber for crunch. It pairs well with the sweet watermelon. - You can also add red onion for a bit of bite. Adjust the amount based on your taste. - Feel free to tweak the dressing. If you like it sweeter, add more balsamic glaze. If you prefer it tangy, add more lime juice. - This salad goes great with grilled meats. Try it alongside chicken or steak. - It’s also perfect as a side dish for picnics or barbecues. - Serve it as a light lunch. Just add some crusty bread for a complete meal. For the full recipe, check out the [Full Recipe]. {{image_4}} You can change the feta cheese to goat cheese or ricotta. Both options add a creamy taste. Goat cheese gives a tangy flavor that pairs well with watermelon. Ricotta offers a mild and smooth touch. These swaps can keep the salad exciting. You can also switch up the herbs. Try using fresh basil or cilantro instead of mint. Basil brings a sweet and aromatic taste, while cilantro adds a bright and zesty kick. Both options elevate the salad in unique ways. If you want a vegan or dairy-free version, skip the feta cheese. Use avocado instead for creaminess. You can also try dairy-free feta made from nuts. This keeps the salad fresh and vibrant while meeting dietary needs. For gluten-free eaters, this salad is a perfect choice. All the ingredients are naturally gluten-free. You can enjoy this dish without worry while savoring its flavor. You can add seasonal fruits or vegetables for a new twist. In summer, try adding fresh berries for sweetness. In fall, diced apples can add a crisp bite. You can also mix in cucumbers for extra crunch during warm months. Each season brings new flavors to explore in your salad. After making this salad, store it in a tight container. Keep it in the fridge. The salad tastes best fresh. However, it can last for 1 to 2 days. The watermelon stays juicy, and the feta stays creamy. If you notice the mint wilting, use it up quickly. You should not freeze watermelon feta salad. Freezing changes the texture of the watermelon. It becomes mushy when thawed. Feta also does not freeze well. Enjoy this salad fresh for the best taste. You do not need to reheat this salad. If you have leftovers, just refresh it. Add a touch of olive oil and a squeeze of lime juice. This brightens the flavors again. Toss gently to combine. Enjoy the flavors as if it were fresh! You can make the salad ahead of time. However, I suggest you wait to add the dressing until just before serving. This keeps the watermelon fresh and crisp. You can prep the watermelon, feta, and mint a few hours in advance. Just store them in the fridge in separate containers. This way, everything stays fresh and delicious. This salad pairs well with many dishes. Here are some tasty ideas: - Grilled chicken or fish for a light meal. - A fresh baguette or pita bread for a fun crunch. - Quinoa or couscous salad for extra fiber. - A light soup like gazpacho for a refreshing combo. These options add flavor and balance to your meal, making it even more enjoyable. Choosing the right watermelon is key to a great salad. Here are some easy tips: - Look for a watermelon that feels heavy for its size. - Check for a uniform shape; avoid any that are flat or irregular. - Find a creamy yellow spot on the bottom. This means it ripened on the ground. - Tap the watermelon; it should sound hollow. - Lastly, avoid any bruises or soft spots. With these tips, you can find a sweet and juicy watermelon for your salad. For the full recipe, check out the details above. This blog post covered the ingredients and steps for making a delicious watermelon feta salad. You learned about choosing fresh watermelon, the best cheese, and seasoning tips. I shared ideas for easy variations and how to store the salad safely. Remember, this dish pairs well with grilled meats and can be tailored to your taste. So, feel free to experiment with different herbs and dressings. Enjoy this refreshing salad at your next meal!](https://fastmealmate.com/wp-content/uploads/2025/07/95b959a9-55ac-465b-944b-7a71b981c201-768x768.webp)
![Fresh strawberries are the star of this drink. They give a sweet and tart flavor. Choose ripe, bright red strawberries. They should smell sweet and feel firm. Slice them into small pieces for easy mixing. You will need 2 cups of fresh strawberries, hulled and sliced. Dried apricots add depth to the tea. They bring a chewy texture and a rich sweetness. Make sure to pick soft, bright apricots for the best taste. Chop them into small pieces to help them blend with the strawberries. You will need 1 cup of dried apricots, chopped into small pieces. These flavor enhancers boost the tea's taste. Black tea gives a strong base. Use either 2 tablespoons of loose black tea or 4 tea bags. Honey adds sweetness, so adjust to your taste. You will need 2 tablespoons of honey. Fresh lemon juice brightens the flavors and balances the sweetness. Squeeze juice from 1 lemon into the mix. Finally, fresh mint leaves provide a refreshing touch for garnish. For the full recipe, check the details above. Start by gathering your ingredients. You need fresh strawberries and dried apricots. - 2 cups fresh strawberries, hulled and sliced - 1 cup dried apricots, chopped into small pieces In a large heatproof bowl or pitcher, combine the sliced strawberries and chopped apricots. This mix brings together sweet and tart flavors. Pour 4 cups of boiling water over the fruit. Make sure all the fruit is under the water. Let it steep for about 10 minutes. This waiting time helps the flavors blend nicely. Next, we add the tea. You can use either loose black tea or tea bags. - 2 tablespoons loose black tea or 4 individual black tea bags Add the tea to the fruit mixture after the first steep. Let it sit for an extra 5 minutes. This step mixes the bold tea taste with the fruity flavor. After steeping, remove the tea bags or strain it through a fine mesh sieve. Press the fruit gently with a spoon to get all the good flavors out. While the tea is still warm, it’s time to add sweetness and zest. - 2 tablespoons honey (adjust according to your sweetness preference) - Juice of 1 fresh lemon Stir in the honey and lemon juice. Mix well until the honey dissolves. Let the tea cool at room temperature for about 10-15 minutes. Then, chill it in the fridge for at least 30 minutes. This chilling time enhances the taste. Serve the tea over ice in glasses. For a nice touch, add fresh mint leaves on top. This drink is a colorful and tasty way to enjoy a sunny day. For the full recipe, check out the [Full Recipe]. Using fresh and high-quality ingredients makes your tea stand out. Choose ripe strawberries with bright red color. Avoid any that look dull or have brown spots. For apricots, select dried ones that feel soft and moist, not hard or dry. These choices help create a sweet and fruity taste in your drink. When using tea, opt for loose black tea for a richer flavor. Sweetness is key to balancing flavors. If you like it sweeter, add more honey. Start with two tablespoons, then taste. You can always add more if needed. For a different twist, try using agave syrup or maple syrup. They both add a unique flavor. Always mix well until the sweetener dissolves, ensuring a smooth blend. Leftover strawberries and apricots can be stored. Place them in an airtight container in the fridge. They last for about three days. You can use leftover fruit in smoothies or yogurt. For leftover tea, store it in a sealed jar. Keep it in the fridge for up to a week. Enjoy it cold or heat it up for a warm drink. {{image_4}} You can swap strawberries and apricots for other fruits. Try peaches, raspberries, or mangoes. Each fruit will give a new twist to the tea. Peaches add a sweet, juicy taste, while raspberries bring a tart kick. Mangoes offer a tropical flair. Use what you love or what’s in season. I enjoy both iced and hot Strawberry Apricot Sunrise Tea. Serve it hot for a cozy feel. It warms you up on chilly days. For a refreshing treat, serve it iced. Pour the tea over ice and add mint leaves. This makes a perfect summer drink. You can enjoy it any time of year. Honey is great, but you can use other sweeteners too. Maple syrup adds a unique flavor. Agave nectar is another option, as it dissolves easily. For a sugar-free choice, try stevia. Adjust the amount to suit your taste buds. Sweetness can change the whole drink. You can store Strawberry Apricot Sunrise Tea in the fridge for up to three days. Use a clean, airtight container. This keeps the tea fresh and tasty. If you have leftovers, pour them into a pitcher. Seal it well, and place it in the fridge. Cold tea is perfect for hot days. If you want to keep the tea longer, freeze it. Pour the cooled tea into ice cube trays. Once frozen, pop the cubes into a freezer bag. This way, you can enjoy the tea later. Just remember, frozen tea is best used within three months. To serve chilled tea, just pour it over ice. If you want warm tea, heat it gently. Use a pot on low heat. Avoid boiling, as this can change the flavor. Stir in fresh mint for extra taste when serving. Enjoy the refreshing flavor of Strawberry Apricot Sunrise Tea! Strawberry Apricot Sunrise Tea is not just tasty; it also offers many health benefits. Strawberries are high in vitamin C, which boosts your immune system. They also have antioxidants that can help fight inflammation. Apricots provide vitamin A, which is great for your skin and eyes. Plus, they add natural sweetness without too much sugar. Black tea can improve heart health and boost focus. When you mix all these ingredients, you create a drink that is both delicious and good for you. Yes, you can use different types of tea! While black tea is the main choice here, you have options. Green tea adds a lighter flavor and more antioxidants. Herbal teas, such as chamomile or hibiscus, can offer unique tastes. If you prefer caffeine-free, herbal blends are perfect. Just adjust steeping times based on the type of tea you choose. Each tea will change the flavor and health benefits, so feel free to experiment. To make this tea more refreshing in summer, try a few simple tricks. First, serve it over ice, as it cools you down quickly. You can also add more lemon juice for a zesty kick. Fresh mint leaves not only add flavor but also a cooling effect. For a fruity twist, toss in additional fresh fruit slices, like peaches or citrus. Lastly, consider blending the tea with ice for a slushy drink. These tips will elevate your Strawberry Apricot Sunrise Tea to a perfect summer drink. This blog post covered how to make Strawberry Apricot Sunrise Tea. You learned about fresh strawberries, dried apricots, and flavor enhancers. We looked at preparing the fruit, steeping the tea, and tips for best quality. You now know variations, storage methods, and answers to common questions. Enjoy making this tasty tea. Experiment with different fruits and flavors. Treat yourself to a drink that's both fun and healthy. Enjoy every sip!](https://fastmealmate.com/wp-content/uploads/2025/06/c3c6e810-3cfa-4a88-aebb-572649891222-768x768.webp)