Garlic Parmesan Chicken Tenders Tasty and Simple Dish

- Chicken and Quality: It is very important to use fresh chicken tenderloins. Fresh chicken gives a better taste and texture. When you choose tenderloins, look for ones that are pink and firm. Avoid any that look dull or have an off smell. - Dry Ingredients: This dish needs basic dry ingredients. You will need: - 1 cup all-purpose flour - 1 cup breadcrumbs (I recommend panko for extra crunch) - 1 cup grated Parmesan cheese - Spices like: - 1 teaspoon paprika - 1 teaspoon dried oregano - 1 teaspoon salt - ½ teaspoon black pepper - ½ teaspoon crushed red pepper flakes (optional for spice) These dry ingredients create a crispy and flavorful coating. - Wet Ingredients: The wet ingredients are key to helping the dry ones stick. You need: - 2 large eggs - ½ cup olive oil The eggs help the breading stick well, while the olive oil adds flavor and helps with crisping in the oven. For the complete recipe and steps, check the Full Recipe. 1. Preheat and Prepare Baking Sheet: Start by preheating your oven to 425°F (220°C). This high heat helps get a crispy crust. Line your baking sheet with parchment paper. It keeps the tenders from sticking. 2. Mixing and Coating: In a shallow dish, mix the flour, paprika, salt, black pepper, and dried oregano. Whisk it well. In another bowl, beat the eggs until mixed. For the breadcrumb mix, combine breadcrumbs, minced garlic, Parmesan cheese, and red pepper flakes if you want heat. Stir to blend. 3. Coating the Chicken: Take a chicken tenderloin. Dip it in the flour mix, coating it fully. Shake off any extra flour. Next, immerse it in the egg, letting any excess drip off. Finally, roll it in the breadcrumb mix. Press gently so the crumbs stick well. 4. Arrange on Baking Sheet: Place the coated tenders on the lined sheet. Keep space between each tender. This helps them cook evenly. Drizzle olive oil over them. This adds flavor and crispiness. 5. Baking Process: Bake in the preheated oven for 15-20 minutes. The chicken should reach an internal temperature of 165°F (74°C). The coating will turn a nice golden brown and be crispy. - Ensuring Even Cook: Make sure there is space between the tenders on the baking sheet. This helps hot air circulate and cooks them evenly. - Monitoring Internal Temperature: Use a meat thermometer to check the chicken's internal temperature. It should read 165°F (74°C) for safe eating. - Why Panko Breadcrumbs Excel Panko breadcrumbs are light and airy. They create a great crunch. Regular breadcrumbs can be too dense. Panko helps the chicken tenders bake up crispier. The larger flakes trap air, which leads to a golden finish. - Drizzling Oil: Importance for a golden finish Drizzling olive oil over the chicken is key. Oil promotes even cooking and helps the breading turn golden. Without oil, the tenders may dry out. Use just enough to coat the chicken lightly. This small step makes a big difference! - Adding Herbs: Other herbs that complement the chicken Fresh herbs add a burst of flavor. Try adding thyme, basil, or rosemary. These herbs work well with garlic and Parmesan. Don’t be shy; chop them fine and mix them into your breadcrumb mix. - Balancing Spices: Adjusting the heat level Control the spice by adjusting red pepper flakes. If you prefer milder flavors, cut back on the flakes. For more heat, add extra. You can also include smoked paprika for a unique twist. This helps customize the dish to your taste! For a full recipe, check out the instructions above! {{image_4}} You can switch up the flavor of your Garlic Parmesan Chicken Tenders in fun ways. - Spicy Version: If you like some heat, add different spices. Try cayenne or chili powder to the breadcrumb mix. This brings a nice kick to your tenders. You can also add more crushed red pepper flakes for extra spice. - Herb Parmesan: Fresh herbs can take your dish to the next level. Mix in parsley, basil, or thyme with the cheese and breadcrumbs. This adds a fresh flavor and makes your chicken tenders even tastier. Dipping sauces and sides can elevate your meal. - Dipping Sauces: Pair your tenders with great sauces. Marinara sauce is a classic choice. You can also try garlic aioli for a rich taste. Honey mustard or BBQ sauce can add a sweet touch too. - Side Dishes: Complement your chicken tenders with sides. Salad or steamed vegetables work well. You can also serve them with fries or mashed potatoes for a heartier meal. For the complete recipe, check out the Full Recipe section. To keep your chicken tenders fresh, store them right away. Let them cool to room temperature before putting them away. Use an airtight container to lock in moisture. Avoid letting air in, as it makes them dry. You can keep them in the fridge for about 3 days. If you want to save them longer, freeze them. Just wrap them tightly in plastic wrap and then place them in a freezer bag. They can last for up to 3 months in the freezer. To reheat your chicken tenders, the oven works best. Preheat it to 350°F (175°C). Place the tenders on a baking sheet. Bake for about 10-15 minutes until heated through. This method helps keep them crispy. If you’re in a hurry, you can use the microwave. But be careful! Microwaving can make them soggy. To avoid this, place a paper towel under the tenders. This helps absorb moisture. Heat them for 30 seconds at a time until warm. For extra crispiness, you can also use an air fryer. Set it to 350°F (175°C) and cook for about 5-7 minutes. This method restores their crunch. Enjoy your Garlic Parmesan Chicken Tenders again, just like when they were fresh from the oven! Can I use boneless chicken breasts instead? Yes, you can use boneless chicken breasts. Just cut them into strips similar to tenderloins. This way, they will cook evenly. Keep in mind that cooking time may vary slightly. Always check that the internal temperature reaches 165°F (74°C). How can I make this dish gluten-free? To make garlic Parmesan chicken tenders gluten-free, substitute regular flour and breadcrumbs with gluten-free options. Use gluten-free all-purpose flour and gluten-free panko breadcrumbs. These swaps will help you enjoy this dish without gluten. Can I prepare these chicken tenders in advance? Absolutely! You can prepare the chicken tenders ahead of time. After coating them, store them in the fridge for up to 24 hours. When ready to cook, bake them straight from the fridge. This saves time and makes dinner prep easier. For the full recipe, check the detailed instructions above! In this post, we covered how to make tasty Garlic Parmesan Chicken Tenders. We looked at fresh ingredients, like chicken, and the right mix of dry and wet items. The baking method ensures a golden crust, while tips help keep them crisp. You can even add your favorite herbs for more flavor! Now, it’s time to enjoy this easy meal with your favorite sides. Remember to store any leftovers properly for later. Happy cooking!

WANT TO SAVE THIS RECIPE?

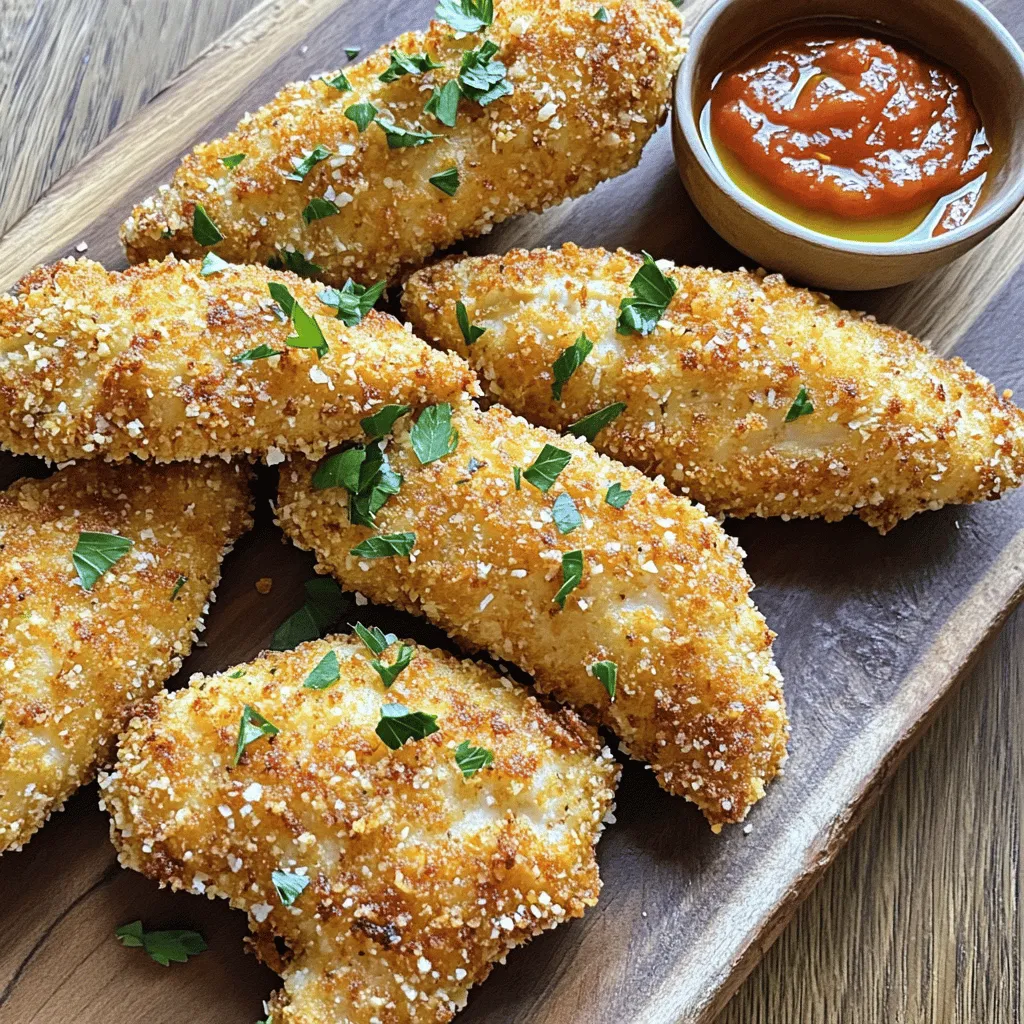
Craving a quick and tasty meal? Garlic Parmesan Chicken Tenders are your answer! This simple dish combines juicy chicken with crispy coating for a flavor explosion. In this post, I’ll guide you through every step, from choosing fresh ingredients to baking tips that ensure perfect results. Get ready to impress your family with a delightful dish that’s both easy to make and sure to satisfy! Let’s dive in!

Ingredients

Complete List of Ingredients

Chicken and Quality: It is very important to use fresh chicken tenderloins. Fresh chicken gives a better taste and texture. When you choose tenderloins, look for ones that are pink and firm. Avoid any that look dull or have an off smell.

Dry Ingredients: This dish needs basic dry ingredients. You will need:

– 1 cup all-purpose flour

– 1 cup breadcrumbs (I recommend panko for extra crunch)

– 1 cup grated Parmesan cheese

– Spices like:

– 1 teaspoon paprika

– 1 teaspoon dried oregano

– 1 teaspoon salt

– ½ teaspoon black pepper

– ½ teaspoon crushed red pepper flakes (optional for spice)

These dry ingredients create a crispy and flavorful coating.

Wet Ingredients: The wet ingredients are key to helping the dry ones stick. You need:

– 2 large eggs

– ½ cup olive oil

The eggs help the breading stick well, while the olive oil adds flavor and helps with crisping in the oven.

For the complete recipe and steps, check the Full Recipe.

Step-by-Step Instructions

Preparation Steps

1. Preheat and Prepare Baking Sheet: Start by preheating your oven to 425°F (220°C). This high heat helps get a crispy crust. Line your baking sheet with parchment paper. It keeps the tenders from sticking.

2. Mixing and Coating: In a shallow dish, mix the flour, paprika, salt, black pepper, and dried oregano. Whisk it well. In another bowl, beat the eggs until mixed. For the breadcrumb mix, combine breadcrumbs, minced garlic, Parmesan cheese, and red pepper flakes if you want heat. Stir to blend.

3. Coating the Chicken: Take a chicken tenderloin. Dip it in the flour mix, coating it fully. Shake off any extra flour. Next, immerse it in the egg, letting any excess drip off. Finally, roll it in the breadcrumb mix. Press gently so the crumbs stick well.

4. Arrange on Baking Sheet: Place the coated tenders on the lined sheet. Keep space between each tender. This helps them cook evenly. Drizzle olive oil over them. This adds flavor and crispiness.

5. Baking Process: Bake in the preheated oven for 15-20 minutes. The chicken should reach an internal temperature of 165°F (74°C). The coating will turn a nice golden brown and be crispy.

Cooking Tips

Ensuring Even Cook: Make sure there is space between the tenders on the baking sheet. This helps hot air circulate and cooks them evenly.

Monitoring Internal Temperature: Use a meat thermometer to check the chicken’s internal temperature. It should read 165°F (74°C) for safe eating.

Tips & Tricks

Expert Tips for Crispiness

Why Panko Breadcrumbs Excel

Panko breadcrumbs are light and airy. They create a great crunch. Regular breadcrumbs can be too dense. Panko helps the chicken tenders bake up crispier. The larger flakes trap air, which leads to a golden finish.

Drizzling Oil: Importance for a golden finish

Drizzling olive oil over the chicken is key. Oil promotes even cooking and helps the breading turn golden. Without oil, the tenders may dry out. Use just enough to coat the chicken lightly. This small step makes a big difference!

Enhancing Flavor

Adding Herbs: Other herbs that complement the chicken

Fresh herbs add a burst of flavor. Try adding thyme, basil, or rosemary. These herbs work well with garlic and Parmesan. Don’t be shy; chop them fine and mix them into your breadcrumb mix.

Balancing Spices: Adjusting the heat level

Control the spice by adjusting red pepper flakes. If you prefer milder flavors, cut back on the flakes. For more heat, add extra. You can also include smoked paprika for a unique twist. This helps customize the dish to your taste!

For a full recipe, check out the instructions above!

Variations

Flavor Variations

You can switch up the flavor of your Garlic Parmesan Chicken Tenders in fun ways.

Spicy Version: If you like some heat, add different spices. Try cayenne or chili powder to the breadcrumb mix. This brings a nice kick to your tenders. You can also add more crushed red pepper flakes for extra spice.

Herb Parmesan: Fresh herbs can take your dish to the next level. Mix in parsley, basil, or thyme with the cheese and breadcrumbs. This adds a fresh flavor and makes your chicken tenders even tastier.

Serving Suggestions

Dipping sauces and sides can elevate your meal.

Dipping Sauces: Pair your tenders with great sauces. Marinara sauce is a classic choice. You can also try garlic aioli for a rich taste. Honey mustard or BBQ sauce can add a sweet touch too.

Side Dishes: Complement your chicken tenders with sides. Salad or steamed vegetables work well. You can also serve them with fries or mashed potatoes for a heartier meal.

For the complete recipe, check out the Full Recipe section.

Storage Info

Storing Leftovers

To keep your chicken tenders fresh, store them right away. Let them cool to room temperature before putting them away. Use an airtight container to lock in moisture. Avoid letting air in, as it makes them dry. You can keep them in the fridge for about 3 days. If you want to save them longer, freeze them. Just wrap them tightly in plastic wrap and then place them in a freezer bag. They can last for up to 3 months in the freezer.

Reheating Instructions

To reheat your chicken tenders, the oven works best. Preheat it to 350°F (175°C). Place the tenders on a baking sheet. Bake for about 10-15 minutes until heated through. This method helps keep them crispy.

If you’re in a hurry, you can use the microwave. But be careful! Microwaving can make them soggy. To avoid this, place a paper towel under the tenders. This helps absorb moisture. Heat them for 30 seconds at a time until warm.

For extra crispiness, you can also use an air fryer. Set it to 350°F (175°C) and cook for about 5-7 minutes. This method restores their crunch. Enjoy your Garlic Parmesan Chicken Tenders again, just like when they were fresh from the oven!

FAQs

Common Queries

Can I use boneless chicken breasts instead?

Yes, you can use boneless chicken breasts. Just cut them into strips similar to tenderloins. This way, they will cook evenly. Keep in mind that cooking time may vary slightly. Always check that the internal temperature reaches 165°F (74°C).

How can I make this dish gluten-free?

To make garlic Parmesan chicken tenders gluten-free, substitute regular flour and breadcrumbs with gluten-free options. Use gluten-free all-purpose flour and gluten-free panko breadcrumbs. These swaps will help you enjoy this dish without gluten.

Can I prepare these chicken tenders in advance?

Absolutely! You can prepare the chicken tenders ahead of time. After coating them, store them in the fridge for up to 24 hours. When ready to cook, bake them straight from the fridge. This saves time and makes dinner prep easier.

For the full recipe, check the detailed instructions above!

In this post, we covered how to make tasty Garlic Parmesan Chicken Tenders. We looked at fresh ingredients, like chicken, and the right mix of dry and wet items. The baking method ensures a golden crust, while tips help keep them crisp. You can even add your favorite herbs for more flavor!

Now, it’s time to enjoy this easy meal with your favorite sides. Remember to store any leftovers properly for later. Happy cooking!

- Chicken and Quality: It is very important to use fresh chicken tenderloins. Fresh chicken gives a better taste and texture. When you choose tenderloins, look for ones that are pink and firm. Avoid any that look dull or have an off smell. - Dry Ingredients: This dish needs basic dry ingredients. You will need: - 1 cup all-purpose flour - 1 cup breadcrumbs (I recommend panko for extra crunch) - 1 cup grated Parmesan cheese - Spices like: - 1 teaspoon paprika - 1 teaspoon dried oregano - 1 teaspoon salt - ½ teaspoon black pepper - ½ teaspoon crushed red pepper flakes (optional for spice) These dry ingredients create a crispy and flavorful coating. - Wet Ingredients: The wet ingredients are key to helping the dry ones stick. You need: - 2 large eggs - ½ cup olive oil The eggs help the breading stick well, while the olive oil adds flavor and helps with crisping in the oven. For the complete recipe and steps, check the Full Recipe. 1. Preheat and Prepare Baking Sheet: Start by preheating your oven to 425°F (220°C). This high heat helps get a crispy crust. Line your baking sheet with parchment paper. It keeps the tenders from sticking. 2. Mixing and Coating: In a shallow dish, mix the flour, paprika, salt, black pepper, and dried oregano. Whisk it well. In another bowl, beat the eggs until mixed. For the breadcrumb mix, combine breadcrumbs, minced garlic, Parmesan cheese, and red pepper flakes if you want heat. Stir to blend. 3. Coating the Chicken: Take a chicken tenderloin. Dip it in the flour mix, coating it fully. Shake off any extra flour. Next, immerse it in the egg, letting any excess drip off. Finally, roll it in the breadcrumb mix. Press gently so the crumbs stick well. 4. Arrange on Baking Sheet: Place the coated tenders on the lined sheet. Keep space between each tender. This helps them cook evenly. Drizzle olive oil over them. This adds flavor and crispiness. 5. Baking Process: Bake in the preheated oven for 15-20 minutes. The chicken should reach an internal temperature of 165°F (74°C). The coating will turn a nice golden brown and be crispy. - Ensuring Even Cook: Make sure there is space between the tenders on the baking sheet. This helps hot air circulate and cooks them evenly. - Monitoring Internal Temperature: Use a meat thermometer to check the chicken's internal temperature. It should read 165°F (74°C) for safe eating. - Why Panko Breadcrumbs Excel Panko breadcrumbs are light and airy. They create a great crunch. Regular breadcrumbs can be too dense. Panko helps the chicken tenders bake up crispier. The larger flakes trap air, which leads to a golden finish. - Drizzling Oil: Importance for a golden finish Drizzling olive oil over the chicken is key. Oil promotes even cooking and helps the breading turn golden. Without oil, the tenders may dry out. Use just enough to coat the chicken lightly. This small step makes a big difference! - Adding Herbs: Other herbs that complement the chicken Fresh herbs add a burst of flavor. Try adding thyme, basil, or rosemary. These herbs work well with garlic and Parmesan. Don’t be shy; chop them fine and mix them into your breadcrumb mix. - Balancing Spices: Adjusting the heat level Control the spice by adjusting red pepper flakes. If you prefer milder flavors, cut back on the flakes. For more heat, add extra. You can also include smoked paprika for a unique twist. This helps customize the dish to your taste! For a full recipe, check out the instructions above! {{image_4}} You can switch up the flavor of your Garlic Parmesan Chicken Tenders in fun ways. - Spicy Version: If you like some heat, add different spices. Try cayenne or chili powder to the breadcrumb mix. This brings a nice kick to your tenders. You can also add more crushed red pepper flakes for extra spice. - Herb Parmesan: Fresh herbs can take your dish to the next level. Mix in parsley, basil, or thyme with the cheese and breadcrumbs. This adds a fresh flavor and makes your chicken tenders even tastier. Dipping sauces and sides can elevate your meal. - Dipping Sauces: Pair your tenders with great sauces. Marinara sauce is a classic choice. You can also try garlic aioli for a rich taste. Honey mustard or BBQ sauce can add a sweet touch too. - Side Dishes: Complement your chicken tenders with sides. Salad or steamed vegetables work well. You can also serve them with fries or mashed potatoes for a heartier meal. For the complete recipe, check out the Full Recipe section. To keep your chicken tenders fresh, store them right away. Let them cool to room temperature before putting them away. Use an airtight container to lock in moisture. Avoid letting air in, as it makes them dry. You can keep them in the fridge for about 3 days. If you want to save them longer, freeze them. Just wrap them tightly in plastic wrap and then place them in a freezer bag. They can last for up to 3 months in the freezer. To reheat your chicken tenders, the oven works best. Preheat it to 350°F (175°C). Place the tenders on a baking sheet. Bake for about 10-15 minutes until heated through. This method helps keep them crispy. If you’re in a hurry, you can use the microwave. But be careful! Microwaving can make them soggy. To avoid this, place a paper towel under the tenders. This helps absorb moisture. Heat them for 30 seconds at a time until warm. For extra crispiness, you can also use an air fryer. Set it to 350°F (175°C) and cook for about 5-7 minutes. This method restores their crunch. Enjoy your Garlic Parmesan Chicken Tenders again, just like when they were fresh from the oven! Can I use boneless chicken breasts instead? Yes, you can use boneless chicken breasts. Just cut them into strips similar to tenderloins. This way, they will cook evenly. Keep in mind that cooking time may vary slightly. Always check that the internal temperature reaches 165°F (74°C). How can I make this dish gluten-free? To make garlic Parmesan chicken tenders gluten-free, substitute regular flour and breadcrumbs with gluten-free options. Use gluten-free all-purpose flour and gluten-free panko breadcrumbs. These swaps will help you enjoy this dish without gluten. Can I prepare these chicken tenders in advance? Absolutely! You can prepare the chicken tenders ahead of time. After coating them, store them in the fridge for up to 24 hours. When ready to cook, bake them straight from the fridge. This saves time and makes dinner prep easier. For the full recipe, check the detailed instructions above! In this post, we covered how to make tasty Garlic Parmesan Chicken Tenders. We looked at fresh ingredients, like chicken, and the right mix of dry and wet items. The baking method ensures a golden crust, while tips help keep them crisp. You can even add your favorite herbs for more flavor! Now, it’s time to enjoy this easy meal with your favorite sides. Remember to store any leftovers properly for later. Happy cooking!

Garlic Parmesan Chicken Tenders

Indulge in these irresistible Garlic Parmesan Chicken Tenders that are sure to become a family favorite! Crisp coated and bursting with flavor, this easy recipe guides you through every step, from seasoning to baking. Perfect for a quick weeknight dinner or party appetizer, these tenders are deliciously paired with marinara or garlic aioli. Click to explore the full recipe and impress your loved ones tonight!

Ingredients
  

1 lb chicken tenderloins

1 cup all-purpose flour

2 large eggs

1 cup breadcrumbs (preferably panko for extra crunch)

1 cup grated Parmesan cheese

4 cloves garlic, minced

1 teaspoon paprika

1 teaspoon dried oregano

1 teaspoon salt

½ teaspoon black pepper

½ teaspoon crushed red pepper flakes (optional, for a spicy kick)

½ cup olive oil

Fresh parsley, chopped (for garnish)

Instructions
 

Preheat your oven to 425°F (220°C). Line a baking sheet with parchment paper to prevent sticking and make cleanup easier.

    Prepare the Flour Coating: In a shallow dish, combine the all-purpose flour, paprika, salt, black pepper, and dried oregano. Whisk the mixture together until evenly blended.

      Beat the Eggs: In a separate bowl, crack the eggs and whisk them vigorously until the yolks and whites are completely combined and frothy.

        Make the Breadcrumb Mixture: In another bowl, combine the breadcrumbs, minced garlic, grated Parmesan cheese, and crushed red pepper flakes (if using). Stir well to ensure the garlic and cheese are evenly distributed throughout the breadcrumbs.

          Coat the Chicken: Take a chicken tenderloin and first dip it into the flour mixture, ensuring it is fully coated on all sides. Shake off any excess flour.

            Next, immerse the floured tenderloin into the beaten eggs, allowing any excess egg to drip back into the bowl.

              Finally, roll the tenderloin in the breadcrumb mixture, pressing down gently to ensure that the crumbs stick well to the surface.

                Arrange on Baking Sheet: Place your coated chicken tenders on the lined baking sheet in a single layer, leaving space between each tender for even cooking. Drizzle the olive oil over the top of the tenders to promote crispiness as they bake.

                  Bake in the preheated oven for 15-20 minutes, or until the chicken is completely cooked through (internal temperature should reach 165°F/74°C) and the coating is a beautiful golden brown and crispy.

                    Once the chicken tenders are cooked, remove them from the oven and let them cool for about 5 minutes. This will help maintain their juiciness. Garnish with freshly chopped parsley right before serving.

                      Prep Time: 15 minutes | Total Time: 35 minutes | Servings: 4

                        - Presentation Tips: Serve the chicken tenders on a colorful platter, accompanied by a small bowl of marinara sauce or garlic aioli for dipping. Add lemon wedges around the platter for a zesty touch and a sprinkle of extra parsley for an eye-catching finish!

                          WANT TO SAVE THIS RECIPE?

                          Related Posts