Fresh Peach Cake Delightful and Easy Recipe

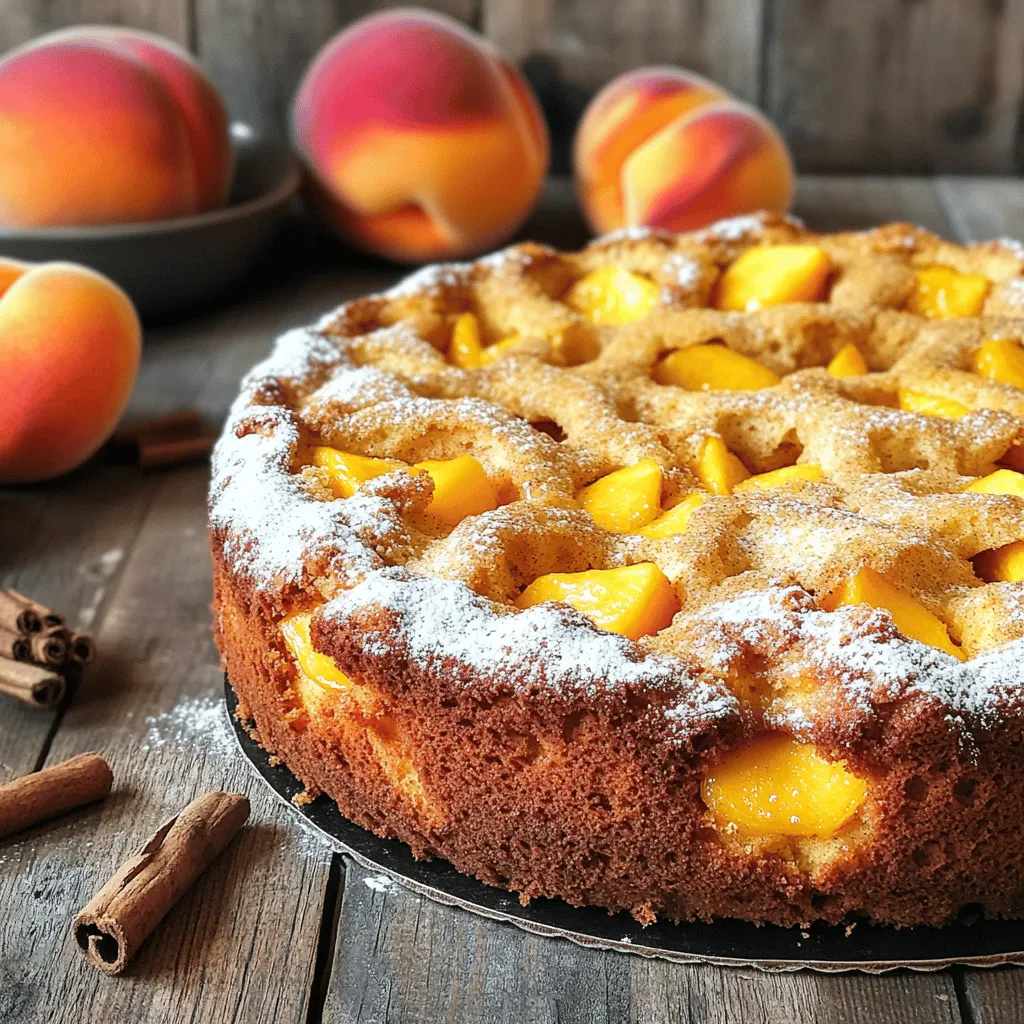
Are you ready to enjoy a sweet slice of summer with fresh peach cake? This delightful recipe is not only simple but also bursting with juicy peach flavor. You’ll impress your friends and family with every bite, turning any occasion into a celebration. In this post, I’ll guide you through each step, from selecting the ripest peaches to baking a moist, perfect cake. Let’s dive into this delicious adventure!
Ingredients for Fresh Peach Cake
Key Ingredients
– Ripe peaches: Look for peaches that are soft but not mushy. A sweet aroma means they are ripe. Choose peaches with a vibrant color and no blemishes. These will give your cake the best flavor.
– Essential pantry staples: You will need sugar, butter, eggs, flour, baking powder, baking soda, and salt. These ingredients create the cake’s base and give it structure. Use unsalted butter for better control over the salt levels. Fresh eggs help in achieving a fluffy texture.
Optional Ingredients
– Variations in spices: You can add ground cinnamon or nutmeg for extra warmth. These spices enhance the peach flavor and make the cake more aromatic. Try using a mix for a unique twist.
– Toppings: Consider frosting or garnishes like whipped cream or powdered sugar. A dollop of cream adds richness, while a sprinkle of sugar gives a pretty finish. You could also use sliced peaches on top for extra freshness.
Step-by-Step Instructions
Preparing the Cake Base
First, preheat your oven to 350°F (175°C). This step gets the oven ready for baking. Next, grease a 9-inch round cake pan with soft butter. Dust it lightly with flour, tapping out the extra. This helps the cake release easily after baking.
Now, let’s cream the butter and sugar. In a large bowl, use a hand mixer or stand mixer. Mix the butter and sugar on medium speed. You want this to be light and fluffy. This process takes about 3 to 5 minutes. Proper creaming adds air, which helps the cake rise.
Mixing the Batter
Next, it’s time to add eggs and vanilla. Add each egg one at a time. Mix well after each egg. This ensures they blend evenly. Then, pour in the pure vanilla extract. Mix for another 30 seconds. This adds rich flavor to the batter.
Now, we need to combine the dry ingredients. In a separate bowl, whisk together the flour, baking powder, baking soda, fine salt, cinnamon, and nutmeg. Make sure there are no clumps. If they clump, your cake may not rise well.
Gradually add the dry mix to the wet batter. Alternate this with the buttermilk. Start with one-third of the dry mix, then half the buttermilk. Keep alternating until everything is added. Mix just until combined to avoid overmixing.
Folding in Peaches and Baking
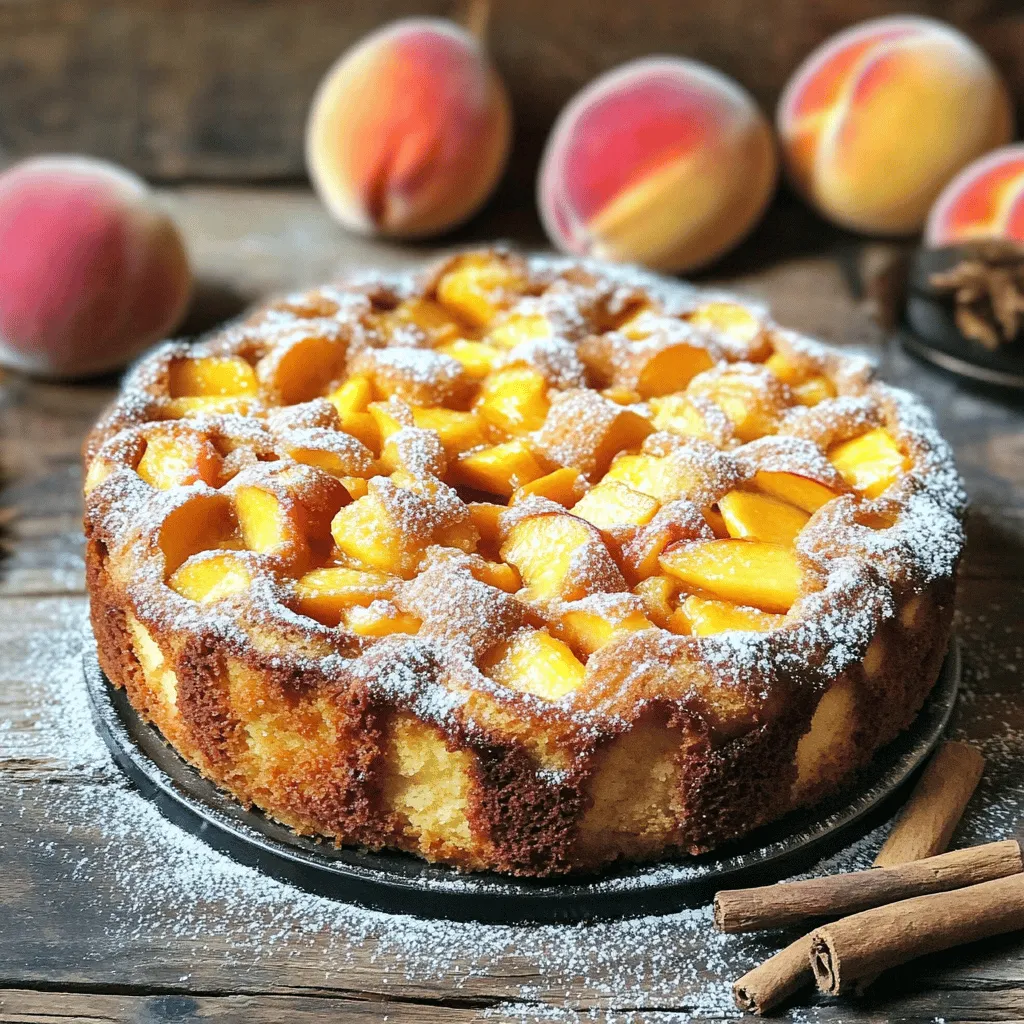
Time to fold in the peaches! Gently add the chopped peaches into the batter. Use a spatula to fold them in. Be careful not to break the peaches. They should stay chunky for great bites in the cake.
Pour the batter into the prepared pan. Use a spatula to spread it evenly. Now, place the pan in the preheated oven. Bake for 35 to 40 minutes. To check for doneness, insert a toothpick into the center. If it comes out clean, your cake is ready!
If the top browns too fast, cover it loosely with aluminum foil. This trick keeps the top from burning while the inside cooks. Once baked, let the cake cool in the pan for 10 minutes. Then, run a knife around the edges to loosen it. Carefully transfer it to a wire rack to cool completely. Enjoy the sweet smell as it cools!
Tips & Tricks for Perfecting Your Cake
Selecting Peaches
How do you choose ripe and flavorful peaches? Look for peaches that are slightly soft to the touch. Their color should be rich and vibrant. A sweet aroma hints at ripeness. Avoid peaches with blemishes or green spots.
Should you pick organic or conventional peaches? Organic peaches often have more flavor and fewer chemicals. However, conventional peaches may be easier to find and cheaper. If possible, choose organic for the best taste.
Baking Tips
What are common baking mistakes? One big mistake is overmixing the batter. This can make your cake tough. Mix just until the dry ingredients blend in.
How can you achieve a moist cake? Using buttermilk is key. It adds moisture and richness. Make sure to keep it at room temperature before mixing. This helps the batter blend smoothly.

Variations of Fresh Peach Cake
Flavor Combinations
You can change this cake in many fun ways. Adding nuts gives a nice crunch. I suggest using chopped walnuts or pecans. They add richness and flavor. If you love chocolate, try chocolate chips. They melt and mix well with peaches.
You can also swap peaches for other fruits. Try fresh nectarines or plums for a twist. Berries like blueberries or raspberries work well too. They bring a burst of color and taste. Each fruit adds its own special touch to your cake.
Dietary Modifications
If you need a gluten-free cake, swap wheat flour with almond flour or gluten-free flour. Almond flour gives a nutty taste and keeps the cake moist.
For a vegan option, replace eggs with flax eggs. Mix one tablespoon of flaxseed meal with three tablespoons of water. Let it sit until it thickens for about five minutes. Use plant-based milk instead of buttermilk. Almond or soy milk works great.
These changes let everyone enjoy this delightful peach cake.
Storage Information
Storing Your Cake
To keep your Fresh Peach Cake fresh, first let it cool completely. Wrap it tightly in plastic wrap. Place it in the fridge if you have leftovers. This helps it stay moist. You can also store it in an airtight container.
If you want to freeze your cake, cut it into slices. Wrap each slice in plastic wrap, then place them in a freezer bag. Press out the air before sealing. Your cake will stay fresh for about three months in the freezer. To thaw, just take a slice out and leave it at room temperature for about an hour.
Shelf Life
At room temperature, your cake lasts about two days. Make sure to keep it in a cool, dry place. If stored in the fridge, it can last up to a week.
Watch for signs of spoilage. If you see mold or if it smells off, it’s time to toss it. If the texture feels dry or crumbly, that’s a sign it’s past its best. For the best taste, enjoy your cake fresh!
FAQs about Fresh Peach Cake
Common User Questions
Can I use canned peaches instead of fresh?
Yes, you can use canned peaches. Drain them well and pat them dry. Fresh peaches give better flavor and texture, but canned peaches work in a pinch.
How can I tell when my cake is done baking?
Check your cake with a toothpick. Insert it in the center. If it comes out clean, the cake is done. If it has batter on it, bake for a few more minutes.
Troubleshooting
What to do if the cake sinks in the middle?
If your cake sinks, it may have too much moisture. Ensure you measure your ingredients correctly. Also, don’t open the oven door too soon. This can let heat escape.
How to fix a dry cake after baking?
If your cake is dry, try adding a simple syrup. Mix equal parts sugar and water. Heat until the sugar dissolves. Brush it on the cake to add moisture back.
Serving Suggestions
Best accompaniments for Fresh Peach Cake
Serve your cake with whipped cream or vanilla ice cream. Fresh peach slices on top add a nice touch. You can also dust it with powdered sugar for a sweet look.
Ideal occasions for serving this delicious dessert
This cake is perfect for summer gatherings. Enjoy it at picnics, birthday parties, or family dinners. It also makes a lovely treat for a cozy evening at home.
Fresh peach cake combines sweet peaches with simple ingredients to create a delightful dessert. We covered how to select ripe peaches and the essential pantry items needed. You learned tips for making the batter smooth and folding in the fruit. Additionally, we explored variations, storage, and answers to common questions.
In the end, this cake is a great way to enjoy summer peaches. With these tips, you can bake a delicious cake every time. Happy baking!


![To make a Zesty Italian Pasta Salad, you need fresh and colorful ingredients. Here’s the complete list of ingredients you will need: - 2 cups rotini pasta - 1 cup cherry tomatoes, halved - 1 cup cucumber, diced - 1/2 cup black olives, sliced - 1/2 cup red bell pepper, chopped - 1/4 cup red onion, finely chopped - 1/2 cup mozzarella balls, halved - 1/3 cup Italian dressing - 1 tablespoon fresh basil, chopped - 1 teaspoon dried oregano - Salt and pepper to taste Each ingredient brings its own flavor and texture. The rotini pasta is fun and holds dressings well. Cherry tomatoes add sweetness, while cucumbers give a nice crunch. Black olives bring a salty bite, and bell peppers add color and freshness. Red onions add a bit of sharpness, while mozzarella balls provide creaminess. For the dressing, you can use store-bought or make your own. I love using fresh basil and oregano for a burst of flavor. Finally, season with salt and pepper to balance everything. You can find the full recipe [here]. Enjoy your cooking adventure! - Bring salted water to a boil. - Cook rotini pasta until al dente. - Drain and cool under cold water. Cooking the pasta is the first step. Use a large pot and fill it with water. Add a good amount of salt to the water. This step adds flavor to the pasta. Once the water boils, add the rotini pasta. Follow the package directions for cooking time until it is al dente. This means the pasta should be firm but cooked. After cooking, drain the pasta and rinse it under cold water. This stops the cooking process and cools the pasta quickly. - Combine cherry tomatoes, cucumber, olives, bell pepper, and onion. - Stir gently to mix. While the pasta cools, you can prepare the vegetables. Take a large bowl and add the halved cherry tomatoes, diced cucumber, sliced black olives, chopped red bell pepper, and finely chopped red onion. Each vegetable brings its own flavor and texture to the salad. Stir gently to mix them without squishing the tomatoes. This colorful mix will make your salad bright and fun! - Add cooled pasta to the vegetable mix. - Incorporate mozzarella balls. - Drizzle with dressing and seasonings. Once the pasta is cool, add it to the bowl with the mixed vegetables. Next, add halved mozzarella balls. These little cheese bites add creaminess. Now, drizzle the Italian dressing over the pasta and vegetables. Don't forget to sprinkle the fresh basil, dried oregano, salt, and pepper. These seasonings will enhance the flavors. - Toss ingredients to combine. - Refrigerate for at least 30 minutes. Now, it is time to mix everything. Toss all the ingredients together carefully. You want every part to be coated with dressing. Cover the bowl with a lid or plastic wrap. Place it in the fridge for at least 30 minutes. Chilling the salad helps the flavors blend well. Trust me, the wait is worth it! To get the best taste from your Zesty Italian Pasta Salad, choose a good Italian dressing. Brands like Annie's or Ken's work well. Don't use too much dressing at first; you can always add more later. Always taste as you go. A little salt and pepper can boost the flavor. Remember, it's easy to add, but hard to take away. Serving your pasta salad is just as fun as making it! You can use a large bowl for a family-style meal. This makes it easy for everyone to help themselves. For a more stylish look, you can serve it in small bowls. This way, each guest gets their own. A sprinkle of fresh basil on top adds a nice touch. It makes the dish look bright and tasty! One common mistake is overcooking the pasta. Make sure to cook it just until it's al dente. This keeps your pasta from getting mushy. Another mistake is not chilling the salad. Chilling helps the flavors blend well. If you skip this step, your salad may not taste as good. Aim to chill it for at least 30 minutes before serving. For the full recipe, check out the Zesty Italian Pasta Salad section. {{image_4}} You can easily adapt this salad to fit different diets. For a gluten-free option, use gluten-free rotini pasta. It cooks just like regular pasta. Many brands make great options now. For a vegan twist, swap the mozzarella cheese with vegan cheese or even avocado. Both add creaminess and flavor to your dish. Want to make this salad more filling? Add some protein! Grilled chicken works great. Just chop it into bite-sized pieces. Shrimp is another tasty choice. Cook it until pink and toss it in. For a plant-based option, chickpeas are perfect. They add a nice texture. When you add protein, taste your salad again. You may need to adjust the seasoning. Just add a pinch of salt or a dash of dressing. Using seasonal veggies can elevate your pasta salad. In summer, add fresh zucchini or bell peppers. They bring a nice crunch and color. In fall, roasted butternut squash can add sweet notes. You can also switch up the dressing. Try a balsamic vinaigrette for a tangy twist. This keeps your salad exciting and fresh year-round. To store your zesty Italian pasta salad, use airtight containers. Glass or plastic containers work well. Make sure the lid seals tightly to keep air out. This helps maintain freshness. For best results, store the salad in the fridge within two hours of serving. You can freeze pasta salad, but it might change texture. To freeze, place it in a freezer-safe container. Label the container with the date. When ready to eat, thaw it in the fridge overnight. Reheat gently on the stove or in the microwave. Be careful not to overcook it again. In the fridge, your pasta salad lasts about three to five days. Keep an eye out for signs of spoilage. If it has an off smell, or if the vegetables look mushy, it’s best to toss it. Trust your senses; they guide you well in the kitchen. You can make Zesty Italian Pasta Salad a day before serving. Cook the pasta, mix it with the veggies, and add the dressing. Store it in the fridge. Chilling helps the flavors blend well. Just give it a good toss before serving. This makes it a great option for parties. Yes, you can customize the ingredients to fit your taste. Try adding different vegetables like bell peppers or zucchini. You can also swap out mozzarella for feta or add beans for protein. Get creative! Make it your own. Italian Pasta Salad pairs well with grilled meats, like chicken or steak. It also goes nicely with crusty bread or a fresh green salad. For a fun twist, serve it with garlic bread for a complete meal. No, it's not safe to leave pasta salad out for long. The safe time is about two hours. After that, bacteria can grow, making it unsafe to eat. Keep it chilled if you are not serving it right away. Absolutely! Homemade Italian dressing adds a personal touch. You can control the flavors and ingredients. Mix olive oil, vinegar, herbs, and spices to create your blend. This makes the salad even more special. For the full recipe, check out the section above! This Zesty Italian Pasta Salad is a bright and tasty dish. It combines fresh veggies, pasta, and cheese. Each bite is full of flavor. Here’s a quick look at what you need and how to make it. - 2 cups rotini pasta - 1 cup cherry tomatoes, halved - 1 cup cucumber, diced - 1/2 cup black olives, sliced - 1/2 cup red bell pepper, chopped - 1/4 cup red onion, finely chopped - 1/2 cup mozzarella balls, halved - 1/3 cup Italian dressing (store-bought or homemade) - 1 tablespoon fresh basil, chopped - 1 teaspoon dried oregano - Salt and pepper to taste First, cook the rotini pasta in salted boiling water. Follow the package instructions for best results. Drain and cool the pasta under cold water. This stops the cooking and keeps it firm. While the pasta cools, chop the veggies. Use a large bowl for the cherry tomatoes, cucumber, black olives, red bell pepper, and red onion. Stir them gently to mix. Next, add the cooled pasta to the veggies. Toss in the mozzarella balls, making sure they spread evenly. Now, drizzle the Italian dressing over the mix. Add the chopped basil, dried oregano, and a sprinkle of salt and pepper. Toss everything together until well coated. Finally, cover the bowl and chill in the fridge for at least 30 minutes. This step helps all the flavors blend nicely. Serve the pasta salad in a large bowl. You can also use individual bowls for a fun touch. Garnish with extra basil leaves for color. Enjoy this tasty dish at picnics or family meals! This blog post detailed how to make a zesty Italian pasta salad. We reviewed all the ingredients, cooking steps, and tips for the best flavor. You learned how to store leftovers and variations to suit your diet. Remember to chill the salad and avoid overcooking the pasta. With these tips, you can impress friends and family with this easy dish. Enjoy creating your own version of this refreshing salad!](https://fastmealmate.com/wp-content/uploads/2025/06/c8b502a6-31c8-41d1-a3bc-a403a8dd39f3-768x768.webp)