Easy Roasted Broccoli Simple and Flavorful Dish

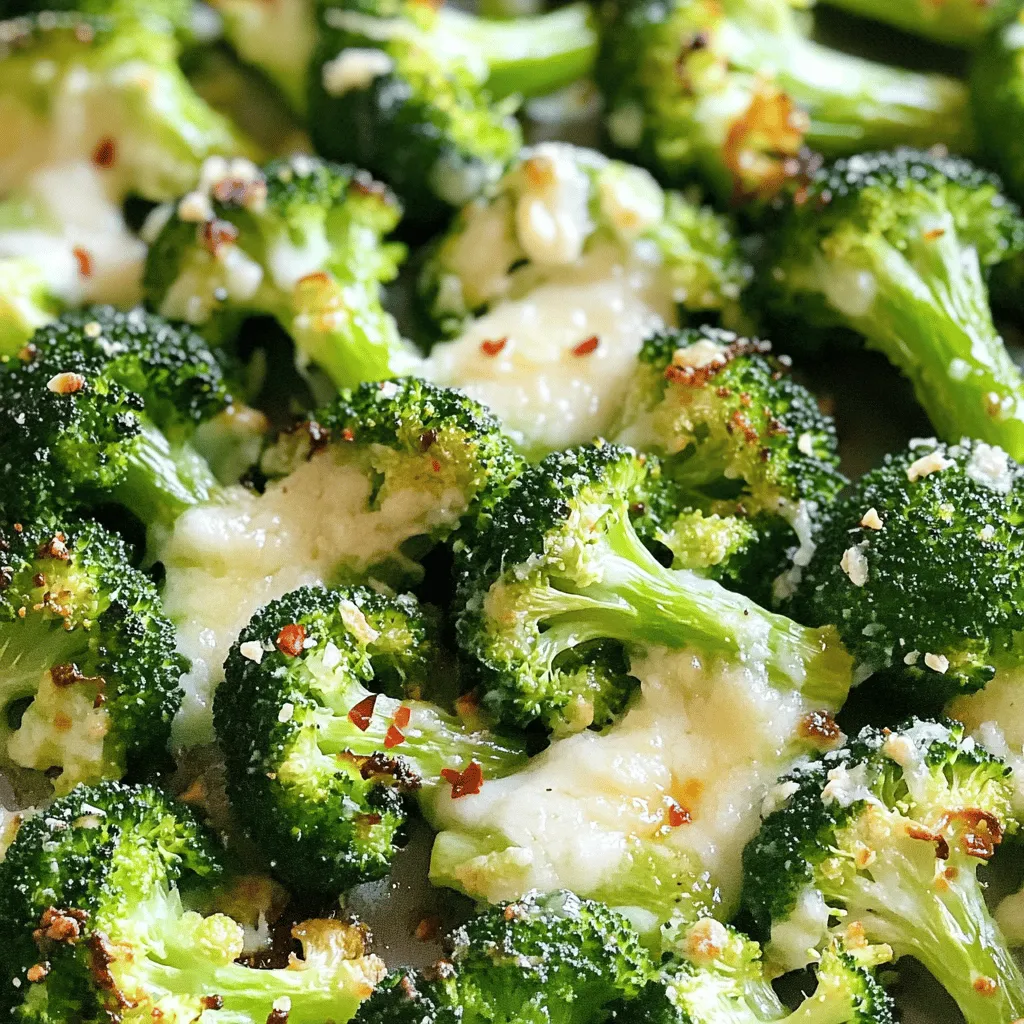
Are you eager to make a simple and tasty side dish? Look no further than this Easy Roasted Broccoli recipe! With just a few fresh ingredients and simple steps, you’ll have a dish that’s packed with flavor. This broccoli not only tastes great, but it also adds color and nutrition to your meal. Ready to impress your family or guests? Let’s dive into this easy-to-follow guide!
Ingredients
To make Easy Roasted Broccoli, you’ll need a few simple ingredients. Gathering the right items helps you create a dish that is both tasty and beautiful. Here’s what you need:
– 1 large head of broccoli, separated into florets
– 3 tablespoons high-quality olive oil
– 4 cloves garlic, finely minced
– Zest of 1 lemon
– 1 teaspoon red pepper flakes (optional)
– Sea salt and freshly cracked black pepper to taste
– 2 tablespoons freshly grated Parmesan cheese (optional)
– 1 tablespoon freshly squeezed lemon juice
Each ingredient plays a key role. The broccoli gives you a healthy base, while olive oil adds richness. Garlic brings depth, and lemon zest brightens the dish. If you like a little heat, add red pepper flakes. Salt and pepper enhance all the flavors. Parmesan cheese, if you choose to use it, adds a nice touch of creaminess. Finally, the lemon juice adds a refreshing pop at the end. This combination of ingredients leads to a simple yet flavorful dish that everyone will love.
Step-by-Step Instructions
Prepping the Broccoli
First, preheat your oven to 425°F (220°C). This step is key for great roasting. Next, take a large bowl and combine broccoli florets with olive oil, minced garlic, lemon zest, red pepper flakes, sea salt, and black pepper. Toss everything well so each floret gets coated. This mix adds flavor to the broccoli.
Preparing the Baking Sheet
For easy cleanup, use parchment paper on the baking sheet. This helps the broccoli not stick. Spread the broccoli in a single layer. Leave space between each piece. This allows hot air to circulate and roast the broccoli evenly.
Roasting the Broccoli
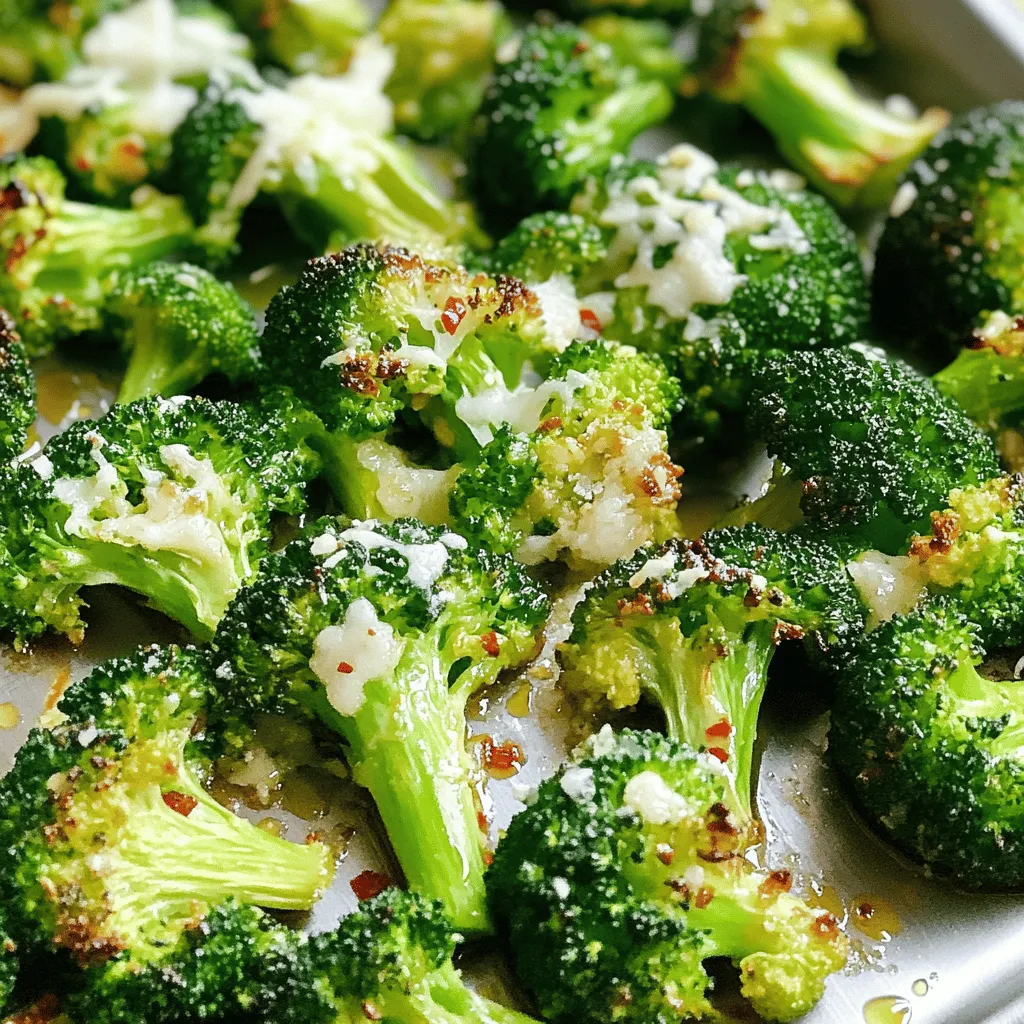
Now, place the baking sheet in the oven. Roast the broccoli for 20-25 minutes. Halfway through cooking, toss the broccoli gently. This helps it cook evenly. You want the broccoli to be tender with crispy edges.
Final Touches
During the last 5 minutes of roasting, sprinkle grated Parmesan cheese over the broccoli. This adds a rich flavor. After taking the baking sheet out of the oven, drizzle freshly squeezed lemon juice over the broccoli. This adds brightness to the dish.
Tips & Tricks
Ensuring Even Roasting
To get the best roasted broccoli, leave space between the florets. This allows hot air to circulate. If the florets are too close, they will steam instead of roast. Toss the broccoli halfway through cooking. This helps each piece cook evenly and develop that nice, crispy texture.
Achieving Perfect Crispiness
Keep an eye on your broccoli while it roasts. Oven temperatures can change, and you want perfect crispiness. Use fresh ingredients for the best flavor. Fresh broccoli and good-quality olive oil make a big difference in taste.
Garnishing Suggestions
For an extra touch, sprinkle more Parmesan cheese on top after roasting. It adds richness and flavor. You can also serve your roasted broccoli with lemon wedges. The fresh lemon juice brightens the dish and enhances its taste.

Variations
Adding Protein
You can make this dish a full meal by adding protein. Chickpeas are a great option. They roast well and add a nice crunch. Grilled chicken also works beautifully. Just slice it up and mix it with the broccoli before roasting. This will keep your meal healthy and satisfying.
Flavor Add-ins
Don’t be afraid to get creative with flavors. You can use different herbs or spices to change the taste. Try adding rosemary or thyme for a fresh twist. Balsamic vinegar is another great choice. It adds a tangy flavor that pairs well with the roasted broccoli. Just drizzle some over the broccoli before you roast it for a new taste sensation.
Cheese Alternatives
If you want a vegan option, try using nutritional yeast instead of Parmesan cheese. It has a cheesy flavor and is packed with nutrients. Sprinkle it over the broccoli just like you would with cheese. This way, you still get that savory taste without dairy. It’s a simple switch that makes a big difference.
Storage Info
Storing Leftovers
After enjoying your roasted broccoli, let it cool down. This step helps keep the flavor fresh. Once cool, place the broccoli in an airtight container. Store it in the fridge. It will stay good for about 3-4 days.
Reheating Tips
To reheat your broccoli, use the oven. Set the oven to 350°F (175°C). This method keeps the broccoli crispy. Avoid using the microwave. Microwaving can make the broccoli soggy and lose its charm.
Freezing Suggestions
If you want to save your roasted broccoli for later, freezing is a great option. First, blanch the broccoli. This means boiling it for a short time, then cooling it quickly. This step helps keep the color and taste. After blanching, place the broccoli in freezer-safe bags. You can freeze it for up to 3 months. Enjoy it later as a quick side dish!
FAQs
How can I make Easy Roasted Broccoli more flavorful?
You can try different seasonings or marinades. Experiment with spices like cumin, paprika, or even a splash of soy sauce. Marinades with lemon juice or balsamic vinegar can add a nice tang. Mixing in herbs like thyme or rosemary can also enhance the taste. Just remember to keep it simple to let the broccoli shine.
Can I make this recipe in advance?
Yes, you can prepare it ahead and reheat it later. Roast the broccoli as per the recipe and let it cool completely. Store it in an airtight container in the fridge. When you’re ready, reheat it in the oven for the best texture. This way, you can enjoy your dish without the last-minute stress.
What is the best way to cut broccoli for roasting?
Cut the broccoli into similar-sized florets. This helps them cook evenly. Larger pieces may remain tough, while smaller ones can burn. Aim for about one to two inches for each floret. This size ensures they become tender yet crisp when roasted.
How long does it take to roast broccoli at 425°F?
It takes approximately 20-25 minutes for tender yet crispy broccoli. Keep an eye on it as oven temperatures can vary. Tossing the broccoli halfway through cooking helps it brown evenly and get that perfect texture.
Can I add other vegetables to this recipe?
Yes, bell peppers and carrots roast well alongside broccoli. You can mix in cauliflower or zucchini for more variety. Just remember to cut them to the same size as the broccoli. This will help all the veggies cook at the same rate and make for a colorful dish.
Roasting broccoli is simple and rewarding. You learned how to prepare, season, and roast it to perfection. Follow the tips for crispy results and explore variations to fit your taste. Store leftovers properly and enjoy them later. This dish is not only tasty but also adaptable.
Remember, fresh ingredients make all the difference. Enjoy your roasted broccoli as a healthy side or main dish anytime!


![For a tasty creamy chicken stroganoff, gather these key ingredients: - 500g boneless chicken breast, sliced into thin strips - 2 cups mushrooms, sliced (button or cremini work well) - 1 medium onion, finely chopped - 3 cloves garlic, minced - 1 tablespoon olive oil - 1 tablespoon unsalted butter - 2 cups chicken broth - 1 cup sour cream - 1 tablespoon Dijon mustard - 1 teaspoon smoked paprika - Salt and freshly ground black pepper to taste - Fresh parsley, finely chopped (for garnish) - 300g egg noodles or pasta of your choice Each ingredient plays a role in making the dish creamy and flavorful. The chicken adds protein, while the mushrooms bring earthy notes. The onion and garlic create a sweet base when cooked. For a garnish, fresh parsley brightens up the dish. You can serve the stroganoff with a side of steamed vegetables or crusty bread. This adds more texture and flavor to your meal. Check [Full Recipe] for all the details on how to put this comfort food together! To start, fill a big pot with water. Add a pinch of salt and bring it to a boil. Once the water is boiling, drop in 300g of egg noodles. Cook them according to the package instructions. This usually takes around 8-10 minutes. You want them al dente, which means they should be tender but still firm. After they are cooked, carefully drain the noodles in a colander. To stop them from sticking, drizzle a bit of olive oil on them. Toss gently to coat. Now, grab a large skillet and heat it over medium heat. Add 1 tablespoon of olive oil. Once hot, add the sliced chicken breast. Season it well with salt and pepper. Cook the chicken for about 5-7 minutes. Stir it often to ensure it cooks evenly. You want that nice golden-brown color. When it is done, remove the chicken from the skillet and place it on a plate. In the same skillet, add 1 tablespoon of unsalted butter. Let it melt over medium heat. Once melted, toss in the chopped onion. Sauté it for about 3-4 minutes until it turns translucent. Next, add 3 cloves of minced garlic and 2 cups of sliced mushrooms. Cook this mixture for around 5-6 minutes. Stir it often until the mushrooms soften and release their moisture. Then, sprinkle in 1 teaspoon of smoked paprika. Mix it well. Gradually pour in 2 cups of chicken broth and bring it to a gentle simmer. Let it cook for about 5 minutes to enhance the flavor. Now it’s time to bring it all together! Return the cooked chicken to the skillet. Stir in 1 cup of sour cream and 1 tablespoon of Dijon mustard. Mix everything until it is well combined and heated through, about 2-3 minutes. Taste the sauce and adjust the seasoning with more salt and black pepper if needed. Finally, add the cooked noodles to the sauce, tossing gently until they are fully coated. If you prefer a fancier look, you can plate the noodles first and then ladle the sauce over them. Don’t forget to garnish with some fresh parsley for a burst of color and flavor. Enjoy this comforting meal! When making creamy chicken stroganoff, avoid a few common mistakes. - Overcooking chicken or noodles: Overcooked chicken can become dry. Noodles can turn mushy. Keep an eye on cooking times. - Insufficient seasoning: Under-seasoned dishes lack flavor. Always taste your sauce and adjust the salt and pepper. You can easily boost the taste of your stroganoff with a few simple changes. - Suggestions for additional spices: Try adding thyme or rosemary for extra depth. A pinch of cayenne adds a nice kick. - Using homemade vs. store-bought broth: Homemade broth gives a richer taste. Store-bought is convenient and still works well. If you or your guests have special diets, there are great options. - Gluten-free alternatives: Use gluten-free pasta or rice instead of egg noodles. This ensures everyone can enjoy the dish. - Dairy-free options: Substitute sour cream with coconut cream or a dairy-free yogurt. These keep the creaminess without the dairy. For the full recipe, check out the complete guide to making creamy chicken stroganoff. Enjoy! {{image_4}} You can switch up the protein in this creamy chicken stroganoff. Beef, pork, or tofu work well. For beef, use tender cuts like sirloin. Cook it for about 10 minutes until browned. For pork, tenderloin is great. Cook it for 7-8 minutes. If you choose tofu, press it first to remove moisture. Sauté it for 5-6 minutes until golden. To add a twist to your dish, consider using wine or mustard. A splash of white wine adds depth to the sauce. Just remember to let it simmer for a few minutes to cook off the alcohol. If you like mustard, try using whole grain or spicy mustard. It brings a unique flavor. You can also add more veggies. Peas, bell peppers, or spinach can enhance the dish. Just sauté them with the onions and mushrooms. This not only adds color but also boosts nutrition. Each variation makes your creamy chicken stroganoff special and fits your taste. For the full recipe, check the linked instructions above. To keep your creamy chicken stroganoff fresh, store it in proper containers. Use airtight containers to prevent moisture loss. It stays good in the fridge for up to three days. Make sure the dish cools down before sealing it. This helps maintain the best flavor and texture. If you want to save some for later, freezing is a great option. Let the stroganoff cool completely before transferring it to freezer-safe containers. Use heavy-duty bags or containers to prevent freezer burn. It can last in the freezer for up to three months. To thaw, place it in the fridge overnight. This slow thawing keeps flavors intact. When ready to eat, reheat it on the stove over low heat. Stir occasionally to ensure even heating. You can also add a splash of broth or water to restore creaminess. Enjoy your stored creamy chicken stroganoff like it’s fresh! You can serve creamy chicken stroganoff with many sides. Here are a few great options: - Steamed green beans - Garlic bread - A fresh green salad - Mashed potatoes These sides add color and balance to your meal. Yes, you can make creamy chicken stroganoff ahead of time. Simply cook the dish, let it cool, and store it in the fridge. It will stay fresh for about three days. When ready to eat, reheat it gently on the stove. Add a splash of chicken broth if it seems too thick. If your sauce is too thin, you can thicken it easily. Here are some methods: - Simmer the sauce longer to reduce it. - Mix a bit of cornstarch with water and stir it in. - Add more sour cream for a richer texture. These tips help you achieve the perfect creamy sauce. Yes, you can make a vegetarian version! Use mushrooms and tofu instead of chicken. Replace chicken broth with vegetable broth. This keeps the flavor while making it meat-free. You can still enjoy that creamy texture with sour cream or a plant-based alternative. Absolutely! You can use different types of noodles for creamy chicken stroganoff. Here are some options: - Egg noodles - Fettuccine - Penne - Gluten-free pasta Each type brings its own texture, making the dish fun and varied. Check the cooking time for each type to ensure they cook perfectly. For the full recipe, refer to the earlier section in this article. You learned how to make Creamy Chicken Stroganoff with fresh ingredients and simple steps. Remember the key points: cook noodles properly, achieve golden-brown chicken, and adjust flavors to your taste. Avoid common mistakes like overcooking and under-seasoning. You can also explore variations with different proteins and flavors. With proper storage, enjoy this dish later too. Now, you have all the tools to create a delicious meal that suits your needs and preferences. Enjoy cooking and sharing this tasty dish with others!](https://fastmealmate.com/wp-content/uploads/2025/06/35ebe0d3-ac06-4ed6-8d84-88d4bff41ffa-768x768.webp)
. - Cut watermelon into small cubes. - Slice peaches into delicate wedges. First, I start with the watermelon. I cut it into small cubes. This shape makes it easy to scoop. Next, I slice the peaches into delicate wedges. Their sweet juices will add a nice touch to the salad. - Combine watermelon and peach slices in a large bowl. - Fold in feta cheese and basil leaves. In a large bowl, I combine the watermelon and peach slices. Their colors make a beautiful mix. Then, I gently fold in crumbled feta cheese and torn basil leaves. This step helps blend the flavors well without breaking the fruit. - Whisk together honey, lime juice, salt, and pepper. In a small bowl, I whisk honey and lime juice. I add a pinch of salt and a few cracks of pepper. This dressing brings sweet and tangy flavors together. - Drizzle dressing over salad and gently toss. - Sprinkle chopped pistachios on top just before serving. I drizzle the honey-lime dressing over the salad. Then, I gently toss everything together. This ensures each piece of fruit gets coated. If I want extra crunch, I sprinkle chopped pistachios on top just before serving. Enjoy right away for the best taste or chill for a bit first. For the full recipe, check out the details above! To make the best Summer Peach Watermelon Salad, start with ripe fruits. Look for peaches that are soft to touch but not mushy. They should smell sweet and fragrant. For watermelon, choose a heavy one with a uniform color. A yellow spot on the bottom shows ripeness. Freshness matters a lot for flavor. The riper your fruits are, the sweeter and juicier your salad will taste. When serving this salad, choose a large, colorful bowl. A bright bowl adds to the salad's appeal. You can also use clear glass bowls for individual servings. This way, everyone can see the vibrant colors. Consider garnishing with more basil leaves on top for a fresh look. This salad pairs well with grilled meats, like chicken or shrimp. You can also serve it alongside other dishes for a complete meal. To elevate your Summer Peach Watermelon Salad, think about adding fresh herbs. Mint or cilantro can add a new twist. You could also sprinkle some chili flakes for a kick. For dressings, try mixing olive oil with balsamic vinegar. This adds a rich layer of flavor. A simple honey-lemon dressing is also a great choice. These enhancements will make your salad even more delicious. You can find the Full Recipe to explore more ideas. {{image_4}} You can change up this salad easily. Swap feta cheese for goat cheese or mozzarella. Both add a creamy touch. If you want some crunch, add nuts or seeds. Try walnuts, almonds, or sunflower seeds for a nice bite. Summer brings many fruits. You can add strawberries or blueberries for a twist. These fruits pair well with peaches and watermelon. If you want a fall twist, use apples and nuts. This keeps the salad fun and fresh all year round. This salad is gluten-free, making it safe for those with gluten issues. If you want a vegan version, skip the cheese and honey. Use agave syrup instead of honey for sweetness. This way, everyone can enjoy this tasty dish! To keep your Summer Peach Watermelon Salad fresh, store it properly. First, place any leftover salad in an airtight container. This helps prevent air from wilting the greens and fruits. It’s best to store the dressing separately. This way, the salad maintains its crispness and flavor. For containers, use glass or BPA-free plastic. Glass containers work well as they do not absorb odors. If you use plastic, ensure it is food-grade. This keeps your salad safe and fresh for longer. You can keep the salad in the refrigerator for about 2 days. After that, the fruits may start to break down. Signs of spoilage include a mushy texture or off smell. If the salad looks slimy, it’s best to toss it. Always trust your senses when it comes to food safety. Yes, you can prepare this salad ahead of time. To keep it fresh, follow these tips: - Cut fruits just before serving: Watermelon and peaches taste best when fresh. - Keep dressing separate: Mix honey and lime juice just before serving. - Store in an airtight container: This helps prevent browning and keeps the salad crisp. You can add many fruits to enhance the taste. Here are some great options: - Strawberries: Their sweet and tart flavor pairs well with peaches. - Blueberries: These tiny gems add a pop of color and sweetness. - Mango: Its juicy texture complements the watermelon nicely. You can easily tweak the sweetness to fit your taste. Here are some ideas: - Add more honey: If you like it sweeter, drizzle in more honey. - Use less honey: For a lighter taste, use less honey while mixing. - Add lime juice: This adds a tangy flavor that balances sweetness. This blog post covers how to make a refreshing summer salad with watermelon and peaches. You learned about the best fresh ingredients, how to prepare the fruits, mix the salad, and create a light dressing. I shared tips for choosing top-quality fruits and offered variations to suit your taste. Remember, freshness is key for flavor. This salad is perfect for warm days and pairs well with grilled dishes. Enjoy this delightful recipe and make it your own with unique twists! Your summer meals will shine with this colorful dish.](https://fastmealmate.com/wp-content/uploads/2025/07/6d26c9a9-fbdd-445d-815a-0962cba54d08-768x768.webp)

![- 1 pre-made 9-inch pie crust - 6 large eggs - 1 cup whole milk For this quiche, I use a pre-made pie crust. It saves time and gives a nice crunch. Next, I add large eggs and whole milk. These create a rich and creamy base that holds everything together. - 1 cup cooked turkey bacon, chopped into bite-sized pieces - 1 cup cherry tomatoes, halved - 1 cup fresh spinach, chopped - 1 cup shredded cheddar cheese The flavor comes from turkey bacon, cherry tomatoes, fresh spinach, and cheddar cheese. Turkey bacon gives a smoky taste. Cherry tomatoes add sweetness, while spinach brings freshness. Cheddar cheese melts wonderfully, making the quiche extra tasty. - 1 teaspoon garlic powder - 1 teaspoon onion powder - Salt and pepper to taste Seasoning is key for a great quiche. I use garlic powder and onion powder for depth. Adding salt and pepper enhances all the flavors. This blend makes every bite delicious. You can check the [Full Recipe] for more details on this savory dish. - Preheat the oven to 375°F (190°C). - Fit the pie crust into the pie dish. To start, you need to preheat your oven. This step is key to getting that perfect, fluffy texture in your quiche. Next, take your pre-made pie crust and carefully fit it into a 9-inch pie dish. Press it gently against the sides to make it even. Set it aside while you prepare the filling. - Whisk eggs and whole milk. - Incorporate garlic powder, onion powder, salt, and pepper. In a large mixing bowl, break open six large eggs. Pour in one cup of whole milk. Whisk them together until the mixture is smooth. This will be the base of your quiche. Now, add one teaspoon of garlic powder and one teaspoon of onion powder. Don't forget to season with salt and pepper to taste. Stir well to mix in all the flavors. - Fold in bacon, tomatoes, spinach, and cheese. - Pour the mixture into the crust. Now comes the fun part! Gently fold in the cooked turkey bacon, halved cherry tomatoes, chopped spinach, and shredded cheddar cheese. Make sure everything is evenly mixed. Then, pour this mixture into the prepared pie crust. Use a spatula to spread the ingredients evenly. This helps them cook nicely. - Bake for 35-40 minutes. - Check for doneness with a toothpick. Place your quiche in the preheated oven. Bake it for about 35 to 40 minutes. You want it to puff up and turn golden brown. To check if it’s done, insert a toothpick into the center. If it comes out clean, your quiche is ready. Enjoy this savory dish, and for the full recipe, be sure to check the details provided earlier. Getting the egg and milk ratio right is key. I use six large eggs and one cup of whole milk. This mix gives the quiche a creamy texture. Too much milk will make it runny, while too few eggs can lead to a dry quiche. After baking, let the quiche cool for about ten minutes. Cooling makes slicing much easier. If you cut it right away, it may fall apart. For sides, I love serving my quiche with a fresh green salad. The crispness of the salad complements the rich quiche. Another great option is fruit. Try fresh berries or sliced melons for a sweet touch. When it comes to seasonings, fresh herbs like basil or chives can really enhance the flavors. A sprinkle of smoked paprika can add a nice depth too. Serve each slice on a colorful plate for a fun look. Garnish with extra cherry tomato halves and a sprig of parsley. This adds color and makes it more appealing. For a pop of color, consider using a bright salad alongside the quiche. The mix of green, red, and yellow will catch the eye. It makes a simple meal look fancy with little effort. You can find the full recipe to create this beautiful dish and impress your guests! {{image_4}} You can make a crustless BLT quiche easily. Just skip the pie crust. Grease your pie dish with oil or butter. Then, pour your filling directly into the dish. Bake it the same way as the regular quiche. The crustless version is lighter and gluten-free. It saves time, too. You won’t have to roll out dough or worry about a soggy crust. Plus, it keeps the focus on the tasty filling. You can mix things up with different proteins. Try using ham or crispy pancetta instead of turkey bacon. Each protein adds its own flavor. You can also change up the veggies. Bell peppers add sweetness, while zucchini offers a mild taste. Feel free to get creative and use what you have on hand. If you want a low-fat quiche, use skim milk instead of whole milk. You can also reduce the amount of cheese. This keeps the quiche tasty without all the fat. For a gluten-free option, look for a gluten-free pie crust. Many stores offer these now. You can even make your own with almond flour or oat flour. This way, everyone can enjoy your quiche! For the full recipe, check out the detailed instructions above. To store leftover quiche, let it cool completely. This helps keep moisture in check. Place it in an airtight container. A glass or plastic container works great. Make sure to wrap it tightly with plastic wrap too. This keeps the flavors fresh. Reheat your quiche in the oven for the best texture. Preheat the oven to 350°F (175°C). Place the quiche in the oven for about 15-20 minutes. If you're in a hurry, you can use the microwave. Heat it for 1-2 minutes, but keep an eye on it. The crust may lose its crunch in the microwave. To freeze quiche, wrap it well in plastic wrap and then in foil. It keeps well for about 2-3 months. When you’re ready to eat, take it out of the freezer. Place it in the fridge to thaw overnight. For reheating, follow the same oven method as before. This ensures your quiche tastes just as good as fresh. To keep your quiche from being watery, control the moisture in your ingredients. Use dry turkey bacon and pat it with a towel to absorb grease. For vegetables, like spinach and tomatoes, squeeze out excess water before adding them. This simple step prevents sogginess. Baking the quiche properly also helps. A preheated oven allows the egg mixture to set quickly, locking in flavors without extra moisture. Yes, you can prepare your quiche the night before. To do this, assemble your quiche as normal. Cover it tightly with plastic wrap or foil and refrigerate. This way, the flavors meld together overnight. When ready to bake, remove it from the fridge and let it sit for about 15 minutes. This helps it cook evenly. Bake according to the instructions in the Full Recipe for a delicious breakfast or brunch! If you want an alternative to turkey bacon, try regular bacon for a richer flavor. For a vegetarian option, use mushrooms or tempeh. Both add great texture and taste to your quiche. You could also use smoked tofu for a unique twist. Each of these options brings its own flavor, so choose what you like best. You can tell your quiche is done when it’s puffed and golden on top. Insert a toothpick into the center; it should come out clean. If it has some egg mixture on it, bake for a few more minutes and check again. It’s important to let it cool for about 10 minutes after baking. This resting time makes slicing easier and helps the filling set. BLT quiche is a tasty dish that mixes flavors and textures. We covered key ingredients like pie crust, eggs, milk, turkey bacon, and veggies. The step-by-step guide helps you bake it perfectly, while tips on storing and reheating keep it fresh for later. You can even switch up the ingredients for new twists. Remember, cooking is about experimenting. Enjoy your time in the kitchen, and don’t be afraid to make it your own!](https://fastmealmate.com/wp-content/uploads/2025/06/6e495986-43c5-45ef-a717-6d7df2569586-768x768.webp)