Creamy Pasta Salad Tasty and Refreshing Dish

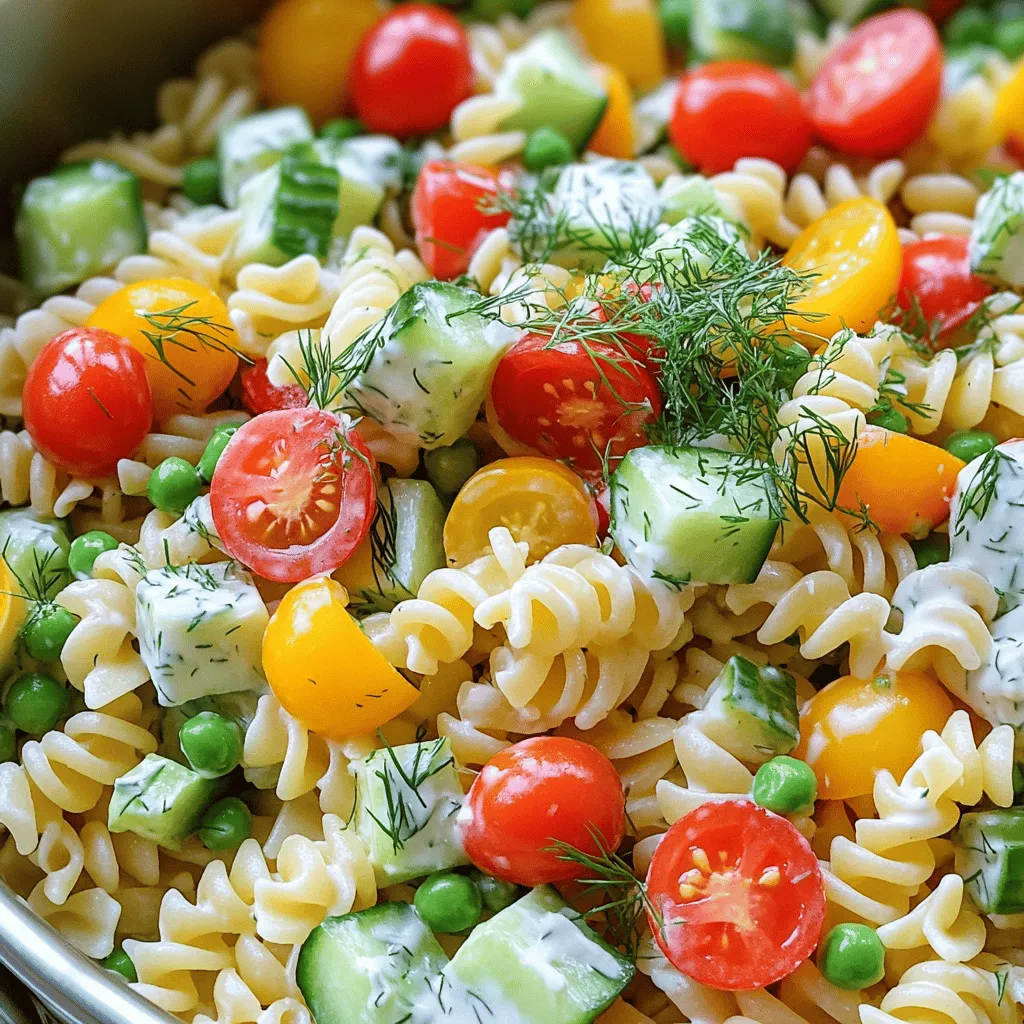
Looking for a dish that’s both creamy and refreshing? You’ve found it! This creamy pasta salad is a perfect choice for hot days or casual gatherings. With simple ingredients, it’s easy to make and fun to customize. In this post, I’ll guide you through each step, from choosing the best pasta to adding fresh veggies and flavors. Let’s dive into making a dish everyone will love!
Ingredients
Pasta Options
For this creamy pasta salad, I often choose rotini pasta. It holds the dressing well. You can also use penne or farfalle if you like. These shapes add fun texture. Make sure to cook the pasta just right. Al dente is best, so it stays firm.
Fresh Vegetables
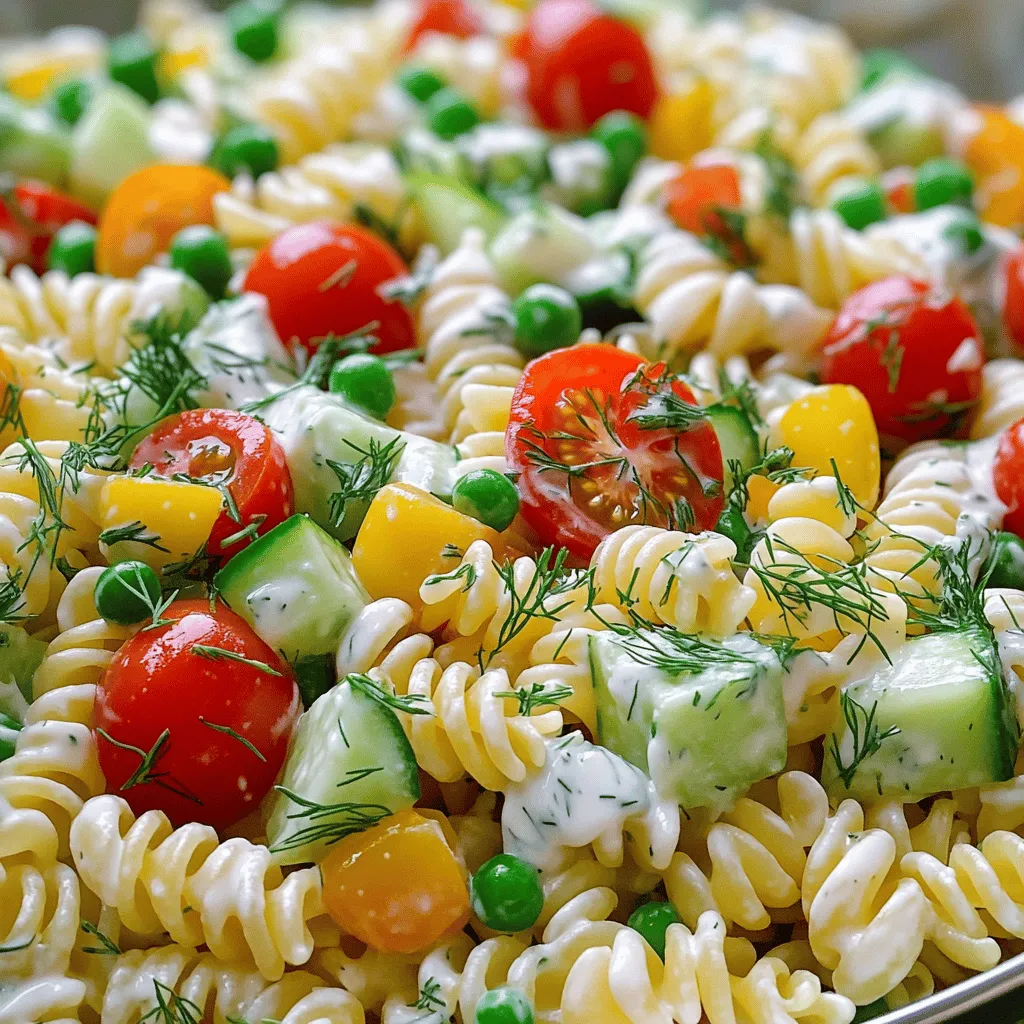
Fresh veggies make this salad bright and tasty. I love using cherry tomatoes for sweetness. Diced cucumber adds crunch, while bell peppers bring color. You can pick any color bell pepper you like. Frozen peas are a great option, too. They add sweetness and vibrant green. Lastly, I always include red onion for a little zing.
Creamy Dressing Components
The dressing is the heart of this dish. I mix Greek yogurt and mayonnaise for creaminess. Fresh lemon juice adds a zesty kick. Dijon mustard gives depth. I also toss in fresh herbs like dill and parsley. They make the dressing fresh and fragrant. Salt and pepper tie all the flavors together.
This creamy pasta salad is delightful and easy to make.
Step-by-Step Instructions
Cooking the Pasta
To start, bring a large pot of salted water to a boil. Use about 4 quarts of water for 8 oz of rotini pasta. Once the water is boiling, add the pasta. Cook it according to the package instructions until it is al dente. This usually takes about 8 to 10 minutes. When the pasta is done, drain it in a colander. Rinse the pasta under cold water to stop the cooking. Set it aside to cool completely.
Preparing the Vegetables
Next, grab a big mixing bowl. Here, you will add your veggies. Chop 1 cup of cherry tomatoes in half. Dice 1 cucumber and 1 bell pepper. Make sure to use any color bell pepper you like. Add 1 cup of thawed frozen peas and ½ cup of finely chopped red onion to the bowl. Toss these ingredients gently. This mix will add great color and crunch to your salad.
Making the Creamy Dressing
Now, let’s make the dressing. In a medium bowl, combine 1 cup of Greek yogurt and ¼ cup of mayonnaise. Add 2 tablespoons of freshly squeezed lemon juice and 1 tablespoon of Dijon mustard. Then, mix in 1 tablespoon of finely chopped fresh dill and 1 tablespoon of finely chopped fresh parsley. Whisk everything together until it is smooth and creamy. Taste it, and sprinkle in salt and pepper as you like. This dressing is packed with flavor.
Combining Ingredients
When your pasta is cool, it’s time to combine everything. Add the cooled pasta to the large bowl with the vegetables. Pour the creamy dressing over the pasta and veggies. Gently fold everything together. Make sure the pasta and veggies are well coated with the dressing. This step is key for a delicious salad.
Chilling and Serving
For the best flavor, cover your salad with plastic wrap. You can also use an airtight container. Chill it in the fridge for at least 30 minutes. This helps the flavors mix. When you’re ready to serve, give the salad a light stir. Adjust the seasoning, adding more salt or pepper if needed. For a fresh look, garnish with extra chopped herbs. Serve it in a big bowl or individual jars for a fun touch. Enjoy your creamy pasta salad!
Tips & Tricks
Enhancing Flavor Profiles
To make your creamy pasta salad burst with flavor, consider these tips:
– Herbs: Fresh herbs elevate taste. Try basil, chives, or tarragon.
– Citrus Zest: Add lemon or lime zest for brightness. This adds a fresh zing.
– Cheese: Feta or parmesan can deepen the flavor. Crumble or shave it over the salad.
– Spices: A dash of paprika or garlic powder can add warmth. Experiment with your favorites.
Texture Tips
A pleasing texture makes every bite enjoyable. Here’s how to achieve that:
– Cook Pasta Correctly: Ensure pasta is al dente. This keeps it firm and prevents mushiness.
– Crunchy Veggies: Use crispy vegetables like bell peppers and cucumbers. They add a nice crunch.
– Nutty Elements: Consider adding toasted nuts, like almonds or walnuts. This gives a delightful crunch.
Presentation Ideas
A beautiful salad is more appetizing. Here are some fun ways to present it:
– Colorful Bowls: Use a bright serving bowl to make the colors pop. It draws the eye.
– Layered Jars: Serve in glass jars for a trendy look. This makes it easy to grab and go.
– Herb Garnish: Top with extra herbs or a sprinkle of cheese. This adds a finishing touch.Enjoy creating your creamy pasta salad!

Variations
Protein Add-ins
Adding protein to your creamy pasta salad makes it heartier. You can mix in cooked chicken, shrimp, or even chickpeas.
– Cooked Chicken: Use grilled or rotisserie chicken. Dice it into bite-sized pieces.
– Shrimp: Sauté shrimp in olive oil with garlic. Toss them in after they cool.
– Chickpeas: Rinse and drain canned chickpeas. They add protein and a nice texture.
Alternative Dressing Ideas
If you want to switch up the flavors, try different dressings. Here are some tasty options:
– Avocado Dressing: Blend ripe avocado with yogurt and lime juice.
– Pesto: Use store-bought or homemade pesto for a fresh twist.
– Vinaigrette: Mix olive oil, vinegar, and herbs for a lighter taste.
Seasonal Vegetables
Using seasonal vegetables can enhance your salad’s taste. Here are some great picks:
– Spring: Add asparagus or snap peas for a fresh crunch.
– Summer: Toss in zucchini or corn for sweetness.
– Fall: Use roasted butternut squash or diced apples for a warm touch.
Storage Info
Best Ways to Store
To keep your creamy pasta salad fresh, store it in an airtight container. This will help lock in moisture and flavor. You can also wrap the bowl tightly with plastic wrap. Make sure it is fully cooled before storing. This will prevent condensation from making the salad soggy.
Shelf Life of Creamy Pasta Salad
Creamy pasta salad lasts about 3 to 5 days in the fridge. After this time, the taste and texture may change. Ensure you check for any signs of spoilage, like off smells or discoloration. If you see any, it’s best to toss it out.
Reheating Tips
Reheating creamy pasta salad is not always needed. If you prefer it warm, heat it gently in the microwave. Use a low power setting and stir it every 30 seconds. This will help heat it evenly. You may want to add a splash of lemon juice or a bit of extra yogurt to refresh the flavors. Enjoy this dish chilled for the best taste.
FAQs
What is the best pasta for creamy pasta salad?
I recommend using rotini pasta. Its twisted shape holds the creamy dressing well. You can also use farfalle or penne. Each type adds a unique look and texture to your salad.
Can I make this pasta salad ahead of time?
Yes, you can! Making this salad a day ahead is a great idea. Chilling it lets the flavors blend. Just cover it and store it in the fridge. It keeps well for up to three days.
What can I substitute for mayonnaise in the dressing?
You can replace mayonnaise with more Greek yogurt. It keeps the creaminess while cutting fat. Another option is to use avocado. This adds healthy fats and a smooth texture.
How do I make the salad spicier?
To add some heat, mix in diced jalapeños. You can also sprinkle in some red pepper flakes. For a zesty kick, try adding a splash of hot sauce to the dressing.
Is it possible to make this salad vegan?
Absolutely! To make this salad vegan, skip the mayonnaise and use a vegan yogurt. Ensure your Dijon mustard is vegan too. Most of the veggies are already plant-based, making it easy. For protein, consider adding chickpeas or tofu.
This blog post covered how to create a creamy pasta salad that tastes great. You learned about pasta choices, fresh veggies, and creamy dressings. I shared easy steps for cooking, prepping, and combining these ingredients. Tips on flavor and presentation make your salad standout. Variations let you customize with proteins or seasonal veggies. Finally, I shared how to store it and answer common questions. With these tools, you can make a delicious dish that everyone will enjoy.


![- 2 slices of rustic sourdough bread - 1 cup cooked chicken, shredded - 1 cup marinara sauce - 1 cup shredded mozzarella cheese - ¼ cup freshly grated Parmesan cheese - 1 tablespoon extra virgin olive oil - 1 teaspoon garlic powder - 1 teaspoon dried Italian seasoning - Salt and pepper, to taste Gathering the right ingredients is key to making a great Lazy Chicken Parmesan Grilled Cheese. Start with rustic sourdough bread. This bread gives your sandwich a hearty base. Next, grab cooked chicken. Shredded rotisserie chicken is a fantastic choice. It adds flavor and saves time. For the sauce, you can use homemade or store-bought marinara. Either way, it brings rich taste. Now, mozzarella cheese is a must for that gooey, stretchy texture. The Parmesan cheese adds a nice sharp bite too. You will also need some simple seasonings. Extra virgin olive oil helps achieve that golden crust. Garlic powder brings out depth in flavor. Italian seasoning adds a nice herbal note. Finally, don’t forget salt and pepper to taste. With these ingredients, you'll create a delightful twist on a classic dish. For the full recipe, check out the [Full Recipe]. First, preheat your skillet over medium heat. This gets the skillet hot and ready. Next, add a tablespoon of olive oil. This will coat the bottom of the skillet. The oil helps keep the bread from sticking and adds flavor. In a mixing bowl, combine your shredded chicken and marinara sauce. You can use any chicken you like, but rotisserie chicken is fast and tasty. Then, add garlic powder, Italian seasoning, and a pinch of salt and pepper. Mix everything well. You want all the chicken to be coated in sauce and spices. Take one slice of the sourdough bread and place it in the hot skillet. Layer half of the shredded mozzarella cheese on top. Spoon the chicken mixture onto the cheese, spreading it evenly. Add the rest of the mozzarella cheese on top of the chicken. Finish with a sprinkle of grated Parmesan cheese. Place the second slice of sourdough on top to make a sandwich. Grill it for about 3-4 minutes. You want the bottom to be golden brown and the cheese to begin melting. Carefully flip the sandwich using a spatula. Grill the other side for another 3-4 minutes. You want both sides crispy and the cheese fully melted. Once done, take it out and slice it in half. Let it cool for a minute before serving. This helps the cheese set a bit. Enjoy your Lazy Chicken Parmesan Grilled Cheese! For more details, check out the Full Recipe. Using rotisserie chicken makes this recipe quick and easy. You can find it at most grocery stores. It saves time, as it is already cooked and seasoned. To shred chicken quickly, use two forks to pull it apart. This method works well and takes just minutes. You can also use your hands if the chicken is cool enough. For the best grilled cheese, choose rustic sourdough bread. It has a great texture and flavor. You can also try a hearty Italian bread or whole grain. To achieve a crispy crust, heat your skillet over medium heat. Make sure to coat the pan with olive oil evenly. This will help the bread brown nicely and not stick. To ensure the cheese melts perfectly, use a mix of mozzarella and Parmesan. The mozzarella adds stretch, while Parmesan adds a sharp flavor. Place a lid on the skillet to trap heat and help the cheese melt faster. This prevents the sandwich from getting soggy. Grill the sandwich until the bread is golden brown and the cheese is gooey. {{image_4}} You can easily boost the health of your Lazy Chicken Parmesan Grilled Cheese by adding veggies. Spinach is a great choice. It adds color and nutrients. Just toss in a handful of fresh spinach when you layer the chicken. Bell peppers work well too. Slice them thin, and add them with the chicken. They give a nice crunch and a pop of flavor. Other ingredients can add texture and taste. Try sun-dried tomatoes for a tangy bite. You can also add mushrooms for an earthy note. Each veggie brings its own special twist. Experiment with what you like best! If you love heat, spice up your sandwich! One easy way is to use spicy marinara sauce. It adds warmth and flavor. You can also add jalapeños for an extra kick. Slice them thin and layer them on top of the chicken. Using pepper jack cheese is another fun option. This cheese melts beautifully and has a nice heat. Mix it with mozzarella to keep things gooey and flavorful. Your taste buds will thank you! For those who need a gluten-free choice, there are great alternatives. Instead of sourdough, try gluten-free bread. Look for brands that are soft and hearty. They will hold up well when grilling. You can adjust the recipe easily. Ensure your marinara sauce is gluten-free too. Many brands offer this option. Always check the labels when shopping. This way, everyone can enjoy this delicious meal! For the full recipe, be sure to check the complete guide. To keep your Lazy Chicken Parmesan Grilled Cheese fresh, wrap it tightly in foil or plastic wrap. Place it in an airtight container. This method helps keep the flavors and moisture inside. You can store it in the fridge for up to three days. If you want to keep it longer, consider freezing it. It can last in the freezer for about one month. Just remember to let it cool completely before storing. Reheating your grilled cheese needs care. I recommend using a skillet or toaster oven for the best results. Heat the skillet over low to medium heat. Add a small amount of butter or oil to keep it crispy. Place the sandwich in the skillet and cover it with a lid. This helps the cheese melt without burning the bread. Heat for about 3-4 minutes on each side. If using a toaster oven, set it to 350°F (175°C). Bake for around 10-15 minutes until warm and crispy. Enjoy that delicious, gooey goodness just like the first time! Yes, you can prepare this dish in advance. Here are some tips for prepping. - Cook the chicken: Shred and mix it with marinara sauce. Store it in the fridge. - Slice the bread: Cut the sourdough and keep it in a sealed bag. - Grate cheese: Pre-grate the mozzarella and Parmesan. Store these in airtight containers. - Assemble before cooking: You can layer the sandwich without grilling. Wrap it tightly in plastic wrap. Making these steps ahead helps save time. Just grill when you are ready to eat! Yes, you can freeze Lazy Chicken Parmesan Grilled Cheese. Here are the best practices. - Assemble without grilling: Build the sandwich fully, but do not cook it. - Wrap tightly: Use plastic wrap or aluminum foil to cover each sandwich. - Store in a freezer bag: Label with the date, then place in the freezer. When you want to eat it, thaw in the fridge overnight. Reheat in a skillet to keep it crispy. Pairing sides can enhance your meal. Here are some tasty suggestions. - Salad: A fresh mixed greens salad adds crunch. - Soup: Tomato or basil soup complements the sandwich well. - Fries: Crispy fries or sweet potato fries are a fun choice. - Veggies: Roasted or steamed veggies give a healthy balance. These sides will make your meal even more delightful. Enjoy your Lazy Chicken Parmesan Grilled Cheese! You learned how to make Lazy Chicken Parmesan Grilled Cheese. This dish is tasty and easy. We covered main ingredients, cooking steps, and useful tips. I shared fun variations to fit your taste. Now, you can store leftovers and reheat them without losing flavor. Enjoy your cooking and make this sandwich again. It’s a great meal for busy days or fun gatherings. Happy grilling!](https://fastmealmate.com/wp-content/uploads/2025/06/c9cbfd60-7ee3-4aef-9602-f6c93f96b3d1-768x768.webp)
![Here are the key ingredients for making Matcha Brûlée Boba: - 2 cups whole milk (or your preferred dairy alternative) - 2 tablespoons matcha powder - 3 tablespoons granulated sugar - 1 teaspoon vanilla extract - 1 cup cooked tapioca pearls - 2 tablespoons brown sugar (for the brûlée topping) - Optional: whipped cream, fresh mint leaves Each ingredient plays a vital role in making this treat delicious and smooth. Whole milk gives a creamy base, while matcha powder brings that unique green tea flavor. Granulated sugar sweetens the mix, and vanilla adds a lovely aroma. The cooked tapioca pearls add a fun texture that makes this drink special. The brown sugar forms a crunchy top that contrasts with the creamy brûlée underneath. Feel free to add whipped cream and mint for extra flair! For the complete recipe, check out the [Full Recipe]. 1. Heating the milk: Start by pouring 2 cups of whole milk into a small saucepan. Heat it gently over medium-low. Stir the milk often to keep it from boiling. You want it warm but not too hot. 2. Mixing matcha with sugar and vanilla: In a medium mixing bowl, combine 2 tablespoons of matcha powder, 3 tablespoons of granulated sugar, and 1 teaspoon of vanilla extract. Whisk these together until no lumps are left. This step is key for a smooth texture. 3. Combining milk with matcha: Once your milk is warm, slowly pour it into the matcha mixture. Whisk continuously as you pour. This makes sure the matcha blends well into the milk, creating a creamy mix. 1. Pouring into ramekins: Carefully pour your matcha mixture into ramekins or small cups. Fill each one halfway. This leaves space for the sweet brûlée topping. 2. Chilling and setting time: Put the filled ramekins in the refrigerator. Chill them for at least 4 hours. The mixture should feel firm when you touch it. This chilling time helps the flavors set. 1. Using a kitchen torch: After chilling, take the ramekins out. Evenly sprinkle 2 tablespoons of brown sugar on top of each one. Use a kitchen torch to caramelize the sugar. Move the flame gently until the sugar turns golden and crunchy. 2. Alternative broiler method: If you don’t have a torch, place the ramekins under a broiler. Watch them closely to prevent burning. It only takes a few minutes to get that nice, crispy layer. 1. Layering tapioca pearls: In a tall glass, add a layer of cooked tapioca pearls. Make sure you have enough for each serving. These give the drink a fun, chewy texture. 2. Adding matcha brûlée: Spoon the chilled matcha brûlée over the tapioca pearls. This creates a beautiful layer effect. Optional: Add a dollop of whipped cream on top. Fresh mint leaves also add a nice touch and flavor. Now you have a delightful and creamy matcha brûlée boba to enjoy! For the full recipe, check out the complete details. - Selecting high-quality matcha: Choose matcha that is bright green. This color shows freshness and quality. Look for matcha labeled as "ceremonial grade" for the best taste. - Tips for mixing without lumps: Always sift your matcha powder before mixing. This step breaks up clumps. When combining matcha with other ingredients, whisk it slowly to make a smooth mixture. - Best practices for caramelizing sugar: Use a kitchen torch for even heat. Hold the torch about 6 inches away from the sugar. Move it in small circles to avoid burning one spot. If using a broiler, keep a close eye. Sugar can burn quickly. - Common mistakes to avoid: Don’t add too much sugar for the brûlée top. A thin layer works best. Also, avoid caramelizing too long. You want a crisp layer, not a hard shell. - Choosing the right garnishes: Fresh mint leaves are a great choice. They add color and a fresh taste. You can also use edible flowers for a beautiful touch. - Tips for serving: Serve in clear glasses to show off the layers. This makes your matcha brûlée boba look stunning. If you add whipped cream, use a piping bag for a fancy look. {{image_4}} You can make your Matcha Brûlée Boba even more fun! Start by adding fruits or syrups. Try fresh strawberries or mango for a fruity twist. You can also drizzle some honey or maple syrup on top. This will add sweetness and flavor to your drink. If you want to switch up the sweetness, use alternative sweeteners. Stevia or agave syrup are great choices. They can make your drink lower in calories while keeping it tasty. Just remember to adjust the amount, as these sweeteners can be stronger than regular sugar. Want a dairy-free version? Simply swap whole milk for almond or coconut milk. These options still keep the drink creamy and delicious. You can also use oat milk for a rich flavor. Just pick what you like best! For a sugar-free version, you can use sugar substitutes. Look for brands that fit your diet. They can help you enjoy your treat without added sugar. Now, let’s talk about how to serve your Matcha Brûlée Boba! Jar presentations are super cute. Layer the tapioca pearls and matcha in small jars. They look great and are easy to grab. If you’re hosting a party, make a big batch. Serve it in a large bowl and let guests help themselves. Add fun straws and garnishes like mint leaves. This makes your drink fun and festive for everyone! Store your matcha brûlée in the fridge. Place it in an airtight container. This keeps it fresh and tasty. It will last for up to four days. After that, it may lose its creamy texture. Always check for any strange smells or changes in color before serving. Keep unused matcha powder in a cool, dark place. A sealed bag or jar works best. This protects it from light and air. For tapioca pearls, store them in water in the fridge. Change the water daily to keep them fresh. They can last up to three days this way. To refresh tapioca pearls, heat them in warm water. Let them soak for about ten minutes. This helps them regain their texture. Serve your matcha brûlée cold. If it has been in the fridge, just scoop and serve. It tastes great straight from the fridge! Matcha Brûlée Boba is a fun drink that mixes matcha and creamy flavors. It has layers of cooked tapioca pearls and a smooth matcha brûlée on top. The brûlée has a crunchy, caramelized sugar layer, adding a nice texture. The drink is both sweet and slightly earthy, making it unique and tasty. To make matcha less bitter, choose high-quality matcha powder. This type has a smoother taste. You can also use less matcha or add more sugar. Mixing matcha with warm milk can also help. Whisking well breaks up clumps, making it creamy. Yes, you can make this recipe vegan easily. Use almond milk, oat milk, or coconut milk instead of whole milk. For the brûlée, skip the whipped cream or use a dairy-free version. These swaps keep the drink just as tasty and creamy. Look for ceremonial grade matcha for the best flavor. It has a vibrant green color and rich taste. I recommend brands like Matcha Konomi or Encha. These brands are well-known for their quality and taste, ensuring a great matcha brûlée boba experience. For the full recipe, check out Matcha Brûlée Boba . In this post, we covered how to make Matcha Brûlée Boba. We explored essential ingredients, from whole milk to matcha powder. I shared easy steps, from preparing the mix to caramelizing sugar. You learned tips for perfect flavor and creative serving ideas. Matcha Brûlée Boba brings joy and flavor to drinks. Try different variations to find your favorite. Enjoy making this treat at home!](https://fastmealmate.com/wp-content/uploads/2025/06/afbc723c-5cf3-4754-a0d3-2d99f4abcad5-768x768.webp)
. To make your salad shine, use bright bowls. Serve it in individual portions for a fancy touch. Add a sprinkle of extra feta on top. A few fresh basil leaves also make a great garnish. For a special look, drizzle balsamic reduction over each serving. This adds both flavor and visual appeal. You can boost the flavor in many ways. Try adding nuts like walnuts or almonds for crunch. You might also include fruits, such as sliced strawberries or juicy peaches. Fresh herbs like cilantro or mint can add a new twist. For a bit of spice, sprinkle in some red pepper flakes. Just remember, balance is key! One common mistake is over-dressing the salad. Too much dressing can drown the fresh flavors. Start with a little, and add more if needed. Another mistake is cutting veggies too small. Larger pieces keep the crunch and texture. Finally, don’t forget to taste before serving. Adjust seasoning to suit your taste buds. {{image_4}} You can easily adjust this salad for special diets. For a vegan version, skip the feta cheese. Instead, use tofu or nuts for a protein boost. If you want a gluten-free option, all ingredients are already safe. Just be sure to check any packaged items for hidden gluten. You can swap ingredients based on the season. In summer, use ripe peaches instead of tomatoes. In fall, try roasted squash in place of corn. These swaps keep the salad fresh and exciting all year. Feel free to mix and match what’s in your garden or local market. Want to make your salad more fun? Add sliced radishes for a peppery crunch. Nuts like almonds or walnuts add a great texture. You could also toss in herbs like dill or cilantro for a different flavor. Don't shy away from experimenting. Each add-on can change the taste and feel of your dish. Check out the Full Recipe for more ideas and inspiration! To keep your garden fresh summer salad tasty, store it right. Use an airtight container. This helps avoid moisture loss. You can keep it in the fridge for up to three days. If you plan to enjoy it later, store the dressing separately. This keeps the greens crisp and fresh. Wash your vegetables before storage. After washing, dry them well to avoid sogginess. You can wrap herbs like basil in a damp paper towel. This helps keep them fresh for longer. For tomatoes, store them at room temperature. This keeps their taste and texture just right. This salad is best enjoyed cold. If you want to warm it up, just use a quick microwave blast. Heat for only a few seconds to avoid mushy greens. When serving, toss the salad gently to mix the flavors. You can add more feta or basil for a fresh touch. For the full recipe, check out the detailed steps above. The best summer vegetables for salad include tomatoes, cucumbers, and bell peppers. You can also use zucchini, radishes, and corn. They add color and crunch. Fresh herbs like basil and cilantro enhance the flavor. Choose veggies that are in season for the best taste. Yes, you can make this salad ahead of time. Prepare the salad without the dressing. Store it in the fridge for up to a day. When you are ready to eat, add the dressing. This keeps the salad fresh and crisp. A light vinaigrette works well with summer salad. You can use olive oil and balsamic vinegar. Lemon juice also adds a nice touch. For a creamier option, try a yogurt-based dressing. These dressings bring out the flavors of the fresh vegetables. For the full recipe, check out the Garden Fresh Summer Salad Delight. In this blog post, we explored how to make a fresh summer salad. We started with the best ingredients and optional add-ins. Then, we covered easy steps to prepare the base and mix in tasty veggies. I shared tips for great presentation and flavor boosts. We also discussed how to adapt this salad for diets and seasons. Lastly, we highlighted storage tips to keep everything fresh. Enjoy experimenting with your salad to make it your own. You have all the tools for success!](https://fastmealmate.com/wp-content/uploads/2025/07/1438f769-be73-4858-be33-2952a8dc2b24-768x768.webp)
